1
1. Basic information
The X-Tatic SR is a multi-platform headset that supports the Dolby®-Headphone technology, thus delivering
a completely new sound experience:
Dolby®Headphone makes sound more spatial, creating a natural sound feeling and – in connection with
Dolby®Pro Logic®II – reproducing 5.1 surround sound on stereo headphones in a realistic way.
This leads to both a more sophisticated sound design and a considerably enhanced sound reproduction and
localization.
2. Features
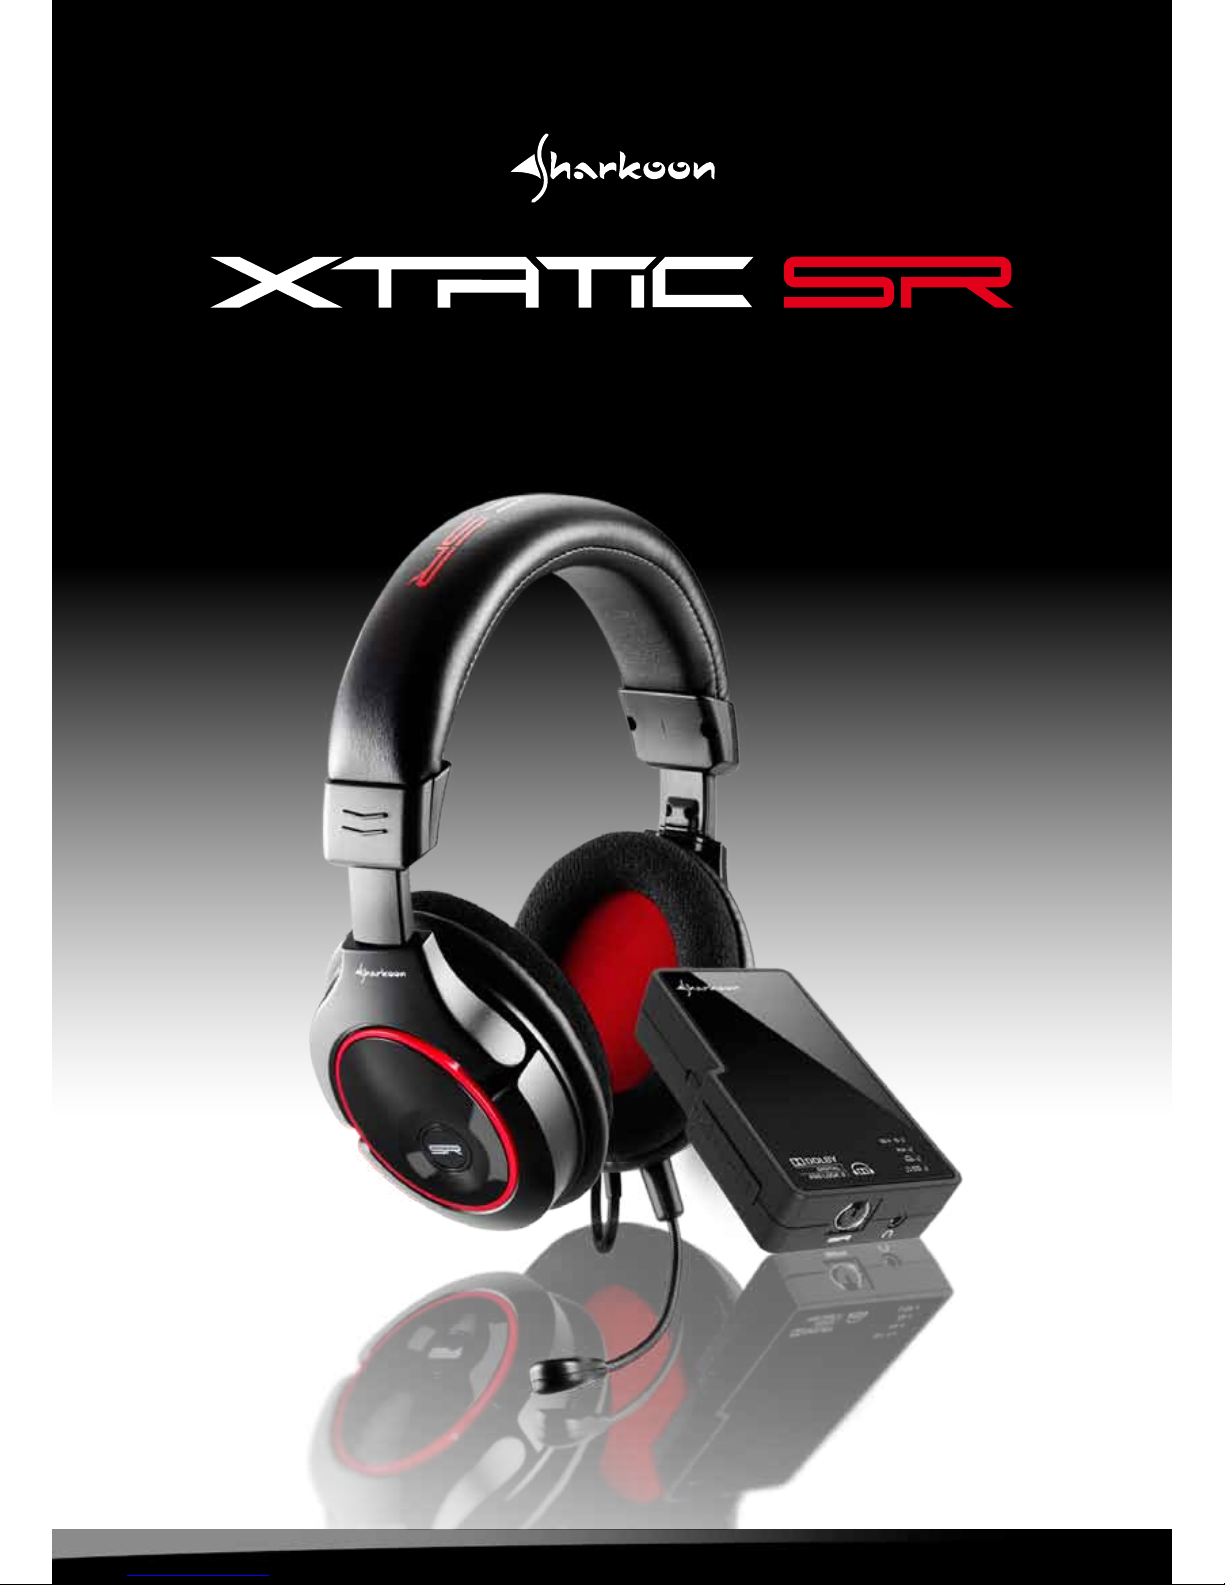
2.1 Headphones
• Dolby®Headphone for multi-platform gaming (Xbox®360, PS3™, PC etc.)
• USB-powered,noadditionalpoweradaptorneeded
• SupportsXbox®Live
• SupportsthePlayStation®3chatfunction(viaUSB)
• Flexible,detachablemicrophone
• MicrophoneconnectedtoXbox®360 controller (2.5 mm plug)
• MicrophoneconnectedviaUSB(USBtoPS3™)
• In-lineamplierwithvolumecontrollerandmicrophonemute
• Separatevolumeadjustmentforvoicecommunication
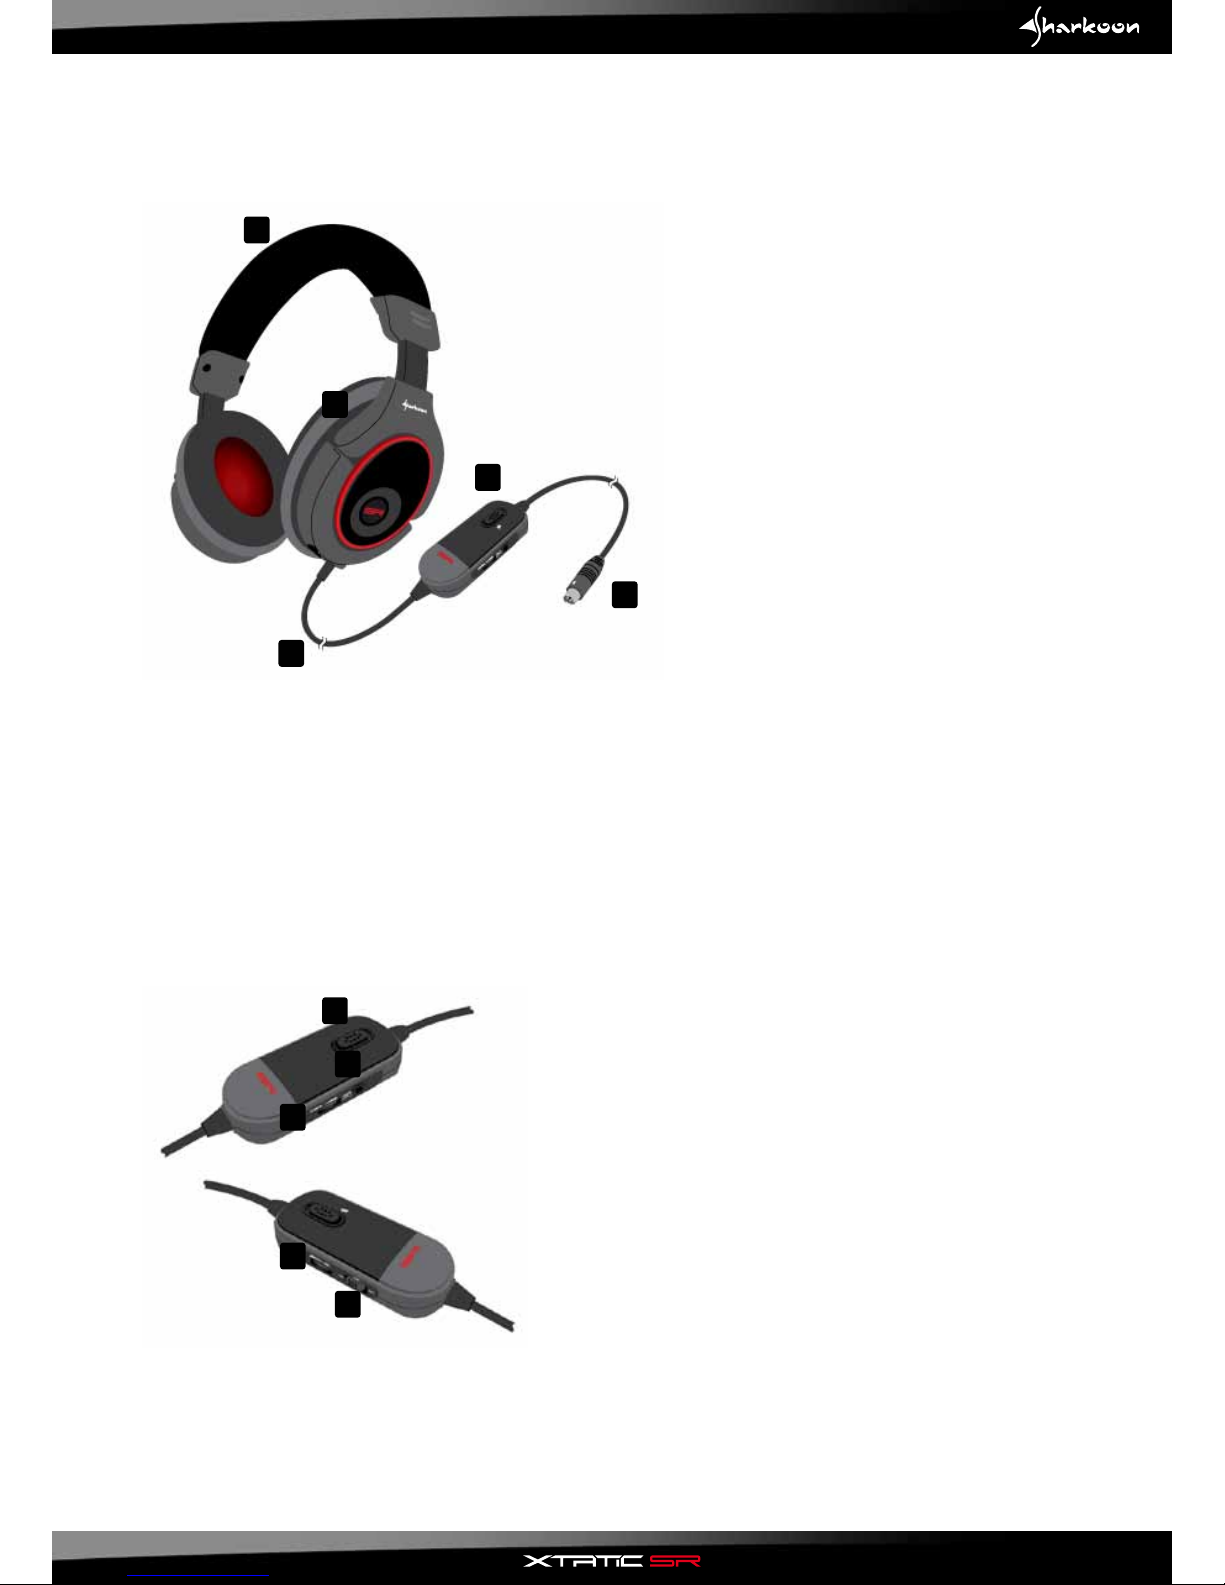
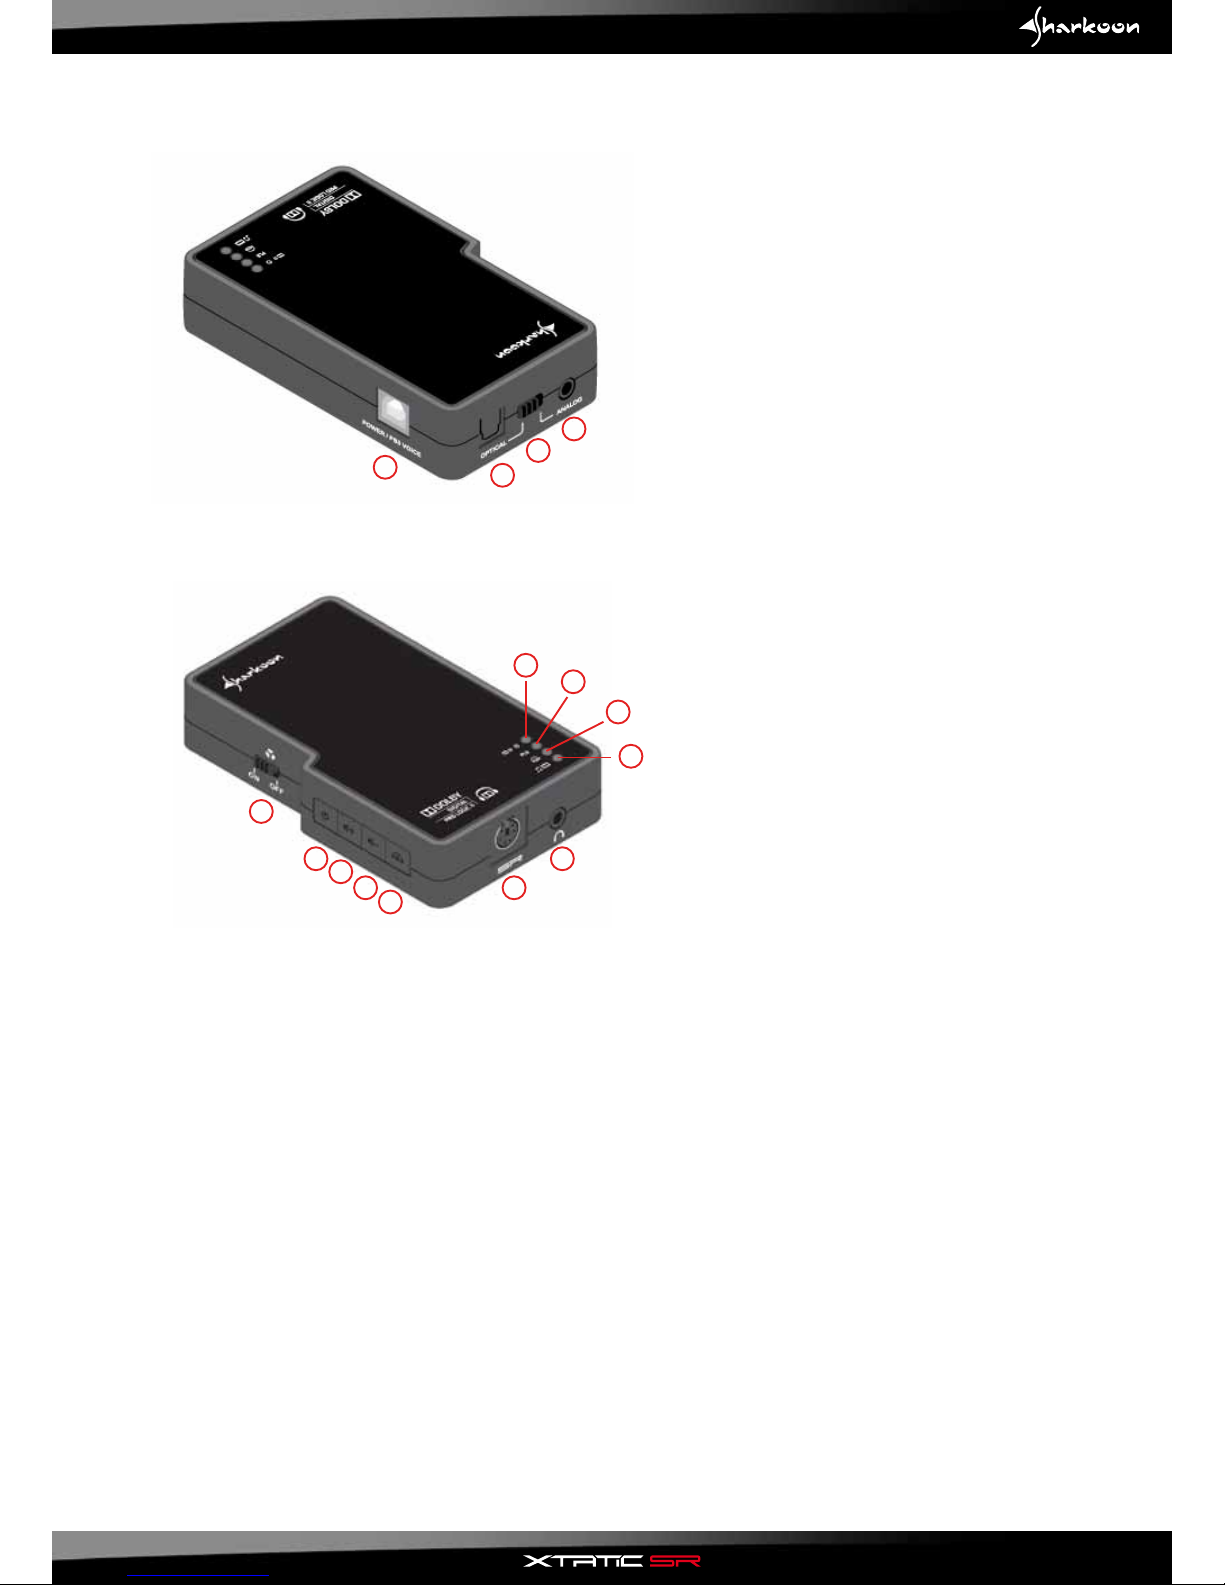
2.2 Sound Control Unit (SCU)
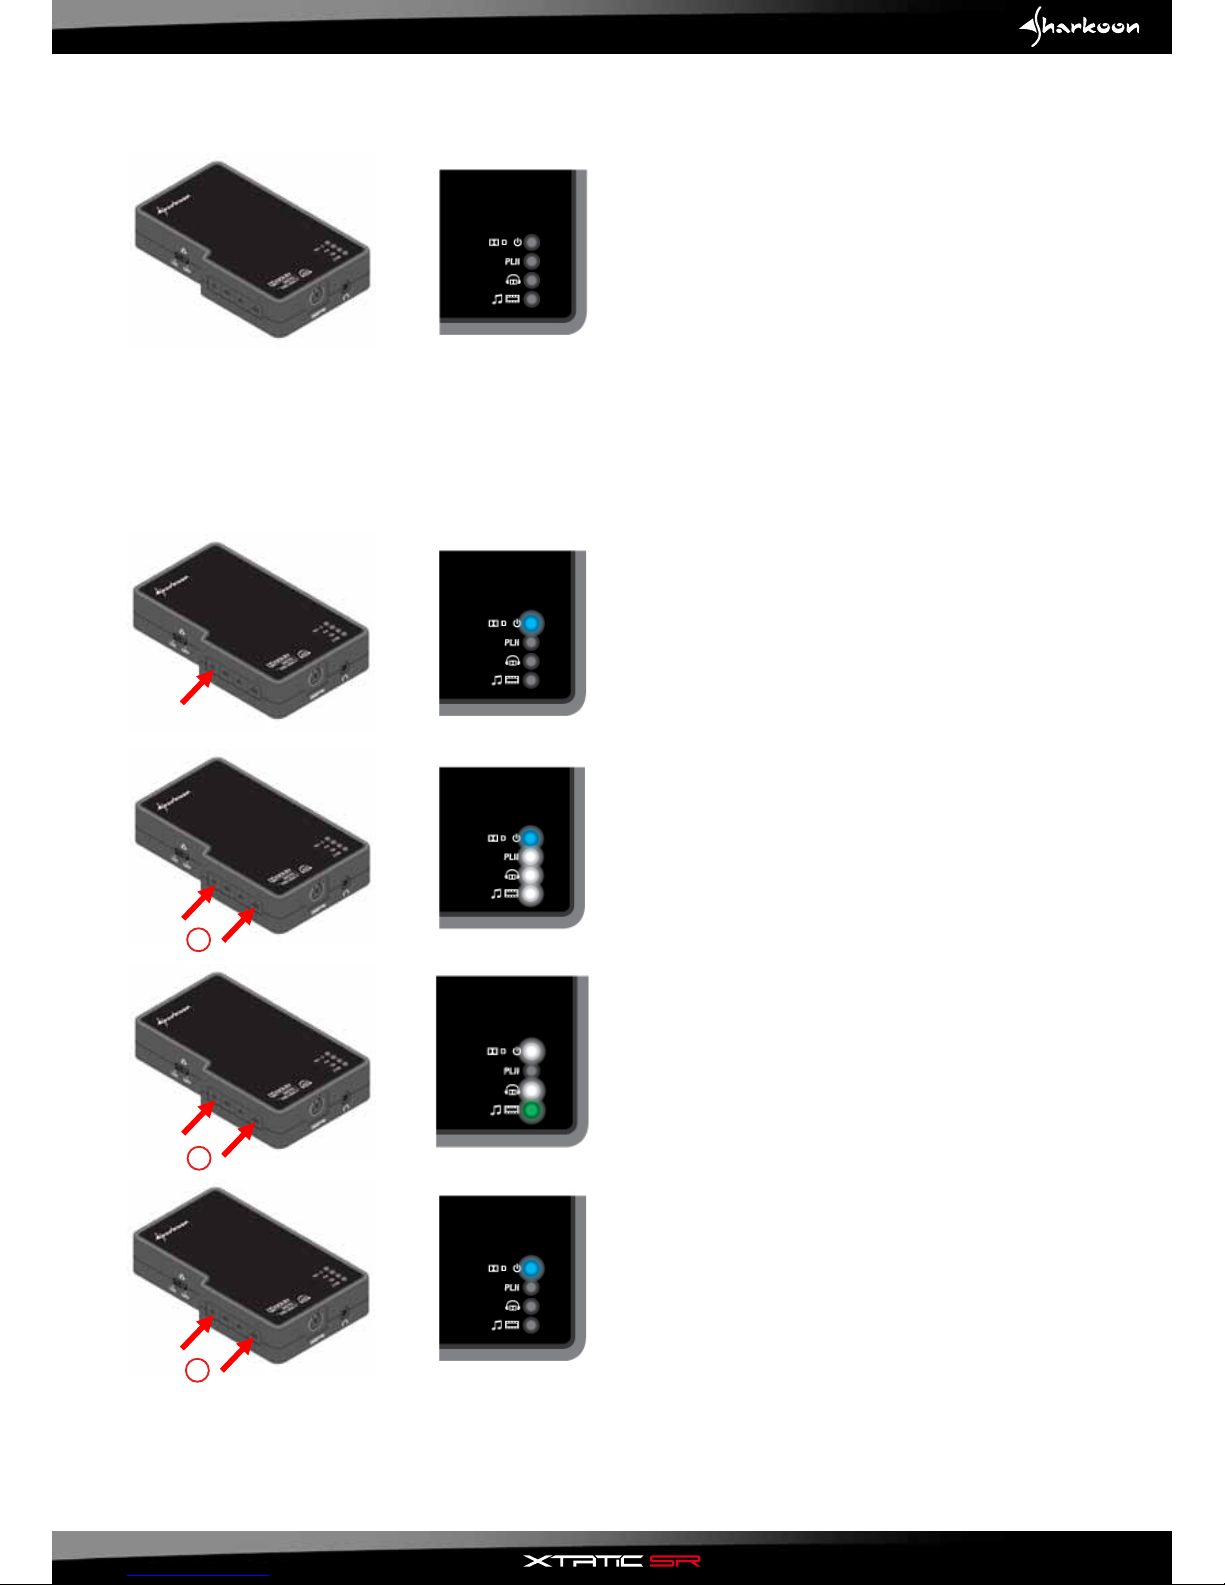
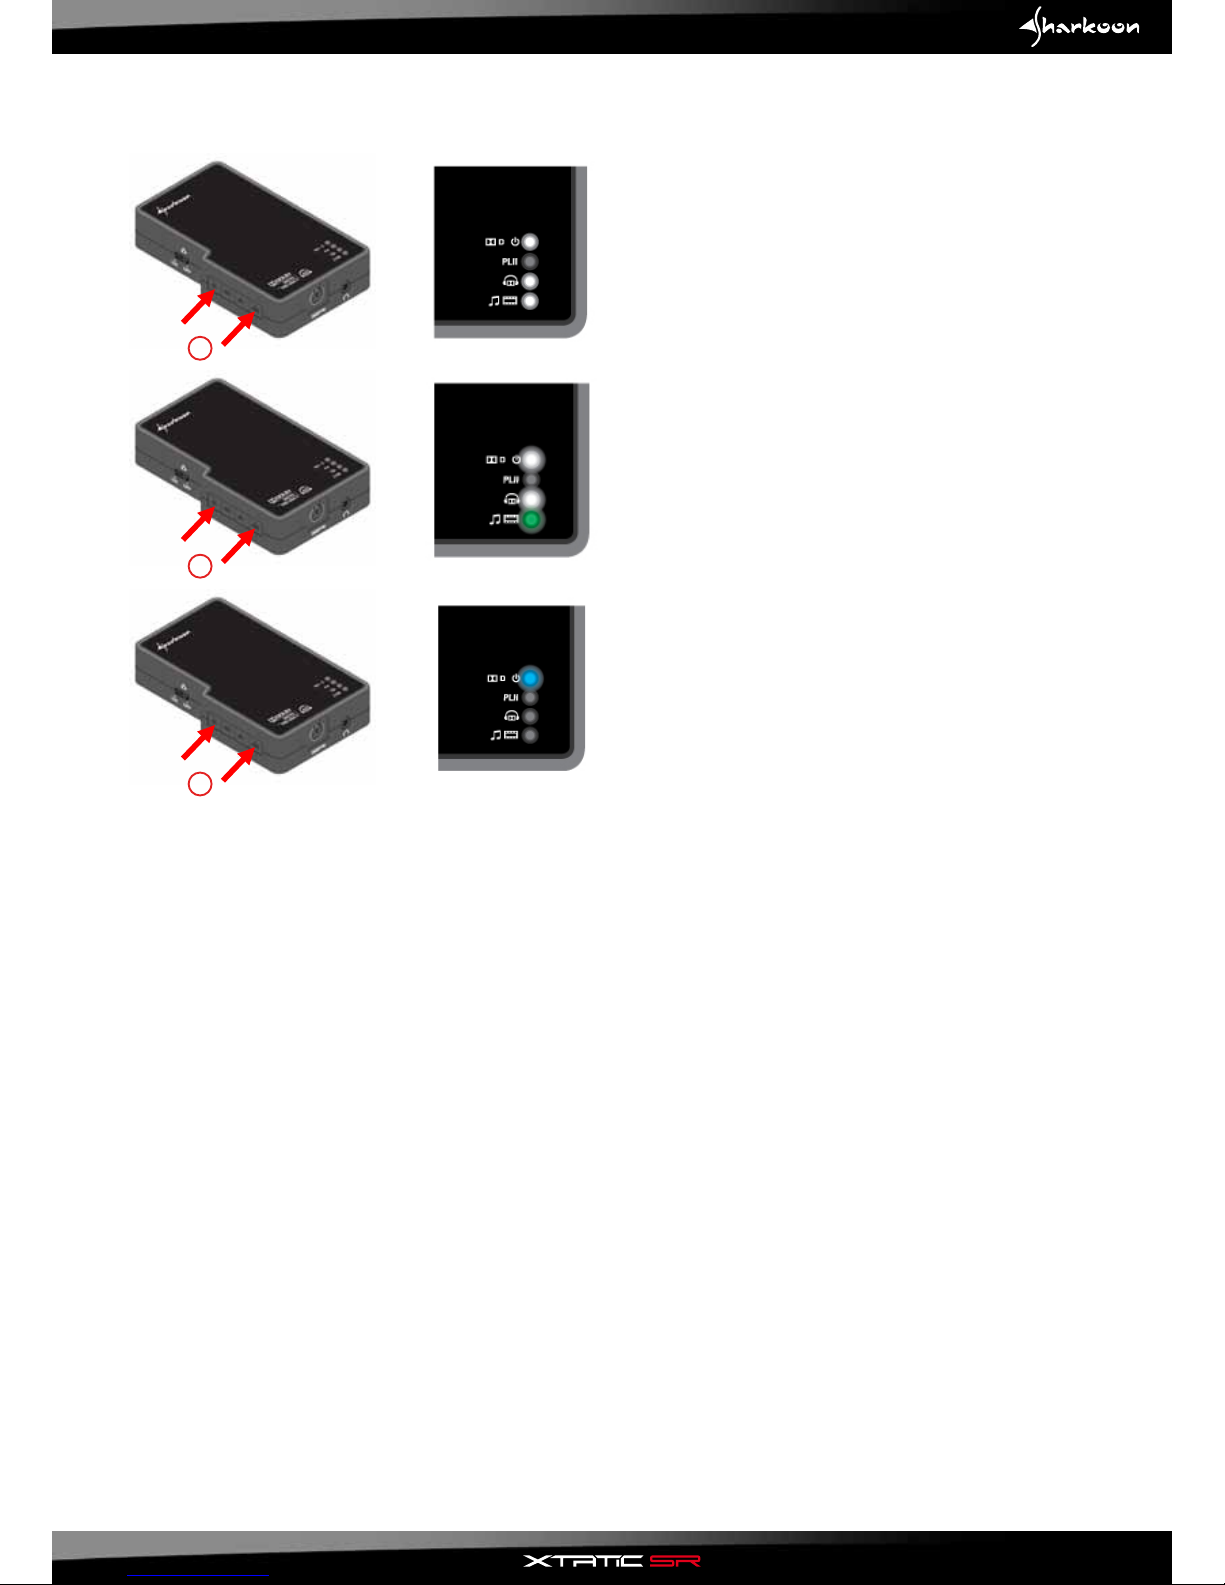
• SupportsDolby®Digital 5.1, Dolby®Pro Logic®II and Dolby®Headphone
• Dolby®Headphone function can be activated/deactivated (stereo bypass)
• 3Dstereofunction(stereoexpander)canbeactivated/deactivated
• Analoganddigitalinput
• SupportsthechatfunctionofPS3™, Xbox®and Xbox®360
• Connectorforadditionalstereoheadset(3.5mmlineout)
• Connectorforadditionalanalogsoundsource(3.5mmlinein)