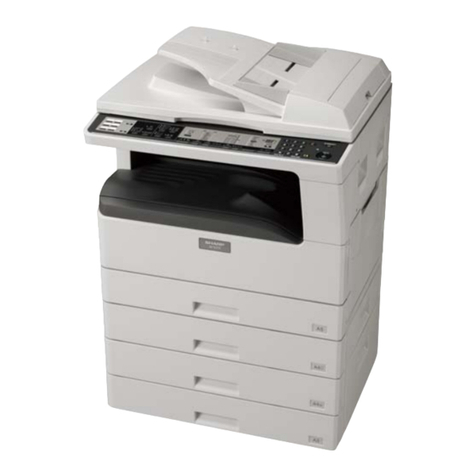
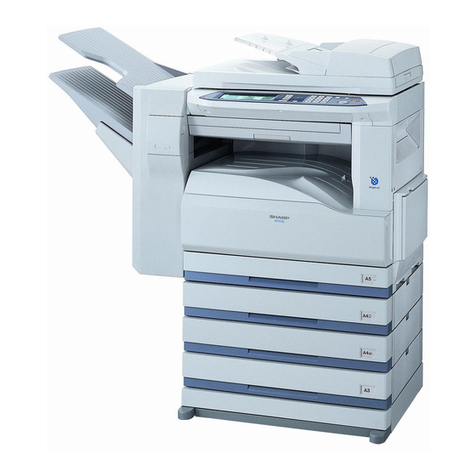
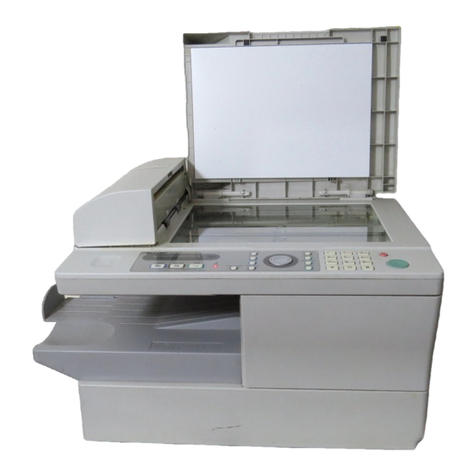
Sharp AR-FX2 User manual

•BEFORE STARTING
•BASIC OPERATIONS
•USING CONVENIENT
FUNCTIONS 1
•USING CONVENIENT
FUNCTIONS 2
•PRINTING LISTS
•
GENERAL INFORMATION
•APPENDIX
1-1
2-1
3-1
4-1
5-1
6-1
Appendix-1
FACSIMILE EXPANSION KIT
OPERATION MANUAL
Page
MODEL
AR-FX2

Note:Thismanual(faxfunction) describestheAR-200modelwithoptionalsinglepass
feeder(AR-SP2), jobseparatortraykit(AR-TR2), andoptionalfacsimileexpansion
kit (AR-FX2) installed. Depending on the model you have and on the options
installed, some of the illustrations in this manual may be different, however, the
basic operations are the same.
Your SharpAR-FX2 Facsimile Expansion Kit has been designed to work with the analogue
PSTNs in the following countries:
• United Kingdom
• Ireland
Country Differentiation Table
This equipment complies with the requirements of Directives 98/13/EC and 89/336/EEC,
73/23/EEC both amended by 93/68/EEC.
Dieses Gerät entspricht den Anforderungen der EU-Richtlinien 98/13/EU und 89/336/
EWG sowie 73/23/EWG, die durch die Richtlinie 93/68/EWG geändert wurden.
Cet appareil est conforme aux exigences de la directive 98/13/CEE ainsi que des
directives 89/336/CEE et 73/ 23/CEE modifiées par la directive 93/68/CEE.
Este aparato satisface las exigencias de las Directivas 98/13/CE y 89/336/CEE, 73/23/
CEE modificadas ambas por medio de la 93/68/CEE.
Quest’apparecchio è conforme ai requisiti delle direttive 98/13/CE e 89/336/EEC, 73/23/
EEC, entrambe emendate dalla 93/68/EEC.
Dit apparaat voldoet aan de eisen van de richtlijnen 98/13/EG en 89/336/EEG, 73/23/
EEG, beide gewijzigd door 93/68/EEG.
Este equipamento obedece às exigências das directivas 98/13/CEE, 89/336/CEE e 73/23/
CEE, cujas versões foram todas corrigidas pela directiva 93/68/CEE.
Denna utrustning uppfyller kraven enligt direktiven 98/13/EC och 89/336/EEC, 72/23/
EEC båda med tillägget 93/68/EEC
Dette udstyr overholder kravene i direktiverne 98/13/EU og 89/336/EEC, 73/23/EEC
begge med ændringer i.h.t 93/68/EEC.
Dette produktet oppfyller kravene i direktivene 98/13/EC og 89/336/EEC, 73/23/EEC,
begge komplettert av 93/68/EEC.
Tämä laite täyttää direktiivien 98/13/EEC ja 89/336/EEC, 73/23/EEC vaatimukset, joista
kumpaakin jälkimmäistä on muutettu direktiivillä 93/68/EEC. : Low voltage directive 93/
68/EEC : CE Mark reguration
Language
Setting
English
English
United
Kingdom
Ireland
Operation
Manual
English
English
Accessory for
TEL Line
Adapter
none
Power
Cord
3 PIN
3 PIN

The equipment has been approved in accordance with Council Decision 98/482/EC for pan-European single
terminal connection to the public switched telephone network (PSTN). However, due to differences between
the individual PSTNs provided in different countries, the approval does not, of itself, give an unconditional
assurance of successful operation on every PSTN network termination point.
In the event of problems, you should contact your equipment supplier in the first instance.
Dieses Geraet wurde gemaess der Entscheidung 98/482/EG des Rates europaweit zur Anschaltung als einzelne
Endeinrichtung an das oeffentliche Fernsprechnetz zugelassen. Aufgrund der zwischen den oeffentlichen
Fernsprechnetzen verschiedener Staaten bestehenden Unterschiede stellt diese Zulassung an sich jedoch keine
unbedingte Gewaehr fuer einen erfolgreichen Betrieb des Geraets an jedem Netzabschlusspunkt dar.
Falls beim Betrieb Probleme auftreten, sollten Sie sich zunaechst an ihren Fachhaendler wenden.
Este equipo ha sido homologado de conformidad con la Decisión 98/482/CE del Consejo para la conexión
paneuropea de un terminal simple a la red telefónica pública conmutada (RTPC). No obstante, a la vista de las
diferencias que existen entre las RTPC que se ofrecen en diferentes países, la homologación no constituye por
sí sola una garantía incondicional de funcionamiento satisfactorio en todos los puntos de terminación de la red
de una RTPC.
En caso de surgir algún problema, procede ponerse en contacto en primer lugar con el proveedor del equipo.
Cet équipement a reçu l’agrément, conformément à la décision 98/482/CE du Conseil, concernant la connexion
paneuropéenne de terminal unique aux réseaux téléphoniques publics commutés (RTPC). Toutefois, comme il
existe des différences d’un pays à l’autre entre les RTPC, l’agrément en soi ne constitue pas une garantie
absolue de fonctionnement optimal à chaque point de terminaison du réseau RTPC.
En cas de problème, vous devez contacter en premier lieu votre fournisseur.
La presente apparecchiatura terminale è stata approvata in conformità della decisione 98/482/CE del Consiglio
per la connessione paneuropea come terminale singolo ad una rete analogica PSTN. A causa delle differenze
tra le reti dei differenti paesi, l’approvazione non garantisce però di per sé il funzionamento corretto in tutti i
punti di terminazione di rete PSTN.
In caso di problemi contattare in primo luogo il fornitore del prodotto.
Dit apparaat is goedgekeurd volgens Beschikking 98/482/EG van de Raad voor de pan-Europese aansluiting
van enkelvoudige eindapparatuur op het openbare geschakelde telefoonnetwerk (PSTN). Gezien de verschillen
tussen de individuele PSTN’s in de verschillende landen, biedt deze goedkeuring op zichzelf geen
onvoorwaardelijke garantie voor een succesvolle werking op elk PSTN-netwerkaansluitpunt.
Neem bij problemen in eerste instantie contact op met de leverancier van het apparaat.
Este equipamento foi aprovado para ligação pan-europeia de um único terminal à rede telefónica pública
comutada (RTPC) nos termos da Decisão 98/482/CE. No entanto, devido às diferenças existentes entre as
RTPC dos diversos países, a aprovação não garante incondicionalmente, por si só, um funcionamento correcto
em todos os pontos terminais da rede da RTPC.
Em caso de problemas, deve entrar-se em contacto, em primeiro lugar, com o fornecedor do equipamento.
Tämä laite on hyväksytty neuvoston päätöksen 98/482/EY mukaisesti liitettäväksi yksittäisenä laitteena yleiseen
kytkentäiseen puhelinverkkoon (PSTN) EU:n jäsenvaltioissa. Eri maiden yleisten kytkentäisten
puhelinverkkojen välillä on kuitenkin eroja, joten hyväksyntä ei sellaisenaan takaa häiriötöntä toimintaa kaikkien
yleisten kytkentäisten puhelinverkkojen liityntäpisteissä.
Ongelmien ilmetessä ottakaa viipymättä yhteyttä laitteen toimittajaan.
Utrustningen har godkänts i enlighet med rådets beslut 98/482/EG för alleuropeisk anslutning som enskild
terminal till det allmänt tillgängliga kopplade telefonnätet (PSTN). På grund av de skillnader som finns mellan
telefonnätet i olika länder utgör godkännandet emellertid inte i sig självt en absolut garanti för att utrustningen
kommer att fungera tillfredsställande vid varje nätsanslutningspunkt i telefonnätet.
Om problem uppstår bör ni i första hand kontakta leverantören av utrustningen.
Udstyret er i henhold til Rådets beslutning 98/482/EF EU-godkendt til at blive opkoblet på de offentlige
telefonnet som enkeltforbundet terminal. På grund af forskelle mellem de offentlige telefonnet i de forskellige
lande giver godkendelsen dog ikke i sig selv ubetinget garanti for, at udstyret kan fungere korrekt på samtlige
nettermineringspunkter på de offentlige telefonnet.
I tilfælde af problemer bør De i første omgang henvende Dem til leverandøren af udstyret.
Utstyret er i henhold til rådsdirektiv 98/482/EF godkjent for tilkopling til det offentlige telefonnett. På grunn
av forskjeller mellom de offentlige telefonnettene i forskjellige land, gir godkjennelsen ikke i seg selv noen
garanti for at utstyret fungerer korrekt på samtlige nettermineringspunkt.
Hvis det skulle oppstå problemer i forbindelse med bruken av utstyret, bør i første omgang utstyrsleverandøren
kontaktes.
i
INTRODUCTION
Important safety information
• If any of your telephone equipment is not operating properly, you should immediately remove it from your
telephone line, as it may cause harm to the telephone network.
• The AC power outlet shall be installed near the equipment and shall be easily accessible.
• Never install telephone wiring during a lightning storm.
• Never install telephone sockets in wet locations unless the socket is specifically designed for wet locations.
• Never touch uninsulated telephone wires or terminals unless the telephone line has been disconnected at the
network interface.
• Use caution when installing or modifying telephone lines.
• Avoid using a telephone (other than a cordless type) during an electrical storm. There may be a remote risk of
electric shock from lightning.
• Do not use a telephone to report a gas leak in the vicinity of the leak.
• Do not install or use the machine near water, or when you are wet.Take care not to spill any liquids on the
machine.

ii
INSTALLATION
Your machine is affected by the environment in which it is installed. Do not install your machine in the following areas.
●Excessively hot, cold, humid, or dry areas (for
example, near stoves, humidifiers, or air
conditioners)
●This may result in damp paper, condensation within the
internal mechanisms, misfeeds, and dirty output.
(Operating Environment: 15˚C to 30˚C, 20 to 85% relative
humidity)
Also, in ultrasonic humidifiers, use purified water. If you
use tap water, mineral residue can form on internal
components of the machine, causing poor-quality output.
●Poorly ventilated areas
●When copying/printing, this machine emits ozone. The
amount of ozone emitted is not harmful, however, if
performing large copying/printing jobs and the smell of
ozone becomes objectionable, open a window or use a fan
to ventilate the area.
*If you place the machine near a window, make sure it is
not exposed to direct sunlight.
●Areas in direct sunlight
●Direct sunlight can distort the
plastic parts of the copier and
result in poor-quality output.
●Dusty areas
●If dust enters the internal parts of the copier, damage or
poor-quality output can result.
●Areas with high concentrations of ammonia
gas
●If you place the machine near another copier that emits
ammonia gas (such as one
used for copying drafting
paper),
poor-quality output can result.

iii
10 cm
●Close to walls
●
Place the rear of the copier at least 10 cm from the wall,
and leave enough space around the copier for comfortable
operation.
●Areas with excessive vibration
●
Excessive vibration can harm the machine.
INSTALLATION
Note
●Sometimes if the machine is plugged into an outlet that is
shared with lighting such as a lamp, the lights will dim or
flicker slightly. Plug the machine into an outlet that is not
shared with lighting.
●When moving the machine, always use two people lifting
with the recessed handholds on the sides of the cabinet.

iv
BEFORE USINGTHE FAX
There are several precautions you must take when using the fax function of this machine.
Please observe the following precautions.
About Entering Information ●●
●●
●Making Settings
Please see page 1-7 of this manual, the section "BEFORE STARTING ENTER YOUR INFORMATION AND MAKE
SETTINGS." Read this section, make the appropriate settings and enter the relevent information for your environment.
About the Internal Lithium Battery
The internal lithium battery is used to protect automatic dialling memories and various other settings.
●The lithium battery is slowly consumed during times when the power is switched off. (The battery is used even if you have
not made settings. When the power is switched on, there is little appreciable drain on the battery.)
●If the battery level becomes low, you can lose settings you have made, so keep a record of the settings by printing them out.
(See page 5-1)
●The life of the lithium battery is about 5 years if the power were always switched off.
●If the lithium battery needs to be replaced, contact your dealer. If the lithium battery is totally depleted, you cannot use the
fax function.
Additional Information
●During a lightning storm, remove the plug from the AC outlet. Information in memory and originals read in memory for
substitute reception are not lost.
●Always keep the power switch on. If you turn the power off, you cannot receive faxes.

v
MAIN FEATURES
Rapid Dialling
●You can send a fax that has been previously programmed by pressing a RAPID key (35 rapid keys available).
(See page 1-16)
Speed Dialling
●You can send a fax that has been previously programmed by pressing the SPEED DIAL key, entering a 3 digit
number (150 speed dial numbers available), and pressing the START key. (See page 1-16)
Memory Sending
●You can send an original that has been scanned into memory. (See page 2-6)
Substitute Reception
●When you are receiving a fax, the fax can be stored in memory if the fax machine is out of toner or papers.
(See page 2-17)
Search Dialling
●You can search for a recipient's name and send a fax. (See page 1-16)
Polling
●You can call another fax machine and request that it sends an original to your fax machine. (See page 3-17)
Memory Polling
●You can allow other fax machines to poll your fax machine, and send them an original stored in memory.
(See page 3-20)
Confidential Faxing
●You can transmit and receive confidential originals. (See page 3-7)
Broadcasting
●You can send an original to several fax machines with one operation. (See page 3-1)
Relay Request
●You can have your fax machine serve as a relay machine, so it receives a relay request and broadcasts an original
to several other fax machines. (See page 3-11)
Timer Operations
●You can automatically send a fax at a specified time. (See page 3-3)
Programs
●You can create customized programs to simplify faxing operations. (See page 3-25)
Dual Access
●While the fax is occupied with another operation, you can prepare to send the next fax. (See page 3-40)
Chain Dialling
●You can insert additional numbers in the recipient's fax number. (See page 3-42)
Fax Data Transfer Mode
●You can transfer faxes that you cannot print to another fax machine. (See page 3-43)

vi
HOWTO USETHIS MANUAL
The layout of this manual is as follows.
About the Difference Between A4 and A4R Orientations
This manual uses A4 and A4R as the sizes for paper and originals. The "R" in A4R is used to distinguish between the two
orientations of paper or originals.
Example Comparing A4 and A4R size orientations
A4 is set as indicated A4R is set as indicated
in the illustration below. in the illustration below.
Portrait orientation Landscape orientation
Top of original Top of original Top of original Top of original
2-19
BASIC OPERATIONS
Note
ENTERING AUTO DIALLING INFORMATION
Note
This model has an easy to use auto dialling feature. Frequently used fax numbers and names can be entered and easily dialed
to send faxes.
About the display for entering auto dialling information ●corrections ●erasing
This alphanumeric code is explained in the chart below.
R01=
ENTER FAX #
Character Rapid Dialling Rapid Dial Number (2 digits)
Number Code Meaning
Speed Dial Number (3 digits)
Group Dial Number (2 digits)
Meaning
Speed Dialling
Group Dialling
R
GProgram Dial Number (2 digits)
Program Dialling
P
S
Entering Rapid Dialling Information
●●
●●
●
Corrections
●●
●●
●
Erasing
Byenteringrapiddiallinginformation,youcandialnumberswithoutusingnumeric
keys by simply pressing a rapid key. Together with group dial numbers, you can
enter up to 35 numbers.
About the START key and ENTER key
Depending on the display you are instructed to press
theSTARTkeyortheENTERkey.However,instead of
pressingtheENTERkeywhereinstructedtodoso,you
canalsopresstheSTARTkeyandperformtheoperation
correctly.
How to Enter Rapid Dialling Information
1From fax mode press the ENTRY key.
2Press the "1" key.
●The following message is displayed.
RAPID KEY
1=SET, 2=CLEAR
●Instead of pressing the "1" key you can also press the left arrow key
() or right arrow key ( ) until the following message appears, and
then press the ENTER key.
Entering Auto Dialling Information
Detailed Instructions
Provides a detailed explanation
of how to perform the operation.
Index
Looking up information is easy
because the index is printed
along the edge of the pages
in each chapter at a different
position.
Explains how to erase or correct information that you entered.
Provides more detailed information about the operation.
............
Operation Steps
The steps of the
operation are explained
in order along with
illustrations, providing
easy-to-understand
directions.
Title
This indicates the
procedure explained
in the section.
Section Explanation
Provides an easy-to-
understand explanation
of the function or operation.
Note
Cancelling ......

vii
Before Starting
BEFORE STARTING
CHAPTER 1
BEFORE STARTING
This chapter explains basic knowledge that you need, information
you must enter, and settings you should make before using the
fax function of this model. Make sure to read this chapter before
starting.
BASIC OPERATIONS
CHAPTER 2
BASIC OPERATIONS
This chapter explains basic operations for sending and receiving
faxes with the fax function and also for entering information.
MAKING COPIES Before Starting MAKING COPIES Before Starting
This operation manual describes only fax
features.Forinformation about copier functions,
maintenance,andrelated topics,suchasloading
paper or removing misfeeds, refer to the copier
operationmanual.
*The operations described in this manual
assumethat thefaxmachineis setasdelivered
fromthefactory.If youchangethesettings,the
procedures and steps described within may
differ slightly and you may not be able to
perform some operations.
CHAPTER 3
USING CONVENIENT FUNCTIONS 1
ABOUT SPECIALTRANSMISSION OPERATIONS
Explains how to use convenient functions. Read the appropriate
sections.
CHAPTER 4
CONVENIENT FUNCTIONS 2
ABOUT MAKING USE OF CONVENIENT FUNCTIONS
Explains how to use additional convenient functions and
connectingan extensiontelephone. Read the appropriatesections.
CHAPTER 5
PRINTING LISTS
Explains how to confirm settings when using various functions.
CHAPTER 6
GENERAL INFORMATION
Contains information that you may need to consult when using
the fax function and troubleshooting.
APPENDIX
USER PROGRAMS AND INDEX
Explains how to set programs for use with the fax function.
INDEX
USING CONVENIENT
FUNCTIONS 1
USING CONVENIENT
FUNCTIONS 2 PRINTING LISTS GENERAL
INFORMATION USER PROGRAMS
AND INDEX

viii
Page
INTRODUCTION ........................................................ i
INSTALLATION...........................................................ii
BEFORE USING THE FAX........................................iv
MAIN FEATURES...................................................... v
HOW TO USE THIS MANUAL ...................................vi
INDEX ......................................................................vii
CHAPTER 1 BEFORE STARTING
PART NAMES AND FUNCTIONS .......................... 1-1
●Overall Layout .................................................. 1-1
●Operation Panel................................................ 1-2
TURNING POWER "ON" AND "OFF"..................... 1-4
●Turning Power "ON".......................................... 1-4
●Turning Power "OFF" ........................................ 1-5
●Selecting Fax Mode .......................................... 1-6
BEFORE STARTING ENTER YOUR INFORMATION
AND MAKE SETTINGS..............................................
1-7
●
EnteringYour Telephone Number and Name .........
1-7
●Setting the Date andTime ................................ 1-7
●About Installation •Connection ......................... 1-7
AUDITING ACCOUNTS ......................................... 1-8
●How to Use Auditing ......................................... 1-8
ABOUT ORIGINALS............................................... 1-9
●Transmittable Originals ..................................... 1-9
ABOUT THE SPF ................................................. 1-10
●Usable Originals ............................................. 1-10
SETTING ORIGINALS ......................................... 1-11
●Using the SPF ................................................ 1-11
●Using the OriginalTable.................................. 1-12
SELECTING FAX RESOLUTION
•
EXPOSURE CONTROL
....
1-14
●Selecting the Fax Resolution .......................... 1-14
●Selecting the Exposure................................... 1-15
ABOUT CONVENIENT DIALLING ....................... 1-16
●Auto Dialling ................................................... 1-16
●Redial ............................................................. 1-17
●On-hook Dialling ............................................. 1-17
CHAPTER 2 BASIC OPERATIONS
SENDING FAXES................................................... 2-1
●How to Send Faxes .......................................... 2-1
●About Memory Send Mode ............................... 2-6
●How to Use Auto Dialling .................................. 2-7
●Dual Access ................................................... 2-11
CANCELLING A FAXTRANSMISSION OR RECEPTION .........
2-12
RECEIVING FAXES ............................................. 2-14
●About the Receiving Method........................... 2-14
●About Receiving Modes.................................. 2-15
●How to Receive Faxes.................................... 2-16
●About Substitute Reception ............................ 2-17
WHEN USING MANUAL SENDING AND RECEIVING...........
2-18
ENTERING AUTO DIALLING INFORMATION .........
2-19
●
Entering Rapid Dialling Information
•
Corrections
•
Erasing...
2-19
●
Entering Speed Dialling Information
•
Corrections
•
Erasing...
2-25
●
Entering Group Dialling Information
•
Additions
•
Erasing ...
2-31
HOW TO ENTER CHARACTERS......................... 2-37
CONTENTS
CHAPTER 3 USING CONVENIENT FUNCTIONS 1
(ABOUT SPECIALTRANSMISSION OPERATIONS)
Page
BROADCASTING................................................... 3-1
●How to Use Broadcasting ................................. 3-2
TIMER OPERATIONS ............................................ 3-3
●SettingTimer Operations .................................. 3-3
CONFIDENTIAL FAXING ....................................... 3-7
●How to Use Confidential Faxing........................ 3-8
RELAY REQUEST................................................ 3-11
●Entering Relay Groups ................................... 3-12
●How to Use the Relay Request Function ........ 3-16
POLLING.............................................................. 3-17
●How to Use the Polling Function ..................... 3-18
●How to Use Memory Polling ........................... 3-20
●Giving Others Permission to Poll your Fax
(Polling Security) ............................................ 3-23
PROGRAMS ........................................................ 3-25
●Entering Program Operations ......................... 3-25
●How to Use Programs .................................... 3-39
DUAL ACCESS .................................................... 3-40
●How to Set Dual Access ................................. 3-41
CHAIN DIALLING ................................................. 3-42
FAX DATATRANSFER MODE ............................. 3-43
●How to Use the Fax Data Transfer Mode ........ 3-43
CHAPTER 4 USING CONVENIENT FUNCTIONS 2
(ABOUT MAKING USE OF CONVENIENT FUNCTIONS)
COVER SHEET FUNCTION .................................. 4-1
●Selecting Whether to Send a Cover Sheet........ 4-2
FAXTRANSMISSION MESSAGE .......................... 4-3
●How to Set theTransmission Message ............. 4-4
INDEX .................................................................... 4-5
EXTENSIONTELEPHONE INSTALLATION ........... 4-6
●How to Connect theTelephone ......................... 4-7
●How to Use an ExtensionTelephone ................ 4-7
CHAPTER 5 PRINTING LISTS
PRINTING .............................................................. 5-1
●About Reports you can Print............................. 5-1
●How to Print...................................................... 5-8
ERROR MESSAGES AND SIGNALS..................... 5-9
CHAPTER 6 GENERAL INFORMATION
SUPPLIES AND OPTIONAL EQUIPMENT ............ 6-1
TROUBLESHOOTING............................................ 6-2
SPECIFICATIONS .................................................. 6-3
APPENDIX USER PROGRAMS AND INDEX
USER PROGRAM LIST........................... Appendix-1
HOWTO USE USER PROGRAMS ......... Appendix-3
ENTERING INFORMATION AND SETTING PROGRAMS (P101-P161)
.......................................................... Appendix-5
INDEX ................................................... Appendix-28

1-1
BEFORE STARTING
Note
Note
Note
PART NAMES AND FUNCTIONS
Single Pass Feeder (SPF) ( - )
Transmitted originals are automatically scanned. When
placing an original on the original table, the single pass
feeder functions as a platen cover.
Exit area
The original is deposited onto this tray after being
transmitted or scanned into memory.
Document feeder tray
Set originals in this area.
Original guides
Adjust the original guides to the width of the original.
Original table
Place books and other originals that cannot be set in
the document feeder tray on the original table.
Job separator tray
Received faxes are deposited here. Lists and reports that
you print using the fax function are also deposited here.
On models without a job separator tray,
received faxes, lists, and reports are
deposited in the paper output tray.The job
separator tray is optional.
Paper output tray
On models without a job separator tray, received faxes,
lists, and reports are deposited here.
Operation panel (See the next page)
Front cover (See the copier operation manual)
Open to clear a misfeed.
Paper trays (See the copier operation manual)
Holdspaper used for receiving faxesand making copies.
The paper trays hold 250 sheets each.
Part Names and Functions
Models with platen
cover installed
Models with only one
paper tray
Overall Layout
The following illustration shows the overall layout of theAR-200 model with optional single pass feeder (SPF) (AR-SP2), job
separator tray kit (AR-TR2), and optional facsimile expansion kit (AR-FX2) installed.
Depending on your model, see the illustrations below.
Some models are equipped with only one
paper tray.
Speaker
The speaker emits the dial tone for on-hook dialling,
and the fax transmission/reception tones.
Power switch (See page 1-4)
Press to turn the machine power on and off.
LINE socket (See page 1-7)
Insert the connector ofthetelephone line in this socket.
TEL socket (See page 4-7)
Platen cover
Close to flatten the original on the original table.
For information about part names and
functions of parts used only with the copy
function and parts used with both the copy
function and fax function (for example, the
misfeed indicator and paper required
indicator), refer to the "PART NAMES AND
FUNCTIONS" section of the copier
operation manual.

1-2
BEFORE STARTING Part Names and Functions
LINE STATUS indicator
Lit when sending/receiving faxes, blinking when
receiving data.
MEMORY key and indicator
Used for sending faxes in memory (indicator is lit) or
direct sending (indicator is not lit).
SPEED DIAL key
Press this key to dial a speed dial number.
Display
Displays fax destination name and other informational
messages.
Left arrow key ( ) and right arrow key ( )
Press these keys to move the cursor and select menu
items.
ENTER key
Press this key to complete an item selection from a
display menu or when entering characters.
SPEAKER key
Before you dial, press this key and the machine waits
for you to dial a number (on-hook dialling).
REDIAL/PAUSE key
Press this key to automatically redial the last number
dialed.You can also use this key to enter a pause while
dialling a fax number.
SEARCH DIAL key
Press this key to search by name for a number stored
for automatic dialling.
Resolution key and indicators (See page 1-14)
Press this key to adjust the resolution before sending
an original. The appropriate indicators light up
depending is selected.
when the second overlay is opened
when the first overlay is opened
Rapid key overlay layout
Operation Panel * The following operation panel is from standard AR-200.
Depending on your model and on installed options, your operation panel
may differ slightly.

1-3
BEFORE STARTING Part Names and Functions
AUDIT CLEAR key
Press this key after sending a fax to clear the audit
account information and return to the initial condition
in auditing mode.
POWER SAVE indicator
Lights up when the copier is in a power saving mode.
Alarm indicators
These indicators light up or blink when paper is
depleted, a misfeed occurs, or maintenance is required.
Output tray full indicator
Lit when more than 100 sheets are output on the job
separator tray.
Paper feedlocation/misfeed locationindicators
The selected paper feed location is shown by a lit
indicator ( ).Thegenerallocation of the misfedpaper
is shown by a blinking red indicator ( ) .
COPY/FAX key and indicators
Press this key to change between copier and fax modes.
The indicator for the mode that you selected lights up.
Rapid key overlay tab
Use this tab to open the rapid key overlay.
Rapid key overlay
Open this overlay to access additional rapid dial
numbers, programs, and to enter characters.
BROADCAST key
Press this key to send an original to a group of receiving
fax machines.
FUNCTION key
Press this key to select various special functions.
SENDING OPTIONS key
Used for advanced features such as timer operations,
confidential fax transmission, polling, serial polling,
memory polling, and relay broadcast.
Note
About the auto power shut-off mode...
●●
●●
●Usingthisfeatureextinguishesalltheoperationpanel indicators exceptthe POWERSAVE indicator,
however, faxfunction indicators and the LCDdisplay are not affected.Formore information about the
auto power shut-off function, see the copier operation manual.
●For more information about keys and indicators used with the copy function, refer to the "Operation
panel" section of the copier operation manual.
REPORT key
Press this key to print out a report of a fax transaction
and also when receiving a confidential fax.
ENTRY key
Used when entering various information.
Rapid keys (01 to 10)
Press one of these keys to automatically dial a number.
Light and dark keys and indicators
Press these keys to adjust the exposure for scanning an
original.
key
If you are performing remote reception with the
extension telephone, press this key after entering the
remote number.
Numeric keys
Use this keypad for dialling and also for setting and
entering information.
# key
Whendialling,pressthiskeyafter youare finishedscanning
originals into memory from the original table.
CLEAR ( ) key
Press this key to stop the current operation and also to
correct mistakes when entering alphanumeric
characters.
START key and indicator
Used for the following:
To begin sending a fax.
Reading an original into memory from the original
table.
Manually receiving a fax.
Entering and setting information.
CLEAR ALL ( ) key
Press when making settings if you want to finish or to
clear all selected settings and return to the initial state.
ORIGINAL SIZE ENTER key and indicators
Pressthis keyto select theoriginal size.Theappropriate
indicator lights up.
Rapid keys (11 to 25)
Press one of these keys to automatically dial a number.
Program/ABCDE (alphabetic entry keys)
Usethese keys to access programsor to enteralphabetic
characters.
Rapid keys (26 to 35)
Press one of these keys to automatically dial a number.
SHIFT key
Press this key to switch between upper and lower case.
SPACE key
Press this key to enter a space.
SP (Symbols) key
Press this key to enter special symbols.
CLEAR ( ) key
Press this key to erase characters when entering names
and numbers.

1-4
BEFORE STARTING
TURNING POWER "ON" AND "OFF"
Turning Power "ON"
To use the fax or copier, turn the power switch located on the left side of the
cabinet to the "ON" position.
1Turn the power switch to the "ON" position.
●After 15 seconds, the system check is finished and the machine enters
the copier or fax mode initial state. To switch between copier and fax
modes press the COPY/FAX key. (See page 1-6)
●When using the fax function, when the initial state is
displayed, you can send faxes.
●When you turn on the power, the machine enters
copiermodeor faxmode depending on thelastmode
usedbeforepowerwasturned off.Forexample,ifthe
machine is in copier mode and the power is turned
off,it will enter copier mode when the poweris turned
on again.Likewise, if the machine is in fax mode and
the power is turned off, it will enter fax mode when
the power is turned on again.
●The machine is set up from the factory to enter a
power save mode from the copier or fax modes if it is
turnedonandnotused for a specified periodof time.
For more information, see the "POWER SAVE
MODES" section of the copier operation manual.
●Do not switch the machine rapidly on and off. After
turning thepoweroff,waitfivesecondsor more before
turning it back on.
To turn the power on and off, use the power switch located on the left side of the cabinet.
Turning Power "ON" and "OFF"
Note
Power On

1-5
BEFORE STARTING
Power Off
Note
TURNING POWER "ON" AND "OFF"
Turning Power "OFF"
You do not need to turn the power off unless you are trying to clear an alarm,
removing foreign substances from within the machine, or moving the machine.
Donotturnoffpowerwhileusingthefaxmachine.Ifyou
turnoffthe power,youwillnot be abletoreceive faxes.
1Confirm that the machine is idle.
●To confirm that the machine is idle, make sure one of the following
conditions exists.
[Copier mode]
●The START key indicator is lit. (Initial state.)
●The POWER SAVE indicator is lit. (In preheat mode and auto power
shut-off mode.) For more information, see the "POWER SAVE
MODES" section of the copier operation manual.
[Fax mode]
●The display panel shows the following message (initial state).
Example
12 NOV FRI 08:30
STAND-BY 100%
●The LINE STATUS indicator is not lit.
Not lit
2Turn the power switch to the "OFF" position.
●If you turn the power off while the machine is in use, a misfeed may
occur. Also, settings will be lost.
Turning Power "ON" and "OFF"

1-6
BEFORE STARTING
Note
Selecting Fax Mode
This model has two modes: copier mode and fax mode. When the fax mode
indicator above the COPY/FAX key is lit, you can use the machine as a fax.When
the copier mode indicator is lit, you can use the machine as a copier. To change
from copier mode to fax mode, press the COPY/FAX key. Features available with
the fax function (for example automatic fax reception) are enabled even in copier
mode.
1If the copier mode indicator is lit, press the COPY/FAX
key.
●The fax mode indicator lights up.
●If you are done faxing and want to enter the copier mode, press the
COPY/FAX key again to select copier mode.
●Ifthemachineisinuse,youcannotchangemodes.If
you want to manually receive a fax or if you want to
quickly enter fax mode, press the CLEAR key to
cancel copying, and press the COPY/FAX key.
●Aftersendingorreceivingfaxes,the machine returns
tothefaxmodeinitialstate,butdoesnotreturn to the
copier mode.
Fax Mode Initial State
In the fax mode initial state, the messages similar to the following are shown on
the display. Depending on user program settings, this display may differ slightly
from yours.
12 NOV FRI 08:30
STAND-BY 100%
Date Day Time % in memory
Fax Function Features Enabled in Copier Mode
●Automatic fax reception (See page 2-14)
●Timer operations (See page 3-3)
●Programs that use timer operations (See page 3-25)
●Memory polling (See page 3-20)
●The relay station function of relay request (See page 3-11)
●Sending originals in memory from memory sending mode (See page 2-6)
●Remote reception (See page 4-6)
Turning Power "ON" and "OFF"
TURNING POWER "ON" AND "OFF"

1-7
BEFORE STARTING
BEFORE STARTING ENTERYOUR
INFORMATION AND MAKE SETTINGS
Note
EnteringYour Telephone Number and Name
Enter the telephone number and name of the person using this machine.
●The telephone number and name that you enter will be printed at the top of the each page on the recipient's copy when you
send a fax.
●This number is used for polling security. (See page 3-17)
Important
The law requires that your name, telephone/fax number, and the date and time appear on each fax message you send. Enter
your name and fax number here and set the date and time as explained in the following section to have the fax machine include
this information automatically at the top of your fax messages.
Enter your telephone number and name with a user program. (See page Appendix-19)
You can print out your phone number and ID code. (See page 5-5)
Setting the Date and Time
There is an internal clock built into this machine. Please enter the current date and time. Enter the date and time with a user
program. (See page Appendix-25)
●The date and time is displayed on the display panel when the fax machine is in the initial state.
●The date and time entered is used for timer operations, so be sure to set it correctly.
About Installation ●●
●●
●Connection
Plug one end of the telephone line code supplied with this facsimile expansion kit into the LINE socket.
Plug the other side into the adapter. Plug the adapter into the telephone socket on the wall.
Before Starting EnterYour Information and Make Settings
After placing the fax and before using it, you must enter the following information.
LINE socket
Adapter
Wall socket
Make sure the ends of cord are
pressed firmly into the sockets.

1-8
BEFORE STARTING
AUDITING ACCOUNTS
When auditing has been set, total fax sending and receiving times and other information can be tracked for each audit account
that can send faxes (maximum of 20 accounts).
Also, for each audit account you can print out a report containing information such as total fax sending times and total page
counts. (See page 5-6)
[This function is set with a user program. (See page Appendix-5)]
Note
How to Use Auditing
When auditing has been set, the fax mode initial state message displays the
following:
ENTER DEPT.#
---
In this case, the user must enter a 3-digit code to use the fax machine.
1Enter your 3-digit account number using the numeric
keys.
●When you enter the digits of your account number the " - " characters
on the display change to " * " characters. If you make a mistake
entering your code, press the CLEAR key and enter your account
number again.
●When the account number is entered correctly, the following message
is displayed:
12 NOV FRI 09:00
STAND-BY 100%
2When you are finished using the fax function, press the
AUDIT CLEAR key.
When copying with auditing set, and you want to
send a fax...
If the account number of the person using the copying
functionandtheaccountnumberforthefaxfunctionare
the same, you can interrupt the copy job, press the
COPY/FAXkeytoenterfaxmode,andsendafax.Ifthe
account numbers are different, wait until copying is
finished, press the COPY/FAX key to enter fax mode,
and enter the account number.
Auditing Accounts
Other manuals for AR-FX2
1
Table of contents
Other Sharp All In One Printer manuals

Sharp
Sharp MX-M550N User manual

Sharp
Sharp MX-M905 Operating instructions

Sharp
Sharp MX 5500N - Color Laser - Copier User instructions

Sharp
Sharp AL-1661CS User manual

Sharp
Sharp MX-C311 Installation and operating manual

Sharp
Sharp MX-M1204 User manual

Sharp
Sharp FO-2080 Setup guide

Sharp
Sharp AL-1661CS User manual

Sharp
Sharp FO-3800M User manual

Sharp
Sharp MX-B201D User manual