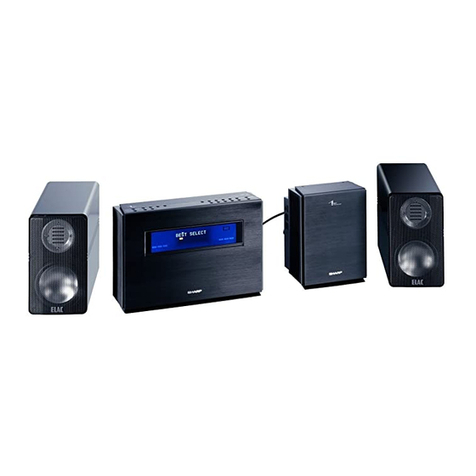
Sharp SM-207H User manual

|
STEREO-VERSTARKER
AMPLIFICATEUR
STEREO
AMPLIFICADOR
ESTEREOFONICO
STEREOFORSTARKARE
AMPLIFICATORE
STEREO
STEREO
AMPLIFIER
STEREO-CASSETTENDECK
PLATINE
A
CASSETTE
STEREO
PLATINA
ESTEREOFONICA
DE
CASSETTE
STEREOKASSETTDACK
PIASTRA
DI
REGISTRAZIONE
STEREO
STEREO
CASSETTE
DECK
.
STEREO-PLATTENSPIELER
FUR
BEIDSEITIGES
ABSPIELEN
TOURNE-DISQUE
STEREO
A
LECTURE
DES
DEUX
FACES
PLATO
GIRATORIO
ESTEREOFONICO
CON
REPRODUCCION
A
AMBAS
CARAS
STEREOSKIVSPELARE
FOR
AVSPELNING
AV
BADA
SIDOR
GIRADISCHI!
STEREO
A
LETTURA
SUI
DUE
LATI
BOTH
SIDES
PLAY
STEREO
TURNTABLE
Se
Mune
DEUTSCH
-
<q
oO
i
2
BS
x
uw
ESPANOL
SHARP»
soncsmicrs
sreeg
hap?
fe
cor
BOTH:
SIDES
PLAY
TINSZ0811AFZZ

Connect
the
AC
supply
lead
only
to
outlets
providing
AC
220V
(50/60
Hz)
power.
Should
power
with
a
rating
other
than
220V(50/60
Hz)
be
used,
the
unit
may
operate
improperly,
or
become
a
fire
or
shock
hazard.
Use
of
the
AC
supply
lead.
Misuse
of
the
AC
supply
lead
will
result
in
breakage,
fire
or
accidental
electric
shock.
e@
Always
take
a
firm
grip
on
the
plug
when
removing
the
AC
supply
lead
from
the
outlet.
Never
pull
the
plug
from
the
outlet
by
gripping
the
lead.
@Do
not
place
any
heavy
object
on
the
AC
supply
lead.
Do
not
excessively
bend
the
AC
supply
lead.
Do
not
place
in
a
position
where
it
will
be
stepped
on.
Do
not
use
or
place
the
unit
where
the
humidity
is
high
as
this
will
result
in
malfunctioning
or
electric
shock.
Do
not
expose
the
unit
to
high
temperatures,
for
example,
in
direct
sunlight
or
close
to
heaters.
This
will
cause
the
plastic
parts
to
warp
and
thus
cause
the
unit
to
malfunction.
Do
not
use
or
place
the
unit
where
there
is
excessive
dust
as
.
this
will
cause
malfunctioning.
Special
attention
should
be
paid
to
records
a$
they
are
prone
to
attract
dust
due
to
static
electricity.
Do
not
expose
the
unit
to
extremely
cold
temperatures
as
this
will
cause
the
unit
to
malfunction.
When
positioning
the
unit,
a
firm,
level
base
should
be
select-
ed.
Be
careful
not
to
allow
the
unit
to
fall.
Do
not
remove
the
cabinet.
There
are
dangerous
high
voltages
inside.
In
the
event
that
trouble
develops
inside
the
unit,
please
contact
the
dealer
from
whom
you
purchased
the
unit.
Do
not
place
cassette
tapes
or
the
unit
near
or
in
magnetic
fields
such
as
magnets,
television
set
or
speakers.
This
will
result
in
noise
or
erasure
of
the
tape.
Do
not
place
the
speakers
so
they
face
the
unit
or
are.
too
close
together;
this
can
cause
howling
affected
by
the
speaker’s
sounds
when
a
record
is
playing.
Stack
the
units
as
shown
in
the
illustration.
Stereo
Amplifier
Stereo
Tuner
Stereo
Cassette
Deck
Stereo
Turntable
Muting
Button:
MUTING
Graphic
Equalizer
Controls:
GRAPHIC
EQUALIZER
Microphone
Mixing
Volume
Control:
MIC
MIXING
Balance
Contro!:
BALANCE
Function
Selector
|
ee
.
Switches
and
Indicators
Microphone
Socket:
MIC
Headphones
Socket:
PHONES
Power
Switch:
POWER
Ban
neers
MTEE
Mics,
sermeecn
commas”
4A
i;
a
om
[E]
1
Power
Indicator:
POWER
Volume
Control:
VOLUME
Muting
Indicator:
MUTING
Loudness
Switch:
LOUDNESS

Deck
1)
Cassette
Compartment
Peak
Level
Display
Deck
1}
Deck
2)
Tape
Indicators
Tape
Indicators
Dolby
NR
Indicator:
Deck
2)
DOLBY
NR
Cassette
Compartment
tol
Deck
2)
Digital
Tape
Counter
and
Tape
Counter
Reset
Button:
TAPE
COUNTER
doo0000
Ip
9.
gl
Deck
2)
Tape
Selector
Switch:
TAPE
SELECTOR
co
=
pee
ae
eee
=
eo
i
aa
an
Deck
1)
Eject
Button:
EJECT
Deck
1)
APMS
Buttons
and
Indicators
Deck
1)
APMS
Clear
Button:
CLEAR
Dubbing
Start
Buttons
and
Indicators:
Deck
1)
APMS
Check
Button:
CHECK
DUBBING
START
Deck
2)
Eject
Button:
Record
Level
Contro!:
RECORD
LEVEL
EJECT
aaa
Dolby
NR
Switch:
aan
DOLBY
NR
—
>
@
Deck
2)
Fast
Forward/
Forward
APSS
Button:
>>
Repeat
Button
and
Indicator:
REPEAT
:
Deck
2)
Stop
Button:
®
Deck
1)
tntroduction
Scan
Button
and
Indicator:
INTRO
SCAN
Deck
2)
Play
Button
and
Indicator:
>
Deck
1)
Fast
Forward/Forward
APSS
Button:
>>
Deck
2)
Rewind/Reverse
APSS
Button:
<<
Deck
1)
Stop
Button:
=
Deck
2)
Record
Button
and
Deck
1}
Play
Button
and
Indicator:
>
Indicator:
©
Deck
1)
Rewind/Reverse
APSS
Button:
<<
Deck
2}
Pause
Button
and
Indicator:
II
Power
Switch:
POWER
Continuous
Play
Button
and
Indicator:
CONT
PLAY

Control
On
the
Rear
Panel
Record
Level
Balance
Control:
BALANCE
Power
Switch:
POWER
Side
A/B
Button
and
Indicators:
SIDE
A/SIDE
B
APSS/APMS
S
Level
C
:
:
enshe
evel
Gontrpts:
SENSOR
introduction
Scan
Button
and
Indicator:
INTRO
SCAN
APMS
Buttons
and
Indicators
Both
Sides
Button
and
APMS
Clear
Button:
CLEAR
Indicator:
BOTH
SIDES
Repeat
Button
and
APMS
Check
Button:
CHECK
Indicator:
REPEAT
:
Tonearm
Forward/APSS
Button:
Synchronize
Button
and
FWD
Indicator:
SYNCHRO
Tonearm
Reverse/APSS
Button:
Speed
Button:
REV
SPEED
Cue
Button:
CUE
Piay/Cut
Button:
PLAY/CUT
Turntable
Compartment
Turntable
Open/Close
Button:
OPEN/CLOSE

7
nee
;
Screw
(smal!]
:
.
Screw
(large)
When
using
the
unit
for
the
first
time,
remove
three
screws
for
transportation
(blue
colour)
that
lock
the
turntable
com-
partment.
e
These
screws
are
necessary
during
re-shipment.
Store
them’
so
that
they
will
not
get
lost.
During
re-shipment,
make
sure
that
you
install
them
in
the
specified
places.
&
ae
Make
the
connections
described
below
before
connecting
the
AC
supply
leads
of
the
amplifier
and
the
tuner.
Compact
Disc
Digital
Audio
Player,
etc.
Another
source
unit
=
3]
FF
voit
nth
gal]
7
Check
the
POWER
switches
of
all
units
are
in
the
|
OFF
or
To
AC
outlet
BL
©/STAND-BY
Positions
before
connecting
the
AC
supply
lead,
RCA-Type
pin
lead
polarity
e
White
plug
ma)
To
the
LEFT
channel
eRed
plug
m7),
To
the
RIGHT
channel
(Left)
(Right)
Speaker
Systems
&
(
Aza
WW
——
Cassette
Deck
(e|
ed
Turntable
mt)
CE]
——
—_
@
Damage
to
the
electronic
circuits
of
this
unit
may
occur
if
speakers
under
6
ohms
are
used.
‘
e
Do
not
allow
the
speaker
connection
leads
or
AC
supply
lead
to
come
near
the
loop
aerial,
or
noise
may
be
mixed
in
the
broadcast
signals.
Note
for
Units
Equipped
with
Non-Polar
AC
Supply
Plug:
If
a
humming
noise
occurs,
unplug
the
AC
supply
plug
from
the
AC
outlet
and
reverse
the
polarity
{i.e.,
unplug
and
turn
the
plug
over),
and
use
in
the
position
that
gives
the
least
noise.
Note:
Even
if
one
of
those
units
such
as
SM-207H,
RT-207H
and
RP-207H
is
not
in
use,
it
has
to
be
left
connected
to
other
units.
Disconnecting
one
of
those
connections
from
the
amplifier
may
produce
hum
from
the
speakers.
4

MUTING
Button
This
button
is
used
to
reduce
the
volume
quickly
when,
for
example,
a
guest
arrives
or
the
telephone
rings.
When
the
button
is
pressed
once
again,
the
sound
gradually
becomes
louder
and
returns
to
its
original
level.
=
=—
=
oe
eae
VOLUME
Control
This
adjusts
the
volume
level
to
the
speakers
or
headphones.
LOUDNESS
Switch
This
switch
allows
compensation
to
be
made
for
ear
insen-
sitivity
to
highs
and
lows
while
listening
at
low
volume
set-
tings.
Bass
and
treble
are
automatically
boosted
by
using
this
switch.
Do
not
use
the
switch
at
normal
volume
setting.
BALANCE
Control
Adjusts
the
relative
volume
of
each
speaker
for
optimum
stereo
effect.
Slide
the
contro!
until
the
sound
seems
to
be
coming
from
the
centre
of
the
listening
area.
GRAPHIC
EQUALIZER
Controls
@
Slide
a
control
of
a
specific
range
upwards
(toward
+10
position)
to
emphasise
the
sounds
in
that
particular
range.
@
Slide
a
control
of
a
specific
range
downwards
(toward
—10
position)
to
diminish
the
sounds
in
that
particular
range.
e
By
setting
all
GRAPHIC
EQUALIZER
controls
to
the
centre
(0)
position,
the
frequency
responses
will
become
flat.
a
a
This
is
the
sound
range
that
will
bring
out
the
fascinating
bass
Slide
the
knob
upwards
and
sounds
from
string
instruments
sounds
of
such
instruments
as
bass
guitars
or
drums.
Slide
‘will
be
emphasised.
Slide
the
knob
downwards
for
the
op-
the
control
knob
upwards
to
increase
output
at
these
posite
effect.
frequencies
and
downwards
to
reduce
output
at
the
same
frequency.
The
upper
register
of
cymbals
and
triangles
is
emphasised
by
|
250
Hz
|
sliding
this
knob
upwards.
Slide
the
knob
downwards
to
This
is
the
range
that
covers
human
voices
and
basic
sounds
_
reduce
tape
hiss
noises.
of
music.
Slide
the
knob
upwards
and
human
voices
will
be
emphasised
and
vice
versa.
This
range
affects
the
middle
register
which
is
higher
than
the
250
Hz
range.
By
sliding
the
knob
upwards,
sounds
from
a
piano
or
brass
instruments,
or
high
human
voices
will
be
|
emphasised
and
vice
versa.
Ba
ee
When
the
units
are
used
as
parts
of
the
system,
system
func-
©
When
the
»
button
or
INTRO
SCAN
button
on
the
RT-
tion
is
changed
automatically
without
touching
the
function
207H
cassette
deck
is
pressed:
selector
switch
on
the
amplifier,
by
the
following
operation.
When
the
</m
PLAY/CUT
button,
«4
FWD
button
or
INTRO
SCAN
button
on
the
RP-207H
turntable
is
pressed:
@When
the
TUNER
CALL
button
on
the
ST-207H
is
press-
©
ed:
When
switchover
is
made
from
TAPE
or
PHONO
to
another
L
input,
playback
of
tape
or
record
is
stopped
automatically.
[E|5

Do
not
touch
with
your
fingers.
Cassette
Tape
Selection
Tape
Slack
Check
to
ensure
there
is
tape
visible
through
the
cassette
centre
window.
Tighten
any
loose
tape
with
a
pencil
or
ball-
point
pen
before
inserting
the
cassette
into
the
compartment,
as
shown
at
left.
1
Press
the
EJECT
button
of
Deck
1
or
Deck
2,
respective-
ly,
2
Insert
the
cassettes
so
that
the
titles
of
the
tape
tracks
to
be
used
are
facing
outwards.
3
Close
the
compartment
door.
Unloading
Press
the
EJECT
button
and
remove
the
cassette
tape.
@
Use
only
well-known
brands
of
tape.
©
Use
of
C-120
(120
minutes)
cassettes
is
not
recommended,
The
extreme
thinness
of
this
tape
may
result
in
breakage
or
other
problems.
Side
‘‘A(1)"'
is
facing
up.
Screwdriver
DB.
Do
not
Cover
the
Detection
Hole.
®
Broken
tapes
can
easily
become
entangled
in
the
drive
mechanism,
causing
major
damage.
®
Stretched
tapes
will
run
at
uneven
speeds
and
will
distort
anything
recorded
on
them.
©
Do
not
place
cassettes
near
objects
with
a
strong
magnetic
field,
such
as
radios,
TV
sets
or
loudspeakers.
Magnetic
fields
may
reduce
the
tape
sensitivity
or
even
erase
the
recording.
®
Do
not
store
cassettes
for
extended
periods
in
hot,
moist
or
dusty
locations.
Removal
of
the
erasure
prevention
tabs
makes
it
impossible
to
accidentally
erase
the
tape.
@
Should
you
later
wish
to
record
on
the
tape,
a
piece
of
tape
over
the
tab
hole
will
allow
recording.
Detection
hole
Erasure
prevention
tab
Good
When
covering
the
erase
safety
tab
holes
care
should
be
taken
sO
as
not
to
cover
the
CrO,
and
METAL
tape
detection
holes.
If
the
holes
are
covered,
the
tape
will
be
treated
as
a
NORMAL
tape.
oy

TAPE
SELECTOR
lf
the
TAPE
SELECTOR
switch
is
set
to
the
AUTO
position,
AUTO,
METAL
the
tape
type
(METAL,
CrO,
or
NORMAL]
will
be
auto-
matically
selected
for
proper
recording
and
playback
by
simply
placing
the
tape
in
the
Cassette
compartment.
iO
NORMAL
(Low-Noise)
tape
METAL
tape
THE
TAPE
TYPE
IS
DISPLAYED
ON
THE
TAPE
!NDICATORS.
LZ
O
Dy
=
No
detection
hole
Detection
hole
B
oO
oO
a
ie
;
Detection
hole
A
METAL
CrO,
tape
=>
0
0D
@Some
tape
manufacturers
do
=
oO
O
=
not
provide
detection
hole
B
for
METAL
|
—
Croe
METAL
tapes.
If
you
are
using
7Croz
{0
OD
this
type
of
tape,
you
must
set
Sid
oOo}
the
TAPE
SELECTOR
switch
to
Datation
hile
METAL,
otherwise
the
tape
NORMAL
a
O
worn
indicator
will
display
CrO,
.
=
<——
Note:
:
The
TAPE
SELECTOR
switch
functions
only
for
Deck
2.
In
Deck
1,
even
if
the
TAPE
SELECTOR
switch
is
set
to
the
METAL
position,
the
tape
type
is
automatically
changed
by
the
AUTO
TAPE
SELECTOR
feature.

Deck
1
Used
only
for
playback.
oenare
aa
eee
tf
Deck
1
and
Deck
2
are
played
back
at
the
same
time,
the
Deck
2-»Used
for
playback
or
recording,
sound
from
Deck
1
will
be
heard.
3
DOLBY
NR
OFF
ON
POWER
a
ROFF
=ON
g
f
(0
\
Dy
Ze
{f
the
tape
has
been
re-
corded
with
the
DOLBY
|
:
oh
ives
NR
system,
set
the
;
:
nsert
a
cassette
into
the
DOLBY
NR
switch
to
the
}
Switch
on
both
the
ampli-
cassette
compartment
of
ON
position.
Otherwise
!
Press
the
»
button
of
Deck
fier
and
cassette
deck.
Deck
1
or
Deck
2.
set
to
the
OFF
position
‘
1
or
Deck
2,
e@Pressing
the
»
button
will
automatically
set
the
func-
tion
indicator
to
TAPE:
(Auto,
Function
Switching
System)
A
asics
the
GRAPHIC
EQUALIZER,
BAL-
ANCE
and
VOLUME
controls,
After
use:
Remove
the
tape,
then
set
the
a
——
POWER
switches
on
both
|
S005
00s
pees
=e
eee
units
to
the
Ml
OFF
Position.
eThe
tape
will
stop
auto-
matically
when
it
reaches
the
end.
e
if
you
wish
to
stop
the
tape
before
it
reaches
the
end,
press
the
#
button.
Press
the
If
button.
The
tape
will
stop
at
this
point.
To
resume
playback,
press
the
>
button,
Before
fast
forward
or
rewind
operation:
Fast
forward
Rewind
,@
Press
the
™
button
if
the
cassette
Press
the
>».
button
of
Deck
1
or
Press
the
<<
button
of
Deck
1
or
Deck
‘deck
is
in
a
mode
other
than
neutral.
Deck
2
for
fast
forward
winding
of
the
2
to
rewind
the
tape.
tape.
.
.
>—>
P
\
a
If
you
make
a
mistake
of
pressing
the
»
button
first
and
next
the
=
button
when
the
POWER
switch
is
at
If
OFF
position,
this
will
cause
the
unit
to
operate
unexpectedly:
i.e.
it
will
go
into
the
play
mode
in
a
moment
after
turning
the
POWER
switch
;
to
the
*
ON
position
and
then
pressing
the
»»
or
<
button.
This
is
not
due
to
any
malfunction
of
the
unit.
.
LE|8

The
APSS
speeds
forward
or
backward
to
locate
the
pro-
gramme
you
wish
to
hear
and
plays
it
back
automatically.
1
Press
the
>
button.
2
Press
the
>»
button
or
<4
button.
:
The
tape
will
advance
to
the
beginning
of
the
next
pro-
gramme
or
be
rewound
to
the
beginning
of
the
current
programme.
Playback
automatically
resumes
when
the
space
before
the
next
programme
is
reached
or
when
the
space
preceding
the
Fast
foward
.
programme
is
reached.
Playback
APSS
Pause
Control
(Deck
2
only)
1
If
you
wish
to
have
the
tape
stop
at
the
beginning
of
the
2
Press
the
»
button
a
second
time
when
you
wish
to
selection,
press
the
tf
button
while
the
APSS
is
in
opera-
cancel
the
pause.
tion.
APMS
lets
you
programme
the
selections
you
wish
to
listen
to,
and
plays
them
back
later
in
the
order
in
which
you
have
programmed
them.
1
2
3
4
5
6
7
8
8
£0
e
For
example,
if
you
would
like
to
listen
in
Deenononvnn
order
of
seventh,
fourth
and
tenth
program-
mes:
Press
the
APMS
buttons
(1
to
10)
until
the
indicators
light
up
at
the
selection
number
you
wish
to
programme.
40
L1b
7
OX
mp
OOK
elf
one
of
the
APMS
buttons
is
pressed
by
mistake,
press
that
button
again
to
turn
the
indicator
off.
Programmes
can
not
be
memorized
when
the
cassette
compartment
is
being
opened.
@
At
most
ten
programmes
can
be
memorized.
Press
the
™
button
when
the
tape
is
playing.
mdaegooa00
coccoooans
Yh
DO
GINBUE
Press
the
>»
button
of
Deck
1.
@Play
will
be
in
the
pro-
gramme
order.
elf
you
would
like
to
cut
the
APMS
playback
on
the
way,
press
©The
APMS
indicator
of
the
programme
which
is
being
played
the
#
button
of
Deck
1.
now
is
flashing
rapidly
and
for
the
programme
which
will
be
(in
this
case,
other
memorized
programmes
are
not
erased.)
played
is
flashing
slowly.
©
After
memorized
programmes
are
finished
playing,
the
APMS
indicators
for
them
are
turned
off.
(E]9

le
Press
the
CHECK
button
after
pressing
the
m
button
of
Deck
1.
The
APMS
indicator
will
show
the
programmed
selection
numbers
in
the
order
in
which
you
have
programmed
them.
@
They
can
not
be
confirmed
while
the
*
unit
is
playing.
Press
the
CLEAR
button
after
pressing
the
=
button.
@eMemorized
programmes
cannot
be
cleared
if
the
unit
is
in
the
playback
mode.
-
:
©
if
the
cassette
compartment
is
opened,
memory
is
automatically
cleared.
a
ee
Eee
Se
Ss
Memorized
programmes
can
be
added
by
pressing
the
buttons
corresponding
to
the
programme
numbers
the
APMS
in-
dicators
of
which
are
not
lighted
and
then
their
indicators
will
be
lighted
up.
Follow
the
operation
as
described
on
page
8,
steps
1
to
3.
:
Press
the
REPEAT
but-
ton.
fs
e
In
order
to
stop
repeat
playback,
press
the
REPEAT
button
again
to
turn
the
indicator
off.
After
finishing
playback
of
the
current
programme,
the
unit
will
be
stopped
automati-
cally.
e@
By
pressing
the
<4
or
>»
button
during
playback,
the
preceding
or
the
next
programmed
selection
can
be
played.
To
repeat
the
programme
which
is
being
repro-
duced
twenty-four
times.
Press
the
»
button
of
Deck
1
or
Deck
2.
e
Repeat
playback
feature
can
be
used
with
automatic
pro-
grammable
music
selector
(APMS)
feature.
For
details
refer
to
page
11.
,
Follow
the
operation
as
described
on
page
8,
steps
1
to
3,
e
Insert
pre-recorded
cas-
settes
into
the
cassette
compartments
of
Deck
1
and
Deck
2,
Press
the
CONT
PLAY
button,
ln
order
to
cut
continuous
playback
off,
press
the
CONT
PLAY
button
again
to
turn
the
indicator
off.
After
finish-
ing
playback
of
the
current
programme,
the
unit.
will
be
stopped
automatically.
@Continuous
playback
feature
can
be
used
with
automatic
programmable
music
selector
(APMS)
feature.
For
details
refer
to
page
11.
@When
the
end
of
the
tape
which
has
started
first
is
reached,
play-
back
of
the
second
Deck
to
be
played.
final-
ly
will
begin.
Press
the
»
button
of
the
Deck
which
is
to
be
played
first.
elf
the
REPEAT
button
is
pressed
before
the
»
button
is
pressed,
continuous
playback
will
be
repeated
twenty-four
times.
:
(E]
16

@
Light
the
indicator
up
by
pressing
the
REPEAT
or
CONT
PLAY
button.
Repeat
Playback
;
Press
the
»
button
of
Deck
1.
Playing
selected
—
Finish
playing
the
(For
details
refer
to
page
10.)
(For
details
refer
to
page
10.)
Continuous
Playback
Press
the
»
button
of
Deck
1
on
1
(APMS
playback)
fete
ta
ogrammes
Press
the
»
button
of
Deck
2
Deck
2
(Playing
all
the
programmes
@
Since
the
function
begins
to
be
effective
at
the
time
when
the
REPEAT
or
CONT
PLAY
button
is
pressed,
those
program-
mes
which
are
finished
before
then
are
not
repeated
or
played
continuously.
;
eWhen
the
REPEAT
and
CONT
PLAY
buttons
are
pressed
simultaneously,
continuous
playback
is
repeated
twenty-four
programmes
by
last
selected
pro-
selected
sequence.
gramme.
Rewind
the
cassette
automatically
to
the
beginning
of
its
-first-
ly
selected
programme.
Deck
2
(Playing
all
the
pr:
on
one
side
of
the
cassette.)
on
the
side
of
the
cassette.)
Deck
1
(APMS
playback)
The
intro-scan
playback
is
a
feature
which
allows
you
to
listen
to
12
seconds
of
each
programme
on
pre-recorded
music
tapes
and
then
resume
forward
APSS.
:
This
feature
is
useful
for
quickly
finding
a
programme
that
you
do
not
know
the
location
of.
Follow
the
operation
as
described
on
page
8,
steps
1
to
3.
elnsert
a
cassette
into
the
cassette
compart-
ment
of
Deck
1.
Press
the
INTRO
SCAN
button.
The
indicator
lights
up.
e
Scanned
introduction
playback
is
continued
until
the
end
of
the
cassette.
‘
ein
order
to
stop
scanned
introduction
playback,
press
the
|
®
button.
@
The
intro-scan
playback
functions
for
Deck
1
only.
@When
the
beginning
of
the
programme
that
was
being
heard
or
the
beginning
of
the
next
programme
is
found,
ap-
proximately
12
seconds
of
the
programme
is
automatical-
ly
played.
At
this
time,
check
the
programme
to
see
if
it
is
the
desired
one.
e@
After
approximately
12
seconds
of
the
programme
is
play-
ed,
forward
APSS
is
resumed
and
approximately
12
seconds
of
the
next
programme
will
be
played
and
this
process
is
repeated.
S
;
When
the
desired
programme
is
found,
press
the
>»
button.
|@
Reverse
APSS
will
operate
and
the
tape
will
be
rewound
and
the
programme
will
be
played
from
the
beginning.

-»
Introduction
of
the
next
programme
_
is
elf
undesirable
programme
is
found
while
introduction
of
the
programme
is
being
played,
press
the
>>
button.
layed.
‘
.
ae
Then
introduction
of
the
next
programme
will
be
played.
Press
this
while
introduction
of
the
programme
is
being
played.
EOS
Sr
y
Eee
ts
@
:
Seek
EF%
eFor
example,
if
you
would
like
to
play
introductions
of
1
Press
the
APMS
buttons
in
order
of
7
4
and
10
to
light
the
programmes
in
order
of
the
seventh,
fourth
and
tenth
the
APMS
Indicators
up
before
the
INTRO
SCAN
button
programmes:
is
pressed.
a
INTRO
e
2
Press
the
INTRO
SCAN
button.
(Introductions
of
the
programmes
are
played
in
order
of
7,
4,
10
and
introductions
of
other
programmes
are
not
played.)
©
Press
the
APMS
button
of
the
programme
the
introduction
of
which
is
being
played.
When
the
APMS
button
is
pressed,
introduction
of
the
next
programme
will
be
played.
Flashed
while
in-
troduction
of
the
programme
is
being
played.
Press
the
APMS
button
while
in-
troduction
of
the
third
pro-
gramme
is
being
played.
The
APMS
indicators
of
the
memorized
programme
numbers
‘Introduction
of
the
will
not
be
turned
off.
;
next
programme
will
be
played.
These
features
operate
by
finding
approximately
a
4-second
©
Tapes
in
which
the
music
has
long
periods
of
pianissimo
space
between
programmes
on
pre-recorded
music
tapes.
(sections
of
softly
played
music),
or
music
where
there
are
Using
tapes
of
the
following
kind
may
result
in
improper
breaks
of
silence.
operation,
@
Tapes
in
which
the
space
between
programmes
is
very
short
@
Tapes
of
speech
or
dialogs.
(less
than
3
sec.).
;
©
Tapes
with
a
low
recording
level
(—20dB).
©
Tapes
recorded
with
loud
noise
or
hum.
"

LP
[25
cm.
(10)
or
EP
[17cm.
(7")]
Switch
on
both.
the
amplifier
30cm.
(12'')]
record
record
and
turntable.
OPEN/CLOSE
Load
with
only
one
record
by
placing
the
side
A
to
be
played
face
up
on
the
turntable
platter.
Press
the
OPEN/CLOSE
but-
ton
and
the
turntable
com-
partment
will
open.
OPEN/CLOSE
Ss
Press
the
OPEN/CLOSE
but-
ton
and
the
compartment
will
Ej
Adjust
the
adaptor
for
17
cm.
(17)
EP
records
to
suit
close.
the
record
being
used.
4
e
e
For
records
with
a
small
centre
hole,
push
down
the
adap-
tor
while
turning
to
the
right
as
shown
in
the
illustration.
For
records
with
a
large
centre
hole,
turn
the
adaptor
to
the
left
until
it
pops
up..
Be
careful
of
dust
and
dirt,
easily
picked
up
by
the
record
due
to
static
electricity.
Records
should
not
be
left
on
the
turntable
platter
for
extended
periods
when
not
in
use.
To
avoid
loss
in
quality,
records
should
be
removed
from
the
unit
and
stored
properly.
The
unit'is
designed
to
accept
standard
records
and
will
function
automatically
with
the
greater
majority
of
records
available.
There
are
records
on
the
market
though
which
have
uniquely
designed,
often
sharply
angled,
rims
(i.e.,
groove
guard).
Some
records,
rather
than
the
normal
black,
are
transparent
or
coloured
in
a
pale
shade.
With
such
non-standard
records,
the
infrared
sensing
device
equipped
within
the
tonearm
may
fail
to
receive
a
proper
reading
from
the
record
surface,
and
in
the
automatic
mode
may
display
the
following
problems.
©
The
cartridge
does
not
come
down
on
the
record
and
return
to
its
origina!
position.
@
The
play
begins
in
the
middle
of
the
record.
Cross-sectional
view
of
record
17cm.
(7)
45
rpm
record
G
uard
Groove
guard
:
;
Sas
‘
With
such
records,
see
page
15
for
details
about
operating
the
semen
see
SY)
ne
Record
with
norma!
edge
Record
with
sharp
edge
The
following
types
of
records
should
not
be
played;
they
17cm.
(7'’)
33
rpm
record
could
be
damaged
and
at
the
same
time
cause
damage
to
the
Groove
guard
Groove
guard
cartridge
stylus.
@
Phonosheets
eee
seemgcmae
|
Sey
wed
cm
e
Records
with
a
centre
hole
that
is
not
properly
rounded,
Record
with
normal
edge
Record
with
sharp
edge
=
:
eat
than
usual,
off-centre
or
partially
covered
by
the
label.
Sees
|
Te145
LE]
13
Ww

The
unit
may
not
be
operated
when
the
</#
PLAY/CUT
button
is
pressed
immediately
after
the
POWER
switch
is
id
set
to
the
m
ON
position.
Since
this
is
because
control
—+__——
a
microcomputer
is
not
yet
ready,
press
the
«/s
PLAY/CUT
tale
button
again
after
about
three
seconds.
Do
not
push
this
part
strongly
or
open
this
up
by
hand.
While
the
turntable
compartment
is
opening
or
closing,
do
—
not
open
or
close
it
forcibly
by
hand.
If
excessive
force
is
applied
to
the
turntable
compartment,
it
will
be
stopped
on
the
way
and
all
the
APMS
indicators
will
flash.
In
this
case,
after
setting
the
POWER
switch
to
the
I
OFF
position,
set
it
again
to
the
m=
ON
position
and
start
the
operation
-
over
again.
lf
the
OPEN/CLOSE
button
is
pressed
while
a
record
is
playing,
the
record
will
stop
rotating
and
the
turntable
com-
partment
will
be
opened.
e@
The
turntable
compartment
will
not
be
opened
when
the
POWER
switch
is
at
the
Jf
OFF
position.
SIDE
A/SIDE
B
oa
a
Press
the
SIDE
A/SIDE
B,
button
to
select
the
side
you
wish
to
play.
e
When
playing
both
sides,
light
the
indicator
to
the
side
that.
you
wish
to
play
first.
PLAY/CUT
OFF
an
ON
Press
the
</m
PLAY/CUT
button.
Load
the
record
on
the
turntable
platter.
Switch
on
both
the
ampli-
fier
and
turntable.
Both
Sides
Play
BOTH
SIDES
PLAY/CUT
Press
the
~
~_]
BOTH/
SIDES
button.
Then
press
the
</m
PLAY/
CUT
button,
e
Both
sides
can
be
played
when
the
J]
BOTH
SIDES
button
is
pressed
while
the
unit
is
on
the
“on.
side’’
play
mode.
elf
the
</m
PLAY/CUT
button
is
pressed
while
the
turntable
eThe
unit
will
start
playing
from
the
first
programme
after
compartment
is
being
opened,
the
compartment
will
close
the
phono
cartridge
moves
to
the
inner
circumference
to
sand
the
unit
is
ready
to
start
playing.
~
memorize
numbers
of
the
programmes
on
the
record.
While
the
cartridge
is
moving,
the
APMS
indicators
will
flash.
E|
14

Press
the
SIDE
A/SIDE
B
SIDE
A/SIDE
B
button,
o9
The
unit
will
start
playing
@
from
the
first
programme
on
the
reverse
side.
When
the
unit
is
in
the
“both
sides’’
play
\
mode,
the
side
currently
playing
:
\
will
be
played
again
after
<<
playing
the
reverse
side
is
finished.
:
the
record
will
continue
to
revolve.
It
may
take
some time
to
hear
the
playing
sound.
To
Change
Record
Speed
Press
the
¥%
¥
CUE
button
to
stop
playing
for
brief
periods;
To
start
playing
again,
press
the
¥
¥
CUE
button
once
more.
@
Do
not
do
the
above
operation
repeatedly
within
one
second.
The
record
speed
is
automatically
set
at
33
rpm
for
30
cm.
(12")
or
25
cm
(10”)
LP
records
and
at
45
rpm
for
17cm.
(7"')
EP
records.
For
45
rpm
LP
records
or
33
rpm
EP
records
press
the
SPEED
(33/45)
button
and
select
the
correct
speed
before
pressing
the
</m
PLAY/CUT
button.
:
PLAY/CUT
Press
the
</m
PLAY/CUT
button.
@
Even
if
a
record
which
has
more
than
eight
programmes
on
one
side
is
placed
on
the
turntable,
programme
numbers
are
displayed
at
most
7”.
e
Depending
on
the
record,
final
transfer
groove
can
be
counted
as
a
programme
and
programme
number
display,
and
the
-
APMS
indicators
will
indicate
more
than
real
numbers
of
the
programme
on
the
record:
‘
eAfter
the
last
programme
is
played,
the
record
is
stopped
automatically,
if
the
unit
is
in
the
‘‘one
side’
play
mode,
after
playing
one
side
is
finished
and
if
it
is
in
the
‘both
sides’’
play
mode,
after
playing
both
sides
is
finished,
the
unit
will
stop
automatically.
Press
the
<4
FWD
button;
@
For
30
cm.
(12’')
LP
records,
press
once.
Follow
the
operation
as
described
on
page
14,
steps
1
to
3.
30cm.
(12’’)
LP
records
e@
For
17
cm.
(7"’)
EP
records,
press
three
e@
For
25cm.
(10)
LP
:
times.
records,
press
twice.
The
third
time
has
to
be
pressed
about
three
seconds
after
the
second
time
it
is
pressed.
peg
eg
pe
neg
=o
25cm.
(10’')
LP
records
17cm.
(7"')
EP
records
Press
they
¥
CUE
button
and
the
record
will
play
from
the
beginning.
©
After
the
above
process
has
been
completed
once,
the
unit
remembers
the
size
of
the
record;
it
can
be
played
again
by
pressing
the
<«/a
PLAY/CUT
button,
as
long
as
the
POWER
switch
is
not
turned
into
the
Jf
OFF
position,
and
the
turntable
compartment
is
not
opened.
om
LE)
'
15

Reverse
APSS
pare
Music
being
Ni
Interval
listened
to
between
songs
Forward
APSS
Cartridge
SS
Sa
ee
cece
ee
|
Music
being
|
eneel
listened
to
Record
songs
elf
a
record
which
has
more
than
eight
programmes
on
one
side
is
used,
programmes
after
the
eighth
may
not
be
cued
correctly.
in
this
case,
move
the
phono
cartridge
according
to
the
description.
Skipping
Over
a
Number
of
Programmes
Repeat
the
operation
by
pressing
the
<«€
FWD
or
>»
REV
button
after
the
beginning
of
a
programme
is
found
and
starts
to
play.
eThe
APSS
feature
allows
the
unit
to
automatically
search
for
the
beginning
and
ending
of
each
programme
on
pre-recorded
records
and
begin
playback
from
the
beginning
of
a
pro-
gramme.
@
At
first
press
the
</m
PLAY/CUT
button
to
play
the
record.
Re-starting
the
Play
of
a
Programme
currently
|
Being
Piayed
(Reverse
APSS)
Press
the
>»
REV
button,
the
side
being
played
does
not
matter.
@
The
unit
will
automatically
resume
play
after
the
beginning
of
the
programme
that
was
being
played
is
found.
Playing
the
Next
Programme
(Forward
APSS)
Press
the
<€
FWD
button,
the
side
being
played
does
not
matter.
e@The
cartridge
will
move
to
the
beginning
of
the
next
piece
and
automatically
begin
playing.
elf
the
APSS
is
operated
at
the
beginning
or
end
of
a
pro-
gramme,
a
programme
before
or
after
the
programme
may
be
skipped.
]
|
the
APMS
indicators
are
being
lighted
up,
turn
the
APMS
indicators
off
by
pressing
the
</m
PLAY/CUT
button.
2
After
starting
playback
by
pressing
the
</#
PLAY/CUT
button,
press
the
%
Y
CUE
button.
3
Press
the
<4
FWD
button
to
move
the
cartridge
for
the
same
direction
as
a
record
is
played
and
press
the
>>
REV
'
button
to
move
it
for
the
opposite
direction.
L
®The
cartridge
is
moving
while
the
button
is
pressed.
And
location
of
the
cartridge
can
be
seen
by
the
APMS
indicators.
@
Press
the
ZY
CUE
button
again
to
start
playing.
Even
if
the
>»
REV
button
is
kept
pressed
until
the
time
when
the
cartridge
may
pass
over
the
outer
circumference,
the
cartridge
is
stopped
automatically
at
the
focation
of
the
first
groove
of
the
record:
‘
iA

APMS
permits
the
selection
and
entry
into
memory
of
a
programme
of
music
selections
which
can
then
be
played
automatically
in
the
order
they
were
selected.
Follow
the
operation
as.
des-
cribed
on
page
14,
steps
1
to
3.
SIDEA/SIDES
DB
ce
on
its
rest
position.
Press
the
SIDE
A/SIDE
B
button
and
the
APMS
buttons
(1
to
7)
until
the
indicators
light
up
at
the
selection
number
you
wish
to
programme.
e@|lf
the
APMS
button
is
pressed
by
mistake,
press
it
again
to
turn
the
indicator
off.
e@Programming
can
be
made
only
when
the
POWER
switch
is
turned
ON
and
the
cartridge
(No
programming
can
be
performed
while
the
unit
is
in
play.)
e
At
most
fourteen
programmes,
seven
programmes
each
for
side
A
and
B,
can
be
memorized.
@For
example,
if
you
would
like
to
play
in
order
of
the
seventh
pro-
gramme
on
side
A,
fourth
programme
on
side
B
and
third
programme
on
side
A:
SIDE
A/SIDE
B
-0-Qa
4
Aa
aed
pie
\
SIDE
A/SIDE
B
SIDE
A/SIDE
8
Prien
0
eDo
not
select
more
numbers
of
the
programmes
than
real
numbers
of
the
programmes
on
the
record.
Depending
on
a
record,
final
transfer
groove
can
be
counted
as
a
programme
and
the
APMS
indicators
light
up
more
than
real
numbers
of
the
programmes
on
the
record.
.
ein
order
to
stop
the
APMS
operation,
press
the
<«/#
PLAY/CUT
button.
In
this
case,
those
memorized
programmes
which
are
being
played
currently
and
not
played
yet,
are
not
erased.
I
PLAY/CUT
©
\
Press
the
</m
PLAY/CUT
button,
@
Play
will
be
in
the
programme
order.
eThe
APMS
indicator
of
currently
playing
programme
flashes
rapidly
and
the
one
for
the
next
programme
is
will
flash
slowly.
If
the
next
programme
is
on
the
reverse
side,
the
indicator
of
that
side,
side
A
or
B,
will
flash
slowly.
eAfter
the
programme
is
played,
corresponding
memorized
programme
number
is
erased
and
the
corresponding
APMS
indicator
is
turned
off.
my
~l

CHECK
After
setting
the
unit
at
the
stop
mode,
After
setting
the
unit
at
the
stop
mode,
eS
press
the
CHECK
button.
press
the
CLEAR
button.
The
APMS
indicator
will
show
the
pro-
@
Memorized
programmes
cannot
be
clear-
grammed
selection
numbers
in
the
order
ed
if
the
unit
is
in
the
play
mode.
\
in
which
you
have
programmed
them.
elf
the
turntable
compartment
is
opened,
e
They
can
not
be
confirmed
while
the
memory
is
automatically
cleared.
.
\
unit
is
playing.
By
pressing
the
APMS
button
the
indicators
of
which
are
not
lighted
up,
programmes
can
be
added
and
corresponding
in-
dicators
light
up.
e
By
pressing
the
<4
FWD
or
>»
REV
button
while
playing
the
record,
the
preceding
or
next
selection
of
the
programme
can
be
played.
FWD
REV
e
if
the
¥
%
CUE
button
is
pressed
before
pressing
the
<«
FWD
or
>»
REV
button,
the
unit
will
pause
at
the
beginning
of
the
selection.
.
In
this
case,
press
the
¥%
CUE
button
to
start
playing
the
record.
eThe
unit
can
be
switched
to
repeat
playback
mode
while
it
is
in
the
“one
side”
play
or
“both
sides’”’
play
mode.
@
When
the
unit
is
in
the
‘‘one
side”
play
mode,
one
side
is
repeated
twenty-four
times
and
when
it
is
in
the
“‘both
sides’’
play
mode,
both
sides
are
repeated
twenty-
four
times.
PLAY/CUT
Follow
the
operation
as
described
on
page
14,
steps
1
to
3.
Press
the
</#
PLAY/CUT
button.
Press
the
[[=]
REPEAT
button.
ein
order
to
stop
repeat
playback,
press
the
([l]
REPEAT
eRepeat
playback
can
be
used
with
automatic
programmable
button
again
to
turn
the
indicator
off.
The
unit
will
be
music
selector
(APMS).
stopped
automatically
after
the
record
being
played
is
hes
finished.
:
@
Press
the
[2]
REPEAT
button
to
light
the
indicator
up.
Play
selected
i
;
Press
the
</m
PLAY/
programmes
in
Finish
playing
CUT
button.
order
of
the
9
>
the
last
selected
selection.
programme.
Move
the
cartridge
to
the
beginning
of
the
first
selected
programme.
@
Repeat
playback
continues
twenty-four
times.
e@
The
("Z)
REPEAT
button
can
be
pressed
while
the
APMS
is
in
operation.
[E]
18

@
The
intro-scan
play
is
a
feature
which
allows
you
to
listen
to
12
seconds
of
each
programme
on
records
and
then
resume
forward
APSS.
This
feature
is
useful
for
quickly
finding
a
programme
that
you
do
not
know
the
location
of.
Follow
the
operation
as
described
on
page
14,
steps
1
to
3.
Press
the
INTRO
SCAN
button.
The
indicator
lights
up.
e@if
the
button
is
pressed
while
the
turntable
compartment
is
being
opened,
the
compartment
will
be
closed
and
the
unit
will
be
ready
to
start
scanned
introduction
playback.
e@Scanned
introduction
playback
will
continue
until
the
end
of
the
record.
When
the
]
BOTH
SIDES
button
is
pressed,
introductions
of
the
programmes
on
both
sides
are
played.
e@ln
order
to
stop
scanned
introduction
playback,
press
the
</m
PLAY/CUT
button.
=
Introduction
of
the
next
programme
will
be
played.
Press
this
while
playing
introduction
of
a
programme,
@When
the
beginning
of
the
programme
that
was
being
heard
or
the
beginning
of
the
next
programme
is
found,
approxi-
mately
12
seconds
of
the
programme
is
automatically
played.
At
this
time,
check
the
programme
to
see
if
it is
the
desired
one.
@
After
approximately
12
seconds
of
thé
programme
is
played,
forward
APSS
is
resumed
and
approximately
12
seconds
of
the
next
programme
will
be
played
and
this
process
is
repeat-
ed.
When
the
desired
programme
is
found,
press
the
INTRO
SCAN
button once
more.
Desired
programme
is
started
from
the
beginning.
And
the
unit
continues
to
play
until
the
last
pro-
gramme.
e@if
undesirable
programme
can
be
found
while
playing
intro-
duction
of
the
programme,
press
the
«4
FWD
button.
Then
introduction
of
the
next
programme
will
be
started.
Being
flashed
while
introduction
of
the
programme
is
playing.
Press
the
APMS
button
while
the
third
programme
is
being
played.
wp
Introduction
of
the
next
programme
will
be
played.
@Press
the
APMS
button
of
the
programme
which
is
being
played:
When
the
botton
is
pressed,
introduction
of
the
next
programme
will
start.
The
APMS
indicators
of
the
memorized
programmes
are
not
turned
off.
In
order
to
play
memorized
programme,
press
the
</m
PLAY/CUT
button
after
playing
introduction
of
the
programme
is
finished.
[E]
19
Other manuals for SM-207H
1
This manual suits for next models
2
Other Sharp Amplifier manuals

Sharp
Sharp SM-SX100 User manual

Sharp
Sharp SM-307H User manual

Sharp
Sharp SD-SG11 User manual

Sharp
Sharp SX-8000H User manual

Sharp
Sharp SM-A75H(BK) User manual

Sharp
Sharp SX8800H User manual

Sharp
Sharp SM-510H User manual

Sharp
Sharp SM-5100H User manual

Sharp
Sharp SM-SX1 User manual

Sharp
Sharp SM-SX1 User manual