manuals.online logo
Brands
  1. Home
  2. •
  3. Brands
  4. •
  5. Sharp
  6. •
  7. Calculator
  8. •
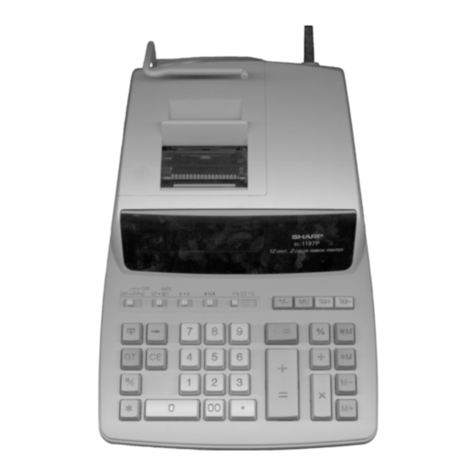
  9. Sharp EL-1801V User manual

Sharp EL-1801V User manual

OPERATIONAL NOTES
To insure trouble-free operation of your SHARP calculator, we recommend the following:
1. The calculator should be kept in areas free from extreme temperature changes,
moisture, and dust.
2. A soft, dry cloth should be used to clean the calculator. Do not use solvents or a wet
cloth.
3. Since this product is not waterproof, do not use it or store it where fluids, for example
water, can splash onto it. Raindrops, water spray, juice, coffee, steam, perspiration, etc.
will also cause malfunction.
4. If service should be required, use only a SHARP servicing dealer, a SHARP approved
service facility or SHARP repair service.
5. Do not operate this unit with the insulation sheet attached; the insulation sheet prevents
the battery wear while shipping, and can be found on the back of the unit's body. If the
insulation sheet is not removed, the previously set date and time, as well as the tax rate
information will be cleared as soon as the AC power is accidentally unplugged.
6. Do not wind the AC cord around the body or otherwise forcibly bend or twist it.
SHARP will not be liable nor responsible for any incidental or consequential economic or
property damage caused by misuse and/or malfunctions of this product and its
peripherals, unless such liability is acknowledged by law.
OPERATING CONTROLS
OFF •P P•IC ON
POWER SWITCH; PRINT / ITEM COUNT MODE SELECTOR:
“OFF”: Power OFF
“•”: Power ON. Set to the non print mode.
“P”: Power ON. Set to the print mode.
“P•IC”: Power ON. Set to the print and item count mode.
1) For addition or subtraction, each time is pressed, 1 is added to the item
counter, and each time is pressed, 1 is subtracted.
•The count is printed when the calculated result is obtained.
•Pressing of , clears the counter.
2) When the grand total/rate setting mode selector is in the ON position (GT), the
counter will count the number of times that the calculation results have been
stored in the grand total memory. To print and clear the count, press the key.
3) The memory item counter will count the number of times that the key has
been pressed in the addition.
Note: •Each time the key is used in the subtraction, 1 will be subtracted from
the count.
•The count is printed when the memory is recalled.
•Pressing of the key clears the counter.
Note: The counter has a maximum capacity of 3 digits (up to ±999). If the count exceeds
the maximum, the counter will recount from zero.
ROUNDING SELECTOR:
Example: Set Decimal Selector to 2.
4 ÷ 9 = 0.444 ... , 5 ÷ 9 = 0.555 ...
Note: The decimal point floats during successive calculation by the use of or .
If the decimal selector is set to “F” then the answer is always rounded down ( ).
GT
•
RATE
SET
GRAND TOTAL / RATE SETTING MODE SELECTOR:
“GT”: Grand Total
“•”: Neutral
“RATE SET”: To set the date, time, and tax rate, set this switch at the “RATE SET”position.
Date:
•Enter in the order of month, day and year, then press to complete the entry.
•Use to separate month, day, and year.
•When is pressed, the number entered is evaluated and displayed as “date”if the
value is within the following range; “Error”is displayed otherwise, and the previously set
date is restored.
Month: 1 - 12; day: 1 - 31; Year: 2000 - 2099 (in 4 digits) or 00 - 99 (in 2 digits)
Time:
•Enter in the order of hour, minutes, then press to complete the entry.
(There is no entry available for the seconds value. The clock starts at zero second.)
•If the hour/minute digit is less than 10, it is not necessary to enter the first digit “0”.
•Use to separate hour and minute values.
•When is pressed, the number entered is evaluated and displayed as “time”if the
value is within the following range; “Error”is displayed otherwise, and the previously set
time is restored.
Hour: 0 - 23 (24-hour system for the hour entry), Minute: 0 - 59
PRÉCAUTIONS
Afin d’assurer un fonctionnement sans ennui de la calculatrice SHARP, veuillez prendre les
précautions suivantes:
1. Ne pas laisser la calculatrice dans les endroits sujets àde forts changements de
température, àl’humidité, et àla poussière.
2. Pour le nettoyage de la calculatrice, utiliser un chiffon doux et sec. Ne pas utiliser de
solvants ni un chiffon humide.
3. Cet appareil n’étant pas étanche, il ne faut pas l’utiliser ou l’entreposer dans des
endroits oùil risquerait d’être mouillé, par exemple par de l’eau. La pluie, l’eau brumisée,
les jus de fruits, le café, la vapeur, la transpiration, etc. sont àl’origine de
dysfonctionnements.
4. Si une réparation s’avérait nécessaire, confier l’appareil àun distributeur agréé par
SHARP et assurant l’entretien, àun service d’entretien agréé par SHARP, ou àun centre
d’entretien SHARP.
5. Ne pas opérer cette unitéavec la languette isolante en place, celle-ci empêche l’usure
de la pile pendant le transport et se trouve au dos de la calculatrice. Si la languette
isolante n’est pas retirée, les informations de date et heure précédemment établies, ainsi
que la taxe seront effacées si la prise secteur est débranchée par inadvertance.
6. Ne pas entourer le cordon secteur autour du boîtier ni ne le plier ou le tordre avec force.
SHARP ne peut pas être tenu responsable pour tout incident ou dommage économique
consécutif ou matériels, causés par une mauvaise utilisation et/ou un mauvais
fonctionnement de cet appareil et de ses périphériques, àmoins qu’une telle
responsabiliténe soit reconnue par la loi.
LES COMMANDES
OFF •P P•IC ON
INTERRUPTEUR; SÉLECTEUR DE MODE D’IMPRESSION / COMPTAGE
D’ARTICLES:
“OFF”: Mise hors tension.
“•”: Mise sous tension. Pour choisir le mode de non impression.
“P”: Mise sous tension. Pour choisir le mode d’impression.
“P•IC”: Mise sous tension. Pour choisir le mode d’impression et de comptage d’articles.
1) Lors des additions et des soustractions, chaque fois que l’on appuie sur , une
unitéest ajoutée au compteur d’articles et chaque fois que l’on appuie sur ,
une unitéest retranchée.
•Le compte est imprimélorsque le résultat calculéest obtenu.
•Le compteur revient àzéro en agissant sur , .
2) Lorsque le sélecteur de mode de total général/réglage de taux est sur ON (GT), le
compteur comptera le nombre de fois que les résultats de calcul ont étéstockés
dans la mémoire du total général. Pour imprimer et remettre àzéro le compteur,
appuyez sur la touche .
3) Le compteur d’article en mémoire comptera le nombre de pressions sur la touche
dans l’addition.
Remarque: •Àchaque utilisation de la touche dans la soustraction, une unité
sera retranchée du compte.
•Le compte est imprimélorsque la mémoire est rappelée.
•Le compteur revient àzéro en agissant sur .
Remarque: La capacitédu compteur est de 3 chiffres maximum (jusqu’à ±999). Si le
compte dépasse ce maximum, le compteur repartira de zéro.
SÉLECTEUR D’ARRONDI:
Exemple: Réglez le sélecteur de décimale sur 2.
4 ÷9 = 0.444 ... , 5 ÷9 = 0.555 ...
Remarque: La virgule flotte durant un calcul successif en utilisant ou .
Si le sélecteur de décimale est sur la position “F ”, le résultat est toujours arrondi àla valeur
inférieure ( ).
GT
•
RATE
SET
SÉLECTEUR DE MODE DE TOTAL GÉNÉRAL / RÉGLAGE DE TAUX:
“GT”: Total général
“•”: Neutre
“RATE SET”: Pour régler la date, heure et taxe, placez ce bouton sur “RATE SET”(réglage
du taux).
Date:
•Saisissez la date dans l’ordre mois, jour et année, puis appuyez sur pour valider la
saisie.
•Utilisez pour séparer le mois, le jour et l’année.
•Lorsque vous appuyez sur , le nombre saisi est évaluéet affichéen tant que “date”si
la valeur est comprise dans la plage suivante; sinon, “Error”(erreur) s’affiche et la date
précédemment définie est rétablie.
Mois:1 - 12; jour: 1 - 31; Année: 2000 - 2099 (à4 chiffres) ou 00 - 99 (à2 chiffres)
Heure:
•Saisissez l’heure dans l’ordre heure, minutes puis appuyez sur pour valider la saisie.
(Aucune entrée n’est disponible pour les secondes. L’horloge démarre àzéro seconde.)
•Si le chiffre des heure/minute est inférieur à10, il n’est pas nécessaire de saisir le premier
chiffre “0”.
•Utilisez pour séparer les heures et les minutes.
•En appuyant sur , le nombre saisi est évaluéet affichécomme “heure”si la valeur est
dans la marge suivante; “Error”s’affiche le cas contraire et l’heure précédemment définie
est rétablie.
Heure: 0 - 23 (Système de 24 heures pour la saisie de l’heure), Minute: 0 - 59
Tax rate:
•Press three times, enter the tax rate, followed by .
•A maximum of 4 digits can be stored (decimal point is not counted as a digit).
•Only one rate can be stored. If you enter a new rate, the previous rate will be cleared.
F 6 3 2 1 0 A
DECIMAL / ADD MODE SELECTOR:
“6 3 2 1 0”: Presets the number of decimal places in the answer.
“F”: The answer is displayed in the floating decimal system.
“A”: The decimal point in addition and subtraction entries is automatically positioned to the
2nd digit from the lowest digit of entry number. Use of the add mode permits addition
and subtraction of numbers without entry of the decimal point. Use of , and
will automatically override the add mode and decimally correct answers will be
printed.
CLOCK / CALENDAR KEY:
•Each time this key is pressed, the mode switches.
Calculation mode →Date display mode →Clock display mode →Calculation mode
•Use this key also to adjust date and time (see “GRAND TOTAL / RATE SETTING
MODE SELECTOR”).
PAPER FEED KEY
LAST DIGIT CORRECTION KEY
NON-ADD / SUBTOTAL KEY:
Non-add –When this key is pressed right after an entry of a number in the Print
mode, the entry is printed on the left-hand side with the symbol “#”. This key is used to
print out numbers not subject to calculation such as code, date, etc.
Subtotal –Used to get subtotal(s) of additions and/or subtractions. When pressed
following the or key, the subtotal is printed with the symbol “
◊
”and the
calculation may be continued.
By pressing this key even in the Non-print mode, the displayed number is
printed without any symbol.
•When the POWER SWITCH; PRINT / ITEM COUNT MODE SELECTOR is set “•”,
“P”or “P•IC”position, and Date or Clock is displayed, press this key to print the
displayed contents, including “#”symbol, from the left side of the paper roll.
Example:
Date printing
#9 •15 •2008 •••••••(when the date is September 15, 2008)
Clock printing
#10 •30 •••••••••••(when the time is 10:30 a.m.)
#6 •25------------ (when the time is 6:25 p.m.)
•When the Date / Clock printing is complete, the Calculation mode is restored.
CLEAR / CLEAR ENTRY KEY
Press this key twice, followed by , to print the set tax rate.
TOTAL KEY
EQUAL KEY
CHANGE SIGN KEY:
Changes the algebraic sign of a number (i.e., positive to negative or negative to
positive).
RECALL AND CLEAR MEMORY KEY
RECALL MEMORY KEY
TAX-INCLUDING KEY
PRE-TAX KEY
AVERAGE KEY:
Used to calculate the average.
GRAND TOTAL KEY
COST PRICE ENTRY KEY:
Press this key to enter the cost price.
SELLING PRICE ENTRY KEY:
Press this key to enter the selling price.
MARGIN ENTRY KEY:
Press this key to enter the margin.
CHANGE CALCULATION KEY:
•To see how much change to return, have the price amount displayed, then enter the
pay amount, followed by this key. The change is calculated in accordance with the
DECIMAL / ADD MODE SELECTOR setup as well as the ROUNDING SELECTOR
setup.
•The intermediate result of an addition or subtraction in the Change calculation is
retained.
•While the POWER SWITCH / PRINT / ITEM COUNT MODE SELECTOR is placed in
“P”or “P•IC”, the pay amount is printed after “•••••••••••••” and the change
printed with “CG”.
Note: The displayed change value will not be added to the grand total memory.
DISPLAY SYMBOLS:
M:Appears when a number is in the memory.
–:Appears when a number is negative.
•:Appears when a number is in the grand total memory.
E:Appears when an overflow or other error is detected.
INK ROLLER REPLACEMENT
If printing is blurry even when the ink roller is in the proper position, replace the roller.
Ink roller: Type EA-772R
WARNING
APPLYING INK TO WORN INK ROLLER OR USE OF UNAPPROVED INK ROLLER MAY
CAUSE SERIOUS DAMAGE TO PRINTER.
1) Set the power switch to OFF.
2) Remove the printer cover. (Fig. 1)
3) Hold the top of the ink roller and remove the roller by pulling it toward you and then
upward. (Fig. 2)
4) Install the new ink roller in the correct position. Make sure that the roller is securely in
place. (Fig. 3)
5) Put back the printer cover.
Cleaning the printing mechanism
If the print becomes dull after long time usage, clean the printing wheel according to
the following procedures:
1) Remove the printer cover and the ink roller.
2) Install the paper roll and feed it until it comes out of the front of the printing mechanism.
3) Hold a small brush (like a tooth brush) lightly to the printing wheel and clean it by
pressing .
4) Put back the ink roller and the printer cover.
Note: •Do not rotate the printing mechanism manually, this may damage the printer.
PAPER ROLL REPLACEMENT
Never insert paper roll if torn. Doing so will cause paper to jam.
Always cut leading edge with scissors first.
1) Insert the leading edge of the paper roll into the opening. (Fig. 1)
2) Turn the power on and feed the paper by pressing . (Fig. 2)
3) Lift the attached metal paper holder up and insert the paper roll to the paper holder. (Fig.
3)
DO NOT PULL PAPER BACKWARDS AS THIS MAY CAUSE DAMAGE TO PRINTING
MECHANISM.
Taxe:
•Appuyez sur trois fois, entrez la taxe, suivie de .
•4 chiffres maximum peuvent être mémorisés (la virgule ne compte pas comme un chiffre.)
•Une seule taxe peut être mémorise. Si vous saisissez une nouvelle taxe, la taxe
précédente sera effacée.
F 6 3 2 1 0 A
SÉLECTEUR DE DÉCIMALE / SOMME:
“6 3 2 1 0”:Préétablit le nombre de décimales dans le résultat.
“F”: Le résultat est affichédans le système àvirgule flottante.
“A”: La virgule dans les additions et soustractions est automatiquement placée au 2ème
chiffre du chiffre inférieur du nombre de l’entrée. Il est possible, avec le mode d’addition,
d’additionner ou de soustraire des nombres sans qu’il soit nécessaire de taper la
virgule. L’emploi de , , et annule le mode d’addition et les résultats à
virgule corrects seront imprimés.
TOUCHE HORLOGE / CALENDRIER:
•Àchaque pression sur cette touche, le mode change comme suit.
Mode de calcul →Mode d’affichage de la date →Mode d’affichage de l’horloge →
Mode de calcul
•Utilisez également cette touche pour régler la date et l’heure (Voir “SÉLECTEUR DE
MODE DE TOTAL GÉNÉRAL / RÉGLAGE DE TAUX”).
TOUCHE DE MONTÉE DE PAPIER
TOUCHE DE CORRECTION DU DERNIER CHIFFRE
TOUCHE DE NON ADDITION / TOTAL PARTIEL:
Non addition –En appuyant sur cette touche juste après la saisie d’un nombre dans
le mode d’impression, l’entrée est imprimée sur le côtégauche avec le symbole “#”.
Cette touche est utilisée pour imprimer les nombres non soumis au calcul comme les
code, date, etc.
Total partiel –Utilisez pour obtenir le ou les totaux partiels d’additions et/ou
soustractions. En appuyant sur cette touche suivie de la touche ou , le total
partiel est impriméavec le symbole “
◊
”et le calcul peut continuer.
En appuyant sur cette touche même en mode de non impression, le nombre
affiché est imprimé sans symbole.
•Lorsque INTERRUPTEUR; SÉLECTEUR DE MODE D’IMPRESSION / COMPTAGE
D’ARTICLES est réglésur “•”, “P”ou “P•IC”et la date ou l’horloge est affichée,
appuyez sur cette touche pour imprimer les contenus affichés, y compris “#”, du côté
gauche du rouleau de papier.
Exemple:
Impression de la date
#9 •15 •2008 •••••••(lorsque la date est le 15 septembre 2008)
Impression de l’heure
#10 •30 •••••••••••(lorsqu’il est 10:30 a.m.)
#6 •25------------ (lorsqu’il est 6:25 p.m.)
•Une fois l’impression Date / Horloge accomplie, le mode de calcul est rétabli.
TOUCHE D’EFFACEMENT / EFFACEMENT DES ENTRÉES:
Appuyez deux fois sur cette touche, suivie de pour imprimer la taxe définie.
TOUCHE TOTAL
TOUCHE ÉGAL
TOUCHE DE CHANGEMENT DE SIGNE:
Change le signe algébrique d’un nombre (ex: positif ànégatif ou négatif àpositif).
TOUCHE D’EFFACEMENT DU CONTENU DE LA MÉMOIRE
TOUCHE DE RAPPEL D’UN SOUS-TOTAL EN MÉMOIRE
TOUCHE DE TAXE INCLUSE
TOUCHE DE PRÉTAXE
TOUCHE DE MOYENNE:
Pour calculer la moyenne.
TOUCHE DE TOTAL GÉNÉRAL
TOUCHE D’ENTRÉE DU PRIX D’ACHAT:
Appuyez sur cette touche pour entrer le prix d’achat.
TOUCHE D’ENTRÉE DU PRIX DE VENTE:
Appuyez sur cette touche pour entrer le prix de vente.
TOUCHE D’ENTRÉE DE MARGE BÉNÉFICIAIRE:
Appuyez sur cette touche pour entrer la marge bénéficiaire.
TOUCHE DE CALCUL DU RENDU DE MONNAIE:
•Pour savoir combien vous devez rendre de monnaie, affichez le prix, puis entrez le
montant payéet appuyez sur cette touche. Le rendu de monnaie est calculé
conformément au réglage SÉLECTEUR DE DÉCIMALE / MODE D’ADDITION et au
réglage SÉLECTEUR D’ARRONDI.
•Le résultat intermédiaire d’une addition ou d’une soustraction dans le calcul du
rendu de monnaie est conservé.
•Lorsque INTERRUPTEUR / SÉLECTEUR DE MODE D’IMPRESSION / COMPTAGE
D’ARTICLES est réglésur “P”ou “P•IC”, le montant payéest impriméaprès
“•••••••••••••”et le rendu de monnaie impriméavec “CG”.
Remarque: Le valeur du rendu de monnaie affichée ne sera pas ajoutée àla mémoire
du total général.
SYMBOLES D’AFFICHAGE:
M:Apparaît lorsqu’un nombre est en mémoire.
–:Apparaît lorsqu’un nombre est négatif.
•:Apparaît lorsqu’un nombre est en mémoire dans le total général.
E:Apparaît lorsqu’un dépassement de la capacitéou une autre erreur est détecté.
REMPLACEMENT DU RUBAN ENCREUR
Si l’impression est floue même lorsque le ruban encreur est dans la bonne position,
remplacez le ruban.
Ruban encreur: Type EA-772R
AVERTISSEMENT
ENCRER UN RUBAN ENCREUR USÉOU UTILISER UN RUBAN ENCREUR NON
AGRÉÉ PEUT GRAVEMENT ENDOMMAGER L’IMPRIMANTE.
1) Placez l’interrupteur sur OFF.
2) Déposez le couvercle de l’imprimante. (Fig. 1)
3) Tenez le haut du ruban encreur et retirez le ruban en le tirant vers vous puis vers le haut.
(Fig. 2)
4) Installez le nouveau ruban encreur dans la bonne position. Assurez-vous que le ruban est
bien fixéen place. (Fig. 3)
5) Remettez en place le couvercle de l’imprimante.
Nettoyage du mécanisme d’impression
Si l’impression devient terne à la longue, nettoyez la roue d’impression comme suit:
1) Déposez le couvercle de l’imprimante et le ruban encreur.
2) Installez le rouleau de papier et faites le avancer jusqu’à ce qu’il sorte àl’avant du
mécanisme d’impression.
3) Placez en douceur une petite brosse (comme une brosse àdent) sur la roue d’impression
et nettoyez-la en appuyant sur .
4) Remettez en place le ruban encreur et le couvercle de l’imprimante.
Remarque: •Ne faites pas tourner manuellement le mécanisme d’impression sous peine
d’endommager l’imprimante.
REMPLACEMENT DU ROULEAU DE PAPIER
Ne tentez pas d’introduire le papier s’il est déchiré. En procédant ainsi, vous risquez
un bourrage.
Avant tout, coupez soigneusement le début de la bande au moyen d’une paire de
ciseaux.
1) Engagez l’extrémitédu rouleau de papier dans l’ouverture. (Fig. 1)
2) Mettez l’appareil sous tension et faites avancer le papier en appuyant sur
. (Fig. 2)
3) Soulevez le support pour papier en métal et introduisez-y le rouleau de papier. (Fig. 3)
NE PAS TIRER LE PAPIER EN ARRIÈRE, CAR CELA POURRAIT ENDOMMAGER LE
MÉCANISME IMPRIMANT.
Fig. 1 Fig. 3
Fig. 2
ERRORS
There are several situations which will cause an overflow or an error condition. When this
occurs, “E”will be displayed. The contents of the memory at the time of the error are
retained.
If an “0䡠E”is displayed at the time of the error, “– ––––––” will be printed in red and
must be used to clear the calculator.
Also, in rare cases, printing may stop midway and the indication “E”will appear on the
display. This is not a malfunction but is caused when the calculator is exposed to strong
electromagnetic noise or static electricity from an external source. Should this occur, press
the key and then repeat the calculation from the beginning.
Error conditions:
1. When the integer portion of an answer exceeds 12 digits.
2. When the integer portion of the contents of the memory or grand total memory exceeds
12 digits. (Ex. 999999999999 1 )
3. When any number is divided by zero. (Ex. 5 0 )
Fig. 1 Fig. 2 Fig. 3
USING THE CALCULATOR FOR THE FIRST TIME
First, pull out the insulation sheet for the memory protection battery (installed for retaining
the date/time/tax rate information). Reset the calculator to initialize the unit's state, then
adjust the date and time before using the calculator.
Removing the insulation sheet, and resetting
1. Pull out the insulation sheet for the memory protection battery.
2. Press the RESET switch located on the back of the unit.
(See “RESETTING THE UNIT”.)
* The clock starts, indicating the current date and time as January 1, 2008, 12:00:00 a.m.
Adjusting date and time
Example: When the date is September 15, 2008, and the time is 3:38 p.m.
* When the adjustment is complete, the clock starts at 3:38:00 p.m.
LORS DE LA PREMIÈRE UTILISATION DE LA CALCULATRICE
En premier lieu, retirez la languette isolante pour la pile de protection de la mémoire (placée
pour préserver les informations de la date/heure/taxe). Réinitialisez la calculatrice pour
initialiser l’état de l’unité, puis réglez l’heure et la date avant d’utiliser la calculatrice.
Retrait du feuillet d’isolation et réinitialisation
1. Enlevez le feuillet d’isolation de la pile pour protéger la mémoire.
2. Appuyez sur le bouton RESET situéau dos de l’unité.
(Voir “RÉINITIALISATION DE L’UNITÉ”.)
*L’horloge démarre, indiquant la date et l’heure actuelle comme étant le 1er janvier 2008,
12:00:00 a.m.
Réglage de la date et de l’heure
Exemple: Lorsque la date est le 15 septembre 2008 et l’heure 3:38 p.m.
* Une fois le réglage terminé, l’horloge démarre à3:38:00 p.m.
ELECTRONIC PRINTING CALCULATOR
CALCULATRICE
IMPRIMANTE
ÉLECTRONIQUE
OPERATION MANUAL
MODE D’EMPLOI
EL-1801V
PRINTED IN CHINA / IMPRIMÉEN CHINE
07FT(TINSK1328EHZZ)
WARNING –FCC Regulations state that any unauthorized changes or modifications to this equipment not expressly approved by the
manufacturer could void the user’s authority to operate this equipment.
Note: This equipment has been tested and found to comply with the limits for a Class B digital device, pursuant to Part 15
of the FCC Rules.
These limits are designed to provide reasonable protection against harmful interference in a residential installation. This equipment generates,
uses, and can radiate radio frequency energy and, if not installed and used in accordance with the instructions, may cause harmful interference
to radio communications. However, there is no guarantee that interference will not occur in a particular installation. If this equipment does
cause harmful interference to radio or television reception, which can be determined by turning the equipment off and on, the user is
encouraged to try to correct the interference by one or more of the following measures:
–Reorient or relocate the receiving antenna.
–Increase the separation between the equipment and receiver.
–Connect the equipment into an outlet on a circuit different from that to which the receiver is connected.
–Consult the dealer or an experienced radio/TV technician for help.
9 15 2008 9-15-2008
15 38 3-38 00 P
0.
(see “GRAND TOTAL / RATE SETTING MODE SELECTOR”)
Operation Display
GT
•
RATE
SET
9 15 2008 9-15-2008
15 38 3-38 00 P
0.
(Voir “SÉLECTEUR DE MODE DE TOTAL GÉNÉRAL / REGLAGE DE TAUX”)
Opération Affichage
GT
•
RATE
SET
4 9 5 9
0.45 0.56
5/4 0.44 0.56
0.44 0.55
4 9 5 9
0.45 0.56
5/4 0.44 0.56
0.44 0.55
EL-1801V(Y12)-1
➀
ERREURS
Il existe plusieurs cas qui entraînent un dépassement de capacitéou une situation d’erreur.
Si cela se produit, “E”sera affiché. Le contenu de la mémoire au moment de l’erreur est
préservé.
Si “E 0.”s’affiche au moment de l’erreur, “– ––––––” sera impriméen rouge et il faudra
utiliser pour effacer l’erreur.
En outre, dans de rares cas, l’impression peut être interrompue àmi parcours et l’indication
“E”s’affichera àl’écran. Il ne s’agit pas d’un dysfonctionnement, mais ceci trouve son
origine dans l’exposition de la calculatrice àun bruit électromagnétique de niveau élevéou
àde l’électricitéstatique provenant d’une source externe. Le cas échéant, appuyez sur la
touche puis recommencez le calcul depuis le début.
Conditions d’erreur:
1. Lorsque la partie entière d’un résultat dépasse 12 chiffres.
2. Lorsque la partie entière du nombre en mémoire ou dans la mémoire du total général
dépasse 12 chiffres. (Ex. 999999999999 1 )
3. Lorsqu’un nombre est divisépar zéro. (Ex. 5 0 )
In U.S.A.:
This Class B digital apparatus complies with Canadian ICES-003.
Cet appareil numérique de la classe B est conforme àla norme NMB-003 du Canada.
EL-1801V(Y12)表面 07.6.13, 2:00 PMPage 1 AdobePageMaker6.0J/PPC
CARACTÉRISTIQUES TECHNIQUES
Capacité: 12 chiffres
Alimentation:
Fonctionnement: CA: 120V, 60Hz
Sauvegarde de la mémoire: 3V ... (CC) (Pile au lithium CR2032 ×1)
Durée de vie de la pile de protection de la mémoire:
Environ 2.500 heures (À 25°C et avec la fiche du cordon d’alimentation non branchée sur
la prise secteur.)
SECTION DE L’HORLOGE
Précision: Dans les ±90 secondes par mois en moyenne (à 25°C)
Rubriques à afficher: mois, jour, année, heure, minute, seconde, a.m. “A”, p.m. “P”
Rubriques à imprimer: mois, jour, année, heure, minute, a.m. “•”, p.m. “–”
Système de l’heure: 12 heures
SECTION D’IMPRESSION
Imprimante: Imprimante mécanique
Vitesse d’impression: Environ 2,1 lignes/sec.
(À une température de 25°C, lorsque “741•9 + ” est imprimé. La vitesse d’impression
dépendra du nombre de lignes et du type de schéma à imprimer.)
Papier d’impression: largeur: 57 mm – 58 mm
diamètre (maxi.): 80 mm
Température de fonctionnement: 0°C – 40°C
Consommation d’énergie: 64 mA
Dimensions: 193 mm (L) ×255 mm (P) ×60,5 mm (H)
Poids: Environ 1,03 kg (avec pile)
Accessoires:
1 pile au lithium (installée), 1 rouleau de papier, 1 rouleau encreur (installé) et mode
d’emploi.
AVERTISSEMENT
LA TENSION UTILISÉE DOIT ÊTRE IDENTIQUE À CELLE INDIQUÉE SUR CETTE
CALCULATRICE. L’UTILISATION DE CETTE CALCULATRICE AVEC UNE TENSION
SUPÉRIEURE À CELLE INDIQUÉE EST DANGEREUSE ET PEUT ÊTRE À L’ORIGINE
D’UN INCENDIE OU AUTRE TYPE D’ACCIDENT DOMMAGEABLE. NOUS
DÉCLINONS TOUTE RESPONSABILITÉ EN CAS D’ACCIDENT RÉSULTANT DE
L’UTILISATION DE CETTE CALCULATRICE AVEC UNE TENSION AUTRE QUE CELLE
INDIQUÉE.
SPECIFICATIONS
Operating capacity: 12 digits
Power supply:
Operating: AC: 120V, 60Hz
Memory backup: 3V ... (DC) (Lithium battery CR2032 ×1)
Memory Protection Battery lifespan:
About 2,500 hours (While at 25°C(77°F), and the power plug is not connected to the
socket.)
CLOCK SECTION
Accuracy: Within ±90 seconds per month average (at 25°C(77°F))
Items to be displayed: month, day, year, hour, minute, second, a.m. “A”, p.m. “P”
Items to be printed: month, day, year, hour, minute, a.m. “•”, p.m. “–”
Time system: 12-hour
PRINTING SECTION
Printer: Mechanical printer
Printing speed: Approx. 2.1 lines/sec.
(At temperature 25°C (77°F), when “741•9 + ” is printed. The printing speed will vary with
the number of rows and the figure types to be printed.)
Printing paper: 57 mm(2-1/4") - 58 mm(2-9/32") wide
80 mm(3-5/32") in diameter (max.)
Operating temperature: 0°C – 40°C (32°F – 104°F)
Power consumption: 64 mA
Dimensions: 193 mm (W) ×255 mm (D) ×60.5 mm (H)
(7-19/32" (W) ×10-1/32" (D) ×2-3/8" (H))
Weight: Approx. 1.03 kg (2.27 lb.) (with battery)
Accessories:
1 lithium battery (installed), 1 paper roll, 1 ink roller (installed), and operation manual
WARNING
THE VOLTAGE USED MUST BE THE SAME AS SPECIFIED ON THIS CALCULATOR.
USING THIS CALCULATOR WITH A HIGHER VOLTAGE THAN THAT WHICH IS
SPECIFIED IS DANGEROUS AND MAY RESULT IN A FIRE OR OTHER TYPE OF
ACCIDENT CAUSING DAMAGE. WE ARE NOT RESPONSIBLE FOR ANY DAMAGE
RESULTING FROM USE OF THIS CALCULATOR WITH A VOLTAGE OTHER THAN
THAT WHICH IS SPECIFIED.
RESETTING THE UNIT
Strong impacts, exposure to electrical fields, or other unusual conditions may render the unit
inoperative, and pressing the keys will have no effect. If this occurs, you will have to press
the RESET switch on the bottom of the unit. The RESET switch should be pressed only
when:
•an abnormal event occurs and all keys are disabled.
Notes:
•Pressing the RESET switch will clear the date and time settings, the tax rate setting, and
the memory contents.
•Use only a ballpoint pen to press the RESET switch. Do not use anything breakable or
anything with a sharp tip, such as a needle.
•After pressing the RESET switch, connect the power supply plug to an outlet. Turn the
power switch “ON” and check that “0.” is displayed.
RÉINITIALISATION DE L’UNITÉ
De forts impacts, une exposition à des champs magnétiques ou d’autres conditions
inhabituelles peuvent rendre l’unité inopérante et la pression sur les touches n’aura aucun
effet. Le cas échéant, vous devrez appuyer sur le bouton RESET au dos de l’unité.
N’appuyez sur le bouton RESET que lorsque:
•une anomalie s’est produite et que toutes les touches sont désactivées.
Remarques:
•La pression sur le bouton RESET effacera les réglages de date et heure, le réglage de la
taxe et le contenu de la mémoire.
•N’utilisez qu’un stylo à bille pour appuyer sur le bouton RESET. N’utilisez pas d’objet
cassable ou avec une pointe affilée comme une aiguille.
•Après avoir appuyé sur le bouton RESET, branchez la fiche du cordon d’alimentation sur
une prise secteur. Mettez l’interrupteur sur ON et vérifiez que “0.” est affiché.
REMPLACEMENT DE LA PILE DE PROTECTION DE LA MÉMOIRE
Quand faut-il remplacer la pile
La durée de vie de la pile de protection de la mémoire est d’environ 2.500 heures à 25°C
avec la fiche du cordon d’alimentation non branchée sur la prise secteur.
* Lorsque la pile de protection de la mémoire est faible, le réglage de date/heure est initialisé
(1/1/2008, 12:00:00 a.m.).
Vérifiez le réglage de la date/heure dans le mode d’affichage date/horloge lors du
branchement de la fiche du cordon d’alimentation sur la prise secteur.
Si le réglage de date/heure est modifié ou incorrect, remplacez rapidement la pile de
protection de la mémoire par une neuve.
(La durée de vie de la pile pré-installée peut être plus courte que prévue en fonction du
temps passé après expédition de la calculatrice de l’usine.)
Méthode de remplacement de la pile
Utilisez une pile au lithium (CR2032).
Attention: Le remplacement de la pile effacera les réglages de date et heure et la taxe
mémorisée.
1) Mettez l’interrupteur sur OFF et débranchez la fiche du cordon d’alimentation de la prise
secteur.
2) Déposez le couvercle de la pile au dos de l’unité. (Fig. 1)
3) Retirez la pile usée et mettez en place une pile au lithium neuve. Essuyez la pile avec un
chiffon doux et placez le signe “+” vers le haut. (Fig. 2)
4) Remettez en place le couvercle de la pile en procédant à l’inverse.
5) Appuyez sur le bouton RESET au dos de l’unité (Voir “RÉINITIALISATION DE L’UNITÉ”).
Après remplacement de la pile
•Branchez la fiche du cordon d’alimentation sur une prise secteur et placez l’interrupteur
sur ON.
Vérifiez que “0.” est affiché. Si “0.” n’est pas affiché, retirez la pile, remettez-la en place et
vérifiez à nouveau l’affichage.
•Réajustez les réglages de date, heure et taxe.
•Dans la case de droite, indiquez le mois ou l’année à laquelle
la pile a été remplacée comme référence pour son prochain
remplacement.
Précautions relatives à l’utilisation de la pile
•Ne laissez pas une pile usée dans l’appareil.
•N’exposez pas la pile à de l’eau ou des flammes et ne la
démontez pas.
•Entreposez les piles dans un endroit hors de portée des
enfants en bas âge.
Remarques sur la manipulation des piles au lithium:
ATTENTION
Risque d’explosion si la pile est mal remise en place.
Remplacez uniquement par une pile identique ou équivalente recommandée par le
fabricant.
Eliminez les piles usées selon les instructions du fabricant.
REPLACEMENT OF BATTERY FOR MEMORY PROTECTION
Time for battery replacement
Life of the memory protection battery is approximately 2,500 hours at 25°C(77°F) with the
power plug not connected to the socket.
* When the memory protection battery is weak, the date/time setting is initialized (1/1/2008,
12:00:00 a.m.).
Verify the date/time setting in the date/clock display mode when connecting the power plug
to the socket.
If the date/time setting is modified or incorrect, promptly replace the memory protection
battery with new one.
(The life of the pre-installed battery may be shorter than expected because of the time the
calculator spends during shipment.)
How to change the battery
Use one lithium battery (CR2032).
Caution: Replacing the battery will clear the date and time settings, and the stored tax rate.
1) Turn the power switch “OFF” and unplug the power supply plug from the outlet.
2) Remove the battery cover on the back of the unit. (Fig. 1)
3) Remove the exhausted battery and install one new lithium battery. Wipe the battery well
with a dry cloth and place the plus “+” side upward. (Fig. 2)
4) Replace the battery cover by reversing the removal procedure.
5) Press the RESET switch on the back of the unit (See “RESETTING THE UNIT”).
After battery replacement
•Connect the power supply plug to an outlet and turn the power switch “ON”.
Check that “0.” is displayed. If “0.” is not displayed, remove the battery, reinstall it, and
check the display again.
•Readjust date, time, and tax rate settings.
•In the box on the right, fill in the month/year that you
changed the battery, as a reminder of when to change it
again.
Precautions on battery use
•Do not leave an exhausted battery in the equipment.
•Do not expose the battery to water or fire, and do not take it
apart.
•Store batteries out of the reach of small children.
Notes for handling Lithium batteries:
CAUTION
Danger of explosion if battery is incorrectly replaced.
Replace only with the same or equivalent type recommended by the manufacturer.
Dispose of used batteries according to the manufacturer’s instructions.
MIXED CALCULATIONS / CALCULS COMPLEXES
A. 5 ×2 + 12 =
55. 5• ×
22• =
10• ✱
10.
10. 10• +
12 22. 12• +
002•••••••••••••
22• ✱
22.
ADDITION AND SUBTRACTION WITH ADD MODE
ADDITION ET SOUSTRACTION AVEC MODE D’ADDITION
12.45 + 16.24 + 19.35 – 5.21 =
*21245 12.45 12•45 +
1624 28.69 16•24 +
1935 48.04 19•35 +
521 42.83 5•21 –
002•••••••••••••
42•83 ✱
42.83
*2 : was not used in the entries.
*2 : La n’a pas été utilisée dans les entrées.
B. (10 + 2) ×5 =
10 10. 10• +
212. 2• +
12. 12• ×
55• =
60• ✱
60.
CALCULATION EXAMPLES
1. Set the decimal selector as specified in each example.
The rounding selector should be in the “5/4” position unless otherwise specified.
2. The grand total/rate setting mode selector should be in the “•” position (off) unless
otherwise specified.
3. The print / item count mode selector should be in the “P” position unless otherwise
specified.
4. Press prior to beginning any calculation.
5. If an error is made while entering a number, press or and enter the correct
number.
6. After entering a value, press , or to activate the Cost/Sell/Margin
Calculation mode. In case of performing different calculation tasks, key must be
pressed first to cancel the Cost/Sell/Margin mode.
7. Example procedures are listed in following manner unless otherwise specified.
EXEMPLES DE CALCUL
1. Réglez le sélecteur de décimale tel que spécifié dans chaque exemple.
Le sélecteur d’arrondi doit être placé sur la position “5/4” sauf indication contraire.
2. Le sélecteur de mode grand total/réglage de taux doit être placé sur la position “•” (OFF)
sauf indication contraire.
3. Le sélecteur de mode d’impression/comptage d’articles doit être placé sur la position “P”
sauf indication contraire.
4. Appuyez sur avant de commencer un calcul.
5. En cas d’erreur lors de la saisie d’un nombre, appuyez sur ou puis saisissez le
bon nombre.
6. Après avoir saisi une valeur, appuyez sur , ou pour activer le mode de
calcul de Achat/Vente/Marge. Si vous procédez à des tâches de calcul différentes, il
faudra appuyer sur la touche pour annuler le mode Achat/Vente/Marge.
7. Les procédures en exemple sont énumérées de la façon suivante sauf indication
contraire.
PRINTING DATE AND TIME
IMPRESSION DE LA DATE ET DE L’HEURE
EXAMPLE:When on October 20, 2008, 1:52:00 p.m.
EXEMPLE: Imprimez la date/heure (au 20 octobre 2008,1:52:00 p.m.).
*110-20-2008.
0. #10•20•2008••••••
1-52 00 P.
0. #1•52------------
*1 : If the date is not shown on the display, press to show the date.
*1 : Si la date ne s’affiche pas à l’écran, appuyez sur .
CONSTANT / CALCULS AVEC CONSTANTE
A. 62.35 ×11.11 =
62.35 ×22.22 =
62.35 62.35 62•35 ×
11.11 11•11 =
692•7085 ✱
692.7085
22.22 22•22 =
1,385•417 ✱
1,385.417
PERCENT / POURCENTAGE
A. 100 ×25% =
100 100. 100• ×
25 25• %
25•00 ✱
25.00
12315 123.15 123•15 +
118 241.15 118•00 +
13158 372.73 131•58 +
12502 497.75 125•02 +
15825 656.00 158•25 +
005•••••••••••••
656•00 ✱
131•20 ∆G
131.20
AVERAGING / CALCULER LA MOYENNE
Ex. / Ex.
Day / Jour Sales / Transactions
If / Monday / Lundi ............................... $123.15 / $123,15
Si Tuesday / Mardi .............................. $118.00 / $118,00
Wednesday / Mercredi ................... $131.58 / $131,58
Thursday / Jeudi ............................. $125.02 / $125,02
Friday / Vendredi ............................ $158.25 / $158,25
Total Sales $656.00 for 5 days
Total des transactions..................... $656,00 pour 5 jours
Then Average Sales = $131.20 /
Alors Transactions moyennes = $131,20
TAX RATE CALCULATIONS
CALCULS DE TAXE
EXAMPLE 1: Set a 5% tax rate.
Calculate the tax on $800 and calculate the total including tax.
EXEMPLE 1: Réglez une taxe de 5%.
Calculez la taxe sur $800 et calculez le total incluant la taxe.
55.
•
•
•
5•000 %
5.000
800 800•
•
•
•
40•
840•
840.
840 840. 840• +
525 1,365. 525• +
1,365•
•
•
•
65• –
1,300•
1,300.
EXAMPLE 2: Perform two calculations using $840 and $525, both of which already include
tax. Calculate the tax on the total and the total without tax. (tax rate: 5%)
EXEMPLE 2: Réalise deux calculs en utilisant $840 et $525, les deux incluant déjà la taxe.
Calcule la taxe sur le total et le total sans la taxe. (taux de la taxe: 5%)
100.55 100.55 100•55 +
200 300.55 200•00 +
500.55 200•00 +
400.55 901.10 400•55 +
500.65 1,401.75 500•65 +
005••••••••••••• (a)
1,401•75 ✱(b)
1,401.75
*3
46 46.M46• ×
78 78• =
3,588.M3,588• +M
125 125.M125• ÷
55• =
25.M25• +M
72 72.M72• ×
88• =
576.M576• –M
3,037•
◊
M
3,037.M
3,037•
✱
M
3,037.M
*3
: Press to clear the memory before starting a memory calculation.
*3
: Effacer le contenu de la mémoire avant de procéder à un calcul avec mémoire.
B. 11.11 ÷ 77.77 =
22.22 ÷ 77.77 =
11.11 11.11 11•11 ÷
77.77 77•77 =
0•14285714285 ✱
0.14285714285
22.22 22•22 =
0•28571428571 ✱
0.28571428571
B. (123 ÷ 1368) ×100 =
123 123. 123• ÷
1368 1,368• %
8•99 ✱
8.99
350 350. 350• ✱C
500 500.
500• ✱∆
30• ✱%
30.
250 250. 250• ✱C
500• ✱∆
50• ✱%
50.
EXAMPLE 3: Determine the margin when the cost price is set at $350, and the selling price
at $500.
➀Cost price ➁Selling Price ➂Margin
Also, obtain the margin when the cost price is set to $250.
EXEMPLE 3: Déterminez la marge bénéficiaire lorsque le prix d’achat est de $350 et le prix
de vente de $500.
➀Prix d’achat ➁Prix de vente ➂Marge bénéficiaire
En outre, obtenez la marge bénéficiaire lorsque le prix d’achat est de $250.
•
: Entries in the order of “500
350
” are also valid.
•
: Les entrées dans l’ordre de “500
350
” sont également valides.
•The entered value (enter value, then press , , or ) will be kept in the
buffer; the re-entry will not be necessary when recalculating.
•The buffer contents will be cleared upon new entry, or when the power switch is turned
off/on, or when “E” is displayed.
•La valeur saisie (entrez la valeur puis appuyez sur , ou ) sera gardée
dans le tampon, il ne sera donc pas nécessaire de la ressaisir lorsque vous
recalculerez.
•Les contenus du tampon seront effacés lors d’une nouvelle saisie ou lorsque
l’interrupteur est mis sur OFF/ON ou encore lorsque “E” est affiché.
500 500. 500• ✱∆
30 30.
30• ✱%
350• ✱C
350.
•
: Entries in the order of “30
500
” are also valid.
•
: Les entrées dans l’ordre de “30
500
” sont également valides.
350 350. 350• ✱C
30 30.
30• ✱%
500• ✱∆
500.
•
: Entries in the order of “30
350
” are also valid.
•
: Les entrées dans l’ordre de “30
350
” sont également valides.
COST / SELL / MARGIN CALCULATION
CALCUL DE ACHAT / VENTE / MARGE
EXAMPLE 1: Determine the cost price for 30% margin when the selling price is set at $500.
➀Selling Price ➁Margin ➂Cost price
EXEMPLE 1: Déterminez le prix d’achat pour une marge bénéficiaire de 30% lorsque le
prix de vente est de $500.
➀Prix de vente ➁Marge bénéficiaire ➂Prix d’achat
EXAMPLE 2: Determine the selling price for 30% margin when the cost price is set at $350.
➀Cost price ➁Margin ➂Selling Price
EXEMPLE 2: Déterminez le prix de vente pour une marge bénéficiaire de 30% lorsque le
prix d’achat est de $350.
➀Prix d’achat ➁Marge bénéficiaire ➂Prix de vente
GRAND TOTAL / TOTAL GÉNÉRAL
100 100. 100• +
200 300. 200• +
300 600. 300• +
600• ✱+
600. •
300 300. •300• +
400 700. •400• +
500 1,200. •500• +
1,200• ✱+
1,200. •
1,800• ✱✱
1,800.
GT
•
RATE
SET
OFF •P P•IC ON
OFF •P P•IC ON
GT
•
RATE
SET
GT
•
RATE
SET
GT
•
RATE
SET
GT
•
RATE
SET
OFF •P P•IC ON
GT
•
RATE
SET
OFF •P P•IC ON
OFF •P P•IC ON
Fig. 1 Fig. 2
Fig. 1 Fig. 2
Opération Affichage Impression
Operation Display Print
F 6 3 2 1 0 A
F 6 3 2 1 0 A
F 6 3 2 1 0 A
EL-1801V(Y12)-2
➀
F 6 3 2 1 0 A
F 6 3 2 1 0 A
F 6 3 2 1 0 A
F 6 3 2 1 0 A
F 6 3 2 1 0 A
ITEM COUNT CALCULATION
DÉTERMINATION DU NOMBRE D’ARTICLES
Bill No. Number of bills Amount
Facture n°Nbre de factures Montant
1 1 $100.55
2 1 $200.00
3 1 $200.00
4 1 $400.55
5 1 $500.65
Total (a) (b)
F 6 3 2 1 0 A
F 6 3 2 1 0 A
MEMORY / MÉMOIRE
46 ×78 =
+) 125 ÷5=
–)72×8=
Total
F 6 3 2 1 0 A
F 6 3 2 1 0 A
F 6 3 2 1 0 A
F 6 3 2 1 0 A
F 6 3 2 1 0 A
F 6 3 2 1 0 A
1 2 3 4 5 6 7 8 9 0 . , 1 2 3 4 5 6 7 8 9 0 . ,
1 2 3 4 5 6 7 8 9 0 . , 1 2 3 4 5 6 7 8 9 0 . ,
1 2 3 4 5 6 7 8 9 0 . , 1 2 3 4 5 6 7 8 9 0 . ,
1 2 3 4 5 6 7 8 9 0 . , 1 2 3 4 5 6 7 8 9 0 . ,
1 2 3 4 5 6 7 8 9 0 . , 1 2 3 4 5 6 7 8 9 0 . ,
1 2 3 4 5 6 7 8 9 0 . , 1 2 3 4 5 6 7 8 9 0 . ,
1 2 3 4 5 6 7 8 9 0 . , 1 2 3 4 5 6 7 8 9 0 . ,
CHANGE CALCULATION
CALCUL DU RENDU DE MONNAIE
EXAMPLE 1: If $100 is paid for three items costing $10, $20, and $30 respectively, how
much change should you return?
EXEMPLE 1: Si vous recevez 100$ pour trois articles coûtant respectivement 10$, 20$ et
30$, combien devez-vous rendre de monnaie?
F 6 3 2 1 0 A
OFF •P P•IC ON
10 10. 10•+
20 30. 20•+
30 60. 30•+
003 •••••••••••••
60•✱
60.
100 •••••••••••••
100•
40•CG
40.
EXAMPLE 2: How much do you return from $100 for a purchase of five items costing $15
each?
EXEMPLE 2: Combien devez-vous rendre de monnaie sur 100$ pour un achat de 5 articles
coûtant 15$ pièce?
15 15. 15•×
55•=
75•✱
75.
100 •••••••••••••
100•
25•CG
25.
F 6 3 2 1 0 A
Caution!
The socket outlet shall be installed near the equipment and shall be easily accessible.
Attention!
La prise de courant murale doit être installée àproximitéde l’appareil et doit être
facilement accessible.
OFF •P P•IC ON
AnnéeMois
YearMonth
GT
•
RATE
SET
100 + 200 + 300 =
+) 300 + 400 + 500 =
Grand total / Total général
LIMITED WARRANTY
Personal Office Products
Congratulations on your purchase!
Sharp Electronics of Canada Ltd. (hereinafter called “Sharp”) gives the following express warranty to the first consumer purchaser
for this Sharp brand product, when shipped in its original container and sold or distributed in Canada by Sharp or by an Authorized
Sharp Dealer:
Sharp warrants that this product is free, under normal use and maintenance, from any defects in material and workmanship. If
any such defects should be found in this product within the applicable warranty period, Sharp shall, at its option, repair or replace
the product as specified herein.
This warranty shall not apply to:
(a) Any defects caused or repairs required as a result of abusive operation, negligence, accident,improper installation or
inappropriate use as outlined in the owner’s manual.
(b) Any Sharp product tampered with, modified, adjusted or repaired by any party other than Sharp,Sharp’s Authorized
Service Centres or Sharp’s Authorized Servicing Dealers.
(c) Damage caused or repairs required as a result of the use with items not specified or approved by Sharp, including but not
limited to software, paper and batteries.
(d) Any replacement of accessories, glassware, consumable or peripheral items required through normal use of the product
including but not limited to batteries, AC adapters, ribbons, correction tapes, ink rollers, cables, printwheel, or paper.
(e) Any cosmetic damage to the surface or exterior that has been defaced or caused by normal wear and tear.
(f) Any damage caused by external or environmental conditions, including but not limited to transmission line/power line
voltage or liquid spillage.
(g) Any product received without appropriate model, serial number and CSA/CUL markings.
(h) Any products used for rental purposes.
(i) Any installation, setup and/or programming charges.
Should this Sharp product fail to operate during the warranty period, warranty service may be obtained upon delivery of the
Sharp product together with proof of purchase and a copy of this LIMITED WARRANTY statement to an Authorized Sharp
Service Centre or an Authorized Sharp Servicing Dealer.
This warranty constitutes the entire express warranty granted by Sharp and no other dealer, service centre or their agent or
employee is authorized to extend, enlarge or transfer this warranty on behalf of Sharp. To the extent the law permits, Sharp
disclaims any and all liability for direct or indirect damages or losses or for any incidental, special or consequential damages or
loss of profits resulting from a defect in material or workmanship relating to the product, including damages for the loss of time
or use of this Sharp product or the loss of information. The purchaser will be responsible for any removal, reinstallation,
transportation and insurance costs incurred. Correction of defects, in the manner and period of time described herein, constitute
complete fulfillment of all obligations and responsibilities of Sharp to the purchaser with respect to the product and shall constitute
full satisfaction of all claims, whether based on contract, negligence, strict liability or otherwise.
SHARP ELECTRONICS OF CANADA LTD
335 Britannia Road East
Mississauga, Ontario
L4Z 1W9
(905) 568-7140
Web site: www.sharp.ca
Calculator without printer 1 year
Calculator with printer 6 months
Pocket Computer 1 year
Personal Computer 1 year
Electronic Organizer 1 year
Personal Digital Assistant 1 year
WARRANTY PERIODS
To obtain the name and address of the nearest Authorized Sharp Service Center or Dealer, please contact:
SHARP ELECTRONICS OF CANADA LTD.
GARANTIE LIMITÉE
Produits de bureau personnels
Bravo! Vous venez de faire un excellent achat!
Sharp Électronique du Canada Ltée (ci-après nommée “Sharp”) donne la garantie expresse suivante àl’acheteur initial du
produit ci-dessous mentionnéde Sharp, si celui-ci est emballédans son contenant original et s’il est vendu et distribuéau
Canada par Sharp ou par un Détaillant autoriséSharp .
Sharp garantit que ledit produit est, s’il est utiliséet entretenu normalement, exempt de défaut de fabrication. Si un défaut de
fabrication est décelédurant la période de garantie stipulée,Sharp s’engage àréparer ou remplacer, selon son choix, le produit
spécifiéci-dessous.
La garantie offerte par Sharp ne s’applique pas:
(a) Aux appareils qui ont étél’objetd’un emploi abusif, de négligence, d’un accident, d’une installation inadéquateou d’une
utilisation non appropriée, tel qu’il est mentionnédans le manuel du propriétaire;
(b) Aux produits Sharp altérés, modifiés, réglés ou réparés ailleurs qu’auxbureaux de Sharp, àun Centre agréé de service
Sharp ou àun Détaillant autoriséau service Sharp;
(c) Au dommage causéou réparation requise àla suite de l’utilisation avec des articles non désignés ou approuvés par
Sharp, y compris, mais non limitéau papier, les piles ou logiciel;
(d) Au remplacement des accessoires, des pièces en verre, des articles consommables ou périphériques, devenu nécessaire
àla suite d’une utilisation normale du produit, y compris, mais sans en être limité, aux piles, le ruban, le ruban correcteur,
les adapteurs c.a., le rouleau encreur, la marguerite ou le papier;
(e) Aux défauts cosmétiques àla surface ou àl’extérieur de l’appareil,et qui sont causés par une usure normale;
(f) Aux dommages causés par des conditions extérieures et relatives àl’environnement, y compris mais non limitéàdu
iquide répandu, une tension de la ligne électrique ou de transmission trop élevée ou autre;
(g) Aux produits dont le numéro de série et de modèleou le marquage CSA/CUL, ou les deux, ont étéenlevés ou éffacés;
(h) Aux produits de utilisés àdes fins de location.
(i) Aux coûts d’installation, configuration et/ou programmation.
Si un défautde fabrication est décelédans ce produit Sharp au cours de la période de la garantie, la réparation sous garantie est
offerte àla condition que le produit Sharp soit livréainsi que la preuve d’achatet une copie de cette GARANTIE LIMITÉE àun
Centre agréé de service Sharp ou àun Détaillant autoriséau service Sharp.
La garantie ci-dessus constitue la seule garantie expresse accordéepar Sharp. Aucun autre détaillant, aucun centre de service,
ses représentants ou ses employés, n’est autoriséàprolonger la durée de la garantie, àfournir des garanties autres ou à
transférercette garantie au nom de Sharp. Dans la mesure oùla loi en vigueur le permet, Sharp décline toute responsabilité
pour les pertes ou les dommages directs ou indirects, pour les pertes ou les dommages imprévus et pour les pertes de profits
indirectes résultant d’un défautde fabrication du produit, y compris les dommages reliés àla perte de temps ou d’utilisation de
ce produit Sharp. L’acheteur doit assumer les coûts de démontage,de réinstallation, de transport et d’assurance de l’appareil.
La réparationdes défectuosités, selon la manière et durant la période de temps ci-haut décrites, constitue l’exécution complète
de toutes les obligations et les responsabilités de Sharp vis-à-vis l’acheteur en ce qui a trait au produit et constituera un
acquittement complet pour toute réclamation, qu’elle soit basée sur le contrat, la négligence, la responsabilitéstricte ou autre.
SHARP ÉLECTRONIQUE DU CANADA LTÉE
335 Britannia Road East
Mississauga, Ontario
L4Z 1W9
(905) 568-7140
Site web: www.sharp.ca
PÉRIODES DE GARANTIE
Calculatrice sans imprimante 1 an
Calculatrice avec imprimante 6 mois
Calculatrice de poche 1 an
Agenda électronique 1 an
Ordinateur Portatif 1 an
Assistant Numérique Personnel 1 an
SHARP ÉLECTRONIQUE DU CANADA LTÉE.
Pour obtenir le nom et l’adresse du Centre de service ou du Détaillant autoriséau service Sharp le plus
près, veuillez écrire ou téléphoner à:
EL-1801V(Y12)裏面 07.6.13, 2:06 PMPage 2 AdobePageMaker6.0J/PPC
Other Sharp Calculator manuals

Sharp EL-330TB Installation instructions

Sharp

Sharp EL-330TB Installation instructions

Sharp ELSIMATE EL-327S User manual

Sharp

Sharp ELSIMATE EL-327S User manual

Sharp Elsimate EL-337C User manual

Sharp

Sharp Elsimate EL-337C User manual

Sharp EL-9900 User manual

Sharp

Sharp EL-9900 User manual

Sharp EL-506W User manual

Sharp

Sharp EL-506W User manual

Sharp EL-W535TG User manual

Sharp

Sharp EL-W535TG User manual

Sharp ELSI MATE EL-320W User manual

Sharp

Sharp ELSI MATE EL-320W User manual

Sharp CS-2635RH Installation manual

Sharp

Sharp CS-2635RH Installation manual

Sharp EL-2902E User manual

Sharp

Sharp EL-2902E User manual

Sharp EL-377T User manual

Sharp

Sharp EL-377T User manual

Sharp EL-9650 User manual

Sharp

Sharp EL-9650 User manual

Sharp Elsi Mate EL-R297 User manual

Sharp

Sharp Elsi Mate EL-R297 User manual

Sharp EL-531V User manual

Sharp

Sharp EL-531V User manual

Sharp EL-500W User manual

Sharp

Sharp EL-500W User manual

Sharp EL-240S Elsimate User manual

Sharp

Sharp EL-240S Elsimate User manual

Sharp ELSI MATE EL-250S User manual

Sharp

Sharp ELSI MATE EL-250S User manual

Sharp EL-2901RH User manual

Sharp

Sharp EL-2901RH User manual

Sharp EL-376SB User manual

Sharp

Sharp EL-376SB User manual

Sharp CS-2635RH User manual

Sharp

Sharp CS-2635RH User manual

Sharp EL-5060 User manual

Sharp

Sharp EL-5060 User manual

Sharp EL1197PIII - Printing Calculator, 12-Digit User manual

Sharp

Sharp EL1197PIII - Printing Calculator, 12-Digit User manual

Sharp EL-2607PC User manual
Sharp

Sharp EL-2607PC User manual
Sharp CS-4194H User manual

Sharp

Sharp CS-4194H User manual

Sharp ELSIMATE EL-2128V User manual

Sharp

Sharp ELSIMATE EL-2128V User manual

Popular Calculator manuals by other brands

HP 12C user guide

HP

HP 12C user guide

Casio FX-300ES PLUS user guide

Casio

Casio FX-300ES PLUS user guide

Citizen SDC-805II operating instructions

Citizen

Citizen SDC-805II operating instructions

Olympia LCD-1110 instruction manual

Olympia

Olympia LCD-1110 instruction manual

Calculated Industries 3416 user guide

Calculated Industries

Calculated Industries 3416 user guide

HP 35s Instruction guide

HP

HP 35s Instruction guide

HP OfficeCalc 200 user guide

HP

HP OfficeCalc 200 user guide

Casio COLLEGE fx-80 Operation manual

Casio

Casio COLLEGE fx-80 Operation manual

Casio Financial Consultant Manuals

Casio

Casio Financial Consultant Manuals

THOMSON Construction Master Pro Workbook

THOMSON

THOMSON Construction Master Pro Workbook

HP 35s user guide

HP

HP 35s user guide

Texas Instruments TI-83 - Plus Graphing Calculator Notes

Texas Instruments

Texas Instruments TI-83 - Plus Graphing Calculator Notes

Canon F-719SG Specifications

Canon

Canon F-719SG Specifications

Wang 300 Series instruction manual

Wang

Wang 300 Series instruction manual

Sentry CA756 instruction manual

Sentry

Sentry CA756 instruction manual

Texas Instruments TI-Nspire Software installation guide

Texas Instruments

Texas Instruments TI-Nspire Software installation guide

Monroe 1930 operating instructions

Monroe

Monroe 1930 operating instructions

Texas Instruments TI-84 Plus CE Getting started

Texas Instruments

Texas Instruments TI-84 Plus CE Getting started

manuals.online logo
manuals.online logoBrands
  • About & Mission
  • Contact us
  • Privacy Policy
  • Terms and Conditions

Copyright 2025 Manuals.Online. All Rights Reserved.