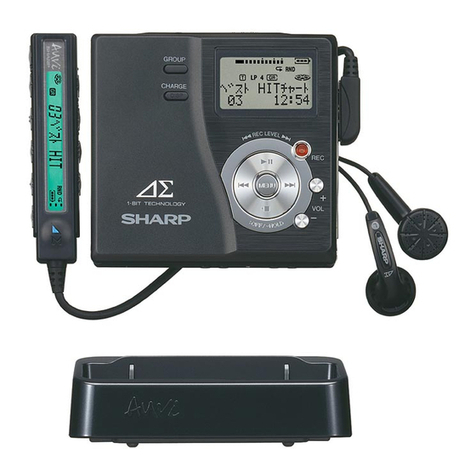
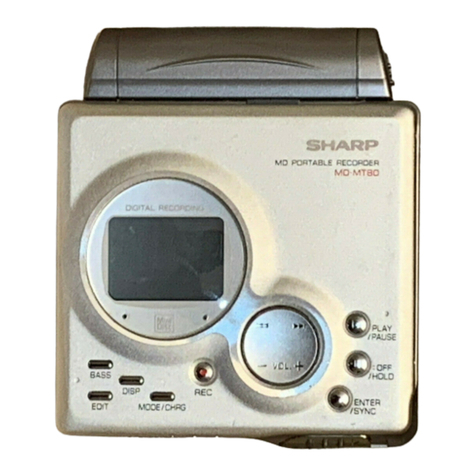
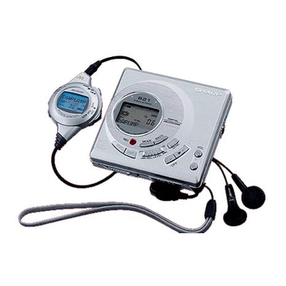
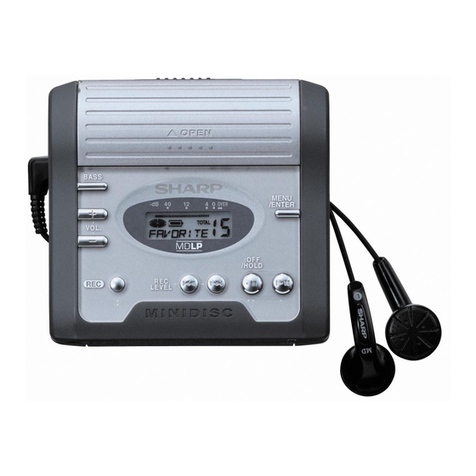
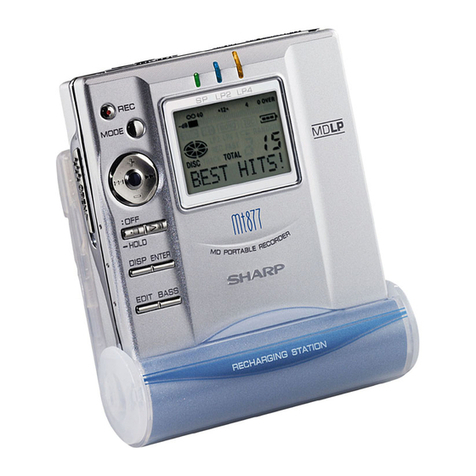
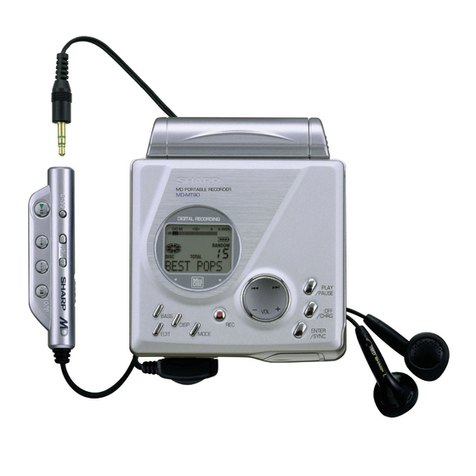
Sharp MD-MT877H User manual

PORTABLE MINIDISC
RECORDER
Thank you for purchasing this SHARP product.
For the best performance, read this manual carefully.
It will guide you in operating your SHARP product.
MODEL
MD-MT877H
If you require any advice or assistance regarding
your Sharp product, please visit our web-site
www.sharp.co.uk/support.
Customerswithoutinternetaccessmaytelephone
08705274277duringofficehours(or(01)6760648
if telephoning from Ireland).
OPERATION MANUAL

2Web-site: www.sharp.co.uk/support Help Line: 08705 274277 (office hours)
Accessories
Notes:
●Partsandequipmentmentionedinthisoperationmanual
other than those detailed above are not included.
●The AC adaptor may be different from the one in the
drawing.
Rechargeable
AC Adaptor Nickel-Metal
Remote Control x 1 Earphones x 1
(RADPA8046AWZZ) x 1
Hydride Battery Battery Charger x 1
(AD-N55BT) x 1
Battery Carrying Connection Cable Connection Cable
Case x 1 (for analogue (for digital Carrying Bag x 1 Battery Case x 1
recording) x 1 recording) x 1
2

DEUTSCH
FRANÇAIS
ESPAÑOL
SVENSKA
ITALIANO
NEDERLANDS
ENGLISH
3
Web-site: www.sharp.co.uk/support Help Line: 08705 274277 (office hours)
Contents
Important Introduction
Special Notes................................................ 4-5
Precautions.......................................................6
Names of Controls and Indicators .............. 7-9
Battery Charger .........................................10-11
Power Source
Using with the Rechargeable Battery..... 12-13
Using with the AC Adaptor ............................14
Using with the Alkaline Battery.....................15
Preparation
Hold Function .................................................16
Inserting a MiniDisc .......................................17
Connections.............................................. 18-19
Basic Operation
Recording.................................................. 20-23
Playback.................................................... 24-26
3
Useful Features
Advanced Playback.................................. 27-29
Advanced Recording ............................... 30-35
Recording from a Microphone ................ 36-38
Checking Displays ................................... 39-40
Changing Default Settings ...................... 41-42
Advanced Features
Titling a MiniDisc...................................... 43-47
Editing a Recorded MiniDisc................... 48-50
Listening to a MiniDisc Through a Stereo
System or a Car Stereo ................................51
References
Other Features and Caution ..........................52
MiniDisc System Limitations.........................53
Error Messages ........................................ 54-55
Troubleshooting ....................................... 56-57
Maintenance....................................................57
Specifications ........................................... 58-59
TERMS OF GUARANTEE ..............Back cover

4Web-site: www.sharp.co.uk/support Help Line: 08705 274277 (office hours)
Important Introduction
– Special Notes –
Special Notes
NOTES FOR USERS IN THE U.K. AND
IRELAND
SERVICE INFORMATION
In the unlikely event of your equipment requiring re-
pair, please contact the dealer or supplier from whom
it was purchased. Where this is not possible, please
visit our web-site www.sharp.co.uk/support.
Customers without internet access may telephone
08705 274277 during office hours (or (01) 676 0648
if telephoning from Ireland).
Please note; all calls will be charged at local rate.
Certain replacement parts and accessories may be
obtained from our main parts distributor.
WILLOW VALE ELECTRONICS LTD.
0121 766 5414
In the unlikely event of this equipment requiring re-
pair during the guarantee period, you will need to
provide proof of the date of purchase to the repairing
company. Please keep your invoice or receipt, which
is supplied at the time of purchase.
Warnings
●The supplied AC adaptor contains no user serviceable
parts.
Never remove covers unless qualified to do so. It con-
tains dangerous voltages, always remove mains plug
from the main outlet socket before any service opera-
tion or when not in use for a long period.
●TheAC adaptor supplied with the MD-MT877H must not
be used with other equipment.
●To prevent fire or shock hazard, do not expose this ap-
pliance to dripping or splashing liquids.
No objects filled with liquids, such as vases, shall be
placed on the apparatus.
●Never use an AC adaptor other than the one specified.
Otherwise,problems or serious hazards maybe created.
Cautions
●When recording important selections, make a prelimi-
nary test to ensure that the desired material is properly
recorded.
●SHARP is not liable for damage or loss of your record-
ing arising from malfunction of this unit.

DEUTSCH
FRANÇAIS
ESPAÑOL
SVENSKA
ITALIANO
NEDERLANDS
ENGLISH
5
Web-site: www.sharp.co.uk/support Help Line: 08705 274277 (office hours)
●At full volume, prolonged listening to a personal stereo
may damage the user’s hearing.
This model complies with the law if used with the correct
earphones (model number RPHOH0176AFSA).
If the earphones are damaged in any way, please order
using the model number given above.
●Use the Portable MiniDisc Recorder only in accordance
with the instructions given in this manual and do not at-
tempt to interfere with the interlock switch or make any
other adjustment as this may result in exposure to haz-
ardous radiation.
Notes
●Recording and playback of any material may require
consent, which SHARP is unable to give. Please refer
particularly to the provisions of the Copyright Act 1956,
the Dramatic and Musical Performers Protection Act
1958,the Performers ProtectionActs1963 and 1972 and
to any subsequent statutory enactments and orders.
●This equipment complies with the requirements of
Directives 89/336/EEC and 73/23/EEC as amended by
93/68/EEC.
●US and foreign patents licensed from Dolby Laborato-
ries.
●The letters in brackets contained in the model number
indicate the colour of the product only. Operation and
specifications are unaffected.
Special NotesSpecial Notes : continued
Important Introduction
– Special Notes –
●It is not recommendable to put the MiniDisc into a rear
pocket, as this may damage the product when sitting.

6Web-site: www.sharp.co.uk/support Help Line: 08705 274277 (office hours)
Important Introduction
– Precautions –
Precautions
Important
●Do not wear your earphones when you are crossing
streets or near traffic.
●Do not use your earphones whilst
driving a motor vehicle, it may create a
traffic hazard and may be illegal.
Remembertoobey allof thesafetyrules
in your area.
●Do not play the unit at a high volume.
Hearing experts advise against ex-
tendedlisteningathigh volume levels.
●If you experience ringing in your ears, reduce the vol-
ume or discontinue use.
●Nonaked flame sources, suchaslighted candles, should
be placed on the apparatus.
●Attention should be drawn to the environmental aspects
of battery disposal.
●The apparatus is designed for use in moderate climate.
●This portable MD should only be used within the range
of 0°C - 40°C (32°F - 104°F).
To avoid accidental electric shock or other possible
problems, observe the precautions listed below.
●Do not disassemble or modify the unit.
●Do not drop or subject the unit to shock.
●Do not use the unit near open flames.
●Do not spill liquid on the unit.
●Do not use an external power supply, other than the 5V
DC supplied with this unit, as it may damage it.
●
SHARPis notresponsible fordamagedue toimproper use.
Refer all servicing to a SHARP authorised service centre.
Storing the unit
Avoid using or leaving the unit in the following places.
●Places exposed to direct sunlight
for many hours (especially in cars
with the doors and windows
closed) or near heaters.
(The cabinet may deform, change
colouror the unit may malfunction.)
●Places exposed to water.
●Places exposed to excessive dust.
●Places where temperatures are ex-
cessively high or low.
●Places (bathrooms) where the hu-
midity is extremely high.
●Places with strong magnetic
fields such as TVs or loud-
speakers.
●Places exposed to vibration.
●Places where sand can easily en-
ter the inside of the unit (beaches
etc.).
●If the unit is used near radio tuners or TVs, noise and/or
picture interference may result. If you experience these
problems, move the unit away from such devices.

DEUTSCH
FRANÇAIS
ESPAÑOL
SVENSKA
ITALIANO
NEDERLANDS
ENGLISH
7
Web-site: www.sharp.co.uk/support Help Line: 08705 274277 (office hours)
Important Introduction
– Names of Controls and Indicators –
Names of Controls and Indicators
Main unit
1314 15
12
2
134
567
89
10
11
1. Record/Track Mark Button (20, 34)
2. Mode Button (29, 31, 41)
3. Volume/Cursor/Fast Forward/Fast Reverse/
Recording Level/Name Select Button
(20, 24, 27, 30, 41-45)
4. Stop/Power Off/Hold Button (16, 20, 24, 41)
5. Open Lever (17)
6. Display/Character Select Button (39, 40, 43)
7. Edit/Auto Mark/Time Mark Button (34, 38, 43-50)
8. Play/Pause Button (20, 24)
9. Enter/Fast Play/Synchro Button (28, 43-50)
10. Bass/Delete Button (24, 45)
11. Rechargeable Battery Cover (12)
12. Handstrap Holder
13. Optical/Line Input Socket (18, 19)
14. Microphone Input Socket (36)
15.
RemoteControl/Earphones/Line Output Socket(24)

8Web-site: www.sharp.co.uk/support Help Line: 08705 274277 (office hours)
Important Introduction
– Names of Controls and Indicators –
01. Level Meter
02. Record Indicator
03. Synchro Recording Indicator
04. Operation indicator
05. Long-play/Recording mode indicator
6. Character/Time Information Indicator
7. Repeat Indicator
8. Battery Indicator
9. Random Indicator
10. Track Number Indicator
11. TOC Indicator
12. Disc Name Indicator
Names of Controls and Indicators (continued)
1
2
3
4
5
6
7
8
9
10
11
12
Main unit display panel
3-colour LED
Various modes are indicated with three colours of lights.
Charging Light
ingstarting with yellow-green light.
Refresh Extinguishingstarting with orange light
after all the lights are lit.
Playback Flashing the colour of the activated
playback mode.
Recording Flashing the colour of the activated re-
cording mode.
Fast Forward
Flashingstarting with yellow-greenlight.
Fast Reverse Flashing starting with orange light.
Volume (+) Lightingstarting with yellow-greenlight.
Volume (–) Extinguishing instantly starting with or-
ange light after all the lights are lit.
TOC Reading: flashing at random.
Blue
Yellow-
green Orange

DEUTSCH
FRANÇAIS
ESPAÑOL
SVENSKA
ITALIANO
NEDERLANDS
ENGLISH
9
Web-site: www.sharp.co.uk/support Help Line: 08705 274277 (office hours)
01. Record Indicator
02. Track Number Indicator
03. Operation indicator
04. Character/Time Information Indicator
05. Battery Indicator
06. Random Indicator
07. Synchro Recording Indicator
08. Total Track Number Indicator
09. Long-play/Recording mode indicator
10. Repeat Indicator
Names of Controls and Indicators : continued
Important Introduction
– Names of Controls and Indicators –
Remote control display panel
1
8
679
2345
Remote control unit
1. Earphones Socket (24)
2. Fast Forward/Fast Reverse Button
3. Display Button
4. Play Mode Button (29)
5. Sound/Track Mark Button (26, 34)
6. Stop/Power Off Button (22, 26)
7. Play/Pause Button
8. Volume Button
9. Hold Switch (16)
1 2 3 45 6
78910

10 Web-site: www.sharp.co.uk/support Help Line: 08705 274277 (office hours)
Important Introduction
– Battery Charger –
Battery Charger
There are two different ways to use the battery charger one is to use it as a normal battery charger, the
other is to use it with an AC adapter by attaching the portable MD to the battery charger.
1. Remote Control Holder (11)
(You can hang the remote control on it.)
2. Lock Detector
3. Hook For Fixing The Main Unit
4. Charge/Operation Switch (10, 11)
5. Stand
6. AC Adaptor Connecting Socket (18, 19)
Names Setting
CHARGE
OPERATION
1
2
3
4
●Before setting the portable MD to the battery charger, make
sure the battery charger is in charge mode (CHARGE). If you
insert the portable MD by force whilst in operation mode
(OPERATION), the hook for fixing the portable MD may break.
●Operating whilst in charge mode, “CHARGEmode” will appear
and no operation is possible.
Face the top
toward you.
Caution:
Charge
mode
1
4
5
6
3
2
CHARGE
OPERATION

DEUTSCH
FRANÇAIS
ESPAÑOL
SVENSKA
ITALIANO
NEDERLANDS
ENGLISH
11
Web-site: www.sharp.co.uk/support Help Line: 08705 274277 (office hours)
Important Introduction
– Battery Charger –
About the Battery Charger : continued
2
1
How to use the Charge / Operation switch
Removing
Charge
mode
(RELEASE)
Operation
mode
(LOCK)
For charging
Moveit tocharge mode(see
“Using with the Recharge-
able Battery” page 12).
For operations
Move it to operation mode
whenplaying back orrecord-
ing (see “Using with the AC
Adaptor” page 14).
●Move the Charge / Operation switch to charge mode.
Charge
mode
(RELEASE)
Setting the battery charger and hanging the
remote control.
When the remote control is not used, hang it on the holder
for your convenience.
For use with the AC adaptor.
When using the unit with AC adaptor, use it horizontally.
Do not stand the unit.

12 Web-site: www.sharp.co.uk/support Help Line: 08705 274277 (office hours)
Power Source
– Using with the Rechargeable Battery –
Using with the Rechargeable Battery
Charging
When the rechargeable battery is used for the first time
or when you want to use it after a long period of disuse,
be sure to charge it fully.
●After the rechargeable battery is charged or used, it will get
slightly warm. This is normal.
●When the portable MD is turned on or operating, the battery
will not be charged.
To the DC IN
5V socket
AC 230-240V
50/60Hz
Charge
mode
Do not force the
battery cover
open too far.
1Insert the rechargeable battery.
2Move the Charge/Operation switch to charge
mode.
3Place the portable MD into the battery charger
and connect the AC adaptor.

DEUTSCH
FRANÇAIS
ESPAÑOL
SVENSKA
ITALIANO
NEDERLANDS
ENGLISH
13
Web-site: www.sharp.co.uk/support Help Line: 08705 274277 (office hours)
Caution:
●Usethespecified batteryAD-N55BTonly.Do not charge
a battery (nickel-cadmium, alkaline, etc.) other than that
specified.
●Do not remove the outer cover of the re-
chargeablebattery. It may cause heat gen-
eration, fire, or explosion.
●Do not dip the battery in water, do not dis-
pose of it in a fire, and do not take it apart.
●Ifthe rechargeable battery terminal isdirty, chargingmay
notstart.Insuch a case, wipe off the dirtwithadrycloth.
●Do not disassemble the battery.
About Power Source : continued
About the liquid crystal display (LCD)
Theconditionof the portable MD will be shown on the LCD
when inserting it into the battery charger.
Display Conditions
Scrolling
●Charging.
Turns off
●The charging is complete.
●When the portable MD is not in-
serted correctly to the battery
charger, or
Rechargeable terminal is dirty, it
maynot be possible to charge the
battery. (Wipetheterminalby cot-
ton swab.)
●Refreshing (see page 41).
Theunit checks and, if necessary,
discharge the rechargeable bat-
tery to recharge it automatically.
(At this time battery indicator is
flashing.)
About charging time
Afterabout3.5hourshave passed, “ ” will go out.
The battery is charged up to 95% if it is completely
discharged.
Notes:
●Charge the battery within the range of 5°C - 35°C (41°F
- 95°F).
●The unit can be left in the charging state after it is com-
pleted.
●If the MiniDisc unit is not to be used for some time,
remove the battery. (The battery drains gradually even
when the power is turned off.)
●Carry the battery in the supplied case.
Power Source
– Using with the Rechargeable Battery –

14 Web-site: www.sharp.co.uk/support Help Line: 08705 274277 (office hours)
Using with the AC Adaptor
1Place the portable MD to the battery
charger.
2Move the Charge/Operation switch to
operation mode.
3Plug the AC adaptor.
Caution:
●If the Charge/Operation switch is not set to operation
mode, no operation is possible.
(See “How to use the Charge/Operation switch”, page 11)
●When the unit is not in use for extended periods, re-
move the AC adaptor from the wall socket.
●Insert the plugs firmly.
Note:
When power failure occurs whilst playing back using the
AC adaptor, disconnect the adaptor from the outlet. Other-
wise, playback may start automatically when the power
returns.
To the DC IN
5V socket
AC 230-240V
50/60Hz
Operation mode
Power Source
– Using with the AC Adaptor –

DEUTSCH
FRANÇAIS
ESPAÑOL
SVENSKA
ITALIANO
NEDERLANDS
ENGLISH
15
Web-site: www.sharp.co.uk/support Help Line: 08705 274277 (office hours)
Useone commercially available alkaline battery (LR6,“AA”
size).
Whenusing the alkaline batteries, makesurethe recharge-
able battery is inserted.
Caution:
●Do not use rechargeable batteries (nickel-cadmium
battery etc.) in the battery case.
Power Source
– Using with the Alkaline Battery –
Using with the Alkaline Battery
1Open the case cover.
2Insert a alkaline battery into the battery
case.
3Attach the battery case to the portable MD.
1
2
Press
Open
Back of the
portable MD
RELEASE LOCK

16 Web-site: www.sharp.co.uk/support Help Line: 08705 274277 (office hours)
Preparation
– Hold Function –
Hold Function
The present operation condition can be kept even if other buttons are accidentally pressed in a place such
as a crowded train.
To cancel the hold mode:
Move the HOLD switch away from the safety posi-
tion (the opposite direction of the arrow).
●If the hold function is active whilst the power is
turned off, the power cannot be turned on by
mistake and the battery will not be drained.
●If the alkaline batteries are inserted or the AC adaptor
is connected, you can set this function even when the
power is turned off.
To cancel the hold mode
Press and hold down for 2 seconds or more whilst the unit
is in the hold mode.
●“HOLD OFF” will be shown
Hold Release
Press the • ■ / –HOLD button for 2 seconds
or more. Move the HOLD switch to the safety position
(direction indicated by the arrow).
Orange mark
Remote control unit
Main unit
Hold

17
Web-site: www.sharp.co.uk/support Help Line: 08705 274277 (office hours)
Inserting a MiniDisc
1Slide the OPEN lever to release the com-
partment door.
2Lift it up.
3Insert a MiniDisc as shown.
4Close the compartment door.
Notes:
●Do not place the MiniDisc under the holder.
●Ifanyresistanceisfelt,donotforcetheMiniDiscintothe
unit, as it may cause damage to the unit. If resistance is
felt, remove the MiniDisc and reload it.
●The lid can not be opened if “TOC” is displayed
refer to
the instruction on page 22.
3
41
2
Preparation
– Inserting a MiniDisc –
Recordable Recording
prevented
When you record on a
MiniDisc, check that the
erase prevention tab is
set to the “recordable”
position.

18 Web-site: www.sharp.co.uk/support Help Line: 08705 274277 (office hours)
AUDIO OUT
RIGHT LEFT
Connections
To the wall socket
To the
DC IN 5V socket
Red : To Right
White : To Left
To the OPTICAL/
LINE IN socket
To a stereo system with “AUDIO OUT” or “LINE OUT”
sockets. (See left, Analogue connection.)
Note:
If the audio system has only one pair of sockets, they are
usually for input only and recording via this connection is not
possible.
AC 230-240V
50/60Hz
To connect to a stereo system with “AUDIO OUT” or “LINE OUT” sockets
You can record your favorite CDs or tapes to an MD.
Preparation
– Connections –

19
Web-site: www.sharp.co.uk/support Help Line: 08705 274277 (office hours)
DIGITAL OUT
Preparation
– Connections –
Connections : continued
To connect to a stereo system with a “DIGITAL OUT” or “OPTICAL OUT” socket
To a stereo system with a “DIGITAL OUT” socket.
(See left, Digital connection.)
Compared to analogue connection recording, it allows
high-quality recording.
Note:
Some audio systems do not have a DIGITAL OUT socket.
Check before connecting.
To the OPTICAL/
LINE IN socket
AC 230-240V
50/60Hz
To the wallsocket
To the
DC IN 5V socket

20 Web-site: www.sharp.co.uk/support Help Line: 08705 274277 (office hours)
Recording
Basic Operation
– Recording –
As for the details, see page 16.
Before Recording
Cancel the hold mode.
The portable MD does not work
whilst in hold mode.
Other manuals for MD-MT877H
2
Table of contents
Other Sharp CD Player manuals

Sharp
Sharp MD-SR50H User manual

Sharp
Sharp MD-MT18H User manual

Sharp
Sharp MD-MT18H User manual

Sharp
Sharp QT-CD170H User manual

Sharp
Sharp MD-MT877 User manual

Sharp
Sharp CD-XP205V User manual

Sharp
Sharp MD-MT90H User manual

Sharp
Sharp MD-MS721H User manual

Sharp
Sharp MD-MT821H User manual

Sharp
Sharp Auvi MD-DR7 User manual

Sharp
Sharp CD-BP99V User manual

Sharp
Sharp TINSE0568AWZZ User manual

Sharp
Sharp MD-MT80H User manual

Sharp
Sharp CD-BK260V User manual

Sharp
Sharp MD-MS701H System manual

Sharp
Sharp MS722 - MiniDisc Recorder - Metallic User manual

Sharp
Sharp MD-MS722H User manual

Sharp
Sharp MD-SR60E User manual

Sharp
Sharp MD-M11H Quick start guide

Sharp
Sharp MD-MT80H User manual