9
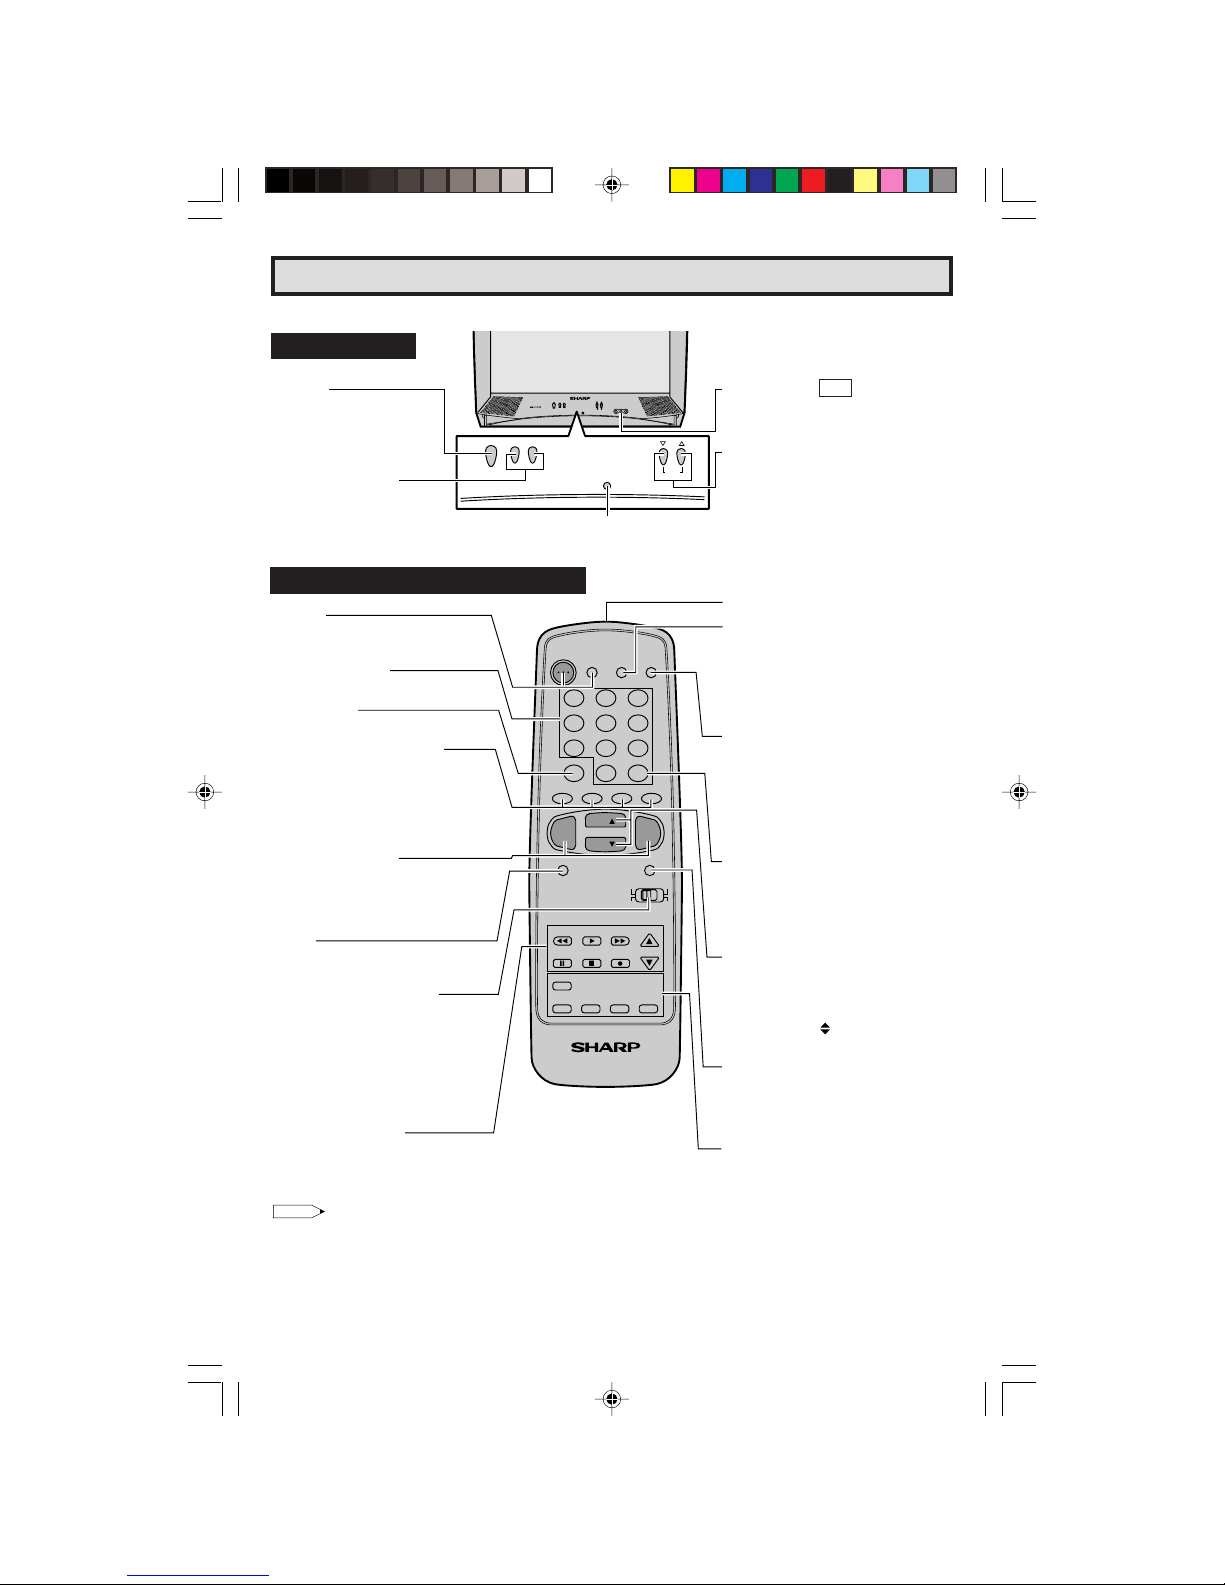
Fenêtre d’émission du signal infrarouge
AFFICHAGE (DISPLAY)
Appuyer pour afficher le canal reçu
pendant quatre secondes.
Appuyer de nouveau pour faire disparaître
le canal.
• Pour afficher temporairement le canal
reçu en mode Sous-titres.
ENTRÉE (INPUT)
Appuyer pour sélectionner le mode
ENTRÉE 1 vidéo externe.
Appuyer 2 fois pour sélectionner le
mode ENTRÉE 2 vidéo externe.
Appuyer 3 fois pour revenir au mode TV
initial.
ENTRER (ENTER)
Parfois utilisée lorsqu’un convertisseur
nécessite l’introduction d’une commande
“enter” après la sélection de canaux à
l’aide du pavé numérique de commande
à distance.
TOUCHES DES CANAUX CROISSANT/
DÉCROISSANT (CHANNEL UP/DOWN)
(8) Sélectionne le canal supérieur suivant.
(9) Sélectionne le canal inférieur précedént.
• Déplace le curseur “ ” sur l’écran du
MENU.
SOURDINE (MUTE)
Appuyer →Mise en sourdine du son.
Appuyer de nouveau →Rétablissement
du son.
• CLOSED CAPTION apparaît lorsque le
son est mis en sourdine.
COMMANDE DU LECTEUR DE DVD/
MAGNÉTOSCOPE
IMAGE DANS L’IMAGE (FUNCTION PIP)
Avec les entrées VIDEO, vous pouvez
regarder deux images en même temps
Remarque:
• Les boutons ombrés de la télécommande illustrés ci-dessus brillent dans l’obscurité lorsque la télécommande a
été placée sous une ampoule fluorescente ou toute autre source lumineuse.
• Le matériau phosphorescent n’est absolument pas toxique ou radioactif. Il peut donc être utilisé en toute sécurité.
• Le degré d’illumination variera en fonction de l’intensité de la source d’éclairage.
• Le degré d’illumination diminuera avec le temps, en fonction de la température.
• Le temps requis pour charger les touches phosphorescentes dépendra de l’éclairage environnant.
• Les rayons directs du soleil et les luminaires fluorescents constituent les meilleures sources de chargement des
touches phosphorescentes.
1 2 3
4 5 6
7 8 9
0
100
POWER
TV
MENU MUTE
PAUSE
PIP
FLASHBACK
DISPLAY
INPUT
TV •CATV •VCR •DVD
STOP REC
REW PLAY FF
CH/SKIP
SWAP FREEZE MOVE SELECT
VOL
—
CH
CH
VOL
+
ENTER
A B C D
PERSONAL PREFERENCE
DVD
VCR
CATV TV
DVD VCR
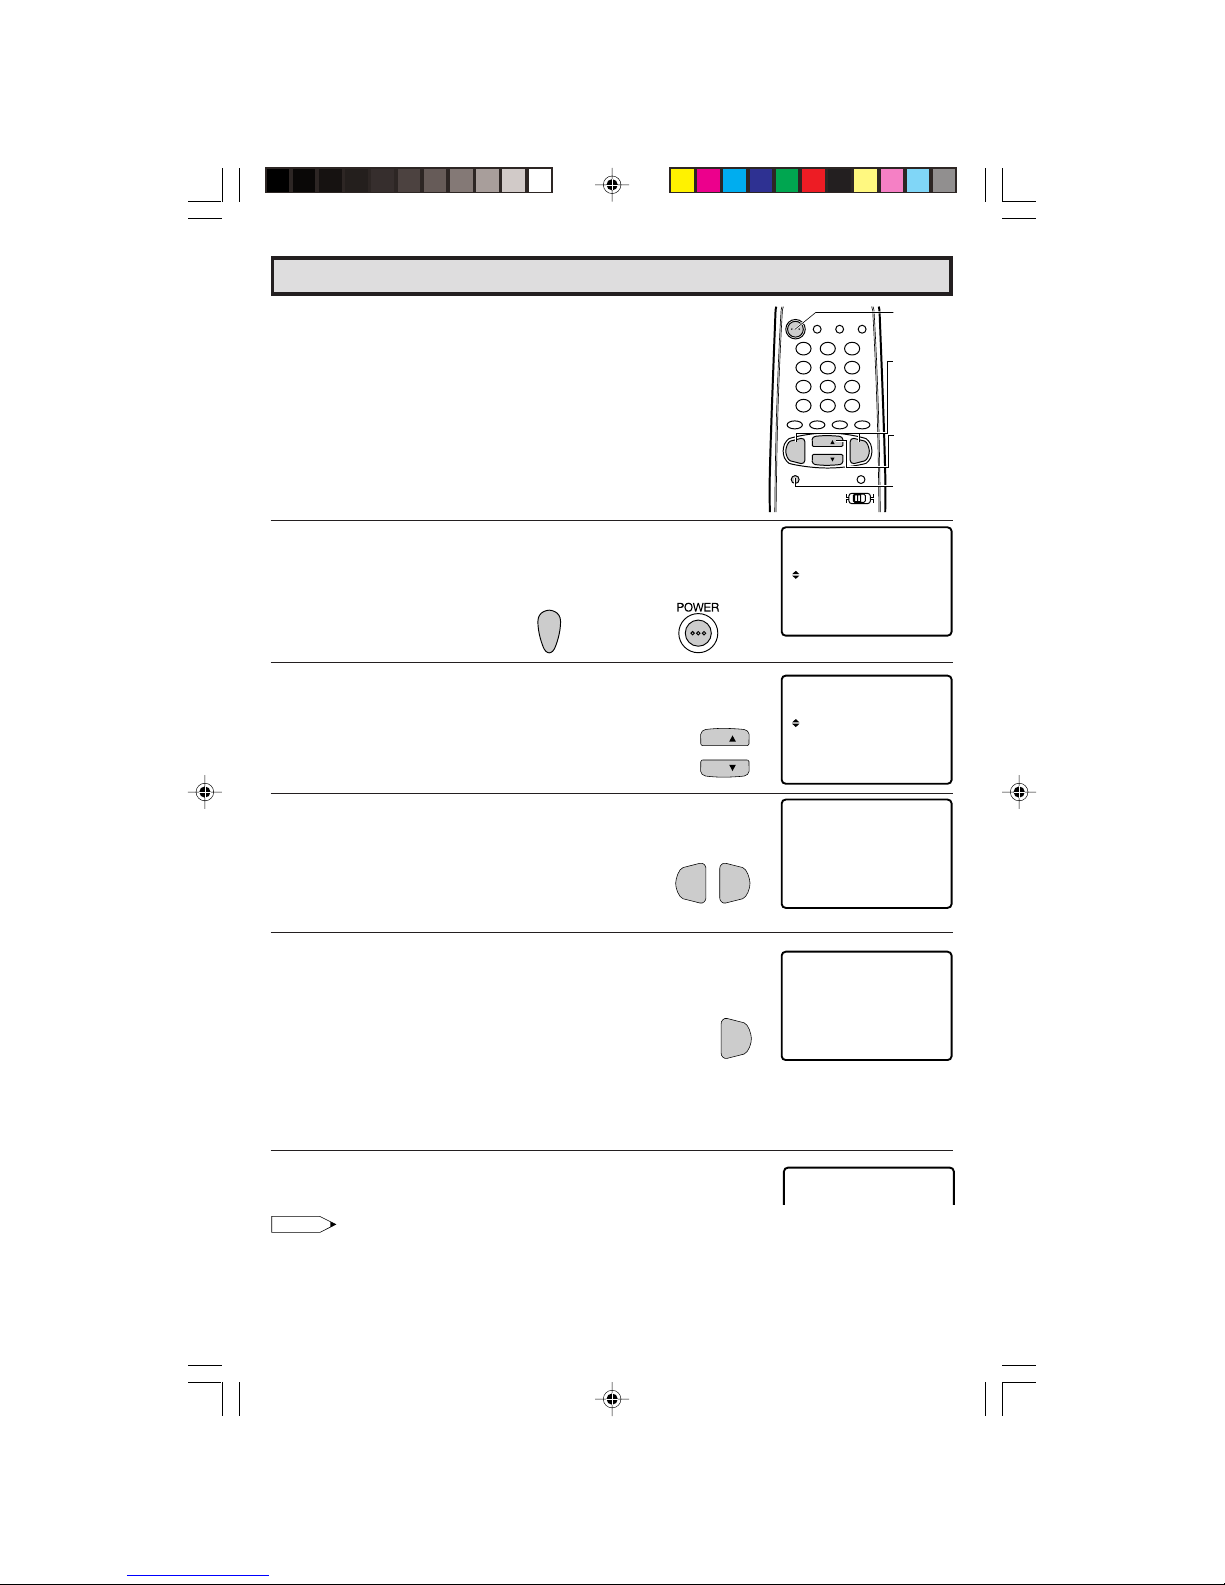
ALIMENTATION (POWER)
Appuyer pour mettre sous tension.
Appuyer de nouveau pour mettre hors
tension.
PAVE NUMERIQUE DE COMMANDE A
DISTANCE (REMOTE KEYPAD)
Sélectionne directement le canal voulu
sur le pavé numérique.
RETOUR (FLASHBACK)
Rappelle le canal regardé précédent.
PREFERENCES PERSONNELLES
Grâce aux touches de préférence
personnelle, vous pouvez programmer
vos programmes préférés à l’aide des 4
catégories:
A, B, C et D. Ces touches vous permettent
d’accéder rapidement à ces canaux.
AUGMENTATION/RÉDUCTION DU
VOLUME SONORE (VOLUME UP/DOWN)
(+) Pour augmenter le volume du son.
(–) Pour diminuer le volume du son.
• Pour changer ou sélectionner les
réglages du téléviseur en mode menu.
RÉGLAGE (MENU)
Appuyer →Accès au MENU PRINCIPAL.
Appuyer de nouveau →Sortie du MENU
PRINCIPAL.
SÉLECTEUR DE MODE DE
CÂBLOVISION/DVD-TÉLÉVISION/
MAGNÉTOSCOPE (CATV/DVD-TV/VCR)
En position télévision/magnétoscope
(TV/VCR), permet de mettre le téléviseur et
le magnétoscope sous/hors tension et de
sélectionner ses canaux (touche de canaux en
ordre croissant/décroissant et d’accès direct).
En position câblovision/DVD (CATV/DVD),
permet de mettre un convertisseur de téléviseur
par câble et un lecteur de DVD sous/hors
tension et de sélectionner ses canaux.
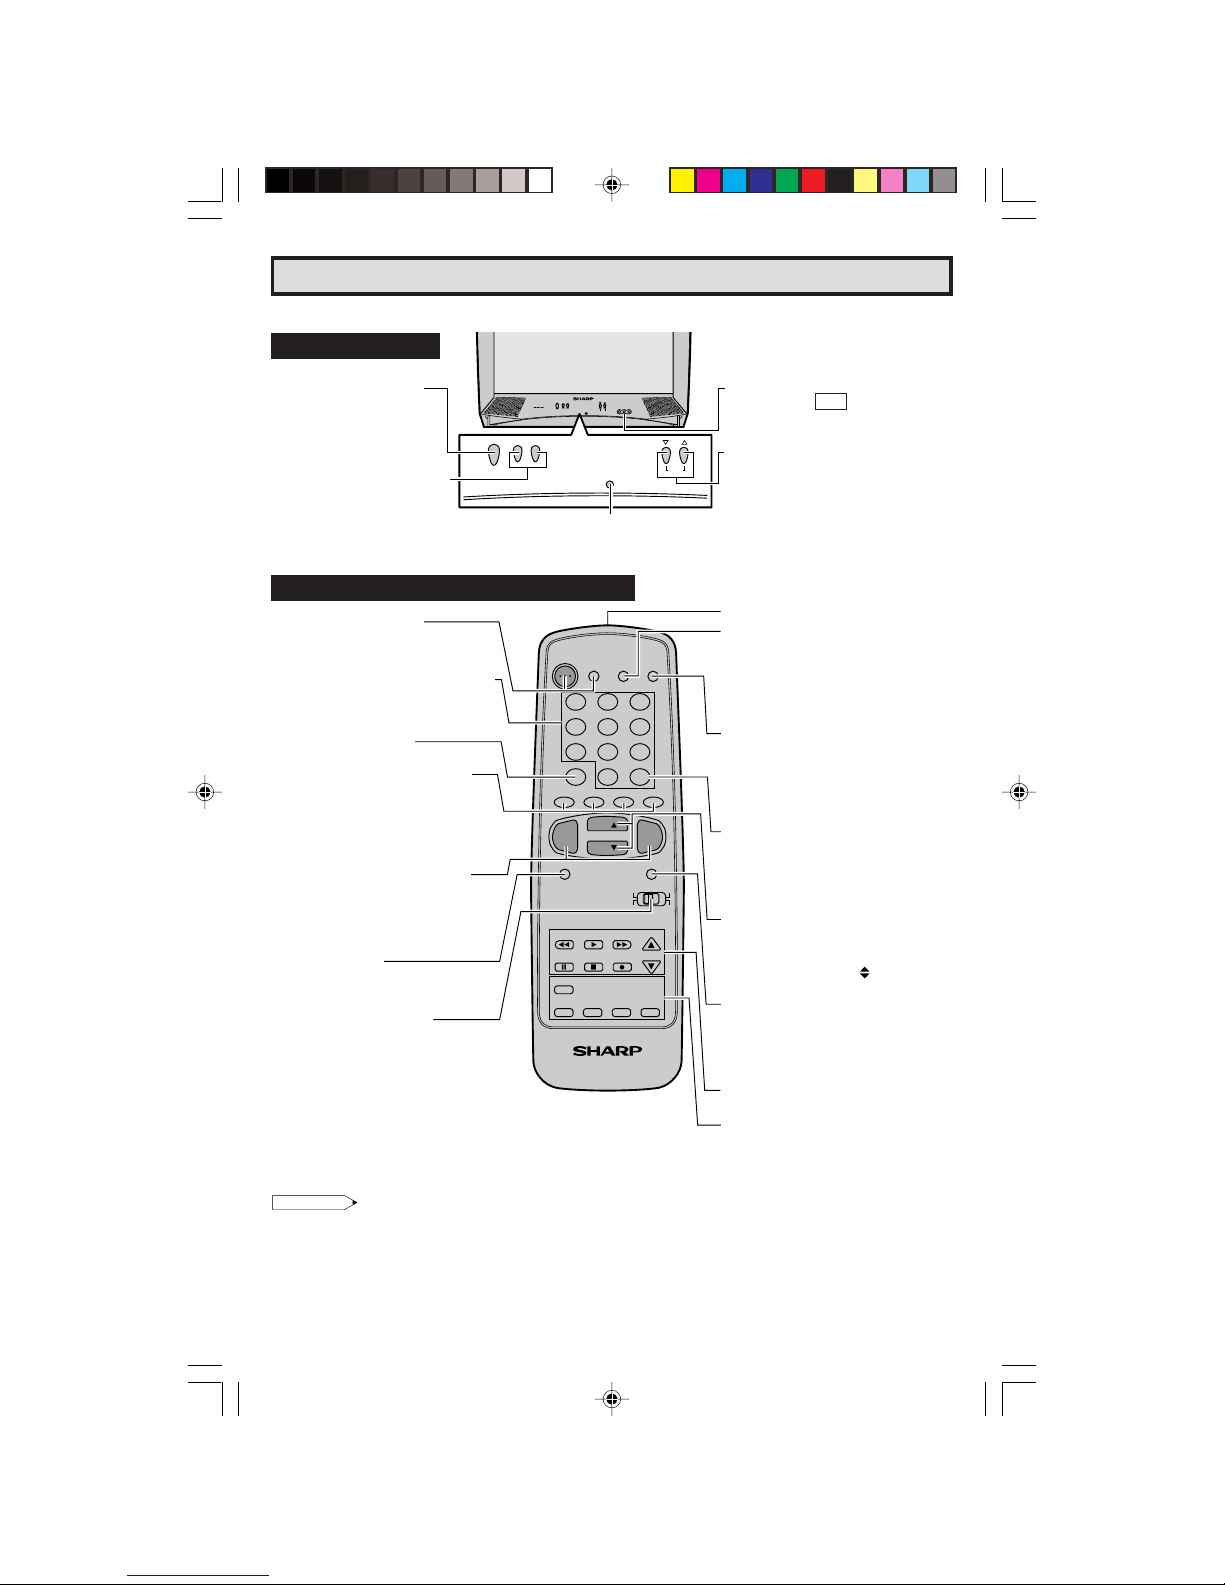
LEmplacement des touches (FRANÇAIS)
Panneau Avant
Référence rapide sur les commandes
Fonctions de base de la télécommande
TOUCHES DES CANAUX CROISSANT/
DÉCROISSANT (CH) –MENU
(8) Sélectionne le canal supérieur
suivant.
(9) Sélectionne le canal inférieur
précédent.
• Appuyez simultanément sur ces deux
touches pour accéder à l’écran MENU
PRINCIPAL.
ZONE DE DETECTION
DU CAPTEUR
POWER CH
–VOL+
POWER CH
–VOL +
MENU
MENU
PRISES D’ENTRÉE
VIDÉO/AUDIO
(Les prises VIDÉO/AUDIO sont
également reprises à l’arrière.)
IN 2
ALIMENTATION (POWER)
Appuyer pour mettre sous
tension.
Appuyer de nouveau pour
mettre hors tension.
AUGMENTATION/RÉDUCTION
DU VOLUME SONORE (VOL)
(+) Pour augmenter le volume du
son.
(–) Pour diminuer le volume du
son.
07-09 32/36R-S400.p65e 16/4/01, 11:24 AM9