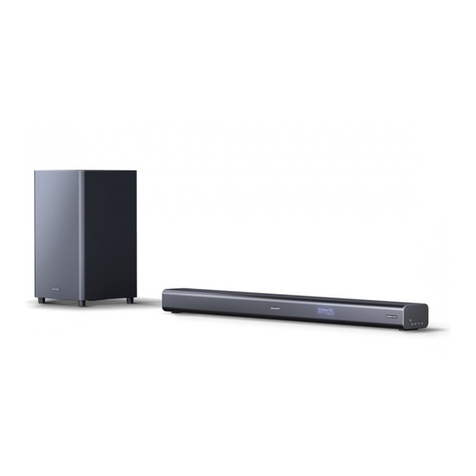
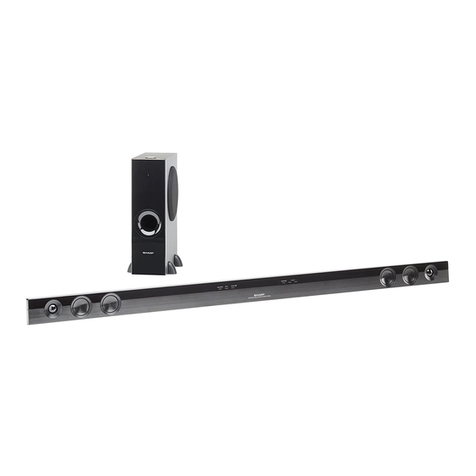
Sharp HT-SL70 User manual

HT-SL70_Front KA058EN.fm 2011April28
Notes:
●This product is recommended for flat panel TV (LCD and plasma).
●For HDMI connection, this product only supports PCM (Pulse Code Modulation) signals.
●This product is controlled via HDMI CEC (Consumer Electronics Control) specification, therefore
for HDMI connection, your TV’s CEC must be enabled. For detail, refer to the operation manual of the TV.
●For TV without HDMI CEC, headphone or RCA (variable output) analogue connection is available.
●For TV without HDMI, headphone or RCA (variable output) connection is required.
●This unit supports HDMI which enables Audio Return Channel (ARC).
Recommended Connection:
TV Type CEC FUNCTION CONNECTION CONNECTION METHOD
HDMI
( with ARC) MUST BE ENABLED HDMI IN
(ARC) Page 11, Method 1
with HDMI MUST BE ENABLED HDMI IN Page 11, Method 2
HDMI TV without
CEC & ARC or non
HDMI TV
NONE
HEADPHONE OUT Page 12, Method 1
RCA
(VARIABLE OUT) Page 12, Method 2
OPERATION MANUAL
Thank you for purchasing this SHARP product. To obtain the best performance from this product, please read
this manual carefully. It will guide you in operating your SHARP product.
TINSKA058AWZZ
Printed in Malaysia
11E R MW 1
MODEL
HT-SL70
SOUND BAR HOME THEATER SYSTEM
ENGLISH
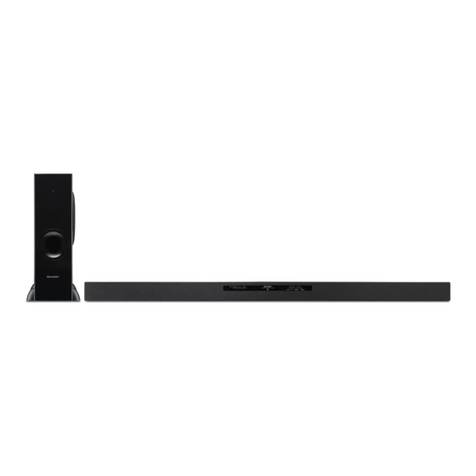
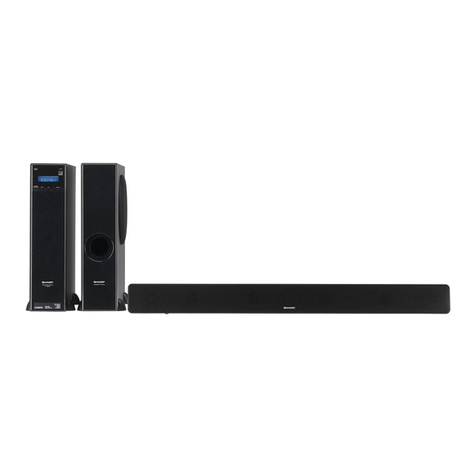
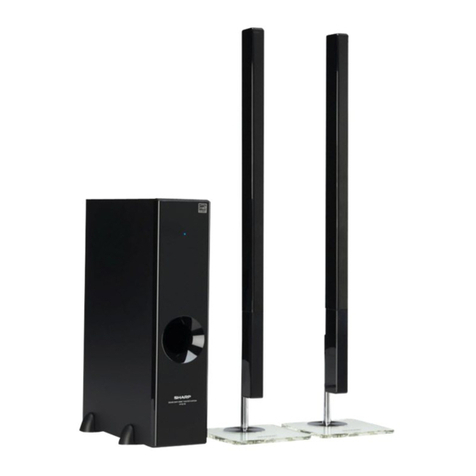
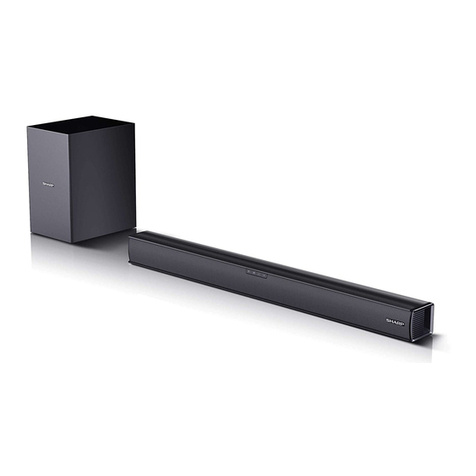
HT-SL70 Sound Bar Home Theater system consisting of Sound Bar and Subwoofer.
SHARP ELECTRONICSOF CANADA LTD.
335 BritanniaRoad East, Mississauga,Ontario L4Z 1W9

9
1
7
6
5
4
3
2
1
9
HT-SL70
E-1
2011 April 27
The following accessories are included.
This product has no remote control.
RCA to Headphone
Cable (1pin - 2 pins) x 1
Subwoofer Stand x 2 Audio Cable x 1 HDMI Cable x 1 Sound Bar Stand
Cushion x 2
Sound Bar Stand x 2
Wall Mount Angle x 2 Pattern Paper Speaker Wire
Sound Bar Cover Joint A
(short) x 1
Wall Mount Bracket
x 2
Screw for Brackets x 6 Stand Cover x 2
Sound Bar Cover Joint B (long) x 1 Stand Base x 2
Accessories
SOUND BAR HOMETHEATER SYSTEM HT-SL70
SOUND BAR HOME THEATER SYSTEM HT-SL70

9
8
7
6
5
4
3
2
1
9
E-2
2011 April 27 HT-SL70
Special Notes
ENERGY STAR
®
Program Information
Productsthat have earned
the ENERGY STAR
®
are
designed to protect the
environment through
superior energy efficiency.
ENERGY STAR®isa U.S. registered mark.
HDMI, the HDMI Logo, and High-Definition Multimedia
Interface are trademarks or registered trademarks of
HDMI Licensing LLC in the United States and other
countries.

9
1
7
6
5
4
3
2
1
9
HT-SL70
E-3
2011 April 27
Special Notes (continued)
VALID IN CANADA ONLY
LIMITED WARRANTY
Consumer Electronics Products
Congratulations on your purchase!
Sharp Electronics of Canada Ltd. (“Sharp”) warrants to the first purchaser for this Sharp brand product (“Product”), when shipped in its original container
and sold or distributed in Canada by Sharp or by an authorized Sharp dealer, that the Product will during the applicable warranty period, be free from
defects in material and workmanship, and will within the applicable warranty period, either repair the defective Product or provide the first purchaser a
replacement of the defective Product.
Conditions: This limited warranty shall not apply to:
(a) Any defects caused or repairs required as a result of abusive operation, negligence, accident, improper installation or inappropriate use as outlined
in the owner’s manual or other applicable Product documentation.
(b) Any defects caused or repairs required as a result of any Product that has been tampered with, modified, adjusted or repaired by any person other
than Sharp, a Sharp authorized service centre or a Sharp authorized servicing dealer.
(c) Any defects caused or repairs required as a result of the use of the Product with items not specified or approved by Sharp, including but not limited
to, head cleaning tapes and chemical cleaning agents.
(d) Any replacement of accessories, glassware, consumable or peripheral items required through normal use of the Product, including but not limited
to, earphones, remote controls, AC adapters, batteries, temperature probe, trays, filters, belts, ribbons, cables and paper.
(e) Any cosmetic damage to the Product surface or exterior that has been defaced or caused by normal wear and tear.
(f) Any defects caused or repairs required as a result of damage caused by any external or environmental conditions, including but not limited to,
transmission line/power line voltage or liquid spillage or acts of God.
(g) Warranty claims for Products returned with illegible or without appropriate model, serial number and CSA/cUL markings.
(h) Any Products used for rental or commercial purposes.
(i) Any installation, setup and/or programming charges.
How to get service: Warranty service may be obtained upon delivery of the Product, together with proof of purchase (including date of purchase) and a
copy of this limited warranty statement, to an authorized Sharp service centre or an authorized Sharp servicing dealer. In home warranty service may be
provided, at Sharp’s discretion, on any Sharp Television with the screen size of 40” or larger and on any Sharp Over-The-Range Microwave Oven or
Home Use Microwave Drawer. No other person (including any Sharp dealer or service centre) is authorized to extend, enlarge or transfer this warranty
on behalf of Sharp. The purchaser will be responsible for any and all removal, reinstallation, transportation and insurance costs incurred.
The express warranties in this limited warranty are, except for consumer purchasers domiciled in Quebec, in lieu of and, except to the extent prohibited
by applicable law, Sharp disclaims all other warranties and conditions, express or implied, whether arising by law, statute, by course of dealing or usage
of trade, including, without limitation, implied warranties or conditions of merchantability and/or quality, fitness for a particular use or purpose, and/or non-
infringement. Limitations (not applicable to consumer purchasers domiciled in Quebec to the extent prohibited under Quebec law): (a) Sharp shall not
be liable for any incidental, special, consequential, economic, exemplary or indirect damages of any kind or nature (including lost profits or damages for
loss of time or loss of use or loss of data) arising from or in any connection with the use or performance of a Product or a failure of a Product, even if
Sharp is aware of or has been advised of the possibility of such damages; (b) the remedies described in this limited warranty constitute complete
fulfillment of all obligations and responsibilities of Sharp to the purchaser with respect to the Product and shall constitute full satisfaction of all claims,
whether based on contract, negligence, strict liability or otherwise. Some provinces may not allow the exclusion or limitation of certain damages, or limits
on the duration or voiding of implied warranties or conditions; in such provinces, the exclusions and limits herein may not apply. This limited warranty is,
except for consumer purchasers domiciled in Quebec, governed by the laws of the Province in Canada in which the purchaser has purchased the
Product. For consumer purchasers domiciled in Quebec this limited warranty is governed by the laws of Quebec.
WARRANTY PERIODS (calculated from the date of original purchase): Parts & Labour (exceptions noted)
raey1tcudorPoiduA
raey1tcudorPyaR-ulB
)syad09pmal(raey1rotcejorP
raey1VTDCL
t
engam(raey1nevOevaworciM ron component-4 additional years)
rae
y1reifiruPriA
raey1renoitidnoCriAelbatroP
raey1rotare
neGnoIretsulcamsalP
raey1sessalGD3
raey1retpadANALss
eleriW
To obtain the name and address of the nearest Authorized Sharp Service Centre or Dealer, or for more information on
this Limited Warranty, Sharp Extended Warranty Offers, Sharp Canada Products or Accessory Sales, please contact
Sharp:
By writing to Sharp Electronics Of Canada Ltd. at 335 Britannia Road East Mississauga, Ontario L4Z 1W9
Calling: at 905-568-7140
Visiting our Web site:
THIS LIMITED WARRANTY IS VALID ONLY IN CANADA
www.sharp.ca
9
8
7
6
5
4
3
2
1
9
E-4
2011 April 27 HT-SL70
●Use the unit on a firm, level surface free from vibration.
●Keep the unit away from direct sunlight, strong
magnetic fields, excessive dust, humidity and
electronic/electrical equipment (home computers, fax
machines, etc.) which generate electrical noise.
●Do not place anything on top of the system.
●Do not expose the unit to moisture, to temperatures
higher than 60°C (140°F) or to extremely low
temperatures.
●If your system does not work properly, disconnect the
AC power lead from the wall socket and replug.
●In case of an electrical storm, unplug the unit for safety.
●Hold the AC power plug by the head when removing it
from the wall socket, as pulling the lead can damage
internal wires.
●The AC power plug is used as a disconnect device and
shall always remain readily operable.
●Do not remove the outer cover, as this may result in
electric shock. Refer internal service to your local
SHARP service facility.
●This unit should only be used within the range of
5°C - 35°C (41°F - 95°F).
Warning:
●The voltage used must be the same as that specified on
this unit. Using this product with a higher voltage other
than that which is specified is dangerous and may
result in a fire or other type of accident causing
damage. SHARP will not be held responsible for any
damage resulting from use of this unit with a voltage
other than that which is specified.
●To prevent fire or shock hazard, do not expose this
appliance to dripping or splashing. No object filled with
liquids, such as vases shall be placed on the apparatus.
Precautions
●Please ensure that the equipment is positioned in a
well-ventilated area and ensure that there is at least
10 cm (4") of free space along the sides, top and back
of the equipment.
General
ACTIVESUBWOOFER SYSTEM
HT-SL70
10 cm (4")
10 cm (4") 10 cm (4")
10 cm (4")

9
1
7
6
5
4
3
2
1
9
HT-SL70
E-5
2011 April 27
1. Left Front Speaker
2. Right Front Speaker
3. Bass Reflex Duct
Reference page
4. Right Front Speaker Terminal (Red/Black) . . . . 10
5. Left Front Speaker Terminal (White/Black) . . . . 10
Reference page
1. Stand-by Indicator
2. Bass Reflect Duct
3. Woofer
4. HDMI (TV ARC) Output Terminal . . . . . . . . . . . . . 11
Reference page
5. HDMI Input Terminal . . . . . . . . . . . . . . . . . . . . . . 11
6. AC Power Lead . . . . . . . . . . . . . . . . . . . . . . . . . . 10
7. Speaker Terminal . . . . . . . . . . . . . . . . . . . . . . . . . 10
8. Audio In (TV) Terminal. . . . . . . . . . . . . . . . . . . . . 12
Controls and indicators
Sound Bar
RL
3
45
3
12
FRONT VIEW
REAR VIEW
Subwoofer
8
7
2
3
6
5
4
ACTIVE SUBWOOFER SYSTEM
HT-SL70
1
FRONT VIEW REAR VIEW

9
8
7
6
5
4
3
2
1
9
E-6
2011 April 27 HT-SL70
Select from three installation methods according to the
preferred position.
For 46" TV sound bar assembly
1. Pull out the cover of joint A (short) as below.
2. Place the two sound bars adjacent to each other and
slot in the sound bar joint and its cover as below.
For 52" TV sound bar assembly
1. Pull out both covers of joint B (long) as below.
2. Place the two sound bars near to each other and slot in
the sound bar joint and its covers as below.
3. Peel off the double sided tape separator and attach the
sound bar stand cushion at the bottom surface of the
sound bar stand.
4. Fix the sound bar stand as shown.
Note:
Sound bar stand can be removed by pulling it off backward
from the sound bar.
Suggestion of the sound bars and LCD TV horizontal
arrangement.
System preparation
Make sure to unplug the AC power lead before
installing the unit or changing the position.
Using stand
SOUND BAR HOME THEATER SYSTEMHT-SL70
SOUNDBAR HOMETHEATERSYSTEMHT-SL70
Sound bar
joint A Cover
SOUNDBARHOMETHEATERSYSTEMHT- SL70
Front side of
the sound bar
Right
Left
Sound bar joint B
Cover
SOUNDBARHOME THEATERSYSTEMHT-SL70
Front side of
the sound bar
Right
Left
Sound bar stand cushion
Double
sided
tape
separator
Sound bar
stand
Hook

9
1
7
6
5
4
3
2
1
9
HT-SL70
E-7
2011 April 27
1. Pull out the cover of sound bar stand as below.
2. Slot in the sound bar into the sound bar stand and fix its
cover as shown.
3. Slot in the sound bar to the base stand according to your
TV size.
Suggestion of the sound bars and LCD TV arrangement.
1. Fix the brackets to the holes as shown.
System preparation (continued)
Using sound bar stand
Sound bar
stand
Cover
46" TV
52" TV
Groove to neatly
arrange the wire in.
Slot in the wire
inside the groove for
better arrangement.
To mount the sound bar on the wall
RIGHT
(For 52" TV)
RIGHT
LEFT
(For 46" TV)
Caution :
Be careful not to fix the bracket
upside down.
LEFT

9
8
7
6
5
4
3
2
1
9
E-8
2011 April 27 HT-SL70
Caution:
●Be very careful to prevent the sound bar [0.9 kg
(1.96 lbs )] from falling when mounting on the wall.
●Before mounting, check the wall strength. (Do not put
on the veneer plaster or whitewashed wall. The sound
bar may fall.) If unsure, consult a qualified service
technician.
●Mounting screws are not supplied. Use appropriate
ones.
●Check all wall mount angle screws for looseness.
●Select a good location. If not, accidents may occur or
the sound bar may get damaged.
●SHARP is not responsible for accidents resulting
from improper installation.
●Do not let children dangle on the sound bar once it is
attached on the wall as it can cause damage and injury.
SHARP designed the sound bar so you may hang them on
the wall. Use proper screws (not supplied). See below for
size and type.
Note:
Make sure all screws are fully tightened. (screws are not
supplied)
Safety wires (not supplied) are useful to prevent the sound
bar from falling off the table.
Loop the safety wires (not supplied) into each hole as
shown and tie the safety wires to the LCD TV stand.
System preparation (continued)
1Fix the pattern paper to the wall in horizontal
position as below.
2Make a hole on the wall following the screw point
marks on the pattern paper by using a drill.
3Fix a wall mount plug (not supplied) into the hole
using a hammer, until it is flush with the wall
surface.
Driving screws
3.2 mm (1/8")
9 mm (3/8")
Min. 22 mm (7/8")
5 mm
(3/16")
Fixing wall mount angle
Pattern paper
Wall surface
Wall surface
8-9 mm (3/8")
32 mm (1-1/4")
Wall surface
8-9 mm (3/8")
32 mm (1-1/4")
4Screw the wall mount angle to the wall as shown in
the illustration. (Total screw is 4 pieces)
1Align the wall mount slot at the sound bar to the
wall mount angle.
2Slot the sound bar into the wall mount angle.
3Fix them securely.
Wall surface
Wall mount angle
Wall mount
angle Wall
surface
Wall surface
Wall
mount
angle
(screws x 2)
(screws x 2)
Installing the sound bar
Wall surface
Falling prevention

9
1
7
6
5
4
3
2
1
9
HT-SL70
E-9
2011 April 27
Installation image:
Place the system as shown.
Remove the protective film covering the sound bar and
subwoofer before using the system.
Notes:
●As the sound from the system is omni-directional, you
can place the speaker anywhere you like. However, it is
recommended to place it as close to the TV as possible.
●The front panel of the speaker is not removable.
Caution:
Do not change the installation direction when the unit is
turned on.
Placing the system
ACTIVESUBWOOFER SYSTEM
HT-SL70
TV
BD Player DVD player
Place the stand as shown.
Placing the stand
ACTIVESUBWOOFER SYSTEM
HT
-SL70
SUBWOOFERSYSTEM
ACTIVESUBWOOFER SYSTEM
HT-SL70
Base

9
8
7
6
5
4
3
2
1
9
E-10
2011 April 27 HT-SL70
Make sure to unplug the AC power lead before making any connections.
System connections
RL
Subwoofer
Sound Bar
Right
Wall socket
AC 120 V ~ 60 Hz
Left
White
Red
CAUTION:
TO PREVENT ELECTRIC SHOCK, MATCH WIDE BLADE OF PLUG TO WIDE SLOT, FULLY INSERT.
Speaker connection
Connect the wire without insulation tube to the minus (–)
terminal, and the wire with red and white insulation tube to
the plus (+) terminal.
Caution:
●Use speaker with an impedance of 3 ohms or more, as
lower impedance speaker can damage the unit.
●Do not make a mistake when
connecting the right and left
speakers. The right speaker is the
one on the right side when you face
the unit.
●Do not let the bare speaker wires
touch each other.
●Do not allow any objects to fall into or
to be placed in the bass reflex duct.
●Do not stand or sit on the subwoofer/sound bar. You
may be injured.
INCORRECT

9
1
7
6
5
4
3
2
1
9
HT-SL70
E-11
2011 April 27
Notes:
●
This unit supports HDMI which enables ARC (Audio Return Channel).
●
To enable ARC make sure to use High Speed
HDMI™
cable (with ARC).
●
This ARC feature requires TV that supports ARC. Refer the operation manual of the TV to determine which terminal supports ARC.
●
To listen to the sound from a non-ARC-compatible TV, connect the audio output from TV to this system’s AUDIO IN (TV)
terminal. (refer page 12)
●
This unit can be operated (power on/off or volume up/down) via a TV or similar component which supports HDMI CEC
(Consumer Electronics Control). If this does not work, it does not mean this system is faulty. Refer to the operation manual
of the respective component on how to activate the CEC.
Example: Go to the Menu of the component to search and enable the CEC. Different brands may have different naming for
the CEC. For Sharp LCD TV, it is named as AQUOS LINK.
●
To listen to the sound from this system, you will need to adjust settings within the TV menu.
For details, refer to the operation manual of the TV.
●
If you are unable to select external speaker setting from the TV menu (E.g. For Sharp LCD TV, it is named as AQUOS AUDIO
SP), turn the CEC OFF and ON again.
●
Make sure the LCD TV Audio output setting is set to PCM, not other formats such as Dolby Digital, DTS, etc.
●
To enjoy 3D images, this system must be connected to a 3D-compatible TV and components (3D BD player, etc.) via High
Speed HDMI cables. Put on the 3D glasses, otherwise 3D images may not be viewed properly.
Select from the 2 methods below:
1. Method 1
This connection is for HDMI TV with ARC (Audio Return Channel).
Notes:
●Refer to the operation manual of the equipment to be connected.
●Fully insert the plugs to avoid fuzzy pictures or noises.
2. Method 2
This connection is for HDMI TV without ARC (Audio Return Channel).
Notes:
●To listen to sound via TV, turn off your connected DVD player or BD player or similar component.
●Connecting via this method may disable TV internal speakers.
System connections (continued)
Connecting to TV (with HDMI)
Caution:
●Turn off all other equipment before making this connection.
●Set the TV at low volume before turning on the system
TV
DVD, BD player
or similar
To HDMI output
terminal
To HDMI (ARC)
terminal
To HDMI
output
terminal
Subwoofer
TV
DVD, BD player or
similar
To HEADPHONE terminal
To H D M I
input
terminal
To audio output terminal
To HDMI terminal
or
HDMI OUTPUT
Subwoofer

9
8
7
6
5
4
3
2
1
9
E-12
2011 April 27 HT-SL70
Connect to the TV using an audio cable.
1. Method 1
Notes:
●Connecting via this method may disable TV internal speakers.
●In some cases, a small background noise could emit from the sound bar, when you use the headphone connection with
a TV-Set. In such case, please change the connection to the HDMI/ARC or RCA-connection! This effect depends on
the used TV-Brand, model and age, and it is not a quality matter from the sound bar!
2. Method 2
Note:
To control the volume, some setting in the TV MENU is needed. For details refer to the operation manual of the TV.
Example: Go to the Setting Menu of the TV, select AUDIO OUT and choose VARIABLE.
However if this does not work, please use method 1.
System connections (continued)
Connecting a TV (with AUDIO IN (TV))
TV
Audio cable
To AUDIO IN (TV)
input terminal
Audio signal
To HEADPHONE terminal
Subwoofer
TV
To AUDIO IN (TV)
input terminal
Audio signal
To audio output terminal
RCA cable
Subwoofer

9
1
7
6
5
4
3
2
1
9
HT-SL70
E-13
2011 April 27
Plug the AC power lead into a wall socket, the stand-by
indicator turns RED.
This unit will automatically power on if:
1. TV or similar component which supports HDMI CEC, is
turned on.
2. Audio signal is detected from Audio input.
The stand-by indicator will turn BLUE if TV signal is
detected.
Notes:
●HDMI input will override the Audio input signal.
●Audio input will function only when there is no signal
from HDMI input.
●A slight audio delay after TV is turned ON does not
mean that the system is faulty. This is normal.
●“AQUOS speaker is enabled” message will be
displayed if SHARP LCD TV does not detect HT-SL70
during power on. However the message “AQUOS audio
with AQUOS LINK is enabled” will be displayed soon as
HT-SL70 is detected. These messages may vary for
other TV model.
The Audio Return Channel (ARC) enables an HDMI ARC-
capable TV to send the audio stream to the HDMI OUT
terminal of the receiver. To use this function, your TV must
support the ARC. Make sure the LCD TV Audio output
setting is set to PCM, not other formats such as Dolby
Digital, DTS, etc. For details, refer to the operation manual
of the TV.
Volume can only be controlled from your TV.
This unit will automatically go to stand-by mode (indicator
turns RED) if:
1. TV or similar component which supports HDMI CEC, is
turned off.
2. No signal from Audio input is detected after 20 minutes.
General Control
Make sure to enable the HDMI CEC when making HDMI connection. For details, refer to the operation manual of
the TV.
To turn the power on
Audio Return Channel (ARC) (Audio
Return Channel submenu)
Volume
Power Off

9
8
7
6
5
4
3
2
1
9
E-14
2011 April 27 HT-SL70
Many potential problems can be resolved by the owner
without calling a service technician.
If something is wrong with this product, check the following
before calling your authorized SHARP dealer or service
centre.
Sudden temperature changes, storage or operation in an
extremely humid environment may cause condensation
inside the cabinet. Condensation can cause the unit to
malfunction. If this happens, leave the power on until
normal playback is possible (about 1 hour). Wipe off any
condensation on the transmitter with a soft cloth before
operating the unit.
When this product is subject to strong external interference
(mechanical shock, excessive static electricity, abnormal
supply voltage due to lightning, etc.) or if it is operated
incorrectly, it may malfunction.
If the unit is not restored in the previous operation,
unplug and plug in the unit again
or
unplug all components connected and plug in again.
Periodically wipe the cabinet with a soft cloth.
Caution:
●Do not use chemicals for cleaning (petrol, paint thinner,
etc.). It may damage the cabinet finish.
●Do not apply oil to the inside of each component. It may
cause malfunctions.
Troubleshooting chart
Symptom Possible cause
●No sound is heard. ●Is the input signal
(selection) set properly?
●Is HDMI compliant
equipment being used?
●Is the HDMI cable
connected correctly?
●Is the HDMI cable of the
correct type being used?
(with ARC)
●Does the sound input
support PCM signal?
●Do not connect or
disconnect an HDMI cable
while power is on. This
may lead to operation
problems.
●Noise is heard
during playback.
●Move the speaker away
from any computers or
mobile phones.
●The power is not
turned on.
●Is the unit unplugged?
●The protection circuit may
be activated. Unplug and
plug in the power lead
again after 5 minutes or
more.
●Volume cannot be
controlled.
●Check if the HDMI CEC is
enabled.
●For headphone or RCA,
TV setting (VARIABLE) is
required.
●3D images not
displayed on the TV.
●Depending on the TV and
Video component, 3D
images may not be
displayed.
Check the operation
manual of the respective
component.
●Background noise
appears when
connecting with
headphone output of
TV-Terminal.
●Please change to HDMI/
ARC or RCA-Output
terminal from TV-Set. This
effect may occur
depending on your used
TV-Brand, model and age,
and it is not the sound bar
problem!
General
Condensation
If problem occurs during operation
Maintenance
Cleaning the cabinet

9
1
7
6
5
4
3
2
1
9
HT-SL70
E-15
2011 April 27
As part of our policy of continuous improvement, SHARP
reserves the right to make design and specification
changes for product improvement without prior notice. The
performance specification figures indicated are nominal
values of production unit. There maybe some deviations
from these values in individual unit.
Specifications
Power source AC 120 V ~ 60 Hz
Power
consumption
40 W
Output power Front Left/Right:
RMS: 100W (50W + 50W) (10% T.H.D.)
RMS: 70W (35W + 35W) (1% T.H.D.)
Subwoofer:
RMS: 100W (10% T.H.D.)
RMS: 100W (1% T.H.D.)
Output
terminal
HDMI™ (with Audio Return Channel)
output: (audio/video support to 1080p)
x 1
Input
terminal
Analogue input (Audio in):
Stereo mini jack Ø 3.5 mm
Input impedance : 33 kohms
HDMI input: (audio/ video support to
1080p) x 1
General
Type Full Range speaker system
2.2 x 11.5 cm (7/8" x 4-1/2")
Full Range
Maximum
input power
100 W/CH
Rated input
power
50 W/CH
Impedance 3 ohms/CH (4 pieces parallel)
HORIZONTAL SETTING
46"
Dimensions
Width: 1071 mm (40 - 3/16")
Height: 26 mm (1 - 1/32")
Depth: 50 mm (1 - 31/32")
Weight 0.85 kg (1.85 lbs.)
52"
Dimensions
Width: 1204 mm (47 - 13/32")
Height: 26 mm (1 - 1/32")
Depth: 50 mm (1 - 31/32")
Weight 0.9 kg (1.96 lbs.)
VERTICAL SETTING
46"
Dimensions
Width: 160 mm (6 - 5/16")
Height: 706 mm (27 - 13/16")
Depth: 160 mm (6 - 5/16")
Weight 0.8 kg (1.76 lbs.)/each
52"
Dimensions
Width: 160 mm (6 - 5/16")
Height: 782 mm (30 - 13/16")
Depth: 160 mm (6 - 5/16")
Weight 0.8 kg (1.76 lbs.)/each
Type Subwoofer system
16 cm (6 - 5/16") woofer
Maximum
input power
200 W
Rated input
power
100 W
Impedance 4 ohms
Dimensions Width: 115 mm (4 - 1/2")
Height: 422 mm (16 - 5/8")
Depth: 307 mm (12 - 1/16")
Weight 4.50 kg (9.92 lbs.)
Soundbar speaker
Subwoofer
Other manuals for HT-SL70
3
Table of contents
Other Sharp Home Theater System manuals

Sharp
Sharp HT-SB60 User manual

Sharp
Sharp HT-SL50 User manual

Sharp
Sharp HT-DP4000 User manual

Sharp
Sharp HT-SL50 User manual

Sharp
Sharp SD-AS10H User manual

Sharp
Sharp HT-SB60 User manual

Sharp
Sharp HT-SB40 User manual

Sharp
Sharp HT-DV40H3 User manual

Sharp
Sharp HT-SBW182 User manual

Sharp
Sharp SD-AT1000 User manual

Sharp
Sharp HT-M750H User manual

Sharp
Sharp HT-X1H User manual

Sharp
Sharp HT-DD5000 User manual

Sharp
Sharp HT-SB600 User manual

Sharp
Sharp CP-X1WF User manual

Sharp
Sharp HT-SB60 User manual

Sharp
Sharp SD-AT1000W User manual

Sharp
Sharp HT-X1 User manual

Sharp
Sharp HT-SB20 User manual

Sharp
Sharp HT-SB60 User manual