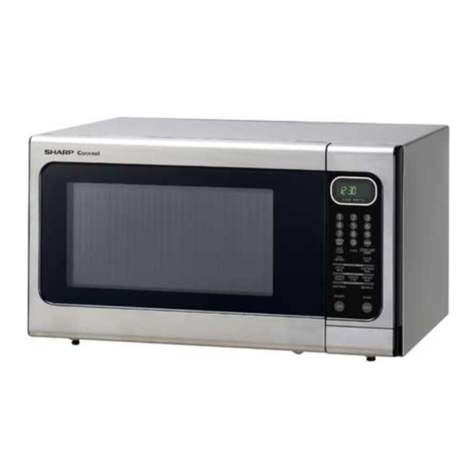
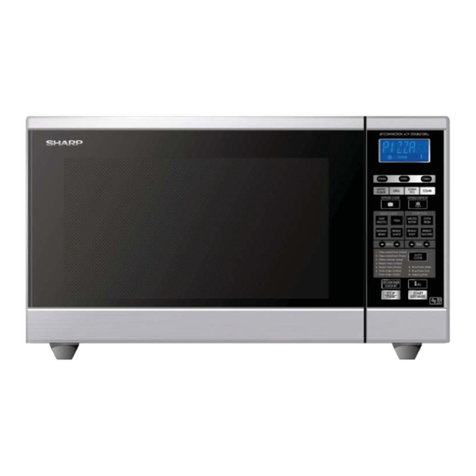
Sharp R-7E47 User manual

R-7E47
MICROWAVE
OVEN
WITH
GRILL
&
CONVECTION
OPERATION
MANUAL
900W
(IEC
705)

contents
|
?
OVENS
INDIA
GCESSORIEG
fy
ch
onal
oh
pr
cg
Mees
oe
Kiaad
ves
uiacas
cscs
2
eS
IIROR
PANEL,
sere
s.
awh
acis
sated
tata
Uh
satya
oS
os
to
cuted.
or
aan
on
3
IMPORTANT
SAFETY
INSTRUCTIONS
0
ccc.
cpedadawnere
es
cddeedce
mele:
4
INST
EE
ION
se
stash
wilt
rietDLe
Ban
elie
Tora
wnt
Coat
ah
2?
oho
4
6
DUCROWAVE
POWERIEVEL:
satryeh\a
Sis
asuite
ohm
tacetaiinn
teens
ocd
6
BEFORE
OPERATION
ic
aod
ta
ecenarenesasarat
heat
Beodeiclon<ullbass
at
7
SE
NUING
THE
CLOCK,
ce
SinigtsGeled
Banari
il
ot
Salley
stint
atin
cy
pole
244
rd
MINA
ORE
RAMON
natin
Renohetnicacteog
laa
teil
hints,
Giatevman
deka
fora
lemadt
8
POISE
CON
COOKING
sta
siete
a
eters
ae
aly
ata
la
ett
a
ditee’
Shee
an 4!
8
PRI
COOKING
viens
gncliten
atta
to
ade
amithae
ho)
cs
wait
tot
in
ete!
oe
on
10
PU
AD
EC
ORING:
y
omtatoti
nasa
ted
vente
ateeee
tn
dicot
tl
ele
4
cceba:
10
MULTIPLE
SEQUENCE
COOKING
.
22.2...
cece
e
eee
e
ec
eeeceeeee
oe,
11
OTHER
CONVENIENT
FUNCTIONS
00.0.0...
cece
cee
eeedeeceecee
ooo.
12
EARESAINDCUEANING
ots
Jaa
eo
Si
opin
uobinacite
dots
tpt
kdee
of
ee
te
on
14
BERNICE
CAL
CHECK
als
Sa
ia
atsrtine
tamed
insets
nent
Test,
14
PPE
CIRIOMTIONS
3
ss
Sictterie
hades
oink
i
rate
nats
namie
tvaaene
Sieh.
15
ENGLISH

1
Control
Panel
2
Oven
Lamp
3
Grill
heating
element
4
Door
Opening
Button
5
Waveguide
cover
6
Coupling
7
Oven
cavity
8
Door
seals
and
sealing
surfaces
9
Ventilation
openings
10
Outer
cabinet
11
Power
cord
ACCESSORIES:
Check
to
make
sure
the
following
accessories
are
provided:
Cookbook
1
Turntable
2
Roller
stay
3
Coupling
4
Low
Rack
5
High
Rack
Place
the
roller
stay
on
the
coupling
on
the
floor
of
the
cavity.
Then
place
the
turntable
on
to
the
roller
stay.
NOTE:
When
you
order
accessories,
please
mention
two
items:
part
name
and
model
name
to
your
dealer
or
SHARP
authorised
service
agent.

—-
\
tes
CONTROL
PANEL
DISPLAY
AND
INDICATORS
Check
indicators
after
the
oven
starts
fo
confirm
the
oven
is
operating
as
desired.
MICROWAVE
indicator
CONVECTION
indicator
GRILL
indicator
POWER
LEVEL
indicator
COOKING
indicator
Uhob
=
OPERATING
KEYS
6
TIME
keys
7
MICROWAVE
POWER
LEVEL
key
8
CONVECTION
TEMPERATURE
key
9
GRILL
key
10
DUAL
COOKING
key
11
CLOCK
SETTING
key
42
MINUTE
PLUS/START
key
13
STOP
key
14
MINUTE
TIMER/HOLD
key

To
avoid
the
danger
of
fire
The
microwave
oven
should
not
be
left
unattended
during
operation.
Power
levels
that
are
too
high
or
cooking
times
that
are
too
long
may
overheat
foods
resulting
in
a
fire.
in
cases
where
the
oven
is
to
be
installed
into
a
kitchen
cabinet,
the
installation
frame
EBR-4500
(B}/(W)
licensed
by
SHARP
must
be
used.
This
is
available
from
your
dealer.
Refer
to
the
frame
installation
instructions
or
ask
your
dealer
for
the
proper
instruction
procedure.
Only
the
use
of
this
frame
will
guarantee
the
safety
and
quality
of
the
product.
The
electrical
outlet
must
be
readily
accessible
so
that
the
unit
can
be
unplugged
easily
in
an
emergency.
The
AC
power
supply
must
be
230V,
50Hz,
with
a
minimum
16A
distribution
line
fuse,
ora
minimum
16A
distribution
circuit
breaker.
It
is
recommended
that
a
separate
circuit
serving
only
this
appliance
be
provided.
Do
not
place
the
oven
in
areas
where
heat
is
generated.
For
example,
close
to.
a
conventional
oven.
Do
not
install
the
oven
in
an
area
of
high
humidity
or
where
moisture
may
collect.
Do
not
store
or
use
the
oven
outdoors.
If
food
being
heated
in
the
oven
begins
to
smoke,
DO
NOT
OPEN
THE
DOOR.
Turn
off
and
unplug
the
oven
and
wait
until
the
food
has
stopped
smoking.
Opening
the
door
while
food
is
smoking
may
cause
a
fire.
Use
only
microwave-safe
containers
and
utensils.
See
corresponding
hints
in
the
included
cookbook.
Do
not
leave
the
oven
unattended
when
using
disposable
plastic,
paper
or
other
combustible
food
containers.
Clean
the
waveguide
cover,
the
oven
cavity,
the
turntable
and
roller
stay
after
use.
These
must
be
dry
and
free
from
grease.
Built-up
grease
may
overheat
and
begin
to
smoke
or
catch
fire.
Do
not
place
flammable
materials
near
the
oven
or
ventilation
openings.
Do
not
block
the
ventilation
openings.
Remove
all
metallic
seals,
wire
twists,
etc.,
from
food
and
food
packages.
Arcing
on
metallic
surfaces
may
cause
a
fire.
Do
not
use
the
microwave
oven
to
fry
oil
or
heat
oil
for
deep
frying.
The
temperature
cannot
be
controlled
and
the
oil
may
catch
fire.
To
make
popcorn,
use
only
special
microwave
popcorn
makers.
Do
not
store
food
or
any
other
items
inside
the
oven.
Check
the
settings
after
you
start
the
oven
to
ensure
the
oven
is
operating
as
desired.
Use
this
operation
manual
and
the
included
cookbook
together.
To
avoid
the
possibility
of
injury
Do
not
operate
the
oven
if
it
is
damaged
or
malfunctioning:
Check
the
following
before
use.
a)
The
door;
make
sure
the
door
closes
properly
and
ensure
it
is
not
misaligned
or
warped.
b)
The
hinges
and
safety
door
latches;
check
to
make
sure
they
are
not
broken
or
loose.
c)
The
door
seals
and
sealing
surfaces;
ensure
that
they
have
not
been
damaged.
d)
Inside
the
oven
cavity
or
on
the
door;
make
sure
there
are
no
dents.
e)
The
power
supply
cord
and
plug;
ensure
that
they
are
not
damaged.
Do
not
try
to
adjust
or
repair
the
oven
yourself.
The
oven
must
be
adjusted
or
repaired
only
by
an
authorised
SHARP
service
agent.
Do
not
operate
the
oven
with
the
door
open
or
alter
the
door
safety
latches
in
any
way.
Do
not
operate
the
oven
if
there
is
an
object
between
the
door
seals
and
sealing
surfaces.
Do
not
allow
grease
or
dirt
to
build
up
on
the
door
seals
and
sealing
surfaces.
Follow
instructions
for
“Care
and
Cleaning”,
Page
14.
Individuals
with
PACEMAKERS
should
check
with
their
doctor
or
the
manufacturer
of
the
pacemaker
for
precautions
regarding
microwave
ovens.
To
avoid
the
possibility
of
electric
shock
Under
no
circumstances
should
you
remove
the
outer
cabinet.
Never
spill
or
insert
any
objects
into
the
door
lock
openings
or
ventilation
openings.
In
the
event
of
a
spill,
turn
off
and
unplug
the
oven
immediately,
and
call
an
authorised
SHARP
service
agent.
Do
not
immerse
the
power
supply
cord
or
plug
in
water
or
any
other
liquid.

Do
not
let
the
power
supply
cord
hang
over
the
edge
of
a
table
or
work
surface.
Keep
the
power
supply
cord
away
from
heated
surfaces.
Do
not
attempt
to
replace
the
oven
lamp
yourself
or
allow
anyone
who
is
not
an
electrician
authorised
by
SHARP
to
do
so.
If
the
oven
fails,
please
consult
your
dealer
or
an
authorised
SHARP
service
agent.
f
the
power
supply
cord
of
this
appliance
is
damaged,
it
must
be
replaced
with
a
special
cord
(FACCVAOO3WRK1}.
The
exchange
must
be
made
by
an
authorised
SHARP
service
agent.
To
avoid
the
possibility
of
explosion
and
sudden
boiling
Never
use
sealed
containers.
Remove
seals
and
lids
before
use.
Sealed
containers
can
explode
due
to
a
build
up
of
pressure
even
after
the
oven
has
been
turned
off.
Take
care
when
microwaving
liquids.
Use
a
wide
mouthed
container
to
allow
bubbles
to
escape.
Never
heat
liquids
in
narrow
necked
containers
such
as
baby
bottles,
as
this
may
result
in
the
contents
erupting
from
the
container
when
heated
and
cause
burns.
To
prevent
sudden
eruption
of
boiling
liquid
and
possible
scalding:
1.
Stir
liquid
prior
to
heating/reheating.
2.
Itis
advisable
to
insert
a
glass
rod
or
similar
utensil
into
the
liquid
whilst
reheating.
3.
Let
liquid
stand
in
the
oven
at
the
end
of
cooking
time
to
prevent
delayed
eruptive
boiling.
Do
not
cook
eggs
in
their
shells.
They
may
explode.
To
cook
or
reheat
eggs
which
have
not
been
scrambled
or
mixed,
pierce
the
yolks
and
the
whites,
or
the
eggs
may
explode.
Shell
and
slice
hard
boiled
eggs
before
reheating
them
in
the
microwave
oven.
Pierce
the
skin
of
such
foods
as
potatoes,
sausages
and
fruit
before
cooking,
or
they
may
explode.
To
avoid
the
possibility
of
burns
Use
pot
holders
or
oven
gloves
when
removing
food
from
the
oven
to
prevent
burns.
Always
open
containers,
popcorn
makers,
oven
cooking
bags,
etc.,
away
from
the
face
and
hands
to
avoid
steam
burns.
Always
stand
back
from
the
oven
door
when
opening
it
to
avoid
burns
from
escaping
steam
and
heat.
Slice
stuffed
baked
foods
after
heating
to
release
steam
and
avoid
burns.
To
avoid
burns,
always
test
food
temperature
and
stir
before
serving
and
pay
special
attention
to
the
temperature
of
food
and
drink
given
to
babies,
children
or
the
elderly.
Temperature
of
the
container
is
not
a
true
indication
of
the
temperature
of
the
food
or
drink;
always
check
the
food
'
femperature.
The
door
may
become
hot
during
cooking,
PLACE
OR
MOUNT
THE
OVEN
SO
THAT
THE
BOTTOM
OF
THE
OVEN
IS
85CM
OR
MORE
ABOVE
THE
FLOOR.
Keep
children
away
from
the
door
to
prevent
them
burning
themselves.
Do
not
touch
the
oven
door,
outer
cabinet,
rear
cabinet,
oven
cavity,
ventilation
openings,
accessories
and
dishes
during
CONVECTION,
GRILL,
and
DUAL
modes
as
they
will
become
hot.
Before
cleaning
make
sure
they
are
not
hot.
To
avoid
misuse
by
children
Children
should
use
ovens
only
under
the
supervision
of
adults.
Do
not
lean
or
swing
on
the
oven
door.
Do
not
play
with
the
oven
or
use
it
as
a
toy.
Children
should
be
taught
all
important
safety
instructions:
use
of
potholders,
careful
removal
of
food
coverings;
paying
special
attention
to
packaging
(e.g.
self-heating
materials)
designed
to
make
food
crisp,
as
they
may
be
extra
hot.
Other
warnings
Never
modify
the
oven
in
any
way.
Do
not
move
the
oven
while
it
is
in
operation.
This
oven
is
for
home
food
preparation
only
and
may
only
be
used
for
cooking
food.
It
is
not
suitable
for
commercial
or
laboratory
use.
To
promote
trouble-free
use
of
your
oven
and
avoid
damage.
Never
operate
the
oven
when
it
is
empty.
Doing
so
may
damage
the
oven.
When
using
a
browning
dish
or
self-heating
material,
always
place
a
heatresistant
insulator
such
as
a
porcelain
plate
under
it
to
prevent
damage
to
the
turntable
and
roller
stay
due
to
heat
ENGLISH

stress.
The
preheating
time
specified
in
the
dish’s
instructions
must
not
be
exceeded.
Do
not
use
metal
utensils,
which
reflect
microwaves
and
may
cause
electrical
arcing.
Do
not
put
cans
in
the
oven.
Use
only
the
turntable
and
the
roller
stay
designed
for
this
oven.
To
prevent
the
turntable
from
breaking:
(a)
Before
cleaning
the
turntable
with
water,
leave
the
turntable
to
cool.
(b]
Do
not
put
hot
foods
or
hot
utensils
on
a
cold
turntable.
:
(c)
Do
not
put
cold
foods
or
cold
utensils
on
a
hot
turntable.
Do
not
use
plastic
containers
for
microwaving
if
the
oven
is
still
hot
from
using
the
CONVECTION,
GRILL,
and
DUAL
modes,
as
they
may
melt.
Plastic
containers
must
not
be
used
during
above
modes
unless
the
container
manufacturer
says
they
are
suitable.
Do
not
place
anything
on
the
outer
cabinet
during
operation.
NOTE
if
you
are
unsure
how
to
connect
your
oven,
please
consult
an
authorised,
qualified
electrician.
Neither
the
manufacturer
nor
the
dealer
can
accept
any
liability
for
damage
to
the
oven
or
personal
injury
resulting
from
failure
to
observe
the
correct
electrical
connection
procedure,
Water
vapour
or
drops
may
occasionally
form
on
the
oven
walls
or
around
the
door
seals
and
sealing
surfaces.
This
is
a
normal
occurrence
and
is
not
an
indication
of
microwave
leakage
or
a
malfunction.
1.
Remove
all
packing
materials
from
inside
of
the
oven
cavity.
Remove
all
the
protective
film
and
the
feature
sticker
from
the
outside
of
the
oven
door.
2.
Check
the
oven
carefully
for
any
signs
of
damage.
3.
Place
the
oven
on
a
flat,
level
surface
strong
enough
to
support
the
oven’s
weight
plus
the
heaviest
item
likely
to
be
cooked,
4.
Securely
connect
the
plug
of
the
oven
to
a
standard
earthed
(grounded)
household
electrical
outlet.
There
are
six
preset
microwave
power
levels
for
your
oven.
LEVELS
HIGH
MEDIUM
HIGH
MEDIUM
100%
70%
50%
30%
10%
MEDIUM
LOW
LOW
HOLD
0%
MICROWAVE
POWER/DISPLAY
WATT
900
630
450
270
90
0

Plug
in
the
oven.
1.
The
oven
display
will
flash:
2.
Touch
the
STOP
key
the
display
will
show:
3.
Set
the
clock,
see
below.
Using
the
Stop
key
Use
the
STOP
key
to:
1.
Erase
a
mistake
during
programming.
2.
Cancel
the
MINUTE
TIMER.
3.
Stop
the
oven
temporarily
during
cooking.
4,
Cancel
a
programme
during
cooking,
touch
twice.
Example:
To
set
the
24
hour
clock
to
23:35.
1.
Onr
WN
To
set
the
24hr
clock
press
the
CLOCK
key
twice.
{To
set
the
12hr
clock
press
the
CLOCK
key
once.)
.
Set
the
hours.
.
Change
from
hours
to
minutes.
.
Set
the
minutes.
.
Start
the
clock
.
Check
the
display.
NOTE:
1.
if
the
oven
is
in
cooking
or
minute
timer
mode
and
you
wish
to
know
the
time
of
day,
touch
the
CLOCK
SETTING
key.
As
long
as
your
finger
is
touching
the
key,
the
time
of
day
will
be
displayed.
.
If
the
electrical
power
supply
to
your
microwave
oven
is
interrupted,
the
display
will
intermittently
show
39389
after
the
power
is
reinstated.
|f
this
occurs
during
cooking,
the
programme
will
be
erased.
The
time
of
day
will
also
be
erased.
Simply
reset
the
clock
for
the
correct
time
of
day.
ENGLISH

With
the
manual
operations,
your
oven
can
be
programmed
for
up
to
99
minutes,
90
seconds.
When
the
operation
of
the
oven
is
finished,
the
time
of
day
will
reappear
on
the
display.
If
the
clock
is
not
set
e
will
appear
on
the
display.
_
Example:
Suppose
you
want
to
heat
soup
for
2
minutes
and
30
seconds
on
50%
microwave
power.
NOTE:
1,
When
the
door
is
opened
during
the
cooking
Enter
the
desired
cooking
process,
the
cooking
time
on
the
digital
display
ic
ae
time
(2
min.
and
30
sec.)
stops
automatically.
The
cooking
time
starts
to
count
down
again
when
the
door
is
closed
and
the
MINUTE
PLUS/START
key
is
pressed.
Choose
the
desired
.
If
you
miss
your
desired
power
level,
continue
fed)
OS.
=
power
50%.
touching
the
POWER
LEVEL
key
until
you
reach
the
desired
level
again.
3.
If
you
wish
to
know
the
power
level
during
cooking,
press
the
POWER
LEVEL
key.
As
long
as
your
finger
is
touching
the
POWER
LEVEL
key,
+1
mind
+1mind
|
D>
;
the
power
level
will
be
displayed.
Nh
x1
Start
to
cook.
Check
the
display.
If
the
level
is
not
selected,
the
level
100%
is
automatically
set.
CONVECTION
COOKING
You
can
programme
your
oven
to
cook
one
of
ten
different
convection
temperatures
(250°C,
230°C,
Example
1:
220°C,
200°C,
180°C,
160°C,
130°C,
100°C
i
:
' ,
10
Enter
the
desired
70°C,
40°C).
(
MIN
}
cooking
time
(25
x2
x5
minutes)
Similar
to
MICROWAVE
cooking
the
temperature
is
set
by
touching
the
CONVECTION
key
until
the
|
Choose
the
cooking
desired
temperature
appears
in
the
display.
°C
temperature.
200°C.
Example
1:
vy
oo
Suppose
you
want
to
cook
at
200°C
for
25
minutes.
°
NOTE:
Programmed
temperature:
If
after
the
convection
is
started
you
wish
to
check
the
temperature
you
have
Start
to
cook.
Check
the
display.
programmed,
simply
touch
the
CONVECTION
key.
The
programmed
temperature
will
be
displayed
as
long
as
the
CONVECTION
key
is
touched.

Example
2:
Choose
preheating
temperature.
230°C.
+1
min<
c>
1
x
Start
preheating.
Check
the
display.
Example
3:
[#]
°C
MIN
x1
x5
bi
‘
Choose
cooking
[#]
C
temperature;
200°C.
See
NOTE
4.
Start
preheating.
Choose
preheating
temperature.
220°C.
x3
Enter
the
desired
cooking
time,
15
min
Check
the
display.
When
preheating
is
over,
*2x
will
Open
the
door
and
place
food
in
the
oven.
Then
close
the
door.
v
*
+1
mind
a2
Start
cooking.
Check
the
display.
appear.
See
NOTE
5
.
PREHEATING
Your
oven
doesn’t
need
to
be
preheated.
If
you
wish
preheat
for
some
specific
recipes
however,
you
may.
Example
2:
Suppose
you
want
to
preheat
to
230°C.
PREHEATING
AND
COOKING
Your
oven
can
be
programmed
to
combine
preheating
and
cooking.
Example
3:
Suppose
you
want
to
preheat
to
220°C
and
bake
biscuits
at
200°C
for
15
minutes.
Place
the
food
in
the
oven
after
preheating.
NOTE:
1.
When
the
oven
reaches
the
programmed
temperature,
an
audible
signal
will
sound
4
times.
The
oven
will
then
begin
holding
its
temperature
and
will
automatically
stay
at
that
temperature
for
30
minutes.
.
You
can
select
your
desired
oven
temperature
by
touching
the
CONVECTION
key
until
the
desired
temperature
appears
on
the
display.
.
Actual
temperature
lf
after
preheating
has
started
you
wish
to
check
the
actual
oven
temperature,
simply
touch
the
CONVECTION
key.
The
actual
oven
temperature
will
be
displayed
as
long
as
the
CONVECTION
key
is
touched.
If
the
oven
temperature
is
below
40°C
at
this
time,
*1gf
__
will
be
displayed.
4.
If
you
wish
to
preheat
and
cook
at
the
same
convection
temperature,
you
can
delete
the
step”.
5.
When
the
oven
reaches
the
preprogrammed
temperature,
an
audible
signal
will
sound
4
times.
The
oven
will
then
begin
temperature
holding
operation.
The
oven
will
automatically
hold
at
the
temperature
for
30
minutes.
NO
Ww

Example:
Suppose
you
want
to
cook
beef
steak
(800g)
for
26
minutes
using
the
GRILL
mode.
Turn
the
beef
steak
over
after
-
2/3rds
cooking
time.
Bh)
>
GB
(2)
>
imo
)O>)
25.00
x2
x6
xl
xl
Enter
the
desired
Choose
the
GRILL
Start
to
cook.
Check
the
display.
cooking
time
(26
min.]
function
NOTE:
in
this
case,
the
high
rack
is
recommended
for
grilling.
With
the
first
use
of
the
grill
mode,
the
grill
heating
element
could
smell
and
smoke.
To
prevent
this
operate
the
oven
without
food
for
approx.
10
minutes
in
the
grill
mode
before
the
first
use.
There
are
twe
types
of
dual
cooking
modes.
One
is
the
dual
cook
mode
by
combination
of
microwave
cooking
and
convection
cooking.
The
other
one
is
the
dual
cook
mode
by
combination
of
microwave
cooking
and
grill
cooking.
The
total
cooking
time
is
generally
shorter
with
dual
cooking
than
with
separate
cooking.
MICROWAVE
OVEN
GRILL
POWER
TEMPERATURE
*
If
you
want
to
adjust
the
microwave
power,
touch
the
MICROWAVE
key.
You
can
select
up
to
70%
power.
**
IF
you
want
to
adjust
the
oven
temperature,
touch
the
CONVECTION
key.
10%*
250°C**
|
OFF
MICROWAVE
/
CONVECTION
10%*
OFF
ON
MICROWAVE
/
GRILL
Example
1:
Suppose
you
want
to
bake
a
cake
for
25
minutes
on
DUAL
COOK
1,
temperature
180°C
and
microwave
power
30%.
NOTE:
1
1.
Do
not
do
wolayer
cooking
in
DUAL
COOK
mode.
=
2
2.
If
after
DUAL
COOK
1
has
started
you
wish
to
check
the
temperature
you
have
programmed,
simply
touch
the
CONVECTION
key.
The
°C
programmed
temperature
will
be
displayed
as
long
as
long
as
the
CONVECTION
key
is
pressed.
Enter
the
desired
cooking
time,(25
mins.}
Choose
DUAL
COOK
1
Choose
cooking
temperature,
180°C.
Choose
desired
power
level,
30%.

|
DUAL
COOKING
Example
2:
Example
2:
10
)
—e
Enter
the
desired
Suppose
you
want
to
cook
chicken
legs
for
25
MIN
\
MIN
)
cooking
time,
minutes
on
DUAL
COOK
2,
microwave
power
x5
(25
mins|]
70%.
1
Choose
DUAL
of
COOK
2.
(
i)
poe
desired
fe)
cw
power
level
70%.
sims)
>|
Start
to
cook
A
sequence
of
maximum
4
stages.
consisting
of
manual
cooking
time
and
mode,
can
be
set.
Example:
Suppose
you
want
to
cook
rice
for
5
minutes
on
100°:
microwave
power
and
then
for
16
minutes
on
30%
power.
Input
the
time
|
—#
|
Input
the
power
100%
Ist
Stage
2nd
Stage
NOTE:
1.
To
select
the
level
100%
power
in
the
final
sequence,
it
is
not
necessary
to
touch
the
MICROWAVE
POWER
LEVEL
key.
Cs]
mE
2.
{F
you
input
one
of
DUAL,
GRILL
or
CONVECTION
cooking
whilst
sequence
programming,
your
sequence
is
restricted
to
3
stages.
MICROWAVE
POWER
LEVEL
key
3.
if
you
input
wo
of
DUAL,
GRILL
or
CONVECTION
cooking
whilst
sequence
programming,
your
sequence
is
restricted
fo
2
stages.
ENGLISH

MINUTE
TIMER
You
can
use
this
key
as
a
timer
for
other
things.
Example
1:
Suppose
you
want
to
time
a
3
minute
long
distance
phone
call.
NOTE:
Any
time
up
to
99
minutes,
90
seconds
can
be
entered.
HOLD
As
well
as
five
power
levels
there
is
also
a
HOLD
setting
which
allows
you
to
leave
food
to
stand
at
the
end
of
the
cooking
period
or
during
cooking.
There
is
no
microwave
energy
during
the
holding
time.
Example
2:
Suppose
you
want
to
cook
food
for
2
minutes
and
30
seconds
on
50%
power
level
as
a
first
programme
and
then
you
want
to
leave
the
food
to
stand
for
1
minute
and
30
seconds
on
HOLD
as
a
second
programme.
NOTE:
You
can
enter
the
facility
for
up
to
99
minutes
and
90
seconds.
E
3
3
o
Enter
desired
time
(3
min.}
MIN
Start
the
TIMER.
Check
the
display
Enter
desired
time
(2
x2
y
x3
min.
and
30
sec.)
Choose
the
desired
Ge
=
power
level
50%
Enter
the
time
for
g
(1
min.
and
30
sec.}.
PS)
ew
moc
the
power
level
0%
power.
+1
min}
Start
to
cook
Check
the
display

MINUTE
PLUS/START
key
MINUTE
PLUS/START
key
The
MINUTE
PLUS/START
key
allows
you
to
operate
the
following
functions:
1.
Direet
Start.
You
can
start
to
cook
directly
on
100%
microwave
power
and
in
1
minute
steps
by
pressing
the
MINUTE
PLUS/START
key.
2.
Extending
the
cooking
time.
You
can
extend
the
cooking
time
in
multiples
of
1
minute,
by
pressing
the
MINUTE
PLUS/START
key,
during
the
cooking
process.
NOTE:
To
avoid
children’s
misuse,
the
MINUTE
|
PLUS/START
key
can
be
used
only
within
1
minute
after
a
preceding
operation.
13

CAUTION:
DO
NOT
USE
COMMERCIAL
OVEN
CLEANERS,
ABRASIVE,
HARSH
CLEANERS
OR
SCOURING
PADS
ON
ANY
PART
OF
YOUR
MICROWAVE
OVEN.
Oven
exterior
The
outside
of
your
oven
can
be
cleaned
easily
with mild
soap
and
water.
Make
sure
the
soap
is
wiped
off
with
a
moist
cloth,
and
dry
the
exterior
with
a
soft
towel.
Oven
controls
Open
the
door
before
cleaning
to
deactivate
the
oven
controls.
Care
should
be
taken
when
cleaning
the
control
panel.
Using
a
cloth
dampened
with
water
only,
gently
wipe
the
panel
until
it
becomes
clean.
Avoid
using
excessive
amounts
of
water.
Do
not
use
any
sort
of
chemical
or
abrasive
cleaner.
Oven
Interior
1)
For
cleaning,
wipe
any
splatters
or
spills
with
a
soft
damp
cloth
or
sponge
after
each
use
while
the
oven
is
still
warm.
For
heavier
spills,
use
a
mild
soap
and
wipe
several
times
with
a
damp
cloth
until
all
residues
are
removed.
2)
Make
sure
that
mild
soap
or
water
does
not
penetrate
the
small
vents
in
the
walls
which
may
cause
damage
to
the
oven.
3)
Do
not
use
spray
type
cleaners
on
the
oven
interior.
Turntable
and
Roller
stay
Remove
the
turntable
and
roller
stay
from
the
oven.
Wash
the
turntable
and
roller
stay
in
mild
soapy
water.
Dry
with
a
soft
cloth.
Both
the
turntable
and
the
roller
stay
are
dishwasher
safe.
Low
Rack
and
High
Rack
These
should
be
washed
in
a
mild
washing
up
liquid
solution
and
dried.
High
and
Low
racks
are
dishwasher
safe.
Door
To
remove
all
trace
of
dirt,
regularly
clean
both
sides
of
the
door,
the
door
seals
and
sealing
surfaces
with
a
soft,
damp
cloth.
Please
check
the
following
before
calling
for
service.
1.
Power
Supply
Check
the
power
plug
is
properly
connected
to
a
suitable
wall
outlet,
Check
the
line
fuse/circuit
breaker
is
functioning
properly.
2.
When
the
door
is
opened,
does
the
oven
lamp
light?
.
Place
a
cup
of
water
(approx.
150
ml
in
the
oven
and
close
the
door.
Programme
the
oven
for
one
minute
w
100%
power,
start
the
oven.
Does
the
oven
lamp
come
on?
Does
the
turntable
rotate?
NOTE:
The
turntable
turns
in
either
direction.
Does
the
ventilation
work?
YES
-_____..
NO
YES
NO
YES
.
NO
YES
NO
(Place
your
hand
over
the
ventilation
openings
and
check
for
air
flow.)
After
1
minute
does
the
signal
sound
and
cook
indicator
go
off?
YES
NO
Is
the
cup
with
water
warm
after
the
above
operation?
YES
___
NO
4.
Take
the
cup
out
of
the
oven
and
close
the
door.
Programme
the
oven
for
3
minutes
at
180°C.
After
3
minutes,
is
the
inside
of
the
oven
hot?
YES
NO
5.
Programme
the
oven
for
3
minutes
on
GRILL,
start
the
oven.
Alter
3
minutes
does
the
grill
heating
element
become
red?
YES
NO
If
you
answer
“No”
to
any
of
the
above
questions,
call
a
Service
Technician
appointed
by
SHARP
and
report
the
results
of
your
check.
See
inside
back
cover
for
details
of
address.

AC
Line
Voltage
Distribution
line
fuse/circuit
breaker
AC
Power
required:
Microwave
Grill
Convection
Dual
Microwave/Grill
Dual
Microwave/Convection
Output
power:
Microwave
Grill
Convection
Microwave
Frequency
Quiside
Dimensions
Cavity
Dimensions
Oven
Capacity
Turntable
Weight
Oven
lamp
:
230V,
50Hz,
single
phase
:
Minimum
16A
:
1.55kW
:
2.55kW
:
1.30kW
:
2.75kW
:
2.85kW
:
9OOW
[IEC
705)
:
1.2kW
:
1.3kW
:
2450MHz
:
520mm(W)
x
305mm(H}
x
478mm(D)
:
342mm(W)
x
195mm(H)
x
357mm(D}
:
24
litres
:
325mm
:
23kg
:
25W/230V
OPERATION
MANUAL
This
operation
manual
contains
important
information
which
you
should
read
carefully
before
using
your
microwave
oven.
IMPORTANT:
There
may
be
a
serious
risk
to
health
if
this
operation
manual
is
not
followed
or
if
the
oven
is
modified
so
that
it
operates
with
the
door
open.
This
oven
complies
with
the
requirements
of
Directives
89/336/EEC
and
73/23/EEC
as
amended
by
93/68/EEC.
Table of contents
Other Sharp Microwave Oven manuals

Sharp
Sharp R-22JT User manual

Sharp
Sharp Carousel R-880B User manual

Sharp
Sharp SuperSteam AX-1200K User manual

Sharp
Sharp R642BKW User manual

Sharp
Sharp YC-MS252A User manual

Sharp
Sharp Carousel R-395N User manual

Sharp
Sharp R-67B1S User manual

Sharp
Sharp R-3V97 User manual

Sharp
Sharp R-65ST Instruction Manual

Sharp
Sharp Carousel R-1870 User manual

Sharp
Sharp SMD2470AS User manual

Sharp
Sharp R-21AT User manual

Sharp
Sharp EBR-9900W User manual

Sharp
Sharp R-371 User manual

Sharp
Sharp R-617R Instruction Manual

Sharp
Sharp R-260L Use and care manual

Sharp
Sharp R-360S User manual

Sharp
Sharp R-937 User manual

Sharp
Sharp Carousel R-210F Use and care manual

Sharp
Sharp R98STM-AA Instruction Manual