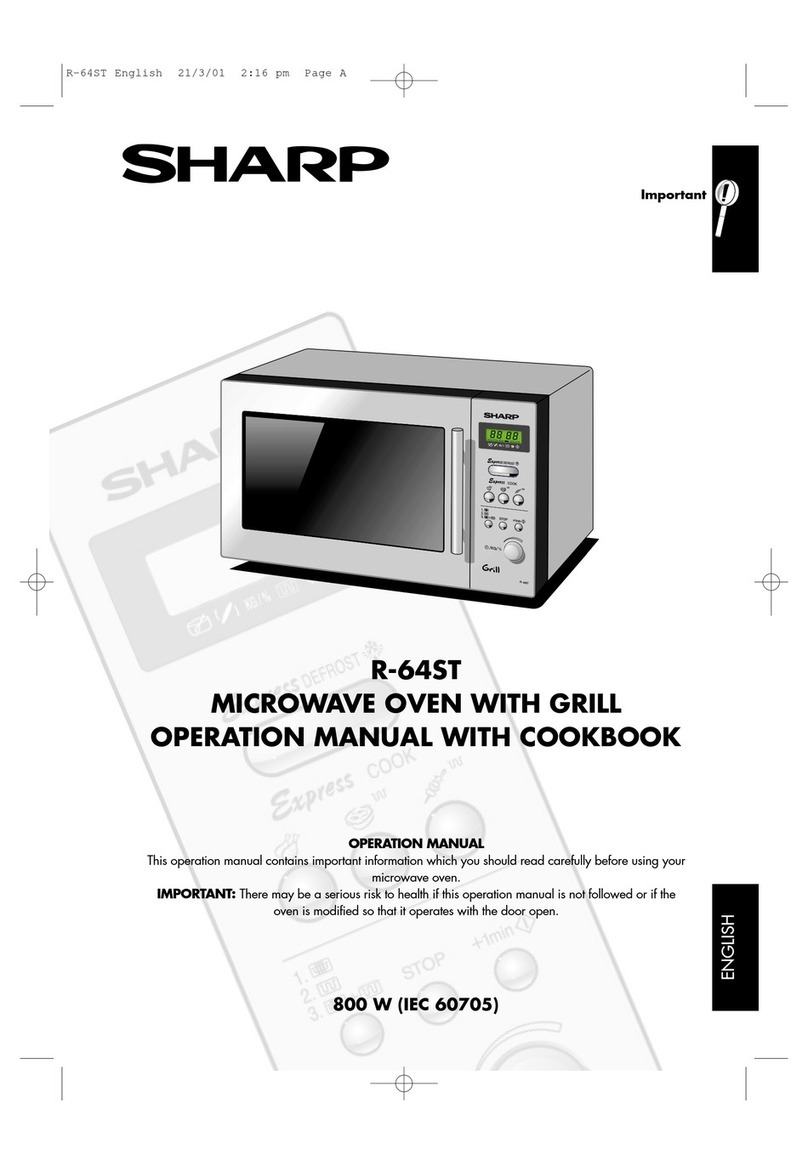
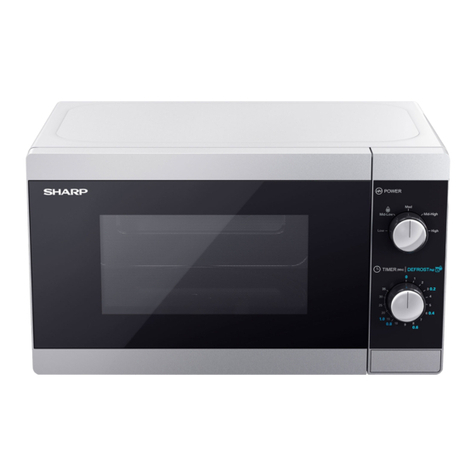
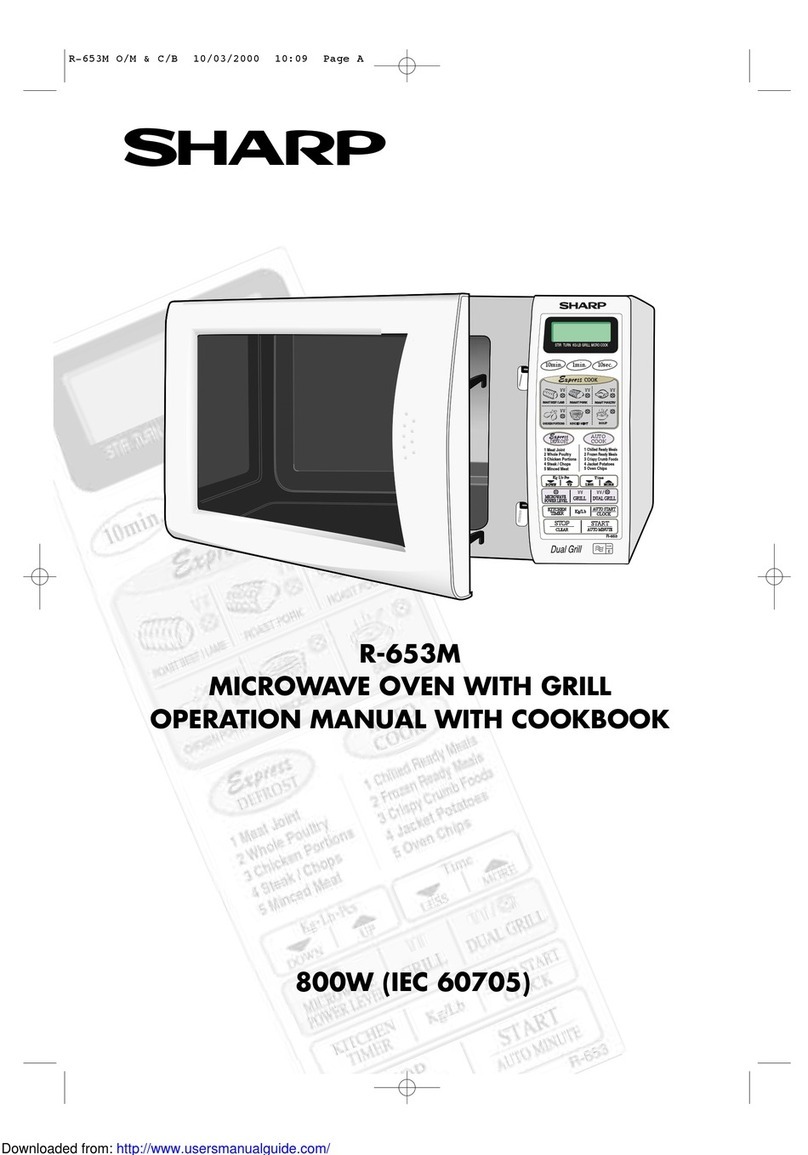
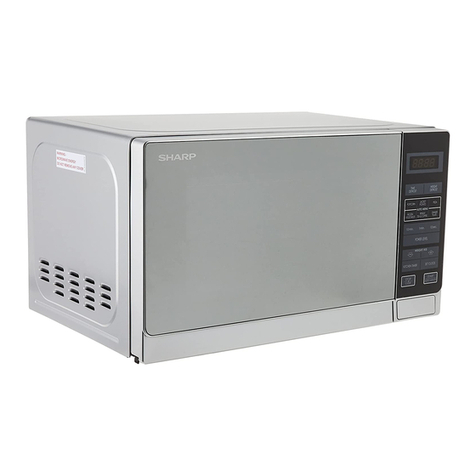
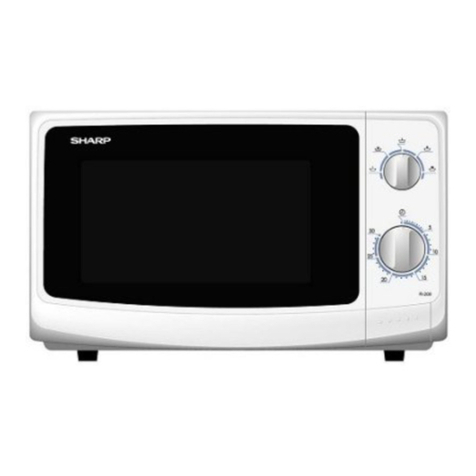
Sharp R-8320E User manual

SHARP SERVICE MANUAL 9
KASMY82101 R J’M
SHARP
CONVECTION MICROWAVE OVEN .
R-8320E
In the interest of user-safety the set should be restored to its original
condition and only parts identical to those specified be used.
SHARP CORPORATIOltl l

SERVICE MANUAL
SHARP
R-8320E
FOREWORD
This Manual has been prepared to provide Sharp Service
Personnel with complete Operation and Service Information
for the Sharp Convection Microwave Oven, R-8320E.
It is recommended that service personnel carefully study
the entire text of this Manual so they will be qualified to
render satisfactory customer service.
CAUTION
MICROWAVE RADIATION
Personnel should not be exposed to the microwave
energy which may radiate from the magnetron or other
microwave generating devices if it is improperly used or
connected.
All input and output microwave connections, waveguides,
flanges, and gaskets must be secured.
Never operate the device without a microwave energy
absorbing load attached.
Never look into an open waveguide or antenna while the
device isenergized.
SHARP CORPORATION
OSAKA, JAPAN
PRODUCT DESCRIPTION ,*,<-;,
OPERATING
‘,.rx.:.
INSTRUCTIONS ^I__.”
x,”;,;
I :I OPERATION kg&$
,,~T*gg
SERVICING
PANEL ASSEMBLY
c2 REPLACEMENT AND .“?
ADJUSTMENT
PARTS LIST

TABLE OF CONTENTS
Page
FOREWORD . . . . . . . . . . . . . . . . . . . . . . . . . . . . . . . . . . . . . . . . . . . . . . . . . . . . . . . . . . . . . . . . . . ..l
CAUTION, MlROWAVE RADIATION . . . . . . . . . . . . . . . . . . . . . . . . . . . . . . . . . . . . . . . . . . . . . . .1
THUMB INDEX..................................................................l
CHAPTER I PRODUCT DESCRIPTION . . . . . . . . . . . . . . . . . . . . . . . . . . . . . . . . . . . . . . . . . . . . . .5
Explanation of Microwave Cooking and Convection Cooking. . . . . . . . . . . . . . . . . . . . . . . . . . . . . . . . . . .5
Specifications. . . . . . . . . . . . . . . . . . . . . . . . . . . . . . . . . . . . . . . . . . . . . . . . . . . . . . . . . . . . . . . . . .5
CHAPTER II OPERATING INSTRUCTIONS . . . _. . . . . . . . . . . . . . . . . . . . . . . . . . . . . . . . . . . . .6
Operation of Auto-TouchTM Control Panel . . . . . . . . . . . . . . . . . . . . . . . . . . . . . . . . . . . . . . . . . . . _ . .6
Auto-TouchTM Control Panel . . . . . . . . . . . . . . . . . . . . . . . . . . . . . . . . . . . . . . . . . . . . . . . . . . . . . . .7
Auto-TouchTM Operation Check . . . . . . . . . . . . . . . . . . . . . . . . . . . . . . . . . . . . . . . . . . . . . . . . . . . . .8
Operation for Clock Setting. . . . . . . . . . . . . . . . . . . . . . . . . . . . . . . . . . . . . . . . . . . . . . . . . . . . . . . . .9
Operation for Microwave Cooking . . . . . . . . . . . . . . . . . . . . . . . . . . . . . . . . . . . . . . . . . . . . . . . . . . . 10
Introduction to Convection Cooking. . . . . . . . . . . . . . . . . . . . . . . . . . . . . . . . . . . . . . . . . . . . . . . . . .I3
Accessories...................................................................13
ConvectionHeating.............................................................l3
Convection Broiling. . . . . . . . . . . . . . . . . . . . . . . . , . . . . . . . . . . . , . . . . . . . . . . . . . . . . . . . . . . . .I4
MixCooking.-.................................................................i5
MixRoasting.................................................................15
MixBaking....................................................................16
Operation for Convection Cooking . . . . . . . . . . . . . . . . . . . . . . . . . . . . . . . . . . . . . . . . . . . . . . . . . . .17
Operation for Mix Cooking. . . . . . . . . . . . . . . . . . . . . . . . . . . . . . . . . . . . . . . . . . . . . . . . . . . . . . . .21
Operation for Special Function Cooking . . . . . . . . . . . . . . . . . . . . . . . . . . . . . . . . . . . . . . . . . . . . . .24
Operation for Auto Start Cooking . . . . . . . . . . . . . . . . . . . . . . . . . . . . . . . . . . . . . . . . . . . . . . . . . . .27
Operation for Memory Cooking. . . . . . . . . . . . . . . . . . . . . . . . . . . . . . . . . . . . . . . . . . . . . . . . . . . . .29
CHAPTER Ill OPERATION . . . . . . . . . . . . . . . . . . . . . . . . . . . . . . . . . . . . . . . . . . . . . . . . . . . . . .31
Normal Cooking Sequence . . . . . . . . . . . . . . . . . . . . . . . . . . . . . . . . . . . . . . . . . . . . . . . . . . . . . . . .31
Description of Operating Sequence (Australia Model). . . . . . . . . . . . . . . . . . . . . . . . . . . . . . . . . . . . . . .31
OffCondition.....................................................,.......31
Microwave Cooking Condition. . . . . . . . . . . . . . . . . . . . . . . . . . . . . . . . . . . . . . , . . . . . . . . . . .32
HighCooking.........................................................32
Medium High, Medium or Medium Low/Defrost Cooking . . . . . . . . . . . . . . . . . . . . . . . . . . . .32
Convection Cooking Condition . . . . . . . . . . . . . . . . . . . . . . . . . . . . . . . . . . . . . . . . . . . . . . . . .33
Preheating Condition. . . . . . . . . . . . . . . . . . . . . . . . . . . . . . . . . . . . . . . . . . . . . . . . . . . .33
Convection Cooking Condition . . . . . . . . . . . . . . . . . . . . . . . . . . . . . . . . . . . . . . . . . . . . .33
Automatic Mix Cooking Condition. . . . . . . . . . ~ . . . . . . . ., . . . . . . . . . . . . . . . . . . . . . . . . . . . .34
Description of Operating Sequence (South Africa Model) . . . . . . . . . . . . . . . . . . . . . . . . . . . . . , . . . . . .38
I
/ OffCondition.............................................................38
I Microwave Cooking Condition. . . . . . . . . . . . . . . . . . . . . . . . . . . . . . . . . . . . . . . . . . . . . . . . . .38
HighCooking.........................................................38
Medium High. Medium or Medium Low/Defrost Cooking . . . . . . . . . . . . . . . . . . . . . . . . . . . ..38
Convection Cooking Condition . . . . . . . . . . . . . . . . . . . . . . . . . . . . . . . . . . . . . . . . . . . . . . . . .39
I Preheating Condition. . . . . . . . . . . . . . . . . . . . . . . . . . . . . . . . . . . . . . . , . . . . . . . . . . . .39
I Convection Cooking Condition . . . . . . . . . . . . . . . . . . . . . . . . . . . . . . . . . . . . . . . . , . . . ,3g
Automatic Mix Cooking Condition. . . . . . . . . . . . . . . . . . . . . . . . . . . . . . . . . . . . . _ . . , . . . . . .40
I Description and Function of Components . . . . . . . . . . . . . . . . . . . . . . . . . . . . . . . . . . . , . . . . , . . . . .44
/ 0venh-w . . . . . . . . . . . . . . . . . . . . . . . . . . . . . . . . . . . . . . . . . . . . . . . . . . . . . . . . . . . ...44
I Cooling Fan Motor . . . . . . . . . . . . . . . . . . . . . . . . . . . . . . . . . . . . . . . . . . . . . . . . . . . . . . . . .44
I ’ Turntable Motor. . . . . . . . . . . . . . . . . . . . . . . . . . . . . . . . . . . . . . . . . . . . . . . . . . . . . . _ . . . .44
Thermistor...............................................................44
Magnetron Thermt! Cut-out. . . . . . . . . . . . . . . . . . . . . . . . . . . . . . . . . . . . . . . . . . . . . . . . . . . .44
1
CookRelay..............................................................44
2
t
HeaterRelay.. ......................................................... ..$4
StopSwitch..............................................................4 4
Door Open Mechanism. ..................................................... .44
Convection Cooking System .................................................. .45
HeatingElement...........................................................4 5
Upper and Lower Latch Switches. .............................................. .45
Monitor Switch (Australia Model). .............................................. .46
PowerTransformer.........................................................4 6
Voltage Doubler Circuit ..................................................... .46
MagnetronTube...........................................................4 6
Damper Operation. ........................................................ .47
RelayUnit...............................................................4 8
CHAPTER IV SERVICING ..................................................... ..5 1
Troubleshooting Guide. ......................................................... .51
Off Condition. ........................................................... .51
Microwave Cooking Condition. ................................................ .52
Convection Cooking Condition ................................................ .53
Test Procedures. .............................................................. .54
Magnetron Assembly Test. ................................................... .54
Power Transformer Test. .................................................... .55
RectifierTest.............................................................5 5
High Voltage Capacitor Test .................................................. .56
Upper Latch Switch Test .................................................... .56
Lower Latch Switch Test .................................................... .56
MonitorSwitchTest........................................................5 6
BlownFuse..............................................................5 7
Magnetron Therm0 Cut-out Test ............................................... .57
Cook Relay or Heater Relay Test. .............................................. .57
StopSwitchTest...........................................................5 7
Touch Control Panel Assembly Test ............................................. .57
Heating Element Test. ...................................................... .58
ThermistorTest...........................................................5 8
Damper Motor Test. .................................. _.................... .58
Damper Switch Test. ....................................................... .58
RelayUnitTest............................................................5 9
CHAPTER V TOUCH CONTROL PANEL ASSEMBLY ............................... .60
Outline of Touch Control Panel .................................................... .60
KeyUnit................................................................6 0
ControlUnit..............................................................6 0
Description of LSI. .......................................... .: ................ .63
LSI (l-l : IX2107YA). ...................................................... .63
LSI (l-l: IX2075YA). ............................... : ...................... .69
Power Source Circuit ............................................................ .75
/3Circuit.. ................................................................ ..7 6
ACLCircuit..................................................................7 6
BuzzerCircuit.................................................................7 6
Thermistor Sensor Circuit. ....................................................... .77
Indicator Circuit. ............................................................. .78
Servicing....................................................................7 9
Checker.....................................................................B 0
UseofChecker............................................................8 0
Connection Method. ....................................................... .80
External of Checker. ....................................................... .81
Checker Circuit Diagram. .................................................... .82
TestProgram.................................................................8 3
Troubleshooting Guide. ......................................................... .87
Adjustment of Thermistor Sensor Circuit. ............................................. .97
3

CHAPTER VI COMPONENT REPLACEMENT AND ADJUSTMENT PROCEDURE ......... .98
Warning.....................................................................g 8
Outer Case Removal. ........................................................... .99
High Voltage Components Removal ................................................. .99
Relay Unit, Cook Relay or Heater Relay Removal. ....................................... .99
Turntable Motor Removal. ....................................................... 100
Magnetron Assembly Removal. .................................................... 100
Cooling Fan Motor Removal ...................................................... 100
Convection Motor Removal. ........ : ............................................ .I00
Damper Motor and Damper Switch Removal ........................................... 105
Heating Element or Convection Fan Removal. .......................................... 105
Oven LampRemoval...........................................................lO 6
Upper Latch Switch and Monitor Switch (Australia Model) Removal. ........................... 106
Lower Latch Switch Removal ..................................................... 106
Upper Latch Switch, Lower Latch Switch and Monitor Switch (Australia Model)
Adjustment .............................................................. ..I0 7
Control Panel Assembly and Components Removal ....................................... 108
Door Replacement and Adjustment ................................................. 110
MICROWAVE MEASUREMENT PROCEDURE . . . . . _. . . . . . . . . . . . . . . . . . . . . . . . . . . . . . . .I1 1
SCHEMATIC DIAGRAM (Australia Model) . . . . . . . . . . . . . . . . . . . . . . . . . . . . . . . . . . . . . . . . . . I12
PICTORIAL DIAGRAM (Australia Model) . . . . . . . . . . . . . . . . . . . . . . . . . . . . . . . . . . . . . . . . . .I13
PICTORIAL DIAGRAM (South Africa Model) . . . . . . . . . . . . . . . . . . . . . . . . . . . . . . . . . . . . . . . I 15
SCHEMATIC DIAGRAM (South Africa Model) ...................................... .I17
PRINTED WIRING BOARD (Control Unit) ......................................... 118
CONTROL PANEL AND RELAY UNIT CIRCUIT .................................. 119
PRINTED WIRING BOARD (Relay Unit). . . . . . . . . . . . . . . . . . . . . . . . . . . . . . . . . . . . . . . . . . . 121
PACKING AND ACCESSORIES . . . . . . . . . . . . . . . . . . . . . . . . . . . . . . . . . . . . 122
PARTS LlST..................................................................l23
4

CHAPTER I
PRODUCT DESCRIPTION
I
EXPLANATION OF MICROWAVE COOKING AND CONVECTION COOKING
The Sharp Convection-Microwave oven uses microwave
energy and the sheath heater to produce heat in the food to
be cooked.
Unlike conventional ovens, microwave energy will cook
foods without applying external heat.
Microwaves which are short electromagnetic waves of RF
(radio frequency) energy, pass through materials such as
glass, paper, china, and most plastics. Materials such as
metal and aluminum foil tend to reflect microwaves and
may be used only as recommended in the cooking
instructions.
I
ITEMS
Power Requirements
I
Microwave Output Power
I
Convection Output Power
Case Dimensions
Width
Height
Depth
Cooking Cavity Dimensions
Width
Height
Depth
Turntable diameter
Control Complement
Weight
Materials with a high moisture content, like most foods,
will absorb microwave energy. As the microwave energy,
at a frequency of 2,450 Megahertz enters the food, the
molecules align themselves with the energy. However,
cooking by microwave energy only, produces no brown-
ing or searing (unless cooking a roast of sufficient thick-
ness). This microwave oven is, therefore, equipped with
a sheath heater to provide browning of the food.
The combination of the heater plus high-speed circulation
of air by a circulating fan around the food provides fast
cooking and browning of foods conventionally with or
without the addition of microwave energy.
SPECIFICATIONS
DESCRIPTIONS
220/24OV
50 Hz
Single phase, 3 wire earthed
650 W (2 litre water load)
I
.5
kW
627 mm
408 mm including feet
480 mm
395 mm
256 mm
422 mm
376 mm
Touch Control System
Cook Pad and Stop Pad
Timer: 99 min. 99 sec.
Clock
Microwave Power for Variable Cooking
Repetition Rate:
High . . . . . . . . . . . .
.Full
Power throughout the cooking time
Med High. . . . . . . .
.
.24
sec. ON, 8 sec. OFF, approx. 70% of high
Med . . . . . . . . . . . .
.I8 sec. ON, I4 sec. OFF, approx. 50% of high
Med Low/Defrost . .
. .I2 sec. ON, 20 sec. OFF, approx. 30% of high
Convection Temperature Control Range:
40°C,
70°C,
I
IO’C,
130°C,
I
50°C,
180°C,
200°C, 220°C, 230°C,
25O’C.
Approx. 34 kg
5

CHAPTER I I
OPERATING INSTRUCTIONS
OPERATION OF AUTO-TOUCHTM CONTROL PANEL
This Auto-Touch Convection Microwave Oven uses a microprocessor, the electronic brain that provides
a wide variety of cooking programs which could not be achieved by conventional control methods.
The operation of the oven is controlled by touching the appropriate pads arranged on the surface of
the control panel. The lighting digital readout will display the cooking time, convection temperature,
memory or time of day, and indicators show the variable cooking setting or cooking function you have
programmed.
An audible entry signal tone should be heard each time you touch the control panel to make a correct
entry. If you do not hear this sound,
1)
you have not used enough pressure in touching the pad,
2)
you have made more entries than the control panel will accept,
3) you have made an incorrect entry.
In addition to the entry signal tone, an audible signal will sound for approximately 2 seconds at the
end of the cooking cycle.
The following pages give complete instructions for using the Auto-Touch control system. Please use
these instructions and practice programming the oven step by step until you are thoroughly familiar
with its operation.
In giving directions, examples of foods have been used so that you may become familiar with the
practical uses for these features. However, we suggest that
yocr
first practice operating the oven with
one cup of water in a glass measuring cup inside rather than food.
Do not operate the oven empty.
*You cannot program the oven if the door is not closed tightly.
*
During cooking, the program cannot be changed until the STOP pad is touched.
All functions are locked in to prevent accidental changes.
Multiple Sequence Cooking
This Auto Touch Convection Microwave Oven can be programmed for multiple cooking sequences for
microwave, convection and combination convection microwave. Some of the sequences you might use
in cooking include:
FIRST SEQUENCE SECOND SEQUENCE THIRD SEQUENCE FOURTH SEQUENCE
Microwave Microwave Microwave Microwave
-e
Microwave Convection
Convection Microwave
I
Preheat
Convection
Preheat
Convection Convection
Preheat
Auto Mix
Preheat
Convection Microwave
Check your Sharp Carousel Convection Microwave Cookbook for ideas on when to use multiple
sequence cooking.
6

AUTO-TOUCHm
CONTROL PANEL
MEM
AUTO
8
1
220~
1
MED
,
,
19
I=II
MEDMGH
I
XONVECTION
FAN SYMBOL
LIGHTED DIGITAL DISPLAY
Shows readout of cooking time, convection
temperature or time of day.
INDICATORS
Indicator lights for Convection
(CONV),
Variable Cooking, Cook, Mix, Memory
(MEM)
and Auto Start (AUTO).
PROGRAM SELECTOR PADS
Touch to set Auto Start/Clock, Memory
Entry and Memory Recall.
-NUMBER AND TEMPERATURE SELEC-
TION (CONVECTION) PADS
Touch to enter cooking times, clock time
or convection temperature (convection).
FUNCTIONS PADS
Touch to select microwave varibale power
settings and automatic convection micro-
wave setting. If no function pad is touched,
HIGH is automatically selected.
-TIMER
PAD
Touch to set minute timer.
CLEAR PAD
Touch to erase cooking program.
COOK PAD
Touch to start operation.
STOP PAD
Touch to stop operation of oven during
cooking.
7

.
AUTO-TOUCHTM OPERATION CHECK
I
Clock
1. Plug the power cord into a three-pronged electrical outlet (240V for
Australia/220V
for South
Africa, 50Hz, 10 amp or more, AC only).
2. The digital display will show
88:88
and flash on and off every second. Touch the CLEAR
pad once and
1-1
will appear. The timer will begin counting up each minute. After one
minute the display will show
]::3]
1. Place the turntable inside the oven cavity. When the door is opened, the oven lamp comes on
automatically.
2. Place one cup of room temperature water in a glass measuring cup on the turntable inside the
oven. Do not attempt to operate the oven without the turntable in place.
3. Close the door securely. Oven lamp will go out.
4. Program the oven to cook three minutes at HIGH. Touch the number pads in the following
sequence: 3 , 0 , 0 .
5. Touch COOK pad to activate the oven. The cooling fan will start, the turntable will begin to
rotate and the oven lamp will light.
6. After three minutes, an audible signal will sound and the unit will turn off.*
7. The water should be bubbling if operating normally.
“When the door is opened during the cooking process, the timer automatically stops. The
timer and cooking process start again when the door is closed and COOK pad is touched.
II
(
Convection
(
1. Place the turntable inside the oven cavity. When the door is opened, the oven light comes on
automatically.
2. Close door securely. Oven light will go out.
3. Program the oven to preheat to 70°C. Touch CONVECTION pad followed by 70°C pad.
4. Touch COOK pad. The red Convection Fan Symbol in the display will flash on and off
and the display will show
(ICI..
The oven light and fan will come on, the turntable will
begin rotating and preheating will begin.
5. When the oven temperature reaches
7O”C,
the Convection Fan Symbol will stop flashing and
will begin rotating. An audible signal will sound 4 times. The oven will then begin temperature
holding operation.
6. The oven will automatically hold the temperature at
70°C
for 15 minutes. After this time has
elapsed, an audible signal will sound 4 times and the unit will turn off.
’
7. The oven cavity will be hot if operating normally.”
Avoid touching oven surface and door as intense heat could cause burns.
8. If the door is opened or STOP pad is touched during the preheating operation, the selected
preheat temperature is displayed but preheating will stop. The oven will continue preheating
when the door is closed and COOK pad is touched.
9.
If
the door is opened or STOP pad is touched during the temperature holding operation,
the program is cancelled and the display will return to time of day.
“lf
the oven emits an odor, program the oven to preheat to 250°C to “burn off” odor. Touch
CONVECTlON
pad, 250°C pad and COOK pad. This is a non-toxic odor common to new
appliances.
8

OPERATION FOR CLOCK SETTING
This oven functions as a clock to keep the time of day. To set the clock, follow this procedure.
When oven is plugged in, the display will
show-f:,
flashing on and off every second. Touch the
CLEAR pad;
1x1
will appear.
*
Suppose you want to enter the correct time of day
12:30
(A.M. or P.M.)
-
Step
Procedure
Pad Order Display
1.
Touch CLOCK pad,
2.
Enter the correct time of day by
touching the numbers in sequence.
3.
1
Touch CLOCK pad
again.
1
m
1
11
The clock is now set and will keep the time of day. If power to the unit is interrupted, the display will
intermittently show
im]
after the power is reinstated. To reset the clock, touch CLEAR
pad
and
then repeat the steps above.
NOTE: This is a 12 hour clock.
1-1
will appear in the readout if you attempt to enter an in-
correct clock time. For example, if *you attempt to enter 8:61
or13:00,-1
indicating
an error will appear. To
erase[EcCj
touch CLEAR pad. If you accidentally touch more
than 4 number pads, the last 4 numbers you have touched will appear on the display.

OPERATION FOR MICROWAVE COOKING
Throughout This Carousel Convection Microwave Cookbook you will find step by step directions for
each recipe. Basic instructions follow:
1. Make sure the oven is plugged into a 3-pronged, grounded 240V
(Australia)/220V
(South Africa),
50 Hz, 10 amp household circuit. When oven is plugged in, the display will show
(61
,flashing
on and off each second. Touch the CLEAR pad;
[I
will appear.
2. Always make certain the metal turntable is seated and in place. The oven should not be used with-
out the turntable in place, and it should never be restricted so that it cannot rotate.
3. The Variable Cooking Control on your Sharp Convection Microwave Oven allows you to select the
amount of microwave energy and the rate of cooking or defrosting. There are four levels or settings
for cooking: HIGH, MED HIGH, MED and MED LOW/DEFROST. Your cookbook explains the
use of this feature.
4. Be sure to select the recommended power level before beginning to cook. Refer to Operation of
Auto-Touch Control Panel for proper procedure. If you do not touch a setting on the Variable
Cooking Control panel, the oven will automatically cook at HIGH. Each recipe in your cookbook
gives instructions for the setting best suited for that particular food category. As you become more
familiar with the use of the Variable Cooking Control and microwave cooking, you will be able to
judge which power level to use for various foods.
5. If food does not seem to be heating properly, check the indicator immediately above the lighted
digital display. Be sure the Variable Cooking Control is on the proper setting.
6. The oven is programmed by touching the appropriate Auto-Touch pads.
[
ToCookat
High
]
Many foods are cooked at HIGH (100% power) for best results. The Variable Cooking Control allows
you to seledt the rate of microwave cooking, but the oven will automatically operate at HIGH if no
Variable Cooking Control pad is touched. If you wish to cook at HIGH, it is not necessary to touch
the HIGH pad. For other Variable Cooking Control levels, the desired setting must be entered.
*
Suppose you want to heat 2 cups coffee for 1 minute 30 seconds at HIGH.
I
I
Step
Procedure
1.
Enter desired cooking time.
2.
Touch the COOK pad.
Pad Order
I
Display
1
1
[4o"cij
[I
I
I
COOK
I
The cooking time will count down to zero. When the timer reaches zero, the indicators will go out
and an audible signal will sound. The time of day will reappear on the display. Microwave energy will
stop.
10

To Cook by Variable Cooking Control
This microwave oven has four preset power levels.
\
Approximate percentage of
microwave power.
(Full Power)
100%
IGH (Roast)
70%
(Simmer)
50%
1
MED LOW/DEFROST (Defrost)
30%
!
Some foods give best results when cooked more slowly at a lower cooking power. Your cookbook will
indicate
the recommended variable setting for each recipe. See your Sharp Carousel Convection Micro-
wave Cookbook for guidelines on how to use the Variable Cooking Control.
*
Suppose you want to heat soup for 2 minutes 15 seconds at MED
HIGH.
Step Procedure
Pad Order Display
1.
Enter desired cooking time.
2. Select desired Variable Cooking
Control setting.
3.
Touch the COOK pad.
The cooking time will count down to zero. When the timer reaches zero, all indicators will go out and
an audible signal will sound. The time of day will reappear on the display.
NOTE: If you accidently touch the wrong Variable Cooking Control pad, immediately touch the
correct pad. The last pad touched will be the setting the oven accepts, For example, if
you
touch
MEDpad
and then immediately touch MED HIGH pad, the oven will cook at MED
HIGH.
-e
11

To Cook at Multiple Sequence
Suppose you want to program the oven to cook at HIGH and reduce to MED HIGH.
Check the microwave recipe section of This Carousel Convection Microwave Cookbook for ideas on
when to use multiple sequence cooking. You can set 4 sequences.
*
Suppose
you
want to roast beef for 5 minutes at HIGH, and then continue to cook for 30 minutes
at MED HIGH.
Procedure Pad Order Display
.
1.
Enter desired time for first cook-
ing sequence.
2.
Select first Variable Cooking Con-
trol setting.
3. Enter desired time for second
cooking sequence.
4. Select second Variable Cooking
Control setting.
5.
Touch the COOK pad.
The timer begins to count
down. When it reaches zero.
--
When the timer reaches zero, all indicator lights will go out and an audible signal will sound. The time
of day will reappear on the display.
NOTE: If HIGH isselected
asthe
final sequence, it is not necessary to touch HIGH pad. If HIGH
is programmed as the first, second or third sequence, HIGH pad must be touched.
12

INTRODUCTION TO CONVECTION COOKING
Convection cooking is a not-so-new form of food preparation that has been used by professional chefs
for three decades for roasting and baking. Hot air is circulated throughout the oven cavity by a high
speed fan. The constantly moving air surrounds the food to quickly heat the outer portion, thereby
sealing in moisture and natural juices. This “sealing-in” process results in more
flavorful
foods cooked
in less time and in many cases at a reduced temperature. The oven can be filled to capacity, using
both the turntable and the baking rack, with no increase in cooking time.
While all foods that are roasted, baked or broiled benefit from convection cooking, the added micro-
wave feature of your new oven makes it possible to cook a wide range of foods in combination
-
that
is with convection, then microwaves or vice-versa.
This section of the Operation Manual explains the use of the oven for Convection heating alone and
combination cooking. Please use it as a guide along with the Carousel Convection Microwave cook-
book.
ACCESSOR!ES
The following accessories were designed especially for use in the Sharp Convection Microwave Oven.
The racks are for convection or combination cooking only; do not use for microwave cooking alone.
Do not substitute similar types of racks for these specially designed ones.
Baking Rack
Broiling Trivet
-
This rack is used for two-levels cooking,
-
Used for roasting or broiling to allow
such as layer cakes, muffins, cookies, etc. juices to drain away from food.
CONVECTION HEATING
Some foods are best when cooked using convection heating alone. These are foods which often have
a cooking time of 15 minutes or less and usually need quick crisping and browning. These include:
Appetizers
-
frozen, pastry-type, or other
Biscuits and rolls
-
dairy case, brown n’serve, your recipe
Brownies
-
mix, your recipe
Biscuits
-
mix, slice n’bake, frozen, your recipe
Cream puffs, puff pastry, turnovers, etc.
Fish sticks
-
frozen, breaded
Muffins
-
mix, your recipe
Pie crust
-
frozen, mix, your recipe
Pizza
-
fresh, frozen, or your recipe
Souff
I&
Basic Convection Heating Procedure
1. Consult recipe or package directions for temperature and time.
2. Preheat oven if required by recipe or package directions.
3. Food may be cooked directly on turntable if appropriate, or on two levels using baking rack and
appropriate baking vessel. Example: Fish sticks may be cooked directly on turntable. Muffins may
be cooked on 2 levels using the baking rack and two
&muffin
baking pans.
4. Check for doneness at the end of cooking time.
13

/Helpful
1. Do not cover turntable or baking rack with aluminum foil. It interferes with the flow of air that
cooks food.
2. If food is not done when checked after cooking time, let stand in oven one or two minutes to
complete cooking.
3. Round pizza pans are excellent cooking utensils for many convection-only items. Choose pans that
do not have extended handles.
Recommended Cooking Utensils
Sharp Carousel metal turntable
Baking rack
Metal baking pans
Paper board containers usable in oven
Aluminum foil containers
Heat resistant glass
Corning Ware@
CONVECTION BROILING
This Convection Microwave Oven wil broil meats, fresh or frozen to perfection! As in conventional
cooking, broiling time will vary with thickness as well as weight. For best results use the directions
that follow.
Basic Convection Broiling Procedure
1. Preheat oven 10 minutes at 250°C.
2. Prepare and season meat on both sides, as desired.
3. Place meat on broiling trivet or turntable.
4. Consult broiling chart in your Sharp Carousel Convection Microwave Cookbook; set timer for
correct cooking time.
5. Turning meat over is not necessary.
6. Test for doneness; slit center of meat, check for desired
color;
red
-
rare, pink
-
medium, gray
-
well done.
jHelpfulHints
-.
1. Do not cover broiling trivet with aluminum foil. It interferes with the flow of air that cooks food.
2. For faster clean up spray trivet and turntable with nonstick vegetable spray.
3. To eliminate excess fat in broiling, use broiling trivet.
4. Broiling may be done ahead of time, then individual portions sliced and reheated with microwave
power (MEDIUM setting) as needed.
5. Hot dogs cooked on the broiling trivet may be turned over to give an even, grilled appearance.
Recommended Broiling Utensils
Sharp recommends only the use of the metal Carousel turntable, and the broiling trivet and baking
rack accessories that are included with the oven,
14

MIX COOKING
With the exception of those foods that cook best by convection heating alone, most foods are well
suited to mix cooking using either the LOW MIX or HIGH MIX setting.
The marriage of convection and microwave cooking produces juicy roasts, moist and tender cakes
and fine textured breads, all with just the right amount of browning and crispness.
MIX ROASTING
Mix roasting in the Sharp Convection Microwave Oven is a simple task when you follow the instruc-
tions given below. The results are juicy, crisp browned meats done to your liking.
Basic Roasting Procedure
1. Place meat directly on the turntable or on the metal broiling trivet, or in a shallow roasting pan on
the turntable, as you prefer.
2. Season, as desired.
3. Consult chart in your Sharp Carousel Convection Microwave Cookbook for roasting temperature
and timing.
4. Program oven for appropriate cooking time and mix setting. Change temperature if recipe requires.
5. Check for desired doneness using a meat thermometer. If desired, a dual safe microwave/conven-
tional thermometer may be inserted in the meat at the
beginning
of
cooktime.”
6. Let meat stand tented with to 15-10 minutes before slicing.
*
A dual safe thermometer is specially designed to withstand high temperature and can safely be used
with heat or microwaves. Do not use conventional meat thermometers for mix cooking and do not
use microwave only thermometers for mix cooking.
1
Helpful Hints
1
1. If roasting frozen meat, insert dual safe meat thermometer halfway through cooking time.
2. Thin sections of meat, and wingtips and legs of poultry that may overcook, can be shielded with
small pieces of aluminum foil.
3. Less tender cuts of beef can be roasted and tenderized using oven cooking bags.
4. For true roasting, and fewer calories, use metal broiling trivet to hold meat out of its juices.
5. If gravy is desired, roast in glass utility dish, remove meat to carving board, then microwave gravy.
Recommended Roasting Utensils
Sharp Carousel metal turntable
Broiling trivet
Shallow metal roasting pans
Aluminum foil containers
Heat resistant glass
Corning Ware@
15

MIX BAKING
Baking with the Sharp Convection Microwave Oven is fast and simple. Using convection heat first
gives baked goods their structure and, of course, their browned appearance; finishing with microwaves
cooks the inside to a perfect doneness in a shorter time.
Basic Mix Baking Procedure
1
1. Consult Mix Baking techniques in your Sharp Cookbook for baking temperature.
2. Program oven for appropriate cooking time and mix setting. Change temperature if recipe requires.
3. Set Convection Cooking time.
4. Check for doneness after microwave time has elapsed. If not completely done, let stand
few minutes to complete cooking. in oven a
I
Recommended Baking Utensils
Sharp Carousel metal turntable
Baking rack
Broiling trivet
Metal baking pans
Paper board containers usable in oven
Aluminum foil containers
Heat resistant glass
Corning Ware@
El
Note
During mix baking some metal baking utensils may cause arcing when they come in contact with the
turntable, oven walls or accessory racks. Arcing is a discharge of electricity that occurs when micro-
waves come in contact with metal.
If arcing occurs when using a fluted tube pan, place a heat resistant dish (Pyrex pie plate, glass pizza’
dish or dinner plate) between the pan and the turntable. If arcing occurs with other metal baking
utensils, discontinue their use for mix cooking.
-.
16

OPERATION FOR CONVECTION COOKING
This oven can also be used for both Convection and Automatic Convection Microwave Cooking.
During convection heating, hot air is circulated throughout the oven cavity to brown and crisp foods
quickly and evenly.
The oven should not be used without the metal turntable in place and it should never be restricted so
that it cannot rotate. You may remove the turntable when preheating the oven or when preparing
food to be cooked directly on the turntable; cookies, for example, biscuits.
1
To Preheat
1
This Auto-Touch Convection Microwave Oven allows you to preheat to the desired temperature by
touching a temperature pad. Whenever you want to automatically preheat the oven, no “time” is
entered. The oven will signal when its ready.
*
Suppose you want to preheat to 150°C.
Step Procedure
Pad Order Display
1.
Touch the CONVECTION pad.
riii-Aq
]I
2.
Enter the desired preheating tem-
peratu re.
/]
11
3. Touch COOK pad.
r-=--j
~~~~t~~tur-;
Convection Fan Symbol will
flash on and off.
When oven temperature rises above
4O”C,
the actual oven temperature will appear on display. When
the oven reaches the programmed temperature, the Convection Fan Symbol will stop flashing and
begin rotating and an audible signal will sound 4 times.*
*At this point the oven is preheated, Food may be placed in the oven and the oven programmed.
If the oven door is not opened, the oven will begin temperature holding operation. The oven will
automatically hold at the preheat temperature for 15 minutes. After this time has elapsed, an audible
signal will sound 4 times and the oven will turn off. All indicators will go out. Whenever the door is
opened or the STOP pad is touched during this 15 minutes period, the program is cancelled and the
display will return to the time of day.
17

To Cook by Convection
This Au to-Touch Convection Microwave Oven can be programmed for ten different convection
cooking temperatures for up to 99 minutes, 99 seconds.
*
Suppose you want to cook at 200°C for 25 minutes.
Step
Procedure
Pad Order Display
1.
Enter desired cooking time.
2. Touch CONVECTION pad.
3. Enter desired temperature.
4. Touch COOK pad.
If
you
wish to check the tem-
perature you set at any time
during cooking, touch
CON-
VECTION
pad.
Convection Fan Symbol will
rotate and the cooking time
will count down to zero.
The oven temperature will
appear on the display as long
as the CONVECTION pad is
touched. The oven will
continue to count down to
zero during this time.
-.
When timer reaches zero, an audible signal will sound and the time of day will reappear on the display
The fan will remain on until the oven cavity has been cooled.
18

To Preheat and Cook by Convection at the Same Temperature
This Convection Microwave Oven can be programmed to combine preheating and convection cooking
or preheating and automatic mix cooking operations.
*
Suppose you want to preheat to 180” C and bake biscuits at 180°C for 15 minutes.
Step Procedure
Pad Order Display
1.
Touch Convect ion pad.
rCO”IYLCTIONI
]
2. Touch desired preheat tempera-
ture pad.
pg=Tgq
jl
3.
Enter desired cooking time.
~,
u
~~
:,.,i
p+gZj
1-~
co
4.
Touch CONVECTION pad again.
rii-&q
11
5. Touch COOK pad.
(Ex.)
Oven temperature is lower
than 40°C.
(,,,,
11
Convection Fan Symbol will
flash on and off.
When the oven reaches the programmed temperature, the Convection Fan Symbol will
stop flashing and begin rotating and an audible signal will sound 4 times. The oven will
then begin temperature holding operation. The oven will automatically hold at the
desired temperature for 15 minutes. This will allow time to finish preparing the food to
be cooked. You may open the door anytime during this holding time.
6. .Push the Door Open button.
Fj
]I
7. Place food in oven. Close door.
Touch COOK pad.
EII
I:,.,,1
Convection Fan Symbol will rotate
The cooking time will count down to zero, When the timer reaches zero, all indicators will go out and
an audible signal will sound. The time of day will reappear on the display.
The fan will remain on until the oven cavity has been cooled.
19
Table of contents
Other Sharp Microwave Oven manuals

Sharp
Sharp YC-QS204AE User manual

Sharp
Sharp R-28ST User manual

Sharp
Sharp R-272M User manual

Sharp
Sharp R-230KK User manual

Sharp
Sharp Carousel R-309Y User manual

Sharp
Sharp R-3V97 User manual

Sharp
Sharp R-21JCA-F User manual

Sharp
Sharp R-343 User manual

Sharp
Sharp R-4A68 User manual

Sharp
Sharp R-874M Instruction Manual

Sharp
Sharp R-216 Instruction Manual

Sharp
Sharp R-290S User manual

Sharp
Sharp R-5800A User manual

Sharp
Sharp KM-2002B User manual

Sharp
Sharp R-350A User manual

Sharp
Sharp R-206 Instruction Manual

Sharp
Sharp R-450H User manual

Sharp
Sharp R-1500AT User manual

Sharp
Sharp R-211TV-SL User manual

Sharp
Sharp R-60ST User manual