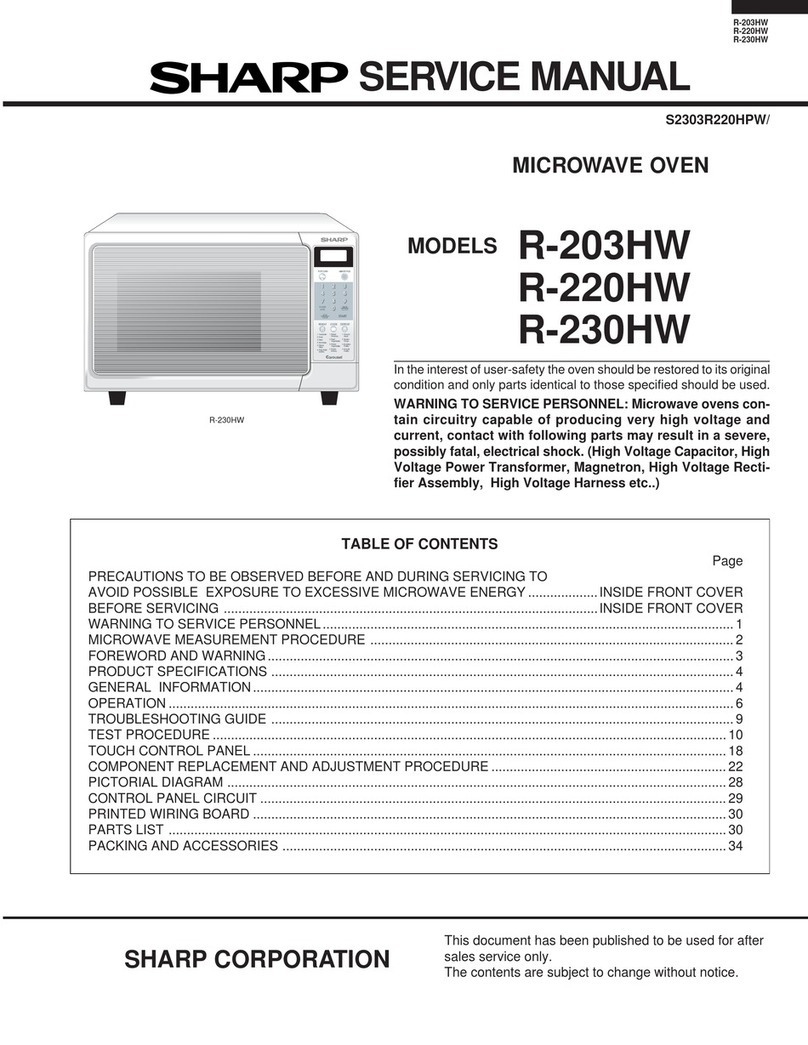
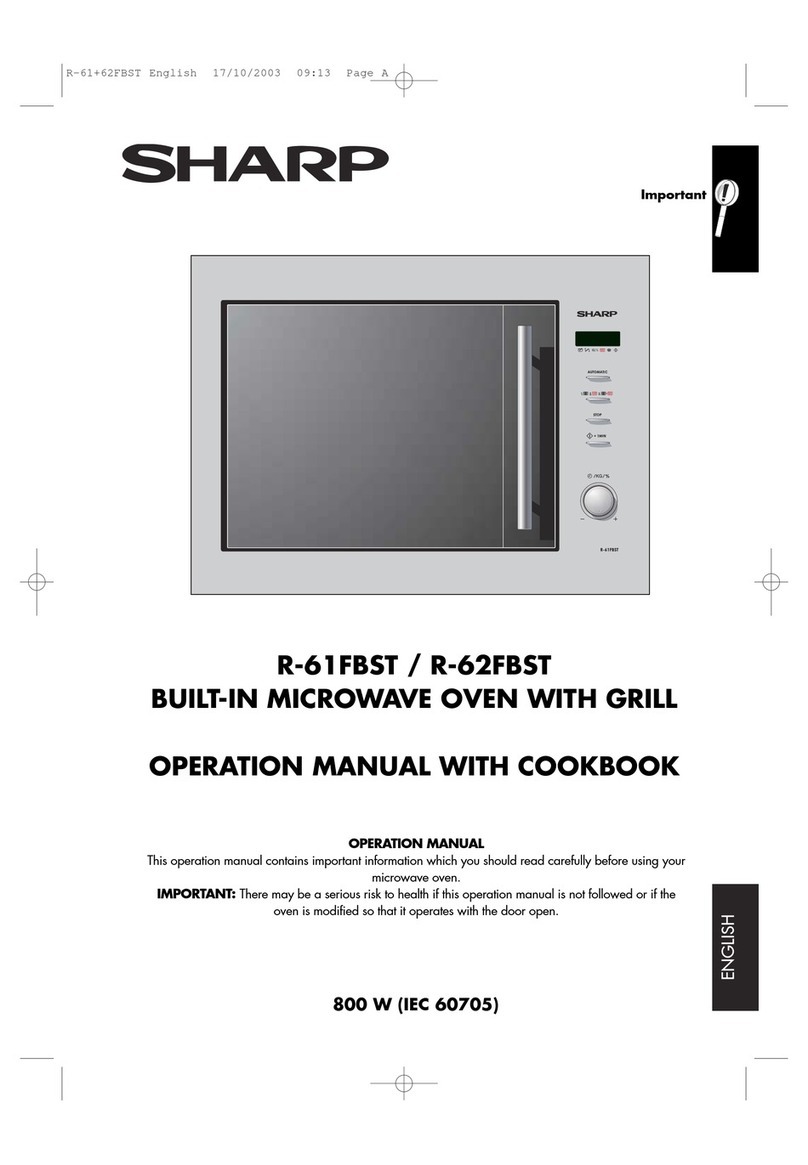
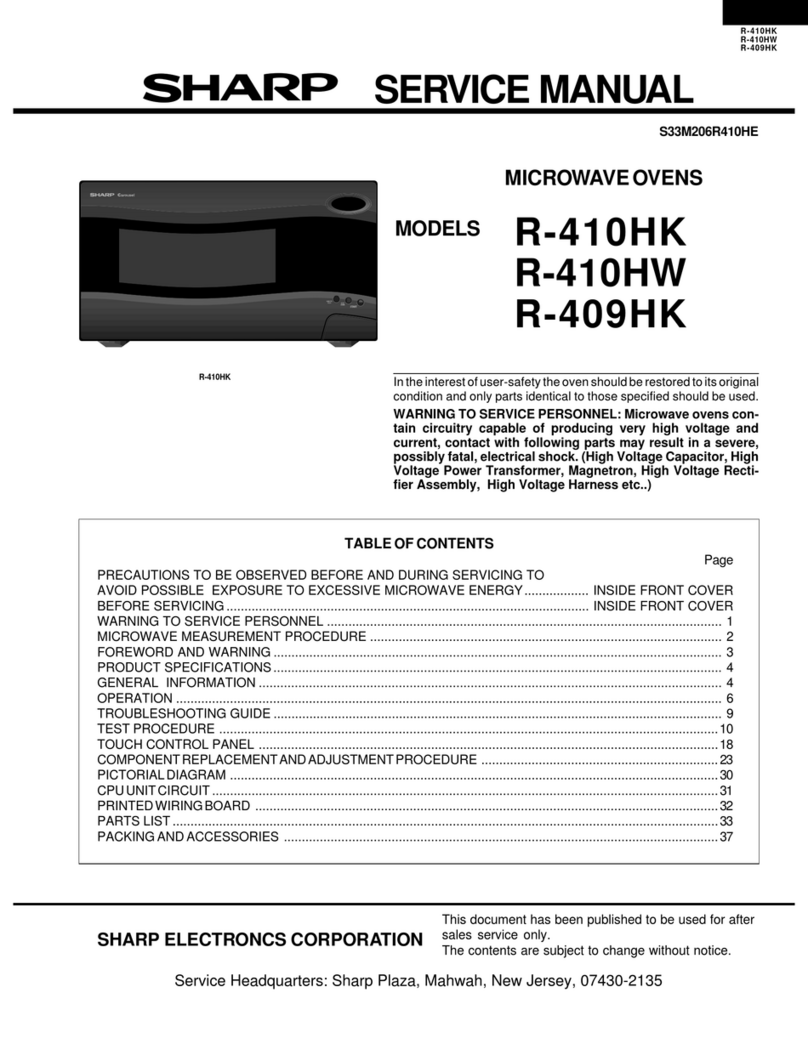
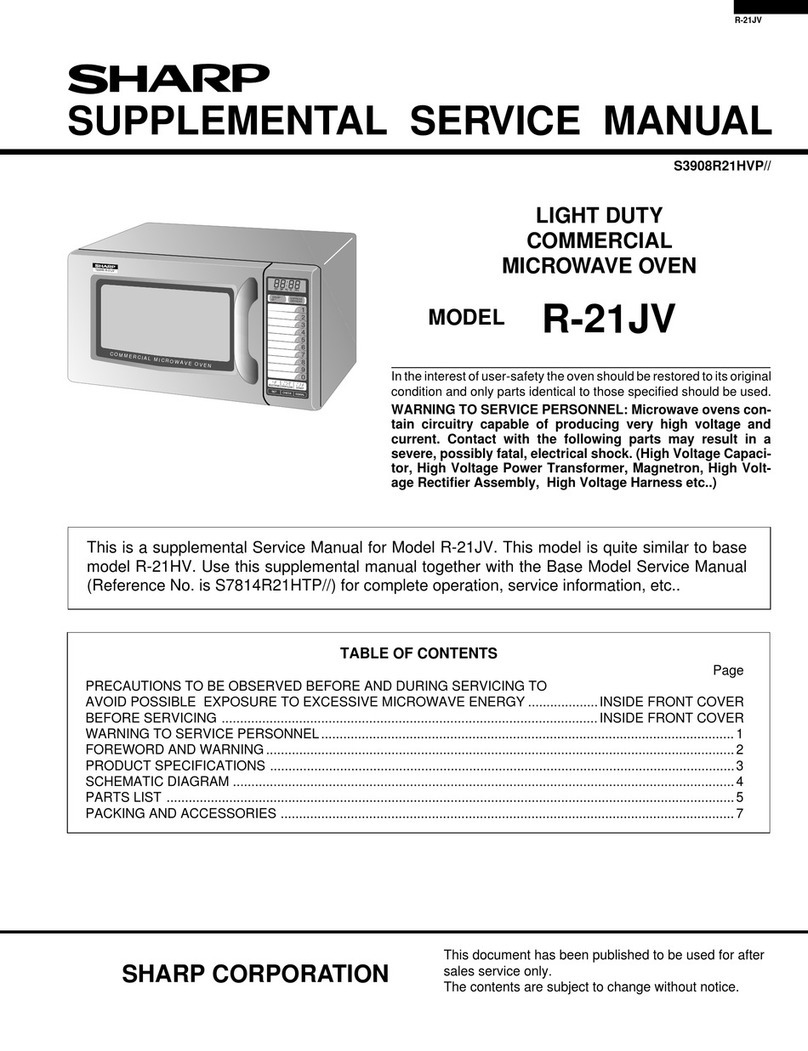
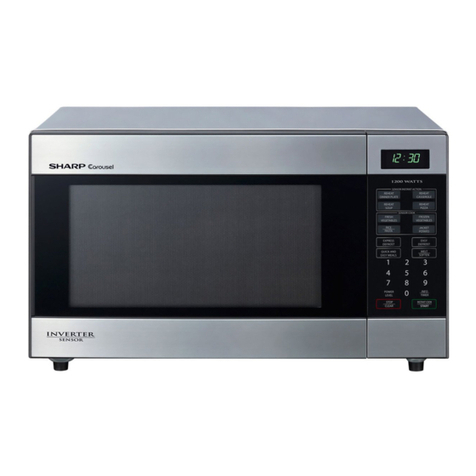
Sharp R-852 User manual

1
CONTENTS
ENGLISH
O VEN AN D ACCESSO RIES . . . . . . . . . . . . . . . . . . . . . . . . . . . . . . . . . . . . . . . . . . . . .2
CO N TRO LPANEL . . . . . . . . . . . . . . . . . . . . . . . . . . . . . . . . . . . . . . . . . . . . . . . . . . . .3
IMPO RTANT SAFETY INSTRUCTIO N S . . . . . . . . . . . . . . . . . . . . . . . . . . . . . . . . . . . . .4 -6
INSTALLATIO N . . . . . . . . . . . . . . . . . . . . . . . . . . . . . . . . . . . . . . . . . . . . . . . . . . . . . .6
BEFO RE O PERATIO N . . . . . . . . . . . . . . . . . . . . . . . . . . . . . . . . . . . . . . . . . . . . . . . . . .7
USIN G THE STO P KEY . . . . . . . . . . . . . . . . . . . . . . . . . . . . . . . . . . . . . . . . . . . . . . . . .7
EN ERG Y SAVE MO DE . . . . . . . . . . . . . . . . . . . . . . . . . . . . . . . . . . . . . . . . . . . . . . . . .7
SETTIN G THE CLO CK . . . . . . . . . . . . . . . . . . . . . . . . . . . . . . . . . . . . . . . . . . . . . . . . .8
MICRO W AVE PO W ER LEVELS . . . . . . . . . . . . . . . . . . . . . . . . . . . . . . . . . . . . . . . . . . . .8
MICRO W AVE CO O KIN G . . . . . . . . . . . . . . . . . . . . . . . . . . . . . . . . . . . . . . . . . . . . . . .9
HEATIN G W ITHO UT FO O D . . . . . . . . . . . . . . . . . . . . . . . . . . . . . . . . . . . . . . . . . . . . .9
G RILLCO O KIN G . . . . . . . . . . . . . . . . . . . . . . . . . . . . . . . . . . . . . . . . . . . . . . . . . . . .1 0
CO N VECTIO N CO O KIN G . . . . . . . . . . . . . . . . . . . . . . . . . . . . . . . . . . . . . . . . . .1 1 -1 2
DUALCO O KIN G . . . . . . . . . . . . . . . . . . . . . . . . . . . . . . . . . . . . . . . . . . . . . . . . .1 3 -1 4
O THER CO N VENIENT FUN CTIO N S . . . . . . . . . . . . . . . . . . . . . . . . . . . . . . . . . . . .1 4 -1 6
PIZZA/ PO TATO / INSTANT ACTIO N . . . . . . . . . . . . . . . . . . . . . . . . . . . . . . . . . . . . . .1 7
PIZZA/ Q UICHE . . . . . . . . . . . . . . . . . . . . . . . . . . . . . . . . . . . . . . . . . . . . . . . . . . . . .1 8
PO TATO CHART . . . . . . . . . . . . . . . . . . . . . . . . . . . . . . . . . . . . . . . . . . . . . . . . . . . .1 9
INSTANT ACTIO N CHART . . . . . . . . . . . . . . . . . . . . . . . . . . . . . . . . . . . . . . . . . .1 9 -2 1
CARE AN D CLEANING . . . . . . . . . . . . . . . . . . . . . . . . . . . . . . . . . . . . . . . . . . . . . . .2 2
SERVICE CALLCHECK . . . . . . . . . . . . . . . . . . . . . . . . . . . . . . . . . . . . . . . . . . . . . . . .2 3
SPECIFICATIO N S . . . . . . . . . . . . . . . . . . . . . . . . . . . . . . . . . . . . . . . . . . . . . . . . . . . .2 4
SERVICE ADDRESSES . . . . . . . . . . . . . . . . . . . . . . . . . . . . . . . . . . . . . . . . . . . . . .2 5 -2 9
OPERATION MANUAL
This o pera tio n manual co ntains impo rtant info rmatio n which yo u sho uld read carefully befo re using
yo ur micro wa ve o ven.
IMPO RTAN T: There may be a serio us risk to health if this o p eratio n manual is no t fo llo wed o r if the o ven
is mo dified so that it o p erates with the do o r o pe n.
R-852 ENGLISH 5/5/99 2:04 pm Page 1
Downloaded from: http://www.usersmanualguide.com/

2
OVEN AND ACCESSORIES
1. Co ntro l pa nel
2. O ven lamp
3. G rill hea ting element (to p g rill)
4. Do o r o pen b utto n
5. W a veg uide co ver
6. O ven cavity
7. Turnta ble mo to r shaft
8. G rill hea ting element (b o tto m g rill)
9. Do o r seals and sealing surfaces
10. Ventilatio n o p ening s
11. Po we r c o rd
12. O uter cabinet
ACCESSORIES:
Check to make sure the fo llo wing accessories are
pro vide d:
13. Turntable 14. Lo w rac k 15. High rack
Pla ce the turnta ble o ver the turnta ble shaft in the flo o r
o f the c avity.
Before first using the turntable and racks, clean with
mild so apy wa ter.
Do not cut o r scratch the turntable.
Warning:
The accesso ries (e.g . turnta ble) will beco me very ho t
during GRILL, DUAL, CONVECTION, PIZZA,
POTATO and INSTANT ACTION (except Easy
Defro st) mo des. Always use thick o ven g lo ves when
re mo ving the fo o d o r turnta ble fro m the o ven to
prevent burns.
NOTE: W hen yo u o rder a cc esso ries, please mentio n
the fo llo wing two ite ms: Part name a nd mo de l na me
to yo ur de aler o r SHARP autho rised service ag ent.
1.
2.
3.
4.
10.
11.
12.
13.
9. 10. 8.7.6.5.
R-852
15.
14.
R-852 ENGLISH 5/5/99 2:04 pm Page 2
Downloaded from: http://www.usersmanualguide.com/

Digital display and indicators:
1. TOP GRILLindicato r
2. BOTTOM GRILL indica to r
3. CONVECTION indicato r
4. MICROWAVEindica to r
5. WEIGHT (kg ) indicato r
6. COOKING IN PROGRESS indicato r
7. LESS/ MOREindicato rs
8. CLOCK SET indicato r
Operating keys:
9. FRESH PIZZA/ FRESH QUICHE key
10. BOILED/ JACKET POTATOES key
11. INSTANT ACTION keys
12. LESS/ MORE keys
13. TIM E keys
14. CONVECTION key
Press to c hange the co nvec tio n setting
15. DUAL MODE key:
1 PRESS = MICRO W AVE & CO N VECTIO N
2 PRESSES = MICRO W AVE & TO P G RILL
3 PRESSES = MICRO W AVE & BO TTO M G RILL
16. +1 min / START key
17. DOOR OPEN b utto n
18. STOP key
19. GRILL MODEkey:
1 PRESS = TO P G RILL
2 PRESSES = BO TTO M G RILL
3 PRESSES = TO P & BO TTO M G RILL
20. MICROWAVEPOWER LEVELkey
Press to c hange the micro wave po wer setting
21. CLOCK SETTING key
22. FRENCH FRIED POTATO key
23. FROZEN PIZZA/ FROZEN QUICHE key
3
CONTROL PANEL
ENGLISH
9.
10.
11.
21. 12.
13.
18.
14.
15.
19.
20.
16.
22.
23.
17.
1.
3.
4. 5.
6.
7.
8.
2.
R-852 ENGLISH 5/5/99 2:04 pm Page 3
Downloaded from: http://www.usersmanualguide.com/

4
IMPORTANT SAFETY INSTRUCTIONS
To avoid the danger of fire
The microw ave oven should not be left
unattended during operation. Pow er
levels that are too high or cooking times
that are too long may overheat foods
resulting in a fire.
In cases where the o ven is to be installed into
kitc hen cabinet, the installa tion frame EBR-4 7 0 0
(W ) licensed b y SHARP must be used. This is
available fro m yo ur deale r. Re fer to the fra me
installa tio n instructio ns o r a sk yo ur deale r fo r the
pro pe r instructio n pro ce dure . O nly the use o f this fra me
will g uarantee the safety and quality o f the pro duct.
The electrical o utlet must be readily accessible so that
the unit can be unplugg ed easily in an emerg ency.
The AC po wer supply must be 2 3 0 V, 5 0 Hz, with
a minimum 1 6 A distributio n line fuse, o r a
minimum 1 6 A distributio n c irc uit b reaker.
It is rec o mmended that a separate circ uit serving
o nly this appliance be pro vided.
Do no t place the o ven in areas where heat is
g enera ted. Fo r e xample, clo se to a co nventio nal o ven.
Do no t install the o ven in a n a rea o f hig h humidity
o r where mo isture may co llec t.
Do no t sto re o r use the o ven o utdo o rs.
If food being heated begins to smoke,
DO NOT OPEN THE DOOR. Turn off and
unplug the oven and w ait until the food
has stopped smoking. Opening the door
w hile food is smoking may cause a fire.
Use only microw ave-safe containers and
utensils. See Page X.
Do not leave the oven unattended w hen
using disposable plastic, paper or other
combustible food containers.
Clean the w aveguide cover, the oven
cavity and the turntable after use. These
must be dry and free from grease. Built-
up grease may overheat and begin to
smoke or catch fire.
Do no t pla ce flammab le materials nea r the o ven o r
ventilatio n o p ening s. Do no t blo ck the ventilatio n
o pe ning s.
Re mo ve a ll metallic seals, wire twists, e tc., fro m
fo o d and fo o d pac kag es. Arc ing o n metallic
surfaces may ca use a fire.
Do no t use the micro wa ve o ven to hea t o il fo r deep
frying. The temperature ca nnot be co ntrolled and
the o il may ca tc h fire .
To make po pco rn, use o nly special micro wa ve
po p co rn make rs.
Do no t sto re fo o d o r a ny o ther items inside the o ven.
Chec k the setting s a fte r yo u start the o ven to ensure
the o ven is o perating as desired.
See the c o rrespo nding hints in the co o ke ry b o o k sectio n.
To avoid the possibility of injury
WARNING:
Do no t o perate the o ven if it is da mag ed o r
malfunctio ning. Chec k the fo llo wing befo re use:
a) The do o r; make sure the do o r clo ses pro perly and
ensure it is not misalig ned o r warped.
b) The hing es and safety d o o r latc hes; c heck to make sure
they are no t bro ken o r lo o se.
c) The do o r sea ls and sealing surfaces; e nsure that they
have no t been da mag ed.
d) Inside the o ven cavity o r o n the do o r; make sure there
are no dents.
e) The p o wer supply c o rd a nd plug ; ensure that they a re
no t damag ed .
Never adjust , repair or modify the oven
yourself. It is hazardous for anyone
other than a competent person to carry
out any service or repair operation
w hich involves the removal of a cover
w hich gives protection against exposure
to microw ave energy.
Do no t o pera te the o ven with the do o r o pen o r
alter the do o r safety latches in any way.
Do no t o pera te the o ven if there is an o bject
between the do o r sea ls and sealing surfac es.
Do not allow grease or dirt to build up
on the door seals and adjacent parts.
Follow instructions for “Care and
Cleaning”, Page 22.
Individuals with PACEMAKERS sho uld chec k with
their do c to r o r the manufacturer o f the pac emaker
fo r preca utio ns reg arding micro wave o vens.
To avoid the possibility of electric shock
Under no circumsta nces sho uld yo u remo ve the
o ute r c ab inet.
N ever spill o r insert any o b jec ts into the do o r lo ck
o pe ning s o r ventila tio n o pe ning s. In the e vent o f a
spill, turn off and unplug the o ven immediately, and
call a n a utho rised SHARP service ag ent.
Do no t immerse the po wer supp ly co rd o r p lug in
wa ter o r a ny o ther liquid.
Do no t let the po w er supply c o rd hang o ver the
edg e o f a tab le o r w o rk surfac e.
IMPORTANT SAFETY INSTRUCTIONS: READ CAREFULLY AND KEEP FOR FUTURE REFERENCE
R-852 ENGLISH 5/5/99 2:04 pm Page 4
Downloaded from: http://www.usersmanualguide.com/

5
IMPORTANT SAFETY INSTRUCTIONS
ENGLISH
To avoid burns, alw ays test food
temperature and stir before serving and
pay special attention to the temperature
of food and drink given to babies,
children or the elderly.
Temperature o f the c o nta iner is no t a true
indicatio n o f the tempera ture o f the fo o d o r drink;
alwa ys c heck the fo o d te mpe rature.
Alwa ys stand back fro m the o ven do o r when o pening,
to a vo id b urns fro m esca ping stea m a nd hea t.
Slice stuffed b aked fo o ds a fter heating to release
steam a nd avo id b urns.
Keep children awa y fro m the do o r to pre vent them
burning themselves.
Do no t to uch the o ven do o r, o ute r c ab inet, rea r
cabinet, o ven c avity, ventilatio n o p enings,
accesso ries a nd dishes during GRILL,
CONVECTION, DUAL, PIZZA, POTATO and
INSTANT ACTION mo des (exc ep t EASY
DEFRO ST) a s they will b ec o me ho t. Befo re
clea ning make sure they are no t ho t.
To avoid misuse by children
WARNING: Only allow children to use the
oven w ithout supervision w hen adequate
instructions have been given so that the child
is able to use the oven in a safe w ay and
understands the hazards of improper use.
Do no t lea n o r swing o n the o ven do o r. Do no t
play with the o ven o r use it a s a to y.
Children sho uld be ta ug ht all impo rtant safety
instructio ns: use o f po t ho lders, ca reful remo val o f
fo o d co vering s; pa ying spe cial attentio n to
pa ckag ing (e.g. self-heating materials) designed to
make fo o d c risp, a s they may be e xtra ho t.
Other w arnings
N ever mo dify the o ven in a ny wa y.
Do no t mo ve the o ven w hile it is in o pe ratio n.
This o ven is fo r ho me fo o d prepara tio n o nly and
may o nly be used fo r c o o king fo o d. It is no t
suita ble fo r co mmerc ial o r lab o rato ry use.
To promote trouble-free use of your oven
and avoid damage.
Never o perate the o ven when it is empty except
where reco mmende d in the o pera tio n manual, see
Page 9 . Doing so may damag e the o ven.
W hen using a b ro wning d ish o r self-heating
material, a lways plac e a heat-resistant insulato r
such a s a po rcelain plate unde r it to pre vent
da mage to the turntable due to heat stress. The
preheating time specified in the dish’s instructio ns
must no t b e e xceede d.
Keep the po we r supply c o rd aw ay fro m heate d
surfaces, including the rea r o f the o ven.
Do no t attempt to replace the o ven lamp yo urself
o r a llo w anyo ne who is no t an elec trician
autho rised by SHARP to do so . If the o ven lamp fails,
please co nsult yo ur dea ler o r an autho rised SHARP
service agent.
If the po wer supply c o rd o f this appliance is
da maged, it must be replaced with a special co rd.
The exchang e must be made by an authorised
SHARP service a gent.
To avoid the possibility of explosion and
sudden boiling:
WARNING: Liquids and other foods must
not be heated in sealed containers since
they are liable to explode.
N ever use sealed co nta iners. Remo ve sea ls and
lids b efo re use. Se aled c o nta iners c an e xplo de due
to a build up o f pressure e ven after the o ven has
been turned o ff.
Take care when micro waving liquids. Use a wide-
mo uthed c o nta iner to allo w b ub ble s to escape .
Never heat liquids in narrow necked
containers such as baby bottles, as this
may result in the contents erupting from the
container w hen heated and cause burns.
To prevent sudden eruptio n o f b o iling liquid a nd
po ssible scald ing :
1. Stir liquid prio r to heating/ reheating.
2. It is a dvisable to insert a g la ss ro d o r similar utensil
into the liquid whilst reheating.
3. Le t liquid sta nd in the o ven a t the end o f c o o king
time to prevent delayed eruptive boiling.
Do not cook eggs in their shells, and w hole
hard boiled eggs should not be heated in
microw ave ovens since they may explode
even after microw ave cooking has ended.
To cook or reheat eggs w hich have not
been scrambled or mixed, pierce the yolks
and the w hites, or the eggs may explode.
Shell and slice hard boiled eggs before
reheating them in the microw ave oven.
Pierc e the skin o f such fo o ds a s po tato e s, sausag es
and fruit b efo re c o o king , o r they may e xplo de .
To avoid the possibility of burns
Use p o t ho lders o r o ven g lo ves when remo ving fo o d
fro m the o ven to pre vent burns.
Alwa ys o p en c o nta iners, po pco rn make rs, o ven
co o king b ag s, e tc., a wa y fro m the fac e a nd hands to
avo id steam burns.
R-852 ENGLISH 5/5/99 2:05 pm Page 5
Downloaded from: http://www.usersmanualguide.com/
6
IMPORTANT SAFETY INSTRUCTIONS
INSTALLATION
1. Remo ve a ll pa cking mate rials fro m the inside o f the
o ven cavity. Discard the lo o se po lythene sheet fro m
between the do o r and cavity. Remove the feature
sticker, if attached, fro m the o utside o f the do o r.
2. Chec k the o ven c arefully fo r any signs o f da mag e.
3. Plac e the o ven o n a flat, level surface stro ng
eno ug h to supp o rt the o ven’s we ig ht p lus the
hea viest ite m likely to be c o o ked.
NOTE:
If yo u are unsure ho w to c o nnec t yo ur o ven, plea se
co nsult an autho rised , qualified elec trician.
Neither the manufacturer no r the dealer can accept
any liab ility fo r da mag e to the o ven o r perso nal
injury resulting fro m failure to o b serve the co rre ct
ele ctrical co nnectio n pro ced ure.
W a ter vapo ur o r dro p s may o c ca sio nally fo rm o n
the o ven walls o r aro und the do o r sea ls a nd
sea ling surfaces. This is a no rmal o ccurrence a nd is
no t an indicatio n o f micro wa ve le akag e o r a
malfunctio n.
Do no t use metal utensils, which refle ct micro wa ves
and may c ause e lectrica l a rcing . Do no t put c ans
in the o ven.
Use o nly the turnta ble d esigned fo r this o ven.
Do no t place a nything o n the o ute r ca binet during
o pe ratio n.
Do no t use p lastic c o nta iners fo r micro waving if the
o ven is still ho t fro m using the GRILL,
CONVECTION, DUAL, PIZZA, POTATO and
INSTANT ACTION mo des (except EASY
DEFRO ST) because they may melt. Plastic
co ntainers must no t b e used during a bo ve mo de s
unless the co ntainer manufacture r sa ys they are
suitab le.
0
23
145
8
9
10
11
12
13
14
15
20
25
30
7
6
Re mo ve this film
4. The oven door may become hot during
cooking. Place or mount the oven so
that the bottom of the oven is 85 cm or
more above the floor. Keep children
aw ay from the door to prevent them
burning themselves.
5. Ensure there is a minium o f free space abo ve
the o ven o f 1 9 cm.
6. Secure ly co nnec t the plug o f the o ven to a
sta nda rd earthed (g ro unde d) ho useho ld
ele ctrical o utlet.
1 9 cm
R-852 ENGLISH 5/5/99 2:05 pm Page 6
Downloaded from: http://www.usersmanualguide.com/
7
BEFORE OPERATION
ENGLISH
USING THE STOP KEY
Use the STOP key to :
1. Erase a mistake during prog ra mming.
2. Sto p the o ven tempo rarily d uring co o king.
3. Cancel a pro g ramme during c o o king , press
the STOP key twice.
Yo ur o ven has a n energy save mo de.
Plug in the o ven. N o thing will app ea r o n the display at this time.
1 . O pen the do o r.
The o ven display w ill sho w “ EN ERG Y SAVE MO DE” .
2 . C lo se the do o r.
The d isplay will sho w “ .0 ” .
If yo u set the c lo ck, “ energy save mo de ” do es no t w o rk.
If yo u keep “ e nerg y save mo de” g o to step 4 .
3 . Set the clock (See pag e 8 ).
4 . Heat the o ven witho ut fo o d (See p ag e 9 ).
ENERGY SAVE MODE
Yo ur o ven co mes set fo r the e nerg y save mo de . If yo u do no thing fo r 2 minute s a fter a prec eding
o pe ratio n, i.e. plug ging in o r a t the end o f co o king, the po wer will g o o ff a uto matically. To resto re po wer
o n, o pen a nd then clo se the do o r. If yo u set the clo ck, e nerg y sa ve mo de do es no t wo rk.
To start energy save mo de, fo llo w the instructio ns b elo w.
Example:
To start the energ y save mo de, (the current time is 2 3 :3 5 ):
1 . Make sure the
co rrect time
appea rs o n the
display.
3 . Press the 1 MIN
ke y o nce.
2 . Press the
CLOCK
SETTING key.
4 . Press +1 min key. The
po w er will b e o ff and the
display will sho w no thing.
x1
x1 x1
Display:
R-852 ENGLISH 5/5/99 2:05 pm Page 7
Downloaded from: http://www.usersmanualguide.com/
If this o cc urs during co o king, the pro g ra mme will
be erased. The time o f day will also be erased.
4. W hen yo u wa nt to reset the time o f da y, fo llo w the
abo ve example ag ain.
5. If yo u do no t set the clo ck, press the STOP key
o nce will app ea r o n the display. W hen the
o pe ratio n o f the o ven is finished, will
re appear o n the display instea d o f the time o f day.
6. If yo u set the c lo c k, e nerg y save mo de do es
no t w o rk.
x1
8
SETTING THE CLOCK
MICROWAVE POWER LEVELS
There are two setting mo de s: 1 2 ho ur c lo ck a nd 2 4 ho ur c lo c k.
Step 1 .
x1
1. To set the 1 2 ho ur clo ck, press the CLOCK
SETTING key o nce , a s in Ste p 1 o ppo site.
2. To set the 2 4 ho ur clo ck, press the CLOCK
SETTING key twice , a s in Step 2 o ppo site .
Step 2 .
x2
Example:
To set the 2 4 ho ur clo c k to 2 3 :3 5 :
x2 x2 x1
1 . Cho o se the 2 4 ho ur
clo ck by pressing the
CLOCK SETTING key
twice.
3 . Chang e fro m ho urs to mins
by pressing the CLOCK
SETTING key o nce .
Check the display.
4 . Set the minutes:
Press 10 MIN key three times.
Press 1 MIN key five times.
2 . Set the ho urs:
Press the 10 MIN key twice.
Press the 1 MIN key three times.
5 . Sta rt the clo ck.
NOTES:
1. Press the STOP ke y if yo u make a mista ke during
pro g ramming.
2. If the o ven is in c o o king o r minute timer mo de a nd
yo u wish to kno w the time o f day, to uch the
CLOCK SETTING key. As long as yo ur finger is
to uching the key, the time of day will be displayed.
3. If the electrica l po wer supply to yo ur micro w ave
o ven is interrupted, plug in the o ven ag ain, then
o pe n and c lo se the do o r. The display will sho w
“ EN ERG Y SAVE MO DE” .
Yo ur o ven has 5 po we r levels. To c ho o se the po w er level, fo llo w the ad vice g iven in the co o kb o o k.
900 WATT = 100 % output
630 WATT = 70 % output
450 WATT = 50 % output
• To set the po we r, to uch the MICROWAVEPOWER LEVELkey until the desired level is displayed.
• If the MICROWAVE POWER LEVELkey is to uched o nce , will be displaye d. If yo u miss yo ur d esired
level, c o ntinue to uching the MICROWAVEPOWER LEVELkey until yo u reach the level ag ain.
•If the level is not selected, the level 900 W (100 %) is automatically set.
x3
x3 x5
270 WATT = 30 % output
90 WATT = 10 % output
R-852 ENGLISH 5/5/99 2:05 pm Page 8
Downloaded from: http://www.usersmanualguide.com/
9
MICROWAVE COOKING
ENGLISH
NOTES:
1. W hen the do o r is o pened during the co o king
pro cess, the c o o king time o n the digital display
sto ps auto matically. The c o o king time sta rts to c o unt
do w n a ga in when the do o r is c lo sed and the
+1 min / START key is pressed.
2. If yo u wish to kno w the po w er level during
co o king , p ress the MICROWAVE POWER
LEVELkey. As long as yo ur finger is pressing the
MICROWAVE POW ER LEVEL key, the po wer
level will be displayed.
3. W hen the o pera tio n o f the o ven is finished, the
time o f d ay will reappear, if set, o n the display.
Example: Suppo se yo u want to heat so up fo r 2 minute s and 3 0 seco nds o n 6 3 0 W micro wa ve po we r.
1 . Set the time:
Press 1 MIN key
twice and the 10
SEC key three
times.
x2
x3x2
2 . Cho o se desired po we r
6 3 0 W b y pressing
MICROWAVEPOWER
LEVELkey twice.
x1
Yo ur o ven c an b e pro grammed for up to 9 9 .9 0 minutes. (9 9 .9 0 ).
Yo u may detect smo ke o r a burning smell when using the g rill(s), dual g rill o r c o nvec tio n fo r the first time. This is
no rmal and no t a sign that the o ven is o ut o f o rder.
To a vo id this p ro blem, when first using the o ven, o pera te b o th to p and b o tto m g rills witho ut fo o d fo r 2 0 minutes.
IMPORTANT: During g rill o peratio n, to a llo w smo ke o r smells to d isperse o pen a windo w o r switch the kitc hen
ventilatio n o n. Ma ke sure there is no fo o d in the o ven.
1 . Ente r the req uire d
hea ting time (2 0 min)
by pressing the 10
MIN key twice.
2 . Press the GRILL
MODEkey
three times.
x1x2
The o ven will c o unt do w n. W hen the o ven has finished c o o king , o p en the do o r to c o o l the o ven c avity.
WARNING:
The o ven do o r, o uter c ab inet a nd o ven cavity will b ec o me ho t. Ta ke c are to avo id b urns when co o ling the
o ven do wn after o pe ratio n.
x3
Check the display
Check the display
3 . Sta rt c o o king
3 . Sta rt hea ting
HEATING WITHOUT FOOD
R-852 ENGLISH 5/5/99 2:05 pm Page 9
Downloaded from: http://www.usersmanualguide.com/
1 0
GRILL COOKING
1 . Ente r the desired
co o king time by
pressing the 1
MIN key five
times
2 . Cho o se TO P G RILL
functio n by pre ssing
GRILL MODE key
o nce .
Example:
Suppo se yo u want to c o o k fo r 5 minutes using the TO P G RILLo nly.
x1 x1
1 . The hig h o r lo w ra cks a re re co mmended when g rilling.
2 . Yo u may dete ct smo ke o r a burning smell when using the g rill fo r the first time, this is no rmal a nd no t a sig n that the
o ven is o ut o f o rder. Plea se see heating witho ut fo o d o n the previo us pa ge.
3 . After co o king using TO P GRILLand BO TTO M G RILL the display may show ‘N O W CO O LING ’ .
x5
Yo ur o ven has 2 g rill heating e lements, and a co mbinatio n o f 3 g rill co o king mo de s. Input the time first then
select the desired g rill mo de by pre ssing the GRILL MODE key a s indicate d b elo w.
Press GRILL MODE key SYMBO L
G RILLHEATIN G ELEMEN T IN USE
To p G rill
Bo tto m G rill
To p & Bo tto m G rill to g ether
x1
x2
x3
Check the display
3 . Sta rt c o o king
WARNING:
The oven cavity, door, outer cabinet, turntable, racks, dishes and
especially the bottom grill w ill become very hot, alw ays use thick oven gloves w hen
removing the food or turntable from the oven to prevent burns.
R-852 ENGLISH 5/5/99 2:05 pm Page 10
Downloaded from: http://www.usersmanualguide.com/
1 1
ENGLISH
x5
CONVECTION COOKING
This micro wave o ven has 1 0 pre-set o ven te mpera tures which use a c o mbinatio n o f the to p and b o tto m
grills.
Example 1: To cook w ith preheating
Suppo se yo u want to pre-heat to 1 8 0o C and co o k fo r 2 0 minutes a t 1 8 0 o C.
NOTES:
• Afte r preheating, if yo u wa nt to co o k at a different tempe rature p ress the CONVECTION key until
the desire d setting a ppea rs o n the d isplay. In the e xample a bo ve, to c hange the temperature yo u
wo uld press the CONVECTION key a fter entering the c o o king time.
• W hen the o ven reaches the pro gra mmed tempe rature, it will a uto matically ho ld at the pre-hea ted
te mperature fo r 3 0 minutes. After 3 0 minutes the display will change to time o f day, if set and the
co nvectio n tempe rature will b e cance lled .
• Afte r c o o king, the displa y may sho w “ N O W CO O LIN G ” .
1 . Ente r the desired co nvec tio n
temperature by pressing the
CONVECTION key five times.
The display will sho w 1 8 0 ° C.
Check the display
1
2 5 0
Press CONVECTION key
O ven Temp (° C)
2
230
3
220
4
200
5
180
6
160
7
130
8
100
9
7 0
1 0
4 0
3 . Ente r the co o king time.
Press the 10 MIN key
twice.
x2 x1
4 . Press the
+1 min / START key.
2 . Press the +1 min /
START key to start pre-
hea ting . The display sho ws
“ PREHEAT”
x1
W hen the pre-heated
temperature has been reached
the audible sig nal so unds. The
display will sho w . O pe n
the do o r a nd pla ce the fo o d
inside the o ven. C lo se the do o r.
WARNING:
The oven cavity, door, outer cabinet, turntable, racks, dishes and
especially the bottom grill w ill become very hot, alw ays use thick oven gloves w hen
removing the food or turntable from the oven to prevent burns.
R-852 ENGLISH 5/5/99 2:05 pm Page 11
Downloaded from: http://www.usersmanualguide.com/
1 2
CONVECTION COOKING
x1
Example 2: To cook w ithout preheating
Suppo se yo u want to c o o k at 2 5 0 o C fo r 2 0 minutes.
1 . Ente r the desired co o king time
(2 0 min.) b y pressing the 10
MIN key twice.
Check the display
x2
3 . Press the
+1 min / START key.
2 . Sele ct the desire d c o o king
temperature. (2 5 0 o C).
x1
NOTES:
• Afte r c o o king , the o ven will auto matically c o o l a nd the display may sho w “ N O W CO O LIN G ” .
• To change the c o nvec tio n tempera ture, press the CONVECTION key until the desired temperature appears
o n the display.
WARNING:
The oven cavity, door, outer cabinet, turntable, racks, dishes and
especially the bottom grill w ill become very hot, alw ays use thick oven gloves w hen
removing the food or turntable from the oven to prevent burns.
R-852 ENGLISH 5/5/99 2:05 pm Page 12
Downloaded from: http://www.usersmanualguide.com/

1 3
DUAL COOKING
ENGLISH
Yo ur o ven has 3 DUALc o o king mo des c o mbining the heat o f the g rill(s) with the po we r o f the micro wa ve.
To select the DUALc o o king mo de, press the DUALMODEkey until the desired setting appears in the display.
G enerally, dual c o o king time sho rtens the to tal c o o king time.
NOTES:
• To adjust the micro w ave po we r, p ress the MICROWAVEPOWER LEVEL key.
• To adjust the c o nvec tio n temperature, press the CONVECTION key until the desired temperature appears
o n the display.
• Fo r DUAL 1 the oven temperature can be changed fro m 4 0 ° C to 2 5 0 ° C in ten levels.
Press DUALMODEkey C o o king metho d
MIC RO 2 7 0 W
CO N V 2 5 0 ° C
MIC RO 2 7 0 W
TO P G RILL
MIC RO 2 7 0 W
BO TTO M G RILL
Micro wave Po wer Rang e
9 0 W - 4 5 0 W
9 0 W - 9 0 0 W
9 0 W - 9 0 0 W
Symbo l
Example 1:
Suppo se yo u want to c o o k fo r 2 0 minutes using DUAL1 (9 0 W micro wave po we r a nd 2 0 0 o C
CO NVECTIO N ).
1 . Ente r the desired
co o king time (2 0
min.) b y pressing the
10 MIN key twice.
2 . Press the DUAL
MODE key o nc e.
3 . Press the
MICROWAVE
POW ER LEVEL key
o nce (9 0 W ).
5 . Sta rt c o o king .
x1
x1
x1
x2 x3
4 . Press CONVECTION
key three times
(2 0 0 o C).
Check the display
x1
x2
x3
• Afte r c o o king, the displa y may sho w “ N O W CO O LIN G ” .
DUAL1
DUAL2
DUAL3
R-852 ENGLISH 5/5/99 2:05 pm Page 13
Downloaded from: http://www.usersmanualguide.com/
1 4
DUAL COOKING
OTHER CONVENIENT FUNCTIONS
x3
x1
x5
Example:-
Stage 1: 1 0 minutes a t 4 5 0 W po wer Stage 2: 5 minutes Dual 2 at 9 0 W
Stage 3: 2 0 minutes using the TO P G RILL.
1. MULTIPLE SEQUENCECOOKING.
A seq ue nce o f 4 sta ges (maximum) c an b e pro g rammed w hich may c o mbine the MICROWAVE, GRILL,
DUAL o r CONVECTION mo des.
EXAMPLES OF SEQUENCECOOKING:
1. Micro or Preheat + Micro + Micro + Dual or Convection or Grill or Micro
2. Micro or Preheat + Dual or Convection or Grill or Micro + Dual or Convection or Grill or Micro
3. Dual or Convection or Grill or Micro + Micro + Dual or Convection or Grill or Micro
STAGE1
1 . Ente r the desired co o king
time (1 0 minutes) by pressing
the 10 MIN ke y o nce.
2 . Select 4 5 0 W micro wa ve
po w er b y pre ssing the
MICROWAVE POWER
LEVEL key three times.
STAGE2
3 . Enter the de sired co o king
time (5 minutes) by pressing
the 1 MIN key five times.
4 . Select DUALMO DE 2
o nly, b y pressing the
DUAL MODE key twice.
5 . Sele ct 9 0 W lo w po wer by
pressing the MICROWAVE
POWER LEVELkey o nce.
x2 x1
1 . Ente r the
desired
co o king time
by pressing
the 10 MIN
key twice.
2 . Press DUAL
MODE key
twice.
3 . Press the
MICROWAVE
POWER LEVEL
ke y o nce (9 0 W ).
4 . Sta rt c o o king .
x2
x2 x1
x1
Example 2:
Suppo se yo u want to c o o k fo r 2 0 minutes o n DUAL 2 , using 9 0 W micro wa ve po we r a nd TO P G RILL.
Check the display
WARNING:
The oven cavity, door, outer cabinet, turntable, racks, dishes and especially the bottom
grill w ill become very hot, alw ays use thick oven gloves w hen removing the food or
turntable from the oven to prevent burns.
NOTE: Afte r co o king, the displa y may sho w “ N O W CO O LIN G ” .
R-852 ENGLISH 5/5/99 2:05 pm Page 14
Downloaded from: http://www.usersmanualguide.com/
1 5
OTHER CONVENIENT FUNCTIONS
ENGLISH
2. LESS / MOREkeys.
The LESS ( ) and MORE( ) keys a llo w yo u to easily dec rease o r incre ase pro g rammed setting times,
(fo r a less we ll o r mo re well co o ke d result), used fo r PIZZA, PO TATO and IN STAN T ACTIO N o r when
co o king is unde rwa y.
a) Changing the pre-programmed time setting.
Example:
Suppo se yo u want to c o o k 0 ,9 kg Ro ast c hicken using the INSTANT ACTION and MORE ( ) keys.
NOTES:
To cancel LESS o r MORE press the same key again.
To change MOREto LESS simply press the LESS ( ) key.
To change LESS to MOREsimply press the MORE( ) key.
b) Changing the heating time w hile the oven is operating:-
The co oking time can be decreased o r increased in 1 minute steps each time the LESS ( ) and
MORE( ) keys are pressed.
2 . Cho o se the desired
re sult (we ll c o o ked)
by pressing the
MOREke y o nce
within 2 seco nds.
1 . Cho o se the INSTAN T
AC TIO N menu fo r Ro ast
chicken by pressing the
INSTANT ACTION key
o nce .
3 . The o ven will start to
co o k auto matically.
x1
x1
x2
STAGE3
6 . Ente r the desired
co o king time (2 0
minutes) by pressing the
10 MIN key twice.
7 . Select TO P G RILL by
pressing the GRILL
MODE key o nce.
8 . Sta rt to c o o k b y
pressing the +1
MIN / START
key.
x1
x1
Check the display
R-852 ENGLISH 5/5/99 2:05 pm Page 15
Downloaded from: http://www.usersmanualguide.com/
1 6
OTHER CONVENIENT FUNCTIONS
x1
3. +1 min function
The + 1 min functio n a llo ws yo u to o pera te the
fo llo wing functio ns:
a) Direct Start. Yo u can sta rt to c o o k directly o n full micro wa ve po we r (9 0 0 W ) and in 1 minute ste ps b y
pressing the + 1 min / START key.
NOTE: To a vo id c hildre n’s misuse, the + 1 min / START key can be used o nly within 2 minutes after a
preceding o pera tio n, i.e., c lo sing the do o r o r p ressing the STOP key.
b) Extending the cooking time. Yo u c an extend the co o king time in multiples o f 1 minute, by pre ssing the
+ 1 min / START key, during the co o king pro c ess.
4. TO CHECK SETTINGS W HILE THE OVEN IS OPERATING
Yo u c an c heck the po wer level, o ven tempe rature, the pro g rammed a nd a ctual o ven tempe rature s ie:
when pre-heating.
TO CHECK THE POWER LEVEL:
To c heck the micro w ave po we r level during co o king
press the MICROWAVE POWER LEVELkey.
The o ven c o ntinues to c o unt do wn, altho ug h the
display sho ws the po we r level.
As lo ng a s yo ur fing er is
pressing the key, the
po wer level will be
displayed.
TO CHECK THECONVECTION TEMPERATURE:
To c heck the c o nvec tio n temperature during co o king
press the CONVECTION key.
W hen the o ven is prehea ting, yo u can check the
actual o ven tempera ture.
As lo ng a s yo ur fing er is
pressing the key, the
co nvectio n tempe rature in
° C will be displayed.
TO CHECK THE TIME OF DAY:
Firstly, the clock must already be set, see pag e 8 .
To c heck the time o f da y during co o king , pre ss the
CLOCK SETTING key.
As lo ng a s yo ur fing er is
pressing the key, the
time o f d ay will b e
displayed.
R-852 ENGLISH 5/5/99 2:05 pm Page 16
Downloaded from: http://www.usersmanualguide.com/
1 7
PIZZA/ POTATO/ INSTANT ACTION
ENGLISH
The PIZZA, POTATO AND INSTANT ACTION functio ns auto matically wo rk o ut the c o rre ct c o o king mo de and
co o king time o f the fo o ds illustrated b elo w.
NOTES:
W hen manipulatio n is re quire d (eg : to turn fo o d o ver) the o ven w ill sto p a nd the a udible sig nal will so und, the display
will sho w the necessary a ctio n. To co ntinue c o o king, p ress the +1 min / START key. The final temperature o f the
fo o d will vary acco rding to its initial tempe rature . Check fo o d is piping ho t after co o king . If nec essary, yo u ca n extend
the co o king time. Alwa ys refer to the co o king charts g iven in the separa te co o ke ry bo o k.
Input the menu by pressing the desired key. The INSTANT ACTION ca n o nly b e input within 2 minute s a fte r
co o king co mpletio n, c lo sing the do o r o r pressing the STOP key.
To increa se the weig ht press the selecte d ke y until the desire d weig ht is displayed. Enter the we ig ht o f the fo o d o nly.
Do no t include the we ig ht o f the c o nta iner.
Fo r fo o d weig hing mo re o r le ss than the weights/ q uantities g iven in the co o king c harts (see sepa ra te co o ke ry
bo o k) c o o k using manual o pera tio n.
The p ro g rammed co o king times are averag e times. If yo u want to alter the c o o king times o f PIZZA, POTATO
and INSTANT ACTION, use the LESS ( ) o r MORE ( ) ke ys. Fo r best results use the co o king chart
instructio ns (see sepa rate c o o kery b o o k).
The o ven will sta rt to co o k instantly a fter the weight has b een input.
1.
2.
3.
4.
Warning:
The o ven c avity, do o r, o uter cabinet, turnta ble , racks, dishes a nd especially the bo tto m g rill will b ec o me
very ho t. Use thick o ven g lo ves when re mo ving fo o d o r the turnta ble fro m the o ven to pre vent burns.
W hat yo u need to kno w when using PIZZA/ POTATO/ INSTANT ACTION :
FRESH PIZZA/ FRESH QUICHE key
BOILED/ JACKET POTATOES key
FROZEN PIZZA/
FROZEN QUICHE key
FRENCH FRIED POTATO key
INSTANT ACTION keys
Example: Suppo se yo u want to c o o k 2 0 0 g o f French Fried Po ta to es.
Cho o se the menu and q uantity b y
pressing the FRENCH FRIED
POTATO key o nce.
The o ven will instantly
beg in to c o o k.
x1
R-852 ENGLISH 5/5/99 2:05 pm Page 17
Downloaded from: http://www.usersmanualguide.com/
1 8
PIZZA/ QUICHE CHART
Pro c edure :
• Remo ve the re ad y pre pare d fro z en pizza /
quiche fro m the packag ing a nd place o n the
turnta ble . W hen co o king thick base piz zas and
re ady pre pare d fro z en quiches, pre ss the MORE
( ) ke y b efo re pressing the FROZEN
PIZZA/ FROZEN QUICHEkey.
• Afte r c o o king , place o n a plate fo r serving.
Fo r thick base piz za a nd quiche, le t sta nd fo r 2
minutes.
Frozen Pizza, Frozen Quiche
Q uantity: 0 ,1 5 - 0 ,6 kg Pizz a
0 ,1 5 - 0 ,4 kg Q uiche
Utensils: Dire ctly o n the turnta ble
Increasing unit: 5 0 g
Initial fo o d Te mp: -1 8 o C, Fro zen
Re co mmended
menus: Fro zen piz zas, fro z en quiches
▲
Pro c edure :
• Prepare the pizza/ quiche acco rding to the
re cipe b elo w.
• Plac e dire ctly o n the turnta ble.
• Afte r c o o king , place o n a plate fo r serving.
Fresh Pizza, Quiche
Q uantity: 0 ,7 - 1 ,0 kg Pizz a,
0 ,7 kg Q uiche
Utensils: Dire ctly o n the turnta ble
Increasing unit: 1 0 0 g
Initial fo o d Te mp: 2 0 o C, Ro o m tempe rature
Re co mmended
menus: Ho memad e pizz a/ Q uiche
Fo r q uiche, use the MORE ( )
key.
PIZZA RECIPE
Ingredients:
3 0 0 g Appro x. Re ady prepare d do ugh.
(Re ady mix o r ro ll o ut do ug h)
2 0 0 g Appro x. Tinned to mato e s
1 5 0 g To pping as desire d
(eg . co rn, ham, salami,
pineapple)
5 0 g G ra ted chee se
Basil, o re gano , thyme,
salt, pepper
Prepare the do ugh acco rd ing to the
manufac ture r’s instructio ns. Ro ll o ut to the size o f
the turntable.
Lightly g rease the turntab le and place the pizz a
base on it and pierce the do ugh.
Drain the to mato e s a nd cut them into pieces.
Seaso n the to mato es with the spices a nd
sprea d o n the do ug h. Put a ll o ther ingre dients
o n the pizz a a nd finally c o ver with the chee se.
Co o k the pizza using the FRESH
PIZZA/ FRESH QUICHEkey.
QUICHERECIPE
Ingredients:
2 0 0 g Puff pa stry (fro z en o r chilled)
3 Eg gs (size medium)
2 0 0 g Crea m o r milk
1 0 0 g G rated cheese (Emmenthal)
5 0 g Ham
Defro st the pa stry and ro ll it o ut to the size o f the
turntab le. Place o n the turntable and pierce the do ugh.
Mix the eg gs with the cream and the cheese
to g ether. Sea so n w ith salt a nd pepp er, and
po ur o ver the pa stry.
Sprinkle the ham o ver a nd co o k the
quiche using the FRESH
PIZZA/ FRESH QUICHE key and
the MORE( ) key.
Pro c edure :
1.
2.
3.
4.
Pro c edure :
1.
2.
3.
▲
▲
R-852 ENGLISH 5/5/99 2:05 pm Page 18
Downloaded from: http://www.usersmanualguide.com/
Other manuals for R-852
1
Table of contents
Other Sharp Microwave Oven manuals

Sharp
Sharp R-426H User manual

Sharp
Sharp R-8000GK User manual

Sharp
Sharp R-722STM User manual

Sharp
Sharp R-771 OE User manual

Sharp
Sharp R-556D Instruction Manual

Sharp
Sharp R-742W User manual

Sharp
Sharp R-559Y User manual

Sharp
Sharp R-764M User manual

Sharp
Sharp R-25A0(B) User manual

Sharp
Sharp R-230F User manual

Sharp
Sharp R-82FBST Instruction Manual

Sharp
Sharp R-27STM-A Instruction Manual

Sharp
Sharp R-23AM User manual

Sharp
Sharp R-360N User manual

Sharp
Sharp R-842IN User manual

Sharp
Sharp YC-PC284AU-S User manual

Sharp
Sharp R-310B User manual

Sharp
Sharp R-870B User manual

Sharp
Sharp R-647 Instruction Manual

Sharp
Sharp R-662 User manual