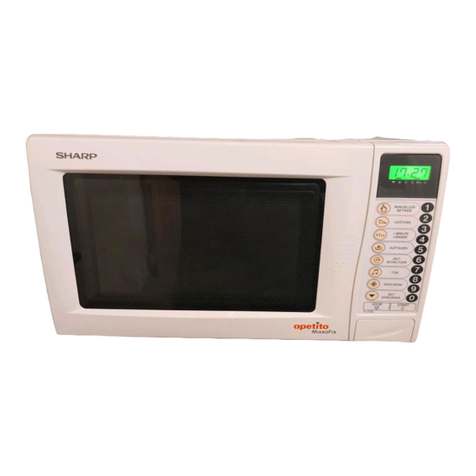
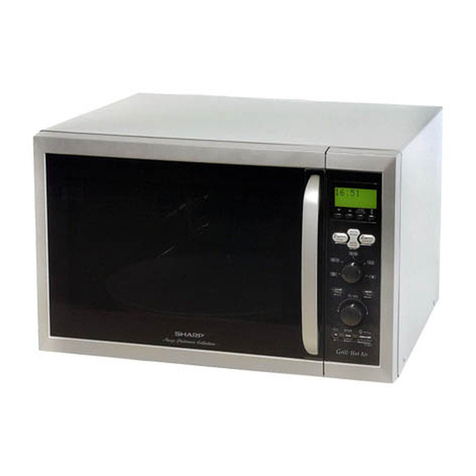
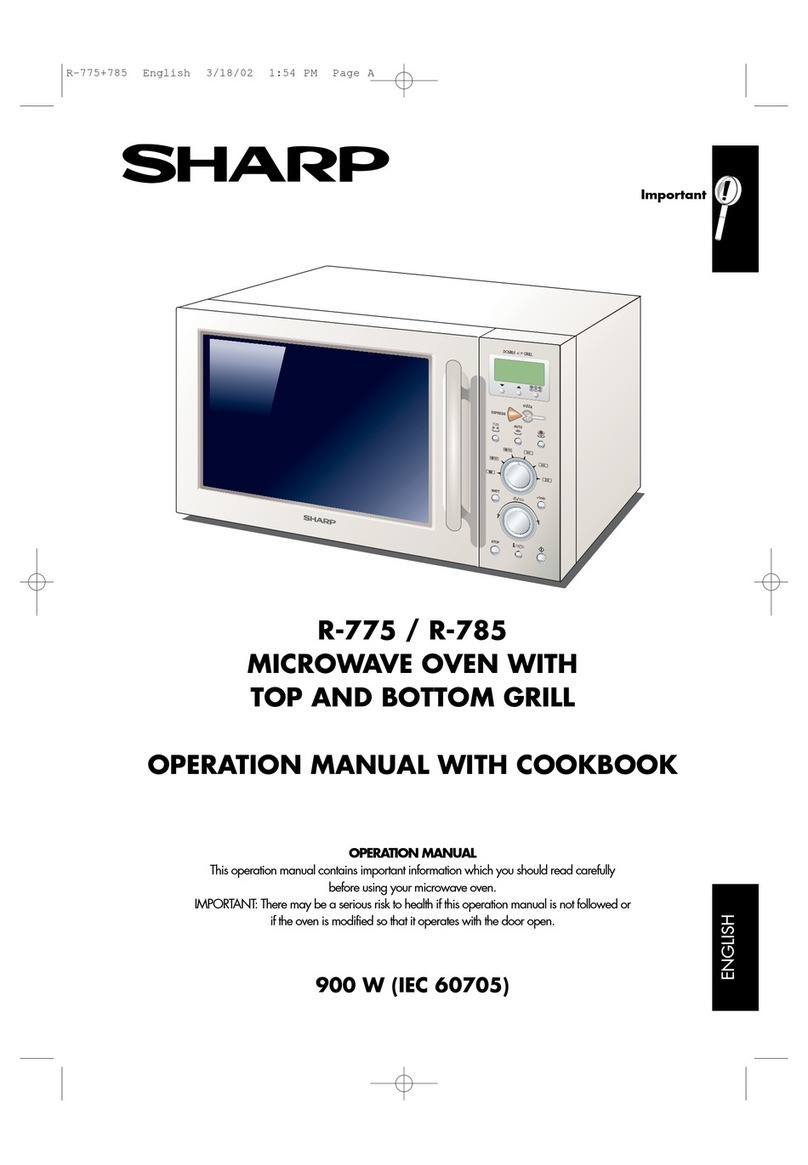
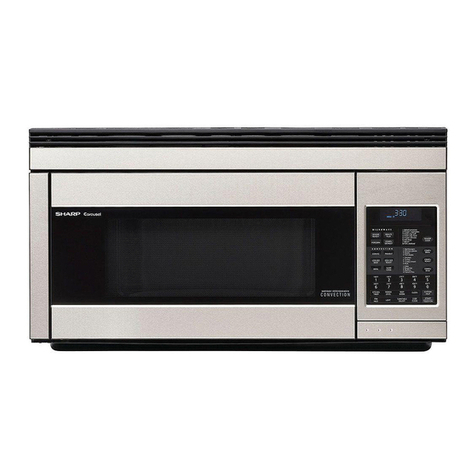
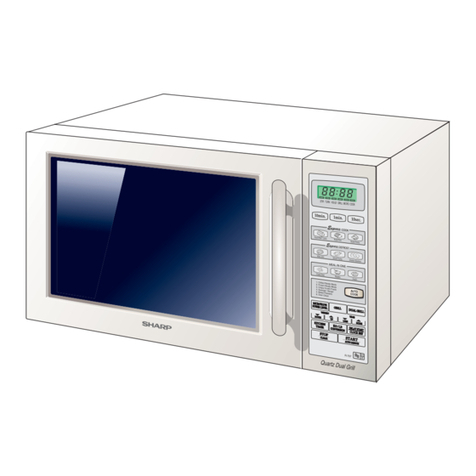
Sharp R-952M User manual

900W (IEC 705)
R-952M
MICROWAVE OVEN WITH
GRILL AND CONVECTION
OPERATION MANUAL
E
900W
Jet Convection & Grill
Master Chef
R-952
1 Meat
2 Poultry
3
Chicken Portions,
Steak,Chops
4 Minced Meat
5 Bread
1 Roast Beef/Lamb
2 Roast Pork
3 Roast Poultry
4 Chicken Portions
5 Pork/Lamb Chops
6 Crispy Crumb Foods
7 Baked Potatoes
8 Oven Chips
9 Cake
Kg Lb
LESS MORE
g oz
GRILL
MICROWAVE
POWER LEVEL
STOP/
CLEAR
TIMER
Kg/Lb
AUTO START
CLOCK
AUTO MINUTE
START
CONVECTION
CONVECTION/
DUAL
GRILL
10min. 1min. 10sec.
-
CHICKEN PORTIONS
FRESH FISH
SAUSAGE/BURGER
YORKSHIRE PUDDING ROAST POTATOES BAKED POTATOES
OVEN CHIPS RICE/PASTA
FRESH VEG.
R-952M O/M FINAL 1/7/99 2:03 pm Page +1

R-952M O/M FINAL 1/7/99 2:03 pm Page +2

CONTENTS
1
OPERATION MANUAL
This operation manual contains important information which you should read carefully
before using your microwave oven.
IMPORTANT: There may be a serious risk to health if this operation manual is not
followed or if the oven is modified so that it operates with the door open.
Contents . . . . . . . . . . . . . . . . . . . . . . . . . . . . . . . . . . . . . . . . . . . . . . . . . . . . .1
Oven and Accessories . . . . . . . . . . . . . . . . . . . . . . . . . . . . . . . . . . . . . . . .2
Control Panel . . . . . . . . . . . . . . . . . . . . . . . . . . . . . . . . . . . . . . . . . . . . . . . .3
Safety:
Important Safety Instructions . . . . . . . . . . . . . . . . . . . . . . . . . . . . . . . . . . . . .4
Installation . . . . . . . . . . . . . . . . . . . . . . . . . . . . . . . . . . . . . . . . . . . . . . . . .4-5
Operation:
Before Operation . . . . . . . . . . . . . . . . . . . . . . . . . . . . . . . . . . . . . . . . . . . .6
Energy Save Guide . . . . . . . . . . . . . . . . . . . . . . . . . . . . . . . . . . . . . . . . . . .6
Setting the Clock . . . . . . . . . . . . . . . . . . . . . . . . . . . . . . . . . . . . . . . . . . . . .7
Maff Heating Category . . . . . . . . . . . . . . . . . . . . . . . . . . . . . . . . . . . . . . . .7
Microwave Power Levels . . . . . . . . . . . . . . . . . . . . . . . . . . . . . . . . . . . . . . .8
Microwaving - Introduction . . . . . . . . . . . . . . . . . . . . . . . . . . . . . . . . . . . . . .8
How to Operate the Oven . . . . . . . . . . . . . . . . . . . . . . . . . . . . . . . . . . . . . .9
Microwave Defrosting . . . . . . . . . . . . . . . . . . . . . . . . . . . . . . . . . . . . . . . . .9
Convection Cooking . . . . . . . . . . . . . . . . . . . . . . . . . . . . . . . . . . . . . . . . . .10
Preheating the oven . . . . . . . . . . . . . . . . . . . . . . . . . . . . . . . . . . . . . . . . . . .11
Grilling . . . . . . . . . . . . . . . . . . . . . . . . . . . . . . . . . . . . . . . . . . . . . . . . . . . .11
Dual Cooking . . . . . . . . . . . . . . . . . . . . . . . . . . . . . . . . . . . . . . . . . . . . . . .12
Instant Cook . . . . . . . . . . . . . . . . . . . . . . . . . . . . . . . . . . . . . . . . . . . . . . . .13
Instant Cook Chart . . . . . . . . . . . . . . . . . . . . . . . . . . . . . . . . . . . . . . . . . . . .13-14
Auto Cook/Auto Defrost . . . . . . . . . . . . . . . . . . . . . . . . . . . . . . . . . . . . . . .15
Auto Cook Chart . . . . . . . . . . . . . . . . . . . . . . . . . . . . . . . . . . . . . . . . . . . . .16-18
Auto Defrost Chart . . . . . . . . . . . . . . . . . . . . . . . . . . . . . . . . . . . . . . . . . . . .18
Other Convenient Functions . . . . . . . . . . . . . . . . . . . . . . . . . . . . . . . . . . . . .19-23
Cooking Advice:
Suitable Cookware . . . . . . . . . . . . . . . . . . . . . . . . . . . . . . . . . . . . . . . . . . .24-25
Food Handling & Preparation . . . . . . . . . . . . . . . . . . . . . . . . . . . . . . . . . . . .25-26
Advice For Defrosting . . . . . . . . . . . . . . . . . . . . . . . . . . . . . . . . . . . . . . . . .27
Advice For Reheating . . . . . . . . . . . . . . . . . . . . . . . . . . . . . . . . . . . . . . . . . .28
Aftercare:
Cleaning & Maintenance . . . . . . . . . . . . . . . . . . . . . . . . . . . . . . . . . . . . . . .29
Troubleshooting . . . . . . . . . . . . . . . . . . . . . . . . . . . . . . . . . . . . . . . . . . . . . .29
To Replace Parts and Accessories . . . . . . . . . . . . . . . . . . . . . . . . . . . . . . . . .30
Guarantee . . . . . . . . . . . . . . . . . . . . . . . . . . . . . . . . . . . . . . . . . . . . . . . . .30
Specifications . . . . . . . . . . . . . . . . . . . . . . . . . . . . . . . . . . . . . . . . . . . . . . .31
Notes . . . . . . . . . . . . . . . . . . . . . . . . . . . . . . . . . . . . . . . . . . . . . . . . . . . . .32
R-952M O/M FINAL 1/7/99 2:03 pm Page 1

R-952
1 Meat
2 Poultry
3
Chicken Portions,
Steak,Chops
4 Minced Meat
5 Bread
1 Roast Beef/Lamb
2 Roast Pork
3 Roast Poultry
4 Pork/Lamb Chops
5 Crispy Crumb Foods
6 Oven Ready Pizza
7
Chilled Ready Meals
8
Frozen Ready Meals
9 Cake
10min. 1min. 10sec.
Kg Lb
LESS MORE
g oz
GRILL
MICROWAVE
POWER LEVEL
STOP/
CLEAR
TIMER
Kg/Lb
AUTO START
CLOCK
AUTO MINUTE
START
CONVECTION
CONVECTION/CONVECTION/
DUAL
GRILL
-
CHICKEN PORTIONS
FRESH FISH
SAUSAGE/BURGER
YORKSHIRE PUDDING ROAST POTATOES BAKED POTATOES
OVEN CHIPS RICE/PASTA
FRESH VEG.
2
OVEN AND ACCESSORIES
ACCESSORIES:
Check to make sure the following accessories
are supplied:
1Turntable 2Turntable support
3Low Rack 4High Rack
• Place the turntable support into the coupling in the centre of
the oven floor, ensuring you place it TOP side up, (TOP is
engraved on one side). It should be able to freely rotate
around the coupling.
• Place the turntable on to the turntable support.
NOTE: When you order accessories,
mention the Model and part name to
your dealer or SHARP authorised service facility
1
2
For use see page 24
1Grill heating
element
2Oven lamp
3Control panel
4Door opening
button
5Waveguide cover
6Oven cavity
7Coupling
8Door seals and
sealing surfaces
9Air-vent openings
10 Outer cabinet
11 Power cord
2
4
1
865
7
4
3
3
11 10
Coupling
9
R-952M O/M FINAL 1/7/99 2:03 pm Page 2

R-952
1 Meat
2 Poultry
3
Chicken Portions,
Steak,Chops
4 Minced Meat
5 Bread
1 Roast Beef/Lamb
2 Roast Pork
3 Roast Poultry
4 Pork/Lamb Chops
5 Crispy Crumb Foods
6 Oven Ready Pizza
7
Chilled Ready Meals
8
Frozen Ready Meals
9 Cake
10min. 1min. 10sec.
LESS MORE
g oz
Kg Lb
GRILL
MICROWAVE
POWER LEVEL
STOP/
CLEAR
TIMER
Kg/Lb
AUTO START
CLOCK
AUTO MINUTE
START
CONVECTION
CONVECTION/
DUAL
GRILL
CHICKEN PORTIONS
FRESH FISH
SAUSAGE/BURGER
YORKSHIRE PUDDING ROAST POTATOES BAKED POTATOES
OVEN CHIPS RICE/PASTA
FRESH VEG.
3
CONTROL PANEL
DIGITAL DISPLAY
1 PCS indicator.
2 KG WEIGHT indicator.
3 CONVECTION indicator.
4 GRILL indicator.
5 MICROWAVE indicator.
6 COOK indicator.
7 LBS WEIGHT indicator.
8 OZ WEIGHT indicator.
9 DEFROST indicator.
10 AUTO indicator.
11 PERCENTAGE indicator.
12 LESS/MORE indicator.
13 INFO indicator.
14 TEMPERATURE indicator.
CONTROL PANEL
15 TIME keys. Use to select cooking times.
16 INSTANT COOK keys.
17 AUTO COOK key.
18 AUTO DEFROST key.
19 INFO key
(for interactive display)
.
20 WEIGHT key.
21 LESS/MORE keys.
Press to shorten or lengthen heating time.
22 GRILL key.
23 CONVECTION key.
24 DUAL CONVECTION/GRILL key.
25 STOP/CLEAR key.
Press once to stop a programme,
and/or twice to cancel a programme.
26 MICROWAVE POWER LEVEL key.
Press to select microwave power level.
27 START/AUTO MINUTE key.
28 TIMER key.
29 AUTO START/CLOCK key.
30 WEIGHT CONVERSION key.
24
25
29
30
21
27
28
23
20
17
26
4
19
18
16
15
22
6
3
78910
5
13
12
11
14
2
1
R-952M O/M FINAL 1/7/99 2:03 pm Page 3

4
Inspect the Oven:
Check the oven carefully for damage before
and regularly after installation.
• Make sure the door closes properly, that
it is not misaligned or warped.
• Check the hinges and door safety latches
are not broken or loose.
• Ensure the door seal and sealing surfaces
are not damaged.
• Inspect the oven interior and door for
dents.
• Warning: If the door or seals are
damaged, the oven must not be operated
until it has been repaired by a competent
person.
IMPORTANT:
If any damage is apparent, do not operate
the oven in any way. Contact your dealer
or an authorised Service Technician
appointed by SHARP.
It is hazardous for anyone other than a
competant person to carry out any service
or repair operation which involves the
removal of a cover which gives protection
against exposure to microwave energy.
INSTALLATION
IMPORTANT SAFETY INSTRUCTIONS
Oven Use:
• The oven is for domestic food preparation only.
Never operate when empty, except as directed in
the operation manual (see page 10).
• Do not leave or store anything inside the oven when
not in use.
• Never attempt to use the oven with the door open. It
is important not to tamper with the door safety latches.
This may result in exposure to microwave energy.
• Never operate the oven with any object caught in
the door sealing surfaces, this again may cause
microwave leakage.
• Do not insert fingers or objects in the holes of the
door latches or air-vent openings as this may
damage the oven and cause an electric shock.
• If water or food drops inside the air vent openings
switch off the oven immediately, unplug it and call a
Service Technician appointed by SHARP.
• Never attempt to move the oven while it is operating.
Childcare:
Pacemaker: If you have a heart pacemaker, consult
your doctor or the pacemaker manufacturer prior to
oven use.
1.Remove all packing materials including the feature
sticker.
2.Place oven on a secure, level surface, strong
enough to take the oven weight, plus the heaviest
item likely to be cooked in the oven.
3.Do not place the oven where heat, moisture or high
humidity are generated, (for example, near or
above a conventional oven or kettle) or near
combustible materials (for example, curtains). Do
not block or obstruct air vent openings, as
obstructions may ignite due to the emission of hot
air.
4.Make sure the power supply cord is undamaged
(See Installation next page) and that it does not run
under the oven or over any hot or sharp surfaces.
Fire: If smoke is observed, switch off and
unplug the appliance and keep the door
closed in order to stifle any flames.
Liquids: Take care when microwaving
liquids and beverages. To prevent
delayed eruptive boiling of liquid and
possible scalding: stir liquid prior to and
during heating/reheating, let liquid
stand in the oven at the end of cooking.
WARNING:
0
23
145
8
9
10
11
12
13
14
15
20
25
30
7
6
READ CAREFULLY AND KEEP FOR FUTURE REFERENCE
Warning: Only allow children to use the oven without
supervision when adequate instructions have been
given so that the child is able to use the oven in a safe
way and understands the hazards of improper use.
R-952M O/M FINAL 1/7/99 2:03 pm Page 4

5
INSTALLATION (Continued)
5.The socket must be readily accessible so that it can
be easily unplugged in an emergency.
6. The oven door may become hot during cooking.
Place or mount the oven so that the bottom of the
oven is 85 cm or more above the floor.
7.Ensure there is a minimum of free space above the
oven of 15cm.
8.Do not use the oven outdoors.
BUILDING-IN-KIT
An installation frame is available which enables the
microwave oven to be integrated within a kitchen unit.
The microwave oven is not designed to be built above
or near a conventional oven.
SHARP recommend the use of the build-in kit,
EBR-9800, available from your SHARP dealer. Only
the use of this frame will guarantee the quality and
safety of the oven. When building, follow installation
instructions supplied carefully.
IMPORTANT ELECTRICAL CONNECTION
• Do not allow water to come into contact with the
power supply cord or plug.
• Insert the plug properly into the socket as the plug
may otherwise overheat and catch fire.
• Do not connect other appliances to the same socket
using an adaptor plug as it may cause the house
wiring to overheat and catch fire.
• If the plug or socket is loose or the power supply
cord is damaged, do not operate the oven, it must
be replaced by the manufacturer or their service
agent or a similarly qualified person in order to
avoid a hazard. A defective plug, power supply
cord or socket may overheat and catch fire during
operation or cause an electrical shock.
• When removing the plug from the socket always
grip the plug, never the mains lead as this may
damage the power supply cord and the
connections inside the plug.
• The product is fitted with a re-wireable plug. Should
it not be suitable for the socket outlet in your home,
remove the plug and fit an appropriate type,
observing “To replace the mains plug” on this page.
If you wish to remove or replace the plug supplied,
ensure the plug is removed properly and not cut off.
When replacing the plug please ensure that you use a
BSI or ASTA approved plug to BS1363, this should be
fitted with a brown coloured 13 amp fuse approved
by BSI or ASTA to BS1362. If you have any doubt
about electrical connection seek the help of a
qualified electrician.
WARNING - IMPORTANT NOTE
Please note both the Operation Manual and Cookery
Book supplied specify 900W (IEC 705) microwave
output power. This applies only when the oven is
operated on a 230-240V supply.
If your supply is less than 230-240V, it may be
necessary to increase the cooking time when
following the Operation Manual and Cookery Book
instructions.
TO REPLACE THE MAINS PLUG
The wires in the mains cable are colour coded:
green and yellow stripes = EARTH
blue = NEUTRAL
brown = LIVE
As the colours of the cores in the mains lead of your
oven may not correspond with the coloured marking
identifying the terminals in your plug, connect the wires
as follows:
• The green and yellow wire to the plug terminal
marked E or or coloured green or coloured
green and yellow.
• The blue wire to the plug terminal marked N or
coloured black or coloured blue.
• The brown wire to the plug terminal marked L or
coloured red or coloured brown.
Make sure the terminal screws are tight and the cable is
held securely by the cable grip where it enters the plug.
Like most appliances in your home, your oven must be
connected to a single phase 230-240V, 50Hz
alternating current supply.
If you do not make the proper electrical connections
you might damage the oven or injure yourself. Neither
SHARP nor the supplier will be liable if this happens.
WARNING!
THIS APPLIANCE MUST BE EARTHED.
To wire an appropriate plug, follow the wiring
code below.
The minimum height of
free space necessary
above the top surface
of the oven.
15cm
R-952M O/M FINAL 1/7/99 2:03 pm Page 5

6
BEFORE OPERATION
ENERGY SAVE MODE
STOP/CLEAR key
Your oven comes set for an “Energy Save” mode. When “Energy Save” mode is on, the microwave display will
show “.0” instead of the time of day. If you do nothing for 2 minutes after the preceding operation, i.e. at the
end of cooking, the power will go off automatically and the display will show “OVEN IN ENERGY SAVE
MODE” just before the oven is in “Energy Save” mode. The energy consumption of the oven will nearly equal
zero in the “Energy Save” mode. To restore the power, open and then close the door. “Energy Save”
mode will remain “on” until you set the clock.
To set the energy save mode:
3. Press the START/AUTO
MINUTE key once.
1. Press the AUTO START/CLOCK
key once.
The energy save mode
will be set and the display
will show nothing.
2. Press the AUTO
START/CLOCK key again.
The display will show:
x1
x1
Your oven has an “Energy Save” mode.
1. Plug in the oven. Nothing will appear in the display at this time.
2. Open the door. The display will flash the message shown opposite.
3. Close the door. The oven display wil show “.0”. If you set the clock “Energy
Save” mode will be off. If you keep “Energy Save” mode, go to step 5.
4. Set the clock, refer to page 7.
5. Heat the oven using the convection and grill without food for 20 minutes.
(For operation, see NOTES on page 10 and 11.
Use the STOP/CLEAR key to:
1. Erase a mistake during programming.
2. Stop the oven temporarily during cooking.
3. Cancel a programme during cooking, press twice.
x1
R-952M O/M FINAL 1/7/99 2:03 pm Page 6

7
E
900W
MAFF HEATING CATEGORY
Model R-952M has a microwave output power of
900 Watts; heating category E.
The heating category (a letter A to E) was
developed by MAFF (Ministry of Agriculture,
Fisheries and Food) with microwave oven and food
manufacturers and indicates the ability of the oven
to heat small quantities of food (up to 500g [1lb
2oz]). It does not represent the general
performance of the oven.
Microwave output power in
watts (based on international
(IEC 705) standard).
600 700 800 900 1000 Watts
OVEN
OUTPUT
POWER
Less heating time required
More heating time required
Letter representing the oven
heating category.
Microwave
Symbol.
A B C D E
OVEN
OUTPUT
CATEGORY
Less heating time required
More heating time required
Food packs carry cooking instructions for heating
categories A to E. Follow instructions for the letter
corresponding to the oven's heating category.
The higher the output power and heating category
of the oven the less heating time is required, as
shown opposite.
Your oven is fitted with a 12 hour clock. To set the time of day, follow the guidelines given in the example below:
EXAMPLE:
To set the time of day, 12:35.
5. Press the AUTO START/ CLOCK
key again to set the clock.
1. Press the AUTO START/CLOCK
key once.
Check the display.
3. Press the AUTO START/
CLOCK key again.
4. Enter the minutes by pressing the
10 MIN key three times and the
1 MIN key five times.
2. Enter the hours, by pressing
the 10 MIN key once and
the 1 MIN key twice.
NOTES:
• If the oven is in cooking or timer mode and you wish to know the time of day, press the AUTO START/CLOCK key.
As long as your finger is pressing the key, the time of day will be displayed.
• If the electrical power supply to your microwave is interrupted, plug in the oven again, then open and close the door.
The display will show “ .0”. If this occurs during cooking, the programme will be erased. The time of day will also be
erased.
• If the clock is set and cooking is complete, the display will show the correct time of day. If the clock has not been set,
the display will show ” .0”.
x1
x1
x1 x2
x3 x5
x1
SETTING THE CLOCK
R-952M O/M FINAL 1/7/99 2:03 pm Page 7

8
MICROWAVING - INTRODUCTION
Water, sugar and fat in food absorbs the microwaves
and causes them to vibrate. This creates heat by
friction, in the same way your hands get warm when
you rub them together.
The outer areas of food are heated by microwave
energy and the remaining portions by conduction. It is
important to turn, rearrange or stir food to ensure
even heating. Where recommended, allow food to
stand, this is not optional but is necessary to ensure
thorough cooking. It is particularly important for dense
food, such as joints of meat.
NOTES:
• Microwaves pass through non-metallic dishes and
utensils and heat the food inside the dishes.
• Microwaves are reflected by metal.
• The oven is lined with metal and has a fine metallic
mesh in the door to prevent microwave leakage.
• Metallic dishes are not suitable for microwaving.
• See SUITABLE COOKWARE, page 24-25.
100%
(HIGH)
70%
(MEDIUM
HIGH)
50%
(MEDIUM)
30%
(MEDIUM
LOW)
10%
(LOW)
x1
x2
x3
x4
x5
MICROWAVE POWER LEVELS
To operate the microwave function:
• Enter the required cooking/defrosting time.
• Select the power level by pressing the
MICROWAVE POWER LEVEL key.
There are 5 microwave power levels (see below).
• Press START/AUTO MINUTE key.
IMPORTANT:
The microwave power level will default to 100% (HIGH)
unless you press the MICROWAVE POWER LEVEL key
to the desired setting. To help you decide which power
level is suitable, refer to the charts in the Cookery Book.
NOTES:
•To check the microwave power level during
cooking/defrosting press the MICROWAVE
POWER LEVEL key. The power level will be
displayed as long as the key is pressed. This
does not affect the programme or cooking time.
• Power level: The microwave power level is
varied by the microwave energy switching on
and off. When using the power levels other than
100% (HIGH) you will be able to hear the
microwave energy pulsing on and off as the
food cooks or defrosts.
R-952M O/M FINAL 1/7/99 2:03 pm Page 8

9
HOW TO OPERATE THE OVEN
Opening and closing the door:
• To open the oven door, press the door opening
button.
• The oven lamp will light when the door is open.
• Close the door firmly and the lamp will go out.
Always operate the oven with the turntable and support fitted correctly, see page 2.
This promotes thorough even cooking.
• A badly fitted turntable may rattle, may not rotate properly and damage the oven.
• The turntable rotates clockwise or counter-clockwise. The rotary direction may change each time you start the
oven. This does not affect cooking performance.
1. Enter the heating time
by pressing the 1min.
key two times.
2. Press the
MICROWAVE
POWER LEVEL key
five times to select 10%.
3. Press the START/AUTO
MINUTE key once to
start cooking.
Display will count
down through
heating time.
x5
x2 x1
WARNING:
NOTES:
•
Your oven can be programmed up to 99 minutes, 90 seconds (99.90)
.
• When the door is opened during cooking, the cooking time on the display stops. The cooking time starts to count
down again when the door is closed and the START/AUTO MINUTE key is pressed.
• When oven operation is finished, the time of day will reappear on the display, if set.
MICROWAVE COOKING:
EXAMPLE:
To cook on 10% (low) power for 2 minutes.
To defrost foods not included in the Auto Defrost menu, use microwave power levels 30%
(MEDIUM LOW) or 10% (LOW). Stir or turn food at least 2-3 times during defrosting.
After defrosting, wrap in aluminium foil and leave to stand until thoroughly defrosted.
Refer to the defrosting charts in the Cookery Book.
MICROWAVE DEFROSTING
R-952M O/M FINAL 1/7/99 2:03 pm Page 9

10
CONVECTION COOKING
The oven cavity, door, turntable, turntable support, racks and dishes will become very hot. Use thick oven gloves
when removing the food or turntable from the oven to prevent burns.
NOTES:
• Once the oven has started you can find out the temperature you have programmed by pressing the
CONVECTION TEMPERATURE key. The temperature will appear on the display. This will not affect the
programme or cooking time.
• If you wish to preheat and cook at a different temperature, press the CONVECTION TEMPERATURE key until the
desired temperature is displayed after step 5 in the above example.
• After cooking is complete, the cooling fan will continue working for a short time to lower the temperature of
the electrical and mechanical components. The display will show “NOW COOLING”
WARNING:
Your oven can be used as a
conventional oven using the
convection facility.
The temperatures available in degrees Centigrade are:
250°C, 230°C, 220°C, 200°C, 180°C,
160°C, 130°C, 100°C, 70°C, 40°C.
NOTES:
•
CONVECTION cooking is ideal for cooking Victoria sandwich cakes, buns, biscuits, scones and for proving
bread at 40˚C.
• When using the CONVECTION facility, all metal cookware can be used. See SUITABLE COOKWARE
page 24-25. To achieve the best results when cooking by CONVECTION, always use the low metal
rack for one layer cooking, and the high rack and low rack for two layer cooking.
• When first using the convection, smoke and odour will be given off. To avoid this happening when
food is being cooked, heat the oven convection 250˚C without food for approximately 20 minutes.
EXAMPLE:
To bake at 200°C for 20 minutes.
1. Input the desired
cooking time, of 20
minutes.
3. Press the START/AUTO MINUTE
key and the oven will cook 20
minutes at 200˚C.
x2 x1
2. Input 200˚C by pressing
the CONVECTION key
four times.
x4
R-952M O/M FINAL 1/7/99 2:03 pm Page 10

11
PREHEATING THE OVEN
The Grill heating element at the top of the oven
cavity has one power setting only. It is efficient and
economical.
The efficiency of the grill is assisted by the turntable
which rotates simultaneously to ensure even
browning. The grill is ideal for cooking bacon,
gammon steak, fish fingers and tea cakes. For
example, you can make toast or cheese on toast. It
is ideal for browning and crisping food which has
been microwaved.
Use the high rack for grilling small items of food such
as bacon, steak and toast, turn over halfway through
grilling. Food can be placed directly on the rack or
placed in a flan dish or on a heat-resistant plate.
When browning and crisping the surface of foods in
a casserole dish, the high rack can be used if the
container is shallow enough. However, it is
advisable to place such containers directly on the
turntable or low rack, allow a little extra time to
brown and crisp as desired.
NOTE:
When first using the grill heater, smoke and odour
will be given off. To avoid this happening when
food is being cooked, heat the grill heater without
food for approx. 20 minutes.
1. Enter the grilling time by
pressing the 1MIN key 8
times.
2. Press the
GRILL key to
select the grill
mode.
3. Press the START/
AUTO MINUTE
key once to start
grilling.
The display counts
down through the
grilling time.
EXAMPLE: To grill for 8 minutes.
x1
x8 x1
EXAMPLE: To preheat the oven to 130°C.
NOTES:
• When the oven reaches the desired temperature, the ‘beep’ signal will sound and display the temperature in °C.
• If you prefer not to preheat the oven where recommended in the Cookery Book, allow extra cooking time.
• The preheated temperature will be maintained for approximately 30 minutes before automatically turning
itself off and returning to the time of day if the clock has been previously set.
Your oven can be preheated to a desired temperature prior to oven cooking.
1. To preheat the oven,
enter the desired
temperature
(130°C).
2. Press the
START/AUTO
MINUTE key to
begin preheating.
3. When the oven reaches 130°C, the ‘beep’ signal will
sound and the oven will display 130°C. Place food in
the oven, enter the desired cooking time and temperature
before pressing the START/AUTO MINUTE key.
x7 x1
GRILLING
NOTE: After cooking is complete, the cooling fan will continue working for a short time to lower the
temperature of the electrical and mechanical components.
The display may show “NOW COOLING”.
R-952M O/M FINAL 1/7/99 2:03 pm Page 11

12
DUAL COOKING
The DUAL CONVECTION/GRILL function
combines any one of the microwave power levels
with convection or the grill.
DUAL CONVECTION/GRILL is programmed with
microwave power level 30% (MED LOW). Press the
MICROWAVE POWER LEVEL key if you wish to
adjust the power level. The combination of
microwave and convection or grill reduces cooking
time and provides a crisp, brown result giving you
the convenience of fast cooking with traditional
appetising taste and appearance.
1. Enter the cooking time by
pressing the 10 MIN key
once and the 1 MIN key
once.
2. Press the DUAL
CONVECTION/
GRILL key twice.
3. Press the MICROWAVE
POWER LEVEL key
three times for 70%
(MEDIUM HIGH).
4. Press the START/
AUTO MINUTE
key once to start
cooking.
EXAMPLE: For DUAL GRILL.
To cook using DUAL GRILL, combining 70% (MEDIUM HIGH) microwave power for 11 minutes.
x1 x1 x2 x3 x1
COOKING HINT: For DUAL GRILL.
Use the high rack for grilling small items such as sausages, bacon or burgers. Turn over halfway through
cooking. Food can be placed directly on the rack, on a heat resistant plate or in a flan dish on the rack.
EXAMPLE: For DUAL CONVECTION.
To cook for 20 minutes on DUAL CONVECTION 230˚C combined with MICROWAVE POWER LEVEL 10% (LOW).
5. Press the START/AUTO
MINUTE key once to
start cooking.
NOTES:
• When browning or crisping foods in a casserole dish, you may use the high rack if the container is
shallow enough. However, it is advisable to place such containers directly onto the turntable or low
rack, allow a little extra time to brown and crisp.
• Follow recommended DUAL COOKING times and procedures given in the chart in the cookery book.
• After cooking is complete, the cooling fan will continue working for a short time to lower the
temperature of the electrical and mechanical components. The display may show “NOW COOLING”.
1. Enter the cooking
time by pressing the
10 MIN. key twice.
2. Press the DUAL
CONVECTION/
GRILL key to select
the cooking mode.
3. Press the CONVECTION
TEMPERATURE key
once to change the
temperature to 230˚C.
4. Press the MICROWAVE
POWER LEVEL key once to
change the power to 10%.
x2 x1 x1
x1 x1
R-952M O/M FINAL 1/7/99 2:04 pm Page 12

13
INSTANT COOK
CHICKEN 1-4 Pieces • Place Chicken on the high rack (chicken portions best side down).
PORTIONS (1 Piece • Turn over when the oven indicates.
300 g) • Stand for 4-5 minutes wrapped in aluminium foil after cooking.
NOTE: For safety reasons it is not possible to use the LESS (▼) key
for chicken portions.
FRESH FISH 150 g, 300 g, • Arrange in a single layer in a large flan dish, cover dish with cling
(FILLETS, STEAKS, 450 g film and pierce in several places. Place on the turntable.
WHOLE) • Stand for 2-3 minutes after cooking before serving.
SAUSAGES 100 g, 200 g • Prick sausages.
(Chilled) 300 g, 400 g • Place meat on the high rack.
BURGERS • Turn over when the oven indicates.
(Chilled/Frozen) NOTE: It is not possible to use the LESS key for this menu.
• Select MORE for frozen burgers.
CHILLED: 1serving (100 g) = 1 beefburger (1/4 lb), 2 thick or 4
thin sausages.
FROZEN: 1 serving (100 g) = 1 beefburger (1/4 lb) (no sausages).
NOTE: The content of sausages vary which may cause differences in the
overall browning. If you prefer a browner result press the MORE key.
MENU WEIGHT COOKING PROCEDURE
RANGE
INSTANT COOK can be used for cooking the foods shown opposite.
Always refer to the Instant Cook Chart before operating this function.
Press the selected key, re-press to select the correct weight and the
programme will automatically start to cook after 2-3 seconds.
If food requires manipulation (i.e. turn over or stir) then open the door,
when the oven indicates follow the instruction, close the door and
press the START/AUTO MINUTE key.
NOTES: Your oven comes set for kg/g mode. For converting to
Lb/Oz, press the WEIGHT CONVERSION key once before
pressing the INSTANT COOK key.
EXAMPLE: To cook 450g Fresh Fish.
Press the FRESH FISH key
three times within two
minutes of closing the door.
The oven will
automatically
start cooking.
FRESH FISH
x3
NOTES:
• The instant cook function can only be input within two minutes after cooking completion, closing the
door or pressing the STOP/CLEAR key.
• Press the MORE or LESS key before selecting the menu where recommended in the chart below.
• The final temperature will vary according to the initial food temperature. Check that the food is piping
hot after cooking. If necessary you can extend the cooking time and change the power level.
CHICKEN PORTIONS
FRESH FISH
SAUSAGE/BURGER
YORKSHIRE PUDDING ROAST POTATOES BAKED POTATOES
OVEN CHIPS RICE/PASTA
FRESH VEG.
INSTANT COOK CHART
R-952M O/M FINAL 1/7/99 2:04 pm Page 13

14
INSTANT COOK CHART (Continued)
YORKSHIRE 4 or 8 • Place 5 ml (1 tsp) oil into 4-8 Yorkshire pudding moulds.
PUDDING Pieces • Place one tray on the low rack, the other (if using) on the high rack.
• Enter quantity 4 or 8 pieces and the oven will preheat.
• Whilst the oven is preheating prepare the batter.
Combine 300 ml (1/2 pint) milk, 2 eggs (size 3), 100 g (4 oz)
plain flour and a pinch of salt until smooth. This recipe makes 8
Yorkshire puddings, halve the ingredients to make 4.
•When the oven stops and displays 220˚C remove tray(s) from the
oven and pour equal quantities of batter into the hot oil in each
mould.
• Return tray(s) to the oven and close the door. The oven will display
the cooking programme. Press the START/AUTO MINUTE key.
ROAST 200 g, 400 g • Peel the potatoes and cut into 50g pieces.
POTATOES 600 g, 800 g • Place in a flan dish with vegetable oil:
200 g = 2 tbsp (30 ml) oil.
400 g = 3 tbsp (45 ml) oil.
600 g = 4 tbsp (60 ml) oil.
800 g = 5 tbsp (75 ml) oil.
• Place on low rack to cook.
• Turn over when oven indicates and baste with the oil.
BAKED 2, 4, 6 potatoes • Pierce each potato in several places, place towards the edge of
POTATOES (each potato the turntable.
= 250 g)
OVEN CHIPS 100 g, 200 g • Spread the chips evenly in a large flan dish, and place on the
300 g, 400 g high rack.
• Turn over as oven indicates.
RICE/PASTA 100 g, 200 g • Add 300 ml (1/2 pint) boiling water per 100 g (4 oz) rice. Do
300 g not cover.
• Stir when oven indicates.
• Stand for 3-4 minutes before draining and rinsing in boiling water.
FRESH 150 g, 300 g • Cut, chop and slice into evenly sized pieces.
VEGETABLES 450 g • Place in a suitable sized casserole dish.
• Add 15 ml (1tsp) of water per 100 g (4 oz) of vegetables.
• Cover dish with cling-film and pierce in five places.
• Stand for 2-3 minutes before serving.
MENU WEIGHT COOKING PROCEDURE
RANGE
INSTANT COOK NOTES:
• All the menus with the exception of Fresh Fish, Rice/Pasta and Fresh Vegetables, use Microwaves with
Convection or Grill during the cooking programme to provide a brown, crisp traditional looking and
tasting result.
• If you wish to cook foods or weights of food not included in the INSTANT COOK facility please refer to
the cooking charts in the Cookery Book.
• For converting to Lb/oz please see the conversion chart on page 10 in the Cookery Book.
R-952M O/M FINAL 1/7/99 2:04 pm Page 14

15
AUTO COOK/AUTO DEFROST
The AUTO COOK / AUTO DEFROST function enables you to cook or
defrost foods listed on the control panel attached to the microwave oven.
Follow the example below for details on how to operate this function.
EXAMPLE: To cook 1.2kg Roast Beef.
1. Press the AUTO COOK key or the AUTO DEFROST key until the number corresponding to the food
listed on the control panel appears in the display.
In the example given here, the AUTO COOK
key is pressed once to select the second item, Roast Beef.
2. To enter the weight in kg/g or lb/oz,
press the relevant WEIGHT keys.
3. Press the START/AUTO MINUTE key to start cooking.
The display counts down through the cooking time.
WEIGHT RANGE:
Food weight should be rounded up to the nearest 0.1kg or 1oz, for example, 0.65 kg to 0.7 kg and
12.5 oz to 13 oz.
You are restricted to enter a weight within the range given (see the chart on the following page).
To cook/defrost weights below or above that range, refer to the charts in the Cookery Book.
If you have the INFORMATION FUNCTION active (see page 21), the weight range flashes on the display. If you
enter a weight below or above the range ERROR will flash on the display screen when you press the START key.
COOKING HINT:
Each setting of AUTO COOK/AUTO DEFROST has a cooking hint. If you wish to check, press the INFO key
whenever info is lit in the display.
x1
x1
You can enter weight in Lb/oz or Kg/g. To convert to either
weight range press the WEIGHT CONVERSION key once
before entering weight.
x2
x1
NOTES:
• Press the MORE or LESS keys before the AUTO COOK or AUTO DEFROST menu where recommended
in the chart on the next page.
• When action is required, (example, to turn food over) the oven stops and the audible signals sound and the
display shows the necessary action. To continue cooking press the START/AUTO MINUTE key.
• The final temperature will vary according to the initial food temperature. Check the food is piping hot after
cooking. If necessary, you can extend the cooking time and change the power level.
1 Meat
2 Poultry
3
Chicken Portions,
Steak,Chops
4 Minced Meat
5 Bread
1 Roast Beef/Lamb
2 Roast Pork
3 Roast Poultry
4 Pork/Lamb Chops
5 Crispy Crumb Foods
6 Oven Ready Pizza
7
Chilled Ready Meals
8
Frozen Ready Meals
9 Cake
R-952M O/M FINAL 1/7/99 2:04 pm Page 15

16
AUTO COOK CHART
1
2
3
4
5
6
7
MENU
N0.
WEIGHT
RANGE
COOKING PROCEDURE
AUTO COOK CHART
ROAST BEEF/
LAMB
ROAST PORK
ROAST
POULTRY
PORK/LAMB
CHOPS
CRISPY
CRUMB
FOODS
OVEN READY
PIZZA
CHILLED
READY MEALS
0.6 - 1.8 kg
0.6 - 1.8 kg
1.2 - 3.6 kg
0.2 - 1.0kg
0.1 - 0.4 kg
0.2 - 0.8 kg
0.3 - 0.8 kg
• Place meat in a flan dish on the low rack.
• Turn over when the oven indicates.
• After cooking, wrap in aluminium foil and leave the meat to stand for
10 minutes.
NOTE: Use the MORE (▲) key for beef/lamb which is well done and
the LESS (▼) key for meat which is rare. It is not possible to use
the LESS (▼) key for pork.
• Place the poultry breast-side down, in a flan dish on the low rack.
• Turn over when the oven indicates.
• After cooking, wrap in foil and leave poultry to stand for 10 minutes.
NOTE: It is not possible to use LESS (▼) for poultry.
• Use the LESS (▼) key for cooking lamb chops and small boneless
pork chops.
• Place the chops on the high rack.
• Turn over when the oven indicates.
• After cooking, stand, wrapped in foil for 2-3 minutes.
• Place in a single layer in a large flan dish on the high rack.
• Turn over when oven indicates.
• After cooking, stand for 2-3 minutes before serving.
NOTE: Use the MORE (▲) key for frozen crispy crumb foods.
• Place either directly on the high rack.
• After cooking, stand for 2-3 minutes before serving.
NOTE: Use the MORE (▲) key for deep pan pizzas. Filled crust pizzas
should be cooked on standard.
• For one section containers,
use a skewer to pierce the film
covering the food in five places.
For two section containers,
pierce as follows:
ie pierce meat/main portion 3 times, and the rice/pasta portion twice.
NOTE: Use the MORE (▲) key for all non-stirrable food.
It is not possible to use the LESS ( ▼ ) key for this menu.
• Stir the food as the oven instructs: for non-stirrable foods, such as
lasagne, the oven will not stop during cooking as it is not necessary to
stir.
• After cooking stand for 2-3 minutes before serving.
MENU
or
or
meat rice/pasta meat rice/pasta
➝
➝
➝
➝
R-952M O/M FINAL 1/7/99 2:04 pm Page 16

17
AUTO COOK CHART
8
9
MENU
NO.
WEIGHT
RANGE
COOKING PROCEDURE
AUTO COOK CHART
FROZEN
READY MEALS
CAKE
0.3 g - 0.8kg
1.1 - 1.4kg
• For one section containers,
use a skewer to pierce the film
covering the food in five places.
For two section containers,
pierce as follows:
ie pierce meat/main portion 3 times, and the rice/pasta portion
twice.
For food contained in bags, pierce meat portion 5 times on each
side, for rice/pasta pierce 5 times on one side only, (where
rice/pasta portion bags come already perforated do not pierce
further).
NOTE: For frozen meals contained in two bags, remove the
rice/pasta portion when the oven indicates “STIR” halfway
through cooking.
• Place in the center of the turntable.
• Stir the food as the oven instructs, for non-stirrable foods, such as
lasagne, the oven will not stop during cooking as it is not necessary
to stir. For food in bags turn over and manipulate contents, when
oven indicates “STIR”.
• After cooking stand for 2-3 minutes before serving.
NOTE: Use the MORE (▲) key for all non-stirrable food (eg lasagne).
It is not possible to use the LESS ( ▼ ) key for this menu.
NOTE: Cakes recommended from the Cookery Book -
Carrot Cake (approx. 1.1kg, pg 56)
Passion Cake (approx. 1.1kg, pg 57)
Parkin (approx. 1.4kg, pg 60)
Chocolate Brownies (approx. 1.3kg, pg 60).
• Carefully follow the recipe in the Cookery Book.
• Place the cake in the oven on the low rack.
MENU
or
or
meat rice/pasta meat rice/pasta
➝
➝
➝
➝
For converting to Lb/oz please see the conversion chart on page 10 in the Cookery Book.
R-952M O/M FINAL 1/7/99 2:04 pm Page 17

18
AUTO COOK/AUTO DEFROST CHART
0.6 - 1.8 kg
1.2 - 3.6 kg
0.3 - 1.2 kg
0.2 - 1.0kg
0.1 - 0.8 kg
MEAT JOINT
(BEEF/LAMB &
PORK)
POULTRY
(WHOLE)
CHICKEN
PORTIONS
STEAK/CHOPS
MINCED MEAT
(BEEF, LAMB,
PORK, POULTRY)
BREAD
1
2
3
4
5
• Place the meat in a flan dish on the turntable.
• Turn over when the oven indicates.
• Stand, wrapped in foil, for 45-60 minutes until thoroughly defrosted.
• Place the meat in a flan dish on the turntable.
• Turn over when the oven indicates.
• Stand, wrapped in foil, for 45-60 minutes until thoroughly defrosted.
• Place in a single layer (where possible) in a large flan dish.
• Turn over/rearrange as the oven indicates. Separate food as it defrosts.
• After defrosting, stand wrapped in foil, for 15-30 minutes until thoroughly
defrosted.
• Place in a pyrex bowl directly on the turntable.
• Turn over or stir when the oven indicates and remove any defrosted parts.
• Leave to stand, covered with foil for 5-10 minutes or until thoroughly defrosted.
• Arrange on turntable
• Turn over/rearrange as the oven indicates and remove any defrosted slices.
• Stand until throughly defrosted before using.
AUTO DEFROST CHART
AUTO COOK NOTES
1All menus with the exception of Chilled and Frozen Ready Meals, use Microwave with Convection or Grill
during the cooking programme to provide a brown, crisp traditional-looking and tasting result.
2If you wish to cook foods or weights of food not included in the AUTO COOK function, please refer to the
cooking charts in the Cookery Book.
3When using AUTO COOK for cakes, use only the utensils recommended in the Cookery Book. Do not
use metal cooking utensils. Please refer to the Cookery Book for the suitable recipes.
IMPORTANT NOTE FOR CHILLED READY MEALS/FROZEN READY MEALS:
1These menus are suitable for savory microwave ready meals only.
2You must only cook one microwave ready meal at a time.
3Always refer to food weight given on packaging.
4Always check food is thoroughly heated before serving, if necessary increase cooking time to MED HIGH
(70%) and check the food every minute.
5Remove outer cardboard packaging as/if instructed by the manufacturer, and note given food pack weight.
6If the food container is made of aluminium, remove as/if instructed by food manufacturer, and place in a
suitable container, See Suitable Cookware, pages 24-25.
7If the container is covered with aluminium foil, remove foil and recover with microwave cling film.
MENU
NO.
WEIGHT
RANGE
COOKING PROCEDURE
MENU
AUTO DEFROST NOTES
1If necessary, small pieces of aluminium foil can be used to shield small areas of meat if they become warm
during defrosting. Ensure foil does not touch oven walls.
2Do not cook meat until thoroughly defrosted.
3If you wish to defrost foods or weights of food not included in the AUTO DEFROST facility please refer to
the defrost chart in the SHARP Cookery Book.
For converting to Lb/oz please see the conversion chart on page 10 in the Cookery Book.
R-952M O/M FINAL 1/7/99 2:04 pm Page 18
Table of contents
Other Sharp Microwave Oven manuals

Sharp
Sharp R-204EWA User manual

Sharp
Sharp R-403HW User manual

Sharp
Sharp Carousel R-1600 User manual

Sharp
Sharp R-630DKA User manual

Sharp
Sharp R-21AM User manual

Sharp
Sharp R-340A User manual

Sharp
Sharp CAROUSEL R-530E Use and care manual

Sharp
Sharp R-671 Instruction Manual

Sharp
Sharp R-933 User manual

Sharp
Sharp R-939 User manual

Sharp
Sharp R-201W Instruction Manual

Sharp
Sharp R-870M User manual

Sharp
Sharp Carousel R-307N User manual

Sharp
Sharp Carousel R-340R User manual

Sharp
Sharp R-234W User manual

Sharp
Sharp R-247 Instruction Manual

Sharp
Sharp R-1482 User manual

Sharp
Sharp R-410LK User manual

Sharp
Sharp R305KS - 1100 Watt 1.1 Cubic Feet Mid Size... User manual

Sharp
Sharp R-308KK User manual