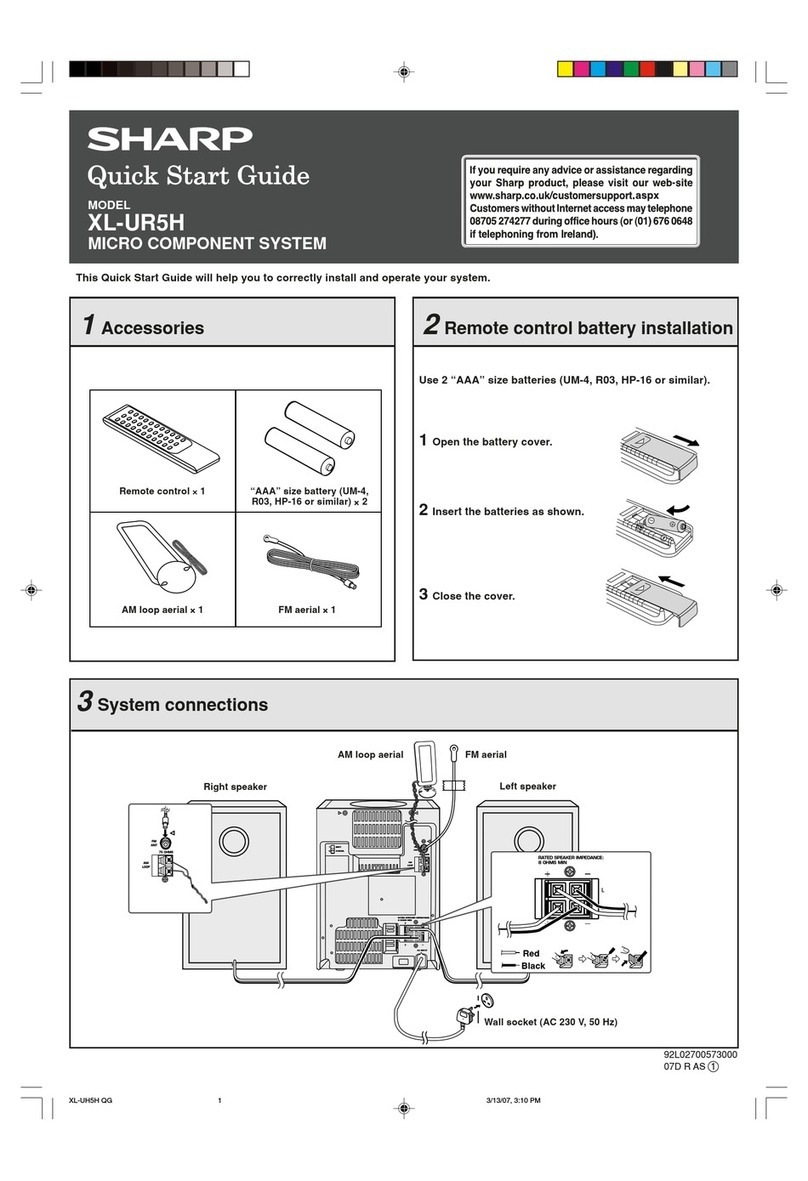
Sharp CD-C250X BK User manual

SHARP
SERVICE
MANUA.L
No.
S8531
CDC250XK
MODEL
CD=C25,OX(bK)
C
D-C%OX(
B
K)
CP-C250(BK)
Illustration:
CD-C250NCP-C2
Illustration:
CD-C260X/CP-C250
l
Difference between
CD-C250X
and
CD-C260X
CD-C250X
differs from
CD-C260X
only in the design of cassette lid,
Front
Panel.and
CD Cover but their functions are the same.
l
In the interests of user-safety the set should be restored to its original
condition and only parts identical to those specified be used.
tLlIIi!m
*
DIGITAL
AUDIO
CONTENTS
.
*
Page
-‘-
SPECIFICATIONS.. ............................................................................................................................................................
2
VOLTAGE SELECTION
................................................. ....................................................................................................
2
AC POWER SUPPLY CORD AND PLUG
..........................................................................................................................
2
NAMES OF PARTS
..........................................................................................
__.
...............................................................
3
OPERATION
MANUAL
......................................................................................................................................................
5
DISASSEMBLY ......................................... .........................................................................................................................
6
REMOVING AND REINSTALLING THE MAIN PARTS
.....................................................................................................
8
ADJUSTMENT .................................................................................................................................................................
10
TROUBLESHOOTING (CD SECTION) ............................................................................................................................
12
FUNCTION TABLE OF
IC
................................................................................................................................................
18
LCD
SEGMENT.. ..............................................................................................................................................................
21
NOTES ON SCHEMATIC DIAGRAM ...............................................................................................................................
22
TYPES OF TRANSISTOR ................................................................................................................................................
22
BLOCK DIAGRAM.. ...........................................................................................................................................................
23
WAVEFORMS OF CD CIRCUIT ...................................................................................................................................... 27
SCHEMATIC DIAGRAM /WIRING SIDE OF
P.W.BOARD
.............................................................................................
29
REPLACEMENT PARTS LIST /EXPLODED VIEW
SHARP
CORPORATION

FOR A COMPLETE DESCRIPTION OF THE OPERATION OF THIS UNIT, PLEASE REFER
TO THE OPERATION MANUAL.
0
General
.r,
0
Compact disc player section
3-disc
multi-play compact disc
player
,Power
source:
AC
11
O/l
2712201230-240
V,
50160
Hz
Power consumption:
80
W
Dimensions:
Width; 270 mm (1
O-5/8”)
Height; 280 mm (11-l/16”)
SPECIFICATIONS
“Weight:
Depth: 340 mm
(13-706”)
5.6
kg (12.3
Ibs.)
0
Amplifier section
Output power:
PMPO; 100
W
(total)
MPO; 36
W
(18
W
+
18 W)
(10
%
T.H.D.)
RMS;
20
W
(10
W
+
10 W)
(10
%
T.H.D.)
-Output
terminals:
Speakers; 8 ohms
I
Headphones;
16-50
ohms
(recommended; 32 ohms)
0
Tuner section
Frequency range:
FM; 88
-
108 MHz
AM; 531-l ,602
kHz
(9kHz
span)
530
-
1,620kHz
(1
OkHz
span)
0
Cassette deck section
Frequencylresponse:
Motor:
Signal/noise ratio:
Wow and flutter:
Bias and erasure
system:
Tape speed:
Heads:
50
-
14,000 Hz (Normal tape)
50
-
15,000 Hz
(CrOz
tape)
DC motor with electronic governor x1
55
dB
(TAPE 1, playback)
50
dB
(TAPE 2, recording/playback)
0.15
%
(WRMS)
AC
4.76
cmisec.
(l-7/8
ips.)
TAPE-l: Playback x
1
TAPE-2: Record/playback x1
Erase x1
Type:
Signal readout:
Rotational speed:
Error correction:
Quantization:
Filter:
D/A
converter:
Frequency response:
Dynamic range:
Wow and flutter:
Non-contact,
3-beam
semi-
conductor laser pickup
200
-
500 rpm CLV, Approx.
CIRC
(Cross Interleave
Reed-
Solomon Code)
16 bit linear
8-times
oversampling
digital filter
l-bit
D/A
converter
20
-
20,000
Hz
90
dB
(1
kHz)
Unmeasurable
(less than 0.001% W.
p.eak)
0
Speaker section
Type:
Maximuminput
power:
Rated input power:
Impedance:
Dimensions:
2-way,
bass-reflex
[12
cm (4-
3/4”) woofer and 5 cm
(2”)
tweeter]
20
w
10
w
8
ohms
Width; 170 mm
(6-3/4”)
Height; 280 mm (11-l/16”)
Depth; 201 mm
(7-15/16”)
2.3 kg (5.1
Ibs.)/each
Weight:
Specifications for this model are subject to change without
prior notice.
VOLTAGE
SELECTION
The voltage selector is located on the AC voltage selector box. If
adjustment is necessary, use a screwdriver in order to slide the selector
to match to the correct voltage.
AC
POWER
SUPPLY
CORD
AND
PLUG
QACCAOOOl
AWOO
QACCEOOOl
AWOO
92LCoRDA1387C
92LCrZrRDTl699A
92LPLUG027
92LPLUG155A
-2-

NAMES
OF
PARTS
Illustration:
CD-C250X
W
Front
panel
1.
Disc Tray
2. Disc Skip Button
3. Open/Close Button: &
4.
CD Repeat Indicator:
c
5. CD Pause Indicator: II
6.
Disc Number Indicator
7. FM Stereo Mode Indicator
8.
Extra Bass Indicator: X-BASS
9. Random Indicator
10.
CD Play Indicator:
)
11.
Record Indicator
12.
Preset Channel Indicator
13.
FM Stereo Indicator:
co
14. Function/Track Number/CD Counter/
~,.
Band/Frequency/VolumeIndicator
15.
Memory Indicator
16.
Power Switch
17.
Record Start Button:
0
18.
Stand-By Indicator
19.
Remote Control Sensor
20.
Extra Bass Button: X-BASS
21.
Disc Number Select Buttons
22.
Function Selector Buttons
23.
Volume Up/Down Buttons:
A/V
24.
Tuning
Up/Down
Buttons:
A/V
25.
Reset Button
26.
Track Down/Review/Preset Down Button:
+rn+r
27.
Stop Button:
w
28.
Play/Repeat Button:
WC
29.
Track Up/Cue/Preset Up Button:
Ic+h+l
30.
Equalizer Mode Button
31.
Memory Button
32.
Headp~hones
Socket
33.
(TAPE 1) Cassette Compartment
34.
(TAPE 2) Cassette Compartment
45
6
78
9
1011
12 13 14
%
15
6171819
(2021
2223
24
25
26
272829.30
31
32
~-
33 34
-3-

n
Rear panel
I.
AM Loop Aerial Socket
2.
FM 75 ohms Aerial Terminal
3. Span Selector Switch
4.
Speaker Terminals
5. AC Power Lead
6.
AC
Voltage
Selector
6
n
Speaker section
7.
Tweeter
8.
Woofer
9. Bass Reflex Duct
TO.
Speaker Wire
q
Remote control
1.
Remote Control Transmitter Window
0
CD control section
2.
Disc Number Select Buttons
3.
Track Down/Review Button:
44
I
I44
4. Stop Button:
n
5.
Disc Skip Button
6.
Track Up/Cue Button:
+
IH
7.
Play/Repeat Button:
)
c
8.
Random Button
9.
Clear Button
10.
Memory Button
11.
Pause Button:
II
0
Tuner control section
12. Preset Up/Down Buttons:
v
I
A
0
Tape control section
13.
(TAPE 1) Play Button:
)
14. (TAPE
1)
Stop Button:
H
15.
(TAPE 2) Stop Button:
n
16.
(TAPE 2) Rewind Button:
t(
17.
(TAPE 2) Play Button:
)
18.
(TAPE 2) Fast Forward Button:
H
19.
Balance Control Buttons
20.
Function Selector Buttons
21.
Equalizer Mode Buttons
22. Volume Up/Down Buttons:
v
ir\
23.
Extra Bass Button: X-BASS
24.
Power
Button
.
rrrrrrrrrrrrr
rrrrrrrrrrrrr
rrrffrrrrrrrr
rrrrrrrrrrrrr
Left speaker Right speaker
fzl
0
u
2
5
36
4
7
‘5,
16-
2423
22
/I7
-18
‘19
'20
'21
-4-

OPERATION
MANUAL
n
Proper use of the remote control
Aim the remote control at the remote control sensor within
50”,
with no obstacles, and operate as shawn.
Notes concerning use:
0
Replace the battenes if control distance decreases or
operation becomes erratic.
0
Periodically clean the transmitter window on the remote
control and the sensor on the main unit with a soft cloth.
0
Exposing the sensor on the main unit to strong light can
interfere with operation. Change the lighting or the direc-
tion of the unit.
0
Keep the remote control away from moisture, excessive
heat, shock, and vibrations.
0
The remote control’s usable range is between 0.2
m
(6”)
and 6
m
(20’) away from the sensor.
RESETTING
THE
MICROCOMPUTER
Reset the microcomputer by performing the following
procedure for the cases shown below:
0
To erase all of the stored memory contents, or
0
If the display does not function properly, or
0
The unit does not operate properly.
1
Set the POWER switch to STAND-BY.
2
Dtsconnect
the AC power lead from the AC socket.
3
Press the RESET button for at least 5 seconds
H
AM/FM interval (span)
The International Telecommunication Union
(ITUJ
has estab-
lished that member countries should maintain either a
10
kHz
or a 9
kHz
interval between broadcasting frequencies
of any AM station. The illustration shows the 9
kHz
interval
zones (regions 1 and
3),
and the 10
kHz
interval zone (re-
gion 2).
Before using the unit, set the SPAN SELECTOR switch (on
the rear panel) to AM tuning interval (span) of your area.
0
Set the SPAN SELECTOR switch to
“5019”
for 9
kHz
AM
interval (50
kHz
FM interval), and
“lOO/lO”
for
10
kHz
AM interval (100
kHz
FM Interval).
To change the tuning zone:
1
Disconnect the AC power lead
from’the
AC socket
2
Press the RESET button on the front panel for at least
3
seconds.
3
Set the SPAN SELECTOR switch as desired.
4
Reconnect the AC power lead into an AC socket.
Note:
0
When the SPAN SELECTOR switch is switched, the
memorised stations will be cancelled.
-5-

A.
cD-gmi&6ox
s
DISASSEMBLY
Caution on Disassembly
Illustration:
CD-C250X
Follow the below-mentioned notes when disassembling the
unit and reassembling it, to keep it safe and ensure excellent
performance:
1. Take cassette tape and compact disc out of the unit.
2. Be sure to remove the power supply plug from the wall
outlet before starting to disassemble the unit.
3. Take off nylon bands or wire holders where they need be
removed when disassembling the unit. After servicing the
unit, be sure to rearrange the leads where they were
before disassembling.
4. Take
suffcient
care on static electricity of integrated
circuits and other circuits when servicing.
m
STEP PROCEDURE
‘IGURE
6-l
1
2
Top Cabinet
Side Panel
(LeftlRiqht)
1
Screw......................
(Al) x4
1.
Screw.. ....................
(Bl)
x2
2.
Screw.. .................... (82) x2 6-l
03
xlOmm
3
CD Player
Unit/
CD
Traym
Cover
1.
Turn on the power supply,
open the disc tray, take out
the disc tray, and close.
(Note
1)
2. Hook
._.........._..........
(Cl) x2
3.
Hook . (C2) x3
4.
Socket . . . . . . . . . . . . . . .
(C3)
x2
6-2
CD
Player
Unit
4
Back Board
1.
Screw......................
(Dl)
x2
2.
Screw.. ....................
/DP)
x2 6-l
5
Headphons PWB
)
1.
Screw . (El) xl
6-3
Front Panel
(Note 2)
I.
Flat Cable ...............
(Fl)
x3
2. Socket ..................... (F2) xl
3.
Socket.. ...................
(F3)
x2
4.
Screw.. ....................
(F4)
x2
6-3
Disc
Tray
Hook
(
c2
)
x3
Display
PWB/
Switch
PWBI
Sub PWB
1.
Socket.. ...................
(Gl)
xl
2.
Screw.. ....................
(G2) x9
3. Screw...................... (G3) xl
‘7-1
FrontPanel
Tape Mechanism 1. Open the cassette holder
2.
Screw
.._.....
(Hl)
x6
7-1
7-2
9
Main
PWBI
1 Screw
.._._.__.___._.__.__..
(Jl
)
x5
Deck
PWBi
2.
Screw (J2) xl
Tuner PWB (with
3. Socket . . . . . . . . . . . . . . . . . (J3) xl
Headohons
PWB‘
Figure 6-2
10
CD Servo PWB
1.
Screw.. ....................
(Ki)
xl
2. Socket .....................
(K2)
it3
7-3
11
1 Screw
___.._.....__._.___.__
(Ll
)
xl 7-4
7-4
7-5
2. Cover . . . .
.._..._...._.....
(L2) xl
1. Screw
__._.__._,.,.,....,,..
(Ml) x4
(M2)
1.
Screw
.._..._._..._.____..__
(Pl) x4
12
Disc Tray
CD
Mechanism
(Note 3)
I.
Screw
___.._.._.,__.._._....
(Ql)
xl
7-5
15
Senser PWB
1. Screw ......................
(Rl) xl
2. Socket .....................
(R2)
xl
7-5
Main
m
i
PWB
Note
1:
if the power supply cannot be turned on,
f&
turn the gear
by hand as shown in Figure 7-3 to open the disc tray.
Note 2: Withdraw upward straight the flat cable.
+uner
PWB
(F4)e
03X8mt77
1
STEP
1
REMOVAL
/
PROCEDURE
1
FIGURE
j
Figure 6-3
1
Speaker
1.
Net
..........................
(Al)
xl
7-6
2. Front Panel .............
(A2) xl
7-7
3. Screw...................... (A3) x6
Note 3: After removing the Flexible PWB for the optical pickup
from the connector wrap the conductive aluminum foil
around the front end of Flexible PWB so as to protect
the optical pickup from electrostatic damage.
Switch
PWB
Fynt
Pane’
(Gl
j
xl
Tape Mechanism
Figure
7-1
I
03
xl
Omm
Figure 7-2
(Kl
)x1
03
xl Omm
CD Servo PWB
Figure 7-3
Turntable
(
M2
)
x2
P--.
CD Player
Unit
(M2)x2
Figure 7-4
(
RI
)
xl
03
xl
Omm
(Pl)x4
03 xl 2mm
02.6
xl0mmT
1
(
Ql
)
xl
hanger
anism
. .
D
Mechanism
Care when installing the CD changer mechanism.
Install the CD changer mechanism on the CD player base after
the shift lever has been set in the highest
position.
Figure 7-5
\
b
7-
03.5
xl4mm
Speaker
(
A2
)
xl
Figure 7-6 Figure 7-7

REMOVING
AND
REINSTALLING
THE
MAIN
PARTS
TAPE MECHANISM
SECTION
Perform steps 1, 2, 3, 4, 6 and 8 of the disassembly method to
remove the tape mechanism.
How to remove the record/playback and erase
heads (TAPE 2) (See Fig. 8-l.)
1.
Carefully bend the record/playback head pawls (Al) x2
PCS.,
in the direction of the arrow
@,
and remove the
record/
playback head upwards.
2. Carefully bend the three pawls
(Bl)
x3
PCS.,
in the arrow
direction
($9,
and remove the erase head upward.
How to remove the playback head (TAPE
1)
(See Fig. 8-2.)
1.
Carefully bend the playback head pawls (Cl) x2
PCS.,
in the
direction of the arrow
0,
and remove the playback head
upwards.
How to remove the pinch roller (TAPE
l/2)
(See Fig.
S-3.)
1.
Carefully bend the pinch roller
paw1
in the direction of the
arrow
0,
and remove the pinch roller
(Dl)
x1 upwards.
Note:
When installing the pinch roller, pay attention to the spring
mounting method.
How to remove the belt (TAPE 1) (See Fig.
8-4.)
1.
Remove the main belt (El)
x
1
PC.,
from the motor side.
How to remove the belt (TAPE 2) (See Fig.
8-4.)
1. Remove the tape 1 main belt (El)
x
Ipc.,
from the motor side.
2. Remove the tape 2 main belt
(Fl)
x
1
PC.,
from the motor side.
3. Remove the
FFiREW
belt (F2) x1
pc.
How to remove the motor
(See Fig. 8-5.)
1. Remove the belt.
2. Remove the screws
(Gl)
x
2
PCS.,
to remove the motor
bracket.
3. Remove the screws (G2) x2
PCS.,
to remove the motor.
Note:
When mounting the motor, pay attention to the motor mounting
angle.
(Gl)
x2
02
x4mm
(G2) x2
02
x4mm
Figure 8-5
p%FE
Record/Playback
r--.,
Head
Pawl
(
Bl
Figure
8-1
JTAPEI]
Figure 8-2
Pinch Roller
(Dl)
xl
Figure 8-3
Figure 8-4
-8-

CD
MECHANISM SECTION
Perform steps 1, 2, 3, 10, 11, 12, and 13 of the disassembly
method to remove the CD mechanism.
How to remove the loading motor (See Fig.
9-1)
1.
Remove the drive belt (Al) x1
PC.,
from the motor side.
2. Remove the screws (A2) x2
PCS.,
to remove the loading
motor.
(Al )x1
Drive Belt
Figure
9-1
How to remove the select motor (See Fig.
9-2)
1.
Removethescrews(Bl)x2pcs.,
toremovetheselectmotor.
(Bl)x2
02.6
x5mm
How to remove the pickup (See Fig. 9-3)
1. Removethe screws (Cl)
x
2
PCS.,
to remove the shaft (C2)
x
1
pc.
2. Remove the stop washer (C3)
x
I
PC.,
to remove the gear (C4)
x
1
pc.
3. Remove the pickup.
Note:
After removing the Flexible PWB for the optical pickup from the
connector wrap the conductive aluminum foil around the front
end of Flexible PWB so as to protect the optical pickup from
electrostatic damage.
Figure
9-2
Figure 9-3
-9-

CD-E;5:0;6OX
ADJUSTMENT
MECHANISM
SECTION
l
Driving Force Check
TUNER
SECTION
fL:
Low-range frequency
fH:
High-renge frequency
l
AM IF/RF
Signal generator: 400 Hz,
30%,
AM modulated
Test Stage
/
Frequency
Frequency
Setting/ Instrument
Display
AdjustingConnection
Parts
IF
450
kHz
1,602
kHz
or
T351
*1
1,620
kHz
Band
-
531
kHz
or
(fL):
T304
*2
Coverage
530
kHz
1.1 IO.1
v
Tracking
990
kHz
990
kHz
(fL):
T302
*1
*l.
Input: Antenna,
Output: TP302
*2.
Input: Antenna, Output: TP301
l
FMRF
Signal generator: 1
kHz,
22.5
kHz
dev., FM modulated
Test Stage Frequency Frequency
Serringl
instrument
Display
Adjusting
5
Connection
Point
Band
-
87.50
MHz
L303(fL):
*1
Coverage
185Vi:50
mV
RF
98.00 MHz 98.00 MHz
L302
l
2
(1
O-30
dB)
*l.
Input: Antenna, Output:
TP301
*2.
Input: Antenna,
Output: Speaker terminal
.-FM IF
Signal generator:
10.7
MHz, FM sweep generator
Torque Meter
Play:
TW-2412
Specified Value
Tape 1: Over 80
9
Tape 2: Over 80
g
l
Tot-clue
Check
Torque Meter
Specified Value
Tape
1
Tape 2
Plav: TW-2111 30 to
60
g.
cm
30
to
60
acm
1
Fast forward: TW-2231
1
160to120gcm
1
1
Rewind: TW-2231
I
/60to120gcm
/
l
Tape Speed
I
Test Tape Adjusting
Specified Instrument
Point Value Connection
Volume in
motor.
3,000 i:
30 Hz
Speaker
terminal
(Load
resistance:
6 ohms)
Normal
speed
MTT-111
f
j
TAPE MECHANISM
1
l
FM Mute Level
Signal generator: 1
kHz,
40
kHz
dev., FM modulated
Frequency Frequency Adjusting
Display Parts Instrument
Connection
98.00 MHz
(25
dBbV)
98.00 MHz
1
VR35’*
*
Adjust so that an output signal appears.
/
TUNER
PWB
(
IC301
FM ANTENNA
TERMINAL
1
FM
IFI
L302
1
AM
ANTENNA
TERMINAL
Figure 10-l ADJUSTMENT POINTS

l
Setting the test mode
Any one of 4 test modes can be set by pressing several keys as follows
<MEMORY>
+
<CD>
+
<POEER>
TEST
:
CD operation test
TEST
MODE
l
TEST 4 mode
Function
-
CD test mode
Setting of TEST 4 mode
k&cation
of CD TST mode (All LCD lights)
ObEN/CLOSE operation is manual operation.
1
IL is not performed.
T<e
pickup can be moved by using the
(w)
or
(+)
key.
1
t
<MEMORY>
<STOP> <MEMORY> <STOP>
When the tracking servo is
-
The pickup returns to the
-
When the tracking servo is
-
The pickup returns to the
turned on, PLAY is started at ordinary stop position. turned off, PLAY is started ordinary stop position.
once.
atonce.
L
<PLAY> key input
-
TOC. IL is performed, and the ordinary PLAY is performed.
-
Press
<STOP>
key.
-
Stop
If the following key is pressed during PLAY, it is possible to
specify directly any Track No.
<Disc
Number
l>
key: Track 3
<Disc Number
2>
key: Track 8
Note:
<Disc
Number
3~
key: Track 15
Only in STOP state it is possible to slide the pickup with the
(m)
or
(4q)
key.
VOL. --- Last memory
BAC.--- CENTER
R.GEQ.
--- FLAT
*
X-BASS --- OFF
Canceling method
-
POWER OFF
CD
SECTION
1.
Focus offset (Fig. 1
l-l)
2. Tracking offset (Fig.
11-2)
Since this CD system incorporates the following automatic adjustment
function, when the pickup is replaced, it is not necessary to readjust it.
3. E/F balance (tracking error balance) (Fig. 11-3)
4. RF level AGC function (HF level: constant)
5. RF level automatic follow-up of the tracking gain
l
Automatic adjustment item
This automatic adjustment is performed each time a disc is changed.
Therefore, each disc is played back using the optimal settings.
0.1s
0.50
v
tci
@
FD
TO
Figure 11-l
FOCUS
OFF-SET
ADJUST
TRACKlNG
OFF-SET
ADJUST
200
ms
I I I
TRACKING/
1Vidi
ERROR
IC
1
BARANCE
‘.
IADJUST
TE
/
CD SERVO
PWB
/
Figure 1 l-3
Figure 11-4 CHECKING POINTS
1Oms
0.50
v
ICl
@
1Oms
0.50
v
ICI
@
II
II’
1
I
Ill1
I
I
Enlaraed
“11””
FD
TO
TRACK!NG
OFF-SET
ADJUST
Figure
11-2
-ll-

TROUBLESHOOTING
(CD
SECTION)
When the CD does not function
When the CD section does not operate When the objective lens of the optical pickup is
dirty,this
section may not
operate.Clean
the
objective
lens,and
check the playback
operation.When
this section does not operate even after the above step is takencheck the
following items.
Remove the cabinet and follow the troubleshooting instructions.
“Track skipping and/or no TOC(Table Of Contents) may be caused by build up of dust other foreign matter on the laser pickup lens.
Before attempting any adjustment make certain that the lens is clean. If not, clean it as mentioned
below.”
Turn the power off.
Gently clean the lens with a lens cleaning tissue and a small amount of isopropyl alcohol.
Do not touch the lens with the bare hand.
Is
L
pulse (approx. 300 ms) input into the
PC701
pin 26 when the
turntable is rotating?
,
Yes
b
Check the SW2 and the wiring from the
IC701
pin 26 to the
No
sw2.
Is there following voltage input on the
IC701
pin 9 in the specific
state?
When the CD mechanism is moved up:
L
In other states:
H
, Check the SW3 and the wiring from the
IC701
pin 9 to the
No
sw3.
Yes
f
/
Check
Q901,
Q902,
and Q904 and the periphery.
I
.
Is there following voltage input on the
IC701
pin 9 in the specific
state?
-
When the CD mechanism is moved up:
L
In other states:
H
+
Check the SW3 and the wiring from the
PC701
pin 9 to the
No
sw3.
Yes
t
I
S
L
output from the
IC701
pin 25
I
Check the wiring from the
IC701
pin 25 to the Q903 base.
I
Yes
Is
H
output from the
IC701
pin 19 during SEC when the disc skip
switch is pressed?
Yes
v
Check the wiring of
IC701
pin 19 and Q904 pin 2.
OK
IC701
defective.
Is
4v
output
from
the
Q901
emitter during operation stated
above?
Yes
Check
Q901,
Q902,
Q904 and the periphery.
t
Check turntable motor (Ml) and turntable mechanism.
1.
-12-

Is there following voltage input in specific state
of
IC701
pin
8’7
Check the
SW1
and the wiring from the
IC701
pin 8 to the
SWl.
Open state:
2.5V
Close state: OV
Intermediate state between open state and close state:
5V
Yes
+
Is
H
output to
IC701
pin 70 or 71 for
5
seconds when the OPEN/
CLOSE key is
pressed?105
is defective. Replace it. Check the wiring of the
lC701
pins 70 and
71,
IC901
pins 1
and9.
OK
Yes
IC701
defective.
Is 4V output between
IC901
pins 3 and 7 during operation stated
above? Check the periphery of
IC901.
I
/
The CD operating keys don’t work.
i
Yes
Check the CD, DPS microcomputer, power supply, 4.19 MHz and
16.93 MHz clock, and reset terminal.
Yes
Check the waveform of SCK, SO (DATA) and
SI
(COMM).
(Fig.
14-l-5)
Yes
See if the pick-up is in the pick-up in SW4 position.
Yes
If the items mentioned above are OK, check the main
microcomputer
IC701.
-13-

6 BYTE 6 BYTE
COMM
DATA
1
6 BYTE
1
6 BYTE
1
100 ms interval
Figure
14-1
CD microcomputer -- Main microcomputer data transmission
CK: 262
kHz
or less
SCK
((
8
BIT
COMM
I
8 BIT
I
DATA
8
BIT
8
BIT
DATA and COMM are read
at rise of SCK.
LSB FIRST
Figure
14-2
CD microcomputer -- Main microcomputer data transmission
GNP
7
5 Pin
20ms
2.00
v
COMM
6
Pin
20ms
2.00
v
DATA
7 Pin
20ms
2.oov
i
SCK
Figure 14-3 Figure
14-4
GNP
7
5 Pin
5~~2.00
V
COM
6 Pin
5lJS
2.00
v
DATA
7 Pin
5lJS
2.00
v
SCK
CNP 7
5
Pin
5ms
2.00
v
COM
6 Pin
5 ms
2.00
v
DATA
7 Pin
5 ms
2.00
v
SCK
t
;
Iilr
Figure
14-5
-
14-

Check the Focus
-
HF svstem.
1
Playback can be performed without a disc.
I
I-
Yes
Focus search OK
No
Does the output waveform of ICi(lG)(FD) match that shown in
Fig.
15-i?
1
No
Check the area around IC5CNP2.
i
Check the
IC1(50)(CLK)
line,
4MHz.
Check the microcomputer data on pins
(51)(CL),
(52)(DAT)
and
(53)CE.
0.5s
0.50
v
Cl
@
FD
Focus search
is performed
two times
when play
operation is
done without
disc.
0%
0.50
v
ICl
@TD
Figure 15-l
Check the laser diode driver.
Yes Check the area around
ICl(l6)
-
(21) (focus servo circuit).
Does the DRF signal change fr
Yes No
If the disc is not turning, the DRF
should not change to
“H”.
Check the spin system.
*~
Is HF waveform normal (see th
i
Yes
Check the periphery-of
ICl pins 41 and 42.
4
Check the tracking system. Waveform is unstable. Check the spin system.
HF
O.lV/DIV
O.Susec/DIV(DC)
(When playing
back the disc)
Figure 15-2
0.5s
1
.oo
v
ICl
@
FD
0.5s
Waveform in
case of normal
play-back
Figure
15-3
-*
,
-15-

Check waveform of ICl pin 7 (TE).
--+
The waveform shown in Fig.16
appears, and no-disc state apperas
soon.
Check the periphery of
IC
1
;i;n6;o
pin 15, and
IC
5 to
Although IL is possible, play is impossible.
I
Yes
Check the periphery of
program top cannot be reached.
I
I
Data cannot be read. Check the VCO-PLL system.
5ms
1.00
v
ICI
@TE
5 ms
5.0
v
ICI
@j)
DRF
Figure 16
Play operation is performed without disc.
1
Yes
+
The turntable rotates a little. The spin driver circuit is normal.
The turntable fails to rotate or rotates at
high speed.
Check the periphery of ICl pins 23 to 27, pin 39, and pin 40,
IC2
pin 13 and pin 14,
IC5
to
CNPS.
-
16-

l
Checking
tke
VCO-PLL system
1
Play operation is performed when disc exits.
Yes
Although HF waveform is normal, Check PDO waveform (Fig.
17-1).
Error
Check the
ICl
pins 43 and 44,
IC2
pins
3,5,7,
10, and
11.
Stop
-->
Play
1
As VCO freque-
ncy is locked at
0.5s
1
.oo
v
IC2
@
PDO
0.5s
1
.oo
v
ICI
@
FD
4.32
M
Hz,
voltage of PDO
rises and stabili-
zes.
Figure 17-l
l
Although MF waveform is norm& ‘and the
&me
indication
is,normat,
no.srrund
is
emRted.
Check
IC
2
Yes
Usually, the number of pulses of flawless disc is 100 pulsesisec
Check
IC2
pins 48, 49, 52, and 53 (Fig.
17-2,3).
Check the periphery of
IC3
(OPAMP).
In STOP stat-
e
CHP/CHN
clocks are the
same. and o-
utput is not
given.
-~
0.2ps
2.00
v
RCHNiLCHN
Figure
17-2
0.2fJs
2.00
v
RCHPILCHP
0.2us
2.00
v
RCHN/LCHN
Due to diffe-
rence in wa-
veform of
CHP/CHN
(duty ratio)
in PLAY
mode output
is given.
Figure 17-3
-17-

FUNCTION
TABLE
OF
IC
IC4
RHiX0039AWZZ (IX0039AW):CD Control Microcomputer
Pin No. Port Name
Terminal Name input/Output
Function
1
PGO
SQOUT Input
Servo/signal control data input
2
PGl
COIN
output Servo AMP, servo/signal control command output
3
PG2 CQCK
output Servo AMP, servo/signal control clock output
4PG3
RWC
output Servo AMP, servo/signal control
R/W
control
5
AV+
--
Connect to AD converter reference voltage input terminal GND.
6AV-
--
Connect to AD converter reference voltage input terminal GND.
7
vss
- -
Connect to VSS terminal
IGND).
8,
9
’
osc1,2
-
-
10
VDD
-
Input
11
RES
-
Input
OSC
C,R
or ceramic oscillator
Power terminal
Reset
12
13
14
15
1.6*
TEST
-
-
Test
SI(PF0) COMM Input
Serial data input from main microcomputer
SO(PF1) DATA
output Serial data output from main microcomputer
SCK(PF2) SCK
lntput Clock input from main microcomputer
5
-
INT(PF3)
lntout lnterruotion reauest terminal
17 PCO”
SL+
output Servo AMP slide feed output
16 PC1
SL-
output Servo AMP. slide return output
19*
PC2
-
-
Input/output common port C-2
20 PC3 LASER
output
“L”
when laser is on
21 PDO
22
PDl
23* PD2
24
PD3
25*
PEO
PU-IN SW Input
DRF Input
-
input
WRQ
Input
--
Pickup internal periphery position detection input; innermost periphery
=
L
Servo AMP. RF detection input
Input/output common port D-2
Servo/signal control request
lnoutloutout
common
oorl
E-O
26*
PEl
--
/
Input/output common port E-l
27* PA0
RES
output
’
Servo/signal
control reset output
26*-30*
PAl-3
-
-
1
Input/output common port A-l
,A-2,A-3
In this unit, the terminal with asterisk mark
(*)
is (open) terminal which is not connected to the outside.
PCO-3
PDO-3
PFl/SO
I
I
Serial
I I
Serial
I
I I
l-r
Its
.
-TEST
Figure 18 BLOCK DIAGRAM OF
IC
-16-

CD-p&60X
m
IC401
VHiLC75395E-1
(LC75395E) or VHiLC75394E-i(LC75394):Audio
Processer
LF4C3
LF4C2
LF4Cl
LF3C3
LF3C2
LFBCI
LFZC3
LFZCZ
LFZC1
LFICS
LFl
C2
LFlCl
LTIN
LSELO
LlNVlNl
DECODER
i
/
,
SHIFTREGISTER
RF4C3
RF4C2
RF4Cl
RF3C3
RF3C2
RF3Cl
RFZC3
RFZCZ
RFPCI
RFlC3
RF1
C2
..~
RFlCl
Figure 19 BLOCK DIAGRAM OF
IC
-19-

CD-E;5Er5;60X
m
IC701
RH-ix0041
AWZZ
(IX0041
AW):System control Microcomputer
Pin No. Port Name Terminal Name
hpUt/OUtput
Function
1-2
VLi-2 VLl-2
Input
Supply voltage of 0-VL2 to LCD
3-10 P67-P60 AN7-AN0 In/Output
CMOS input level CMOS 3 state output. (8 bit I/O port.)
11
P57 ADT In/Output
CMOS input level CMOS 3 state output. (8 bit I/O port.)
12*
P56 TOUT
In/Output CMOS input level CMOS 3 state output.
(8
bit
I/O
port.)
13,14 P55-P54
CNTRl
-CNTR2 In/Output
CMOS input level CMOS 3 state output. (8 bit
I/O
port.)
15.16 P53-52 RTPI -RTP2 In/Output
CMOS inout level CMOS 3 state outout.
(8
bit
I/O
port.)
17-18
P51
-P50
INT3-INT2 In/Output
1
CMOS input level CMOS 3 state output. (8 bit
I/O
port.)
19
/
P47
/
SRDY
1
In/Output
1
CMOS input level CMOS 3 state output. (7 bit I/O port.)
20 P46
21,22
P45,44
23,24
P43,P42
25
P41
26 P40
27 RESET
SCLK
TXD,RXD
INTO-INTI
0
RESET
In/Output
CMOS input level CMOS 3 state output. (7 bit
l/O
port.)
In/Output
CMOS input level CMOS 3 state output. (7 bit I/O port.)
In/Output
CMOS input level CMOS 3 state output. (7 bit I/O port.)
In/Output
CMOS input level CMOS 3 state output. (7 bit
II0
port.)
Input
CMOS input level (1 bit input port.)
lntput The orocessor is reset. if held at
“L”
for more than
2~s.
/
57-60 (60’)
1
P37-34
1
SEG15-SEG12
InDut
CMOS inout level.
(4
bit inout
oort.)
I
61-72
(65*)
SEGI
1
-SEGO
output LCD segment output pin.
73
I vccI vcc
-
I
Power terminal
74 VREF VREF
75 AVSS AVSS
76-79
COM3-COMO
COM3-COMO
80 VL3
VL3
input Input pin for the A-D converter reference voltage.
In/Output
GND input for A-D converter. Connect to VSS
output LCD common output pin.
Input
Supply voltage of VL3 to LCD.
In this unit, the terminal with asterisk mark
(*)
is (open) terminal which is not connected to the outside.
-2o-
This manual suits for next models
5
Table of contents
Other Sharp Stereo System manuals

Sharp
Sharp CP-DP900S User manual

Sharp
Sharp CD-BA150 User manual

Sharp
Sharp CD-C470H User manual

Sharp
Sharp CD-ES222H User manual

Sharp
Sharp CD-G7500V User manual

Sharp
Sharp XL-DV60 User manual

Sharp
Sharp CMS-R70CDH User manual

Sharp
Sharp XL-60H User manual

Sharp
Sharp CD-DK890N User manual

Sharp
Sharp CD-BP90W User manual

Sharp
Sharp CD-ES9 User manual

Sharp
Sharp CD-ES600V User manual

Sharp
Sharp CD-ES700 User manual

Sharp
Sharp CD-ES111H User manual

Sharp
Sharp XL-HF201PH User manual

Sharp
Sharp XL-1000W User manual

Sharp
Sharp CD-DP900E User manual

Sharp
Sharp CD-C405W User manual

Sharp
Sharp XL-UH240H User manual

Sharp
Sharp CD-C662 User manual