Shenzhen Xunlong Software Orange Pi 5 User manual

range Pi User Manual Copyright reserved by Shenzhen Xunlong Software Co., Ltd
Orange Pi 5
User Manual

range Pi User Manual Copyright reserved by Shenzhen Xunlong Software Co., Ltd
Contents
1. Basic features of Orange Pi 5.......................................................................................... 1
1.1. What is Orange Pi 5............................................................................................................1
1.2. Purpose of Orange Pi 5....................................................................................................... 1
1.3. Hardware features of Orange Pi 5...................................................................................... 2
1.4. Top view and bottom view of Orange Pi 5......................................................................... 4
1.5. Interface details of Orange Pi 5.......................................................................................... 6
2. Introduction to the use of the development board...........................................................8
2.1. Prepare the required accessories.........................................................................................8
2.2. Download the image of the development board and related materials.............................13
2.3. Method of burning Linux image to TF card based on Windows PC................................ 13
2.3.1. How to use balenaEtcher to burn Linux image..................................... 13
2.3.2. How to use Win32Diskimager to burn Linux image.............................17
2.4. Method of burning Linux image to TF card based on Ubuntu PC................................... 20
2.5. How to write Linux image to SPI Flash+NVMe SSD..................................................... 23
2.5.1. The method of using the dd command to burn......................................24
2.5.2. The method of burning with balenaEtcher software............................. 29
2.6. The method of burning the Android image to the TF card............................................... 45
2.7. The Method Burning android image to SPI Flash+NVME SSD..................................... 49
2.8. How to burn Orange Pi OS (Droid) image to TF card..................................................... 55
2.9. Burn Orange Pi OS (Droid) image to SPIFlash+NVMe SDD......................................... 59
2.10. Start the Orange Pi development board..........................................................................65
2.11. How to use the debugging serial port............................................................................. 66
2.11.1. Connection instruction of debugging serial port ................................. 66
2.11.2. How to use the debugging serial port on the Ubuntu platform........... 68
2.11.3. How to use the debugging serial port on Windows platform.............. 71

range Pi User Manual Copyright reserved by Shenzhen Xunlong Software Co., Ltd
2.12. Instructions for using the 5v pin in the 26pin interface of the development board to
supply power...............................................................................................................................75
3. Debian system instructions............................................................................................76
3.1. Supported Debian image types and kernel versions.........................................................76
3.2. Linux kernel driver adaptation......................................................................................... 76
3.3. The format of linux commands in this manual.................................................................77
3.4. Linux system login instructions........................................................................................79
3.4.1. Linux system default login account and password ................................79
3.4.2. How to set automatic terminal login in Linux system...........................79
3.4.3. Instructions for automatic login of Linux desktop version system....... 80
3.4.4. Setting method of root user automatic login in Linux desktop version
system..................................................................................................................82
3.4.5. The method of disabling the desktop in the Linux desktop version
system..................................................................................................................82
3.5. Onboard LED Light Test Instructions.............................................................................. 85
3.6. Network connection test................................................................................................... 86
3.6.1. Ethernet port test....................................................................................86
3.6.2. WIFI connection test............................................................................. 88
3.6.3. How to set a static IP address ................................................................ 95
3.7. SSH remote login development board............................................................................104
3.7.1. SSH remote login development board under Ubuntu..........................104
3.7.2. SSH remote login development board under Windows...................... 105
3.8. The method of uploading files to the Linux system of the development board............. 107
3.8.1. The method of uploading files to the development board Linux system in
Ubuntu PC......................................................................................................... 107
3.8.2. Upload files in Windows PC to the method of upload files to the
development board Linux system ......................................................................111
3.9. HDMI Test...................................................................................................................... 116
3.9.1. HDMI Display Test..............................................................................116
3.9.2. HDMI to VGA display test..................................................................117
3.9.3. HDMI resolution setting method.........................................................118

range Pi User Manual Copyright reserved by Shenzhen Xunlong Software Co., Ltd
3.10. How to use Bluetooth use.............................................................................................121
3.10.1. The test method of the desktop image...............................................121
3.11. USB interface test.........................................................................................................125
3.11.1. Connect the USB mouse or keyboard test.........................................125
3.11.2. Connect USB storage device test...................................................... 125
3.11.3. USB wireless network card test.........................................................126
3.11.4. USB Camera Test.............................................................................. 130
3.12. Audio Test.....................................................................................................................133
3.12.1. Test the audio method in the desktop system.................................... 133
3.12.2. How to play the audio with the command line..................................135
3.13. Temperature Sensor...................................................................................................... 137
3.14. 26 PIN interface pin explanation.................................................................................. 138
3.15. How to install Wiringop............................................................................................... 139
3.16. 26Pin interface GPIO, I2C, UART, SPI and PWM test............................................... 141
3.16.1. 26pin GPIO port test..........................................................................141
3.16.2. 26pin SPI test.....................................................................................143
3.16.3. 26pin I2C test.................................................................................... 144
3.16.4. 26pin UART Test...............................................................................146
3.16.5. PWM Test Method.............................................................................148
3.17. Hardware Watch The Door Dog Test............................................................................151
3.18. View the serial number of the RK3588S chip.............................................................. 152
3.19. Method of installing docker..........................................................................................152
3.20. Download the method of downloading and installing ARM64 Balenaetcher.............. 153
3.21. The installation method of the pagoda Linux panel..................................................... 155
3.22. How to remotely log in to the Linux system desktop...................................................160
3.22.1. Use nomachine remote login.............................................................160
3.22.2. Use VNC Remote Login....................................................................165
3.23. Some programming language test supported by the Linux system.............................. 170
3.23.1. Debian Bullseye system.................................................................... 170
3.23.2. Ubuntu Jammy System ......................................................................172

range Pi User Manual Copyright reserved by Shenzhen Xunlong Software Co., Ltd
User Manual Update History
Version
date
Release Notes
v0.1
2022-12-02
initial version
v0.2
2022-12-05
1. How to write Linux image to SPI Flash+NVMe SSD
2. The method of uploading files to the Linux system of the
development board
3. How to download and install the arm64 version of balenaEtcher
4. How to burn Orange Pi OS (Droid) image to TF card
5. How to burn Orange Pi OS (Droid) image to SPIFlash+NVMe SDD
6. How to Remotely Log In to the Desktop of Linux System
Image update history
date
Release Notes
2022-12-02
Orangepi5_1.0.0_debian_bullseye_desktop_xfce_linux5.10.110.7z
* initial version
2022-12-05
Orangepi5_1.0.2_debian_bullseye_desktop_xfce_linux5.10.110.7z
* Preinstalled with balenaEtcherhe and Gparted
* Pre-installed ffmpeg and mpv player
* Add some scripts and configuration files

range Pi User Manual Copyright reserved by Shenzhen Xunlong Software Co., Ltd
www.orangepi.org 1www.xunlong.tv
1. Basic features of Orange Pi 5
1.1. What is Orange Pi 5
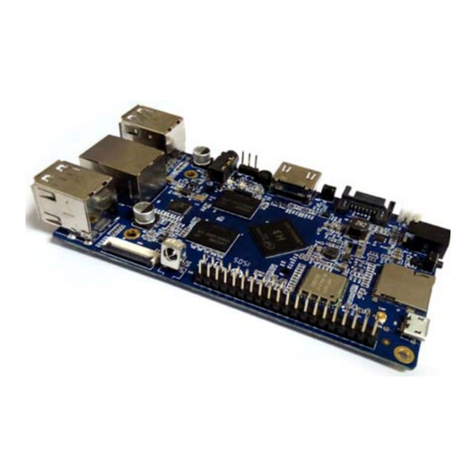
Orange Pi 5 adopts Rockchip RK3588S new-generation octa-core 64-bit ARM
processor, specifically quad-core A76 and quad-core A55, using Samsung 8nm LP
process technology, large-core main frequency up to 2.4GHz, integrated ARM Mali
-G610 MP4 GPU, embedded with high-performance 3D and 2D image acceleration
modules, built-in AI accelerator NPU with a computing power of up to 6 Tops, has
4GB/8GB/16GB/32GB (LPDDR4/4x) memory, and has up to 8K display processing
capabilities.
Orange Pi 5 brings out quite a lot of interfaces, including HDMI output, Type-C,
M.2 PCIe2.0x1, Gigabit Ethernet port, USB2.0, USB3.0 interface and 26pin expansion
pin header, etc. It can be widely used in high-end tablet, edge computing, artificial
intelligence, cloud computing, AR/VR, smart security, smart home and other fields,
covering various AIoT industries.
Orange Pi 5 supports Orange Pi OS, the official operating system developed by
Orange Pi. At the same time, it supports Android 12.1, Debian11 and other operating
systems.
1.2. Purpose of Orange Pi 5
We can use it to achieve:
A Linux desktop computer
A Linux web server
Android tablet
Android game console, etc.
Of course, there are more functions, because the Orange Pi 5 development
board can install Linux systems such as Debian and Ubuntu, and systems such as
Android, which means that we can implement it within the scope of the development
board hardware and software support. Various functions.

range Pi User Manual Copyright reserved by Shenzhen Xunlong Software Co., Ltd
www.orangepi.org 2www.xunlong.tv
1.3. Hardware features of Orange Pi 5
Introduction to hardware features
CPU
• Rockchip RK3588S (8nm LP process)
• 8-core 64-bit processor
• 4-core Cortex-A76 and 4-core Cortex-A55 core architecture
• The main frequency of the large core is up to 2.4GHz, and
the main frequency of the small core is up to 1.8GHz
GPU
• Integrated ARM Mali-G610
• OpenGL ES1.1/2.0/3.2, OpenCL 2.2 and Vulkan 1.2
NPU
• Built-in AI accelerator NPU with up to 6 Tops computing
power
• Support INT4/INT8/INT16 mixed operation
video output
• HDMI 2.1, up to 8K @60Hz
• DP1.4(DisplayPort)
• 2 * MIPI D-PHY TX 4Lane
Memory
4GB/8GB/16GB/32GB(LPDDR4/4x)
Camera
• 1 * MIPI CSI 4Lane
• 2 * MIPI D-PHY RX 4Lane
PMU
RK806-1
onboard storage
• 16MB QSPI Nor FLASH
• MicroSD (TF) Card Slot
• PCIe2.0x1 M.2 M-KEY (SSD) slot
ethernet
10/100/1000Mbps ethernet (YT8531C )
audio
• 3.5mm headphone jack audio input/output
• Onboard MIC input
• HDMI output
PCIe M.2 M-KEY
• support PCIe WIFI6+BT5.0+BLE
• support SSD
USB
1 * USB3.0
2 * USB2.0 (One of them is shared with Type-C interface)

range Pi User Manual Copyright reserved by Shenzhen Xunlong Software Co., Ltd
www.orangepi.org 3www.xunlong.tv
1 * USB3.0 Type-C
26pin extension header
Used to expand UART, PWM, I2C, SPI, CAN and GPIO
interfaces
Debug serial port
3pin debugging serial port
LED light
Power light and status light
button
1 * MaskROM key,1 * RECOVERY,1 * Off button
Power
Type-C interface power supply 5V/4A;
Supported OS
Orange Pi OS (Droid), Android12.1, Debian11 and other
operating systems
Introduction of Appearance Specifications
Product Size
100mm*62mm
weight
46g
range Pi™ is a registered trademark of Shenzhen Xunlong Software Co., Ltd.

range Pi User Manual Copyright reserved by Shenzhen Xunlong Software Co., Ltd
www.orangepi.org 8www.xunlong.tv
2. Introduction to the use of the development board
2.1. Prepare the required accessories
1) TF card, a high-speed SanDisk card of class 10 or above with a minimum capacity of
8GB (32GB or above is recommended)
2) TF card reader, used to burn the image into the TF card
3) Display with HDMI interface
4) HDMI to HDMI cable, used to connect the development board to an HDMI monitor
or TV for display

range Pi User Manual Copyright reserved by Shenzhen Xunlong Software Co., Ltd
www.orangepi.org 9www.xunlong.tv
Note, if you want to connect a 4K or 8K display, please make sure that the
HDMI cable supports 4K or 8K video output.
5) Type-C to HDMI cable, connect the development board to an HDMI monitor or TV
for display through the Type-C interface
6) Type-C to USB adapter, used to connect USB storage devices or USB devices such as
mouse and keyboard
7) 10.1-inch MIPI screen, used to display the system interface of the development board

range Pi User Manual Copyright reserved by Shenzhen Xunlong Software Co., Ltd
www.orangepi.org 10 www.xunlong.tv
8) Power adapter, Orange Pi 5 is recommended to use 5V/4A Type-C power supply for
power supply
There are two Type-C ports that look the same on the development board. The
one on the right is the power port, and the one in the middle has no power supply
function. Please don’t connect it wrong.
The Type-C power interface of the development board does not support the PD
negotiation function, and only supports a fixed 5V voltage input.
9) The mouse and keyboard of the USB interface, as long as the mouse and keyboard of

range Pi User Manual Copyright reserved by Shenzhen Xunlong Software Co., Ltd
www.orangepi.org 11 www.xunlong.tv
the standard USB interface are acceptable, the mouse and keyboard can be used to control
the Orange Pi development board
10) USB camera
11) 5V cooling fan. As shown in the figure below, the 5V and GND pins on the 26pin
interface of the development board can be connected to the cooling fan. The spacing
between the 26pin headers is 2.54mm. The power interface of the cooling fan can be
purchased from Taobao according to this specification.
Note that the 5V pin on the 26pin pin header can be used directly after the
development board is plugged into the power supply of the Type-C interface. No
other settings are required. In addition, the output voltage of the 5V pin on the
26pin pin header cannot be adjusted and turned off by software. (no PWM
function).

range Pi User Manual Copyright reserved by Shenzhen Xunlong Software Co., Ltd
www.orangepi.org 12 www.xunlong.tv
12) 100M or 1000M network cable, used to connect the development board to the
Internet
13) The data cable of the Type-C interface, used to burn the image to NVMe SSD, use
ADB and other functions
14) OV13850 camera with 13 million MIPI interface (picture to be added)
15) Matching shell (pictures and assembly methods to be added)
16) 3.3V USB to TTL module and DuPont line, when using the serial port debugging
function, need USB to TTL module and DuPont line to connect the development board
and computer

range Pi User Manual Copyright reserved by Shenzhen Xunlong Software Co., Ltd
www.orangepi.org 13 www.xunlong.tv
17) Personal computer with Ubuntu and Windows operating systems installed
1
Ubuntu22.04 PC
Optional, used to compile Linux source code
2
Windows PC
For burning Android and Linux images
2.2. Download the image of the development board and related
materials
1) The website for downloading the Chinese version is:
http://www.orangepi.cn/html/hardWare/computerAndMicrocontrollers/service-and-
support/Orange-pi-5.html
2) The website for downloading the English version is:
http://www.orangepi.org/html/hardWare/computerAndMicrocontrollers/service-and
-support/Orange-pi-5.html
3) The information mainly includes
a. Android source code: saved on Google network disk
b. Linux source code: saved on Github
c. User manual and schematic diagram: saved on Google Cloud Disk
d. Official tools: mainly include the software that needs to be used during the use
of the development board
e. Android image: saved on Google Cloud Disk
f. Debian image: saved on Google Cloud Disk
2.3. Method of burning Linux image to TF card based on
Windows PC
Note that the Linux image mentioned here specifically refers to the image of
Linux distributions such as Debian or Ubuntu downloaded from the Orange Pi data
download page.
2.3.1. How to use balenaEtcher to burn Linux image
1) First prepare a TF card with 8GB or larger capacity. The transmission speed of the TF
card must be class 10 or above. It is recommended to use a TF card of SanDisk and other
brands

range Pi User Manual Copyright reserved by Shenzhen Xunlong Software Co., Ltd
www.orangepi.org 14 www.xunlong.tv
2) Then use the card reader to insert the TF card into the computer
3) Download the Linux operating system image file compression package that you want
to burn from the Orange Pi data download page, and then use the decompression software
to decompress it. Among the decompressed files, the file ending with ".img" is the image
file of the operating system. The size is generally more than 2GB
4) Then download the burning software of Linux image——balenaEtcher, the
download address is
https://www.balena.io/etcher/
5) After entering the balenaEtcher download page, click the green download button to
download the installation package of balenaEtcher. You can also select the Portable
version of the balenaEtcher software through the drop-down box. The Portable version
does not need to be installed, and you can use it by double-clicking to open it
6) If the downloaded version of balenaEtcher needs to be installed, please install it
before using it. If you downloaded the Portable version of balenaEtcher, just double-click
to open it. The opened balenaEtcher interface is shown in the figure below
Table of contents
Other Shenzhen Xunlong Software Single Board Computer manuals


