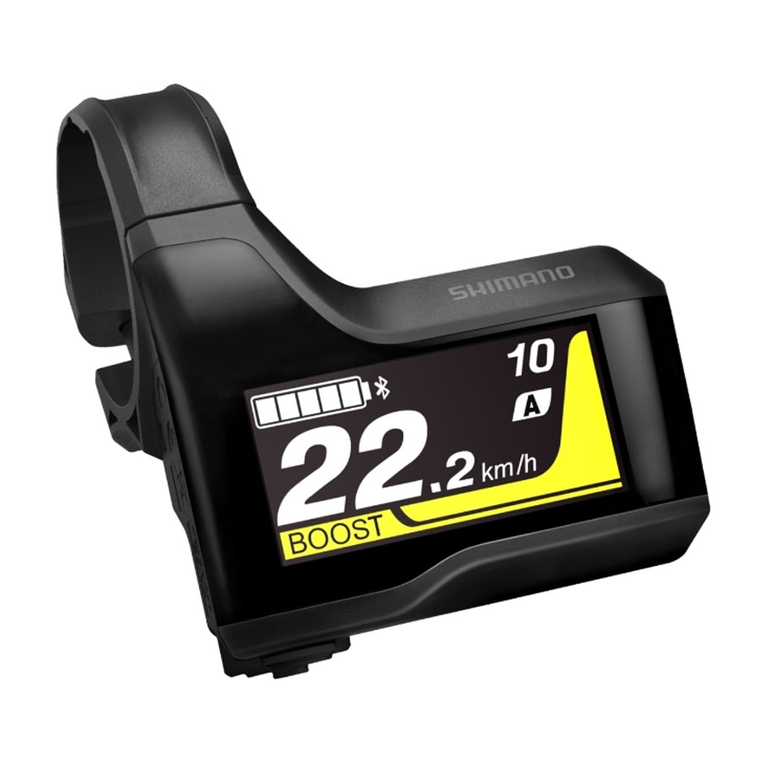
Shimano Steps E6000 Series User manual

OWNER’S MANUAL
BENUTZERHANDBUCH
GEBRUIKERSHANDLEIDING
LE MANUEL DU PROPRIÉTAIRE
IT IS IMPORTANT TO READ THE WARNINGS AND INSTRUCTIONS IN THIS MANUAL BEFORE RIDING YOUR NEW BICYCLE.
LESEN SIE SÄMTLICHE WARNHINWEISE UND ANWEISUNGEN IN DIESER BEDIENUNGSANLEITUNG VOR DER ERSTEN FAHRT MIT IHREM
NEUEN BIKE GRÜNDLICH DURCH.
H
ET IS BELANGRIJK DE WAARSCHUWINGEN EN INSTRUCTIES IN DEZE HANDLEIDING TE LEZEN VÓÓR U MET UW NIEUWE FIETS RIJDT
.
IL EST IMPORTANT DE LIRE LES MISES EN GARDE ET INSTRUCTIONS CONTENUES DANS CE MANUEL AVANT D’UTILISER VOTRE NOUVEAU
VÉLO.

Welcome to our bike family
Thank you for purchasing your new bike.
We believe in bikes. We make high quality bikes that are built to last. That is why each bike we make comes with a limited
lifetime warranty.
We wish you many carefree and enjoyable cycling kilometers with your new bike!
However, if you experience any problems with your bike, do not hesitate to contact your local retailer. If the problem
persists, please call our customer service for a solution.
Willkommen in unserer fahrrad-familie
Vielen Dank für den Kauf ihres neuen Fahrrads.
Wir glauben an das Fahrrad. Wir produzieren hochwertige Fahrräder, damit Sie lange mit ihrem Kauf zufrieden sind.
Aus diesem Grund erhält jedes Fahrrad unsere eingeschränkte lebenslange Garantie.
Wir wünschen ihnen viele problemlose Kilometer und viel Spaß auf ihrem neuen Fahrrad!
Wie auch immer, solten Sie jemals Probleme mit ihrem Fahrrad bekommen, können Sie sich jederzeit an ihren örtlichen
Fachhändler wenden. Wenn das Problem weiterhin besteht, kontaktieren Sie bitte unseren Kundendienst, um eine Lösung
zu finden.
Welkom bij onze fietsfamilie
Dank u voor het kopen van uw nieuwe fiets.
Wij geloven in de kracht van fietsen. We maken hoogwaardige fietsen voor het leven. Daarom wordt elke fiets geleverd met
een beperkte levenslange garantie.
Wij wensen u vele zorgeloze en aangename fietskilometers toe!
Als u echter problemen ondervindt met uw fiets, neem dan contact op met uw plaatselijke fietsendealer.
Als het probleem niet wordt opgelost, vraag dan onze klantenservice om een oplossing.
bienvenue dans notre famille
Merci d’avoir acheté votre nouveau vélo.
Nous croyons aux vertus du vélo. Nous fabriquons des vélos de haute qualité, créés pour durer.
C’est la raison pour laquelle chaque vélo que nous fabriquons est livré avec une garantie à vie limitée.
Nous vous souhaitons de nombreux kilomètres à vélo agréables et sans problème !
Toutefois, si vous avez un souci avec votre vélo, n’hésitez pas à vous adresser à votre distributeur local.
Si le problème persiste, veuillez rechercher une solution auprès de notre service client.
www.trekbikes.com
www.diamantrad.com
Welcome - Willkommen - Welkom - bienvenue

UM-70H0A-001-00
User's manual
E6000 Series
Shimano Total Electric Power System
English

Important to read before the fIrst rIde
The most important points for you to do
1. Even if you have ridden a bicycle for years, it is important for every person to read the general
“Bike Owner’s manual” and the specific “RIDE+ Owner’s manual” carefully before you ride
on the new RIDE+ bicycle.
• Both manuals contain detailed information and useful suggestions about your new bicycle.
• Make sure that you understand the proper use, maintenance, and disposal of the components of
the electrical system of your new RIDE+ bicycle.
2. Think about safety. Your safety and that of other road users is very important.
• Do not ride the electric bike without the battery pack. The battery pack must be on the bike while
riding; else the bike has no lights when needed.
• Do not misuse the electric bike by riding it without a saddle. Some bikes have a quick release on
the seat post. If the saddle gets stolen, it may lead to hazardous situations when still riding on the
electric bike without a saddle.
• Check your bike for normal operation, loose parts and defects before riding. If you find any
problem, visit your bike dealer for repairs before riding.
• Be aware that other road users do not expect that an electric bike can ride faster than a normal
bike. Riding faster also increases the risk of accidents.
• Do not ride abusively. Only ride in the use conditions specified for your bike.
Condition 1 (paved roads with tires staying on the ground) is valid for RIDE+ City/Trekking
bikes, condition 3 (rougher surfaces, tires momentarily NOT on the ground) is valid for RIDE+
Mountain bikes. Please refer to the general Bicycle Owner’s manual for more detailed information.
• Do not over load the rear rack. The maximum allowable weight for the rear rack on RIDE+ bikes
is 20 kg for bikes with a rear rack battery pack and 25 kg for bikes with a down tube battery.
3. The electric system of your new bicycle needs special attention.
• Do not clean your electric bicycle with a high pressure washer. Any electric system is sensitive for
moisture. High pressure water might ingress in connectors or other parts of the electric system.
• Handle your battery pack with care. Do not drop or impact the battery pack. Mishandling of the
battery pack could lead to severe damage or over-heating. In an extremely rare case, a battery pack
that has been severely impacted or otherwise mishandled could potentially catch fire.
If you suspect damage to your battery pack, visit your dealer immediately for inspection.
4. Maintain the battery pack as instructed in the RIDE+ Owner’s manual.
Failure to follow these instructions may result in damage to your battery pack and may require
battery pack replacement:
• Only charge the battery pack with the included Shimano charger.
• When not using the battery pack for a longer period, charge it to approx. 100 % (4 to 5 LEDs lit
on the charge-control indicator).
• Check the charge status of the battery pack regularly if you do not use your bike for a longer period.
When only one LED of the charge-control indicator lights up or flashes, recharge the battery pack
again to approx. 100 % immediately.
• It is not recommended to have the battery pack connected permanently to the charger.
• When the battery pack is stored discharged (empty) for longer periods, it can become damaged
despite the low self-discharging and the battery-pack capacity may be strongly reduced.

• Store the battery pack in a dry, well-ventilated location. Protect the battery pack against
moisture and water.
• Under unfavorable weather conditions, it is recommended e.g. to remove the battery pack from
the bike and store it in an enclosed location until being used again.
• The battery pack can be stored at temperatures between -20°C and +60°C. For a long battery
pack life, however, storing the battery pack at room temperature of approx. 20°C is of advantage.
• Take care that the maximal storage temperature is not exceeded. As an example, do not leave
the battery pack in a vehicle in summer and store it out of direct sunlight.
•
It is recommended to not store the battery pack on the bike.
5. Be careful when transporting a RIDE+ bike.
• An E-bike is heavier than a normal bike. If transporting on a vehicle, be aware of the maximum
load capacity of the vehicle’s roof, towing hook and/or of the applied bike carrier.
Refer to the manual of the vehicle and bike carrier for details.
• Remove the controller, battery pack and, if present, panniers from the bicycle and store them
elsewhere in the vehicle during the drive.
• Always respect local laws about transportation of a(n electric) bicycle.
• Because Li-Ion battery packs of this size and power are considered ‘Dangerous goods, class 9’
when transporting, regulations may restrict the transport of separate Li-Ion batteries in some
places. The restrictions apply to most airlines and some trucking companies. But, if you intend
to ship or travel with your complete RIDE+ bike (with installed battery pack), the regulations are
less strict. Make sure to check ahead with your airline or carrier, before booking your trip, if it is
allowed to travel with your complete RIDE+ bike.
6. Visit your dealer on a regular basis for maintenance of your new bike.
• Your dealer has the right knowledge and equipment to maintain your RIDE+ bike.
• If you have questions about your new RIDE+ bicycle, ask your dealer!
Getting the most from your RIDE+ Bicycle

EN-3
CONTENTS
IMPORTANT NOTICE
......................................................................................5
Important safety information
.........................................................................5
To ensure safety
...........................................................................................5
Features of SHIMANO STePS
...........................................................................8
Features.......................................................................................................................................8
Riding the bicycle........................................................................................................................8
Assist mode .................................................................................................................................8
Names of parts
.............................................................................................9
Specifications
.............................................................................................10
Method of use
...........................................................................................11
Charging the battery................................................................................................................11
Battery level indicator ..............................................................................................................12
Handling and charging the battery.........................................................................................12
Installing / removing the battery............................................................................................13
Turning the power ON / OFF....................................................................................................15
Switching modes.......................................................................................................................16
Installing and removing the cycle computer...........................................................................16
Changing settings
......................................................................................17
Operating the cycle computer .................................................................................................17
SHIMANO STePS logo screen....................................................................................................17
Basic screen display...................................................................................................................18
Launching and exiting the setting menu................................................................................23
Changing the settings ..............................................................................................................24

EN-4
Connection and communication with the PC
...................................................28
Downloading application.........................................................................................................28
Troubleshooting
.........................................................................................29
Battery level and error indication............................................................................................29
Error messages on the cycle computer....................................................................................30
Troubleshooting........................................................................................................................32

EN-5
User's manuals in other languages are
available at :
http://si.shimano.com
IMPORTANT NOTICE
•
Contact the place of purchase or a bicycle dealer for
information on installation and adjustment of the
products which are not found in the user's manual. A
dealer's manual for professional and experienced bicycle
mechanics is available on our website (http://si.shimano.
com).
•
Do not disassemble or alter this product.
•
Use the product according to local laws and regulations.
For safety, be sure to read this user's
manual thoroughly before use, and
follow them for correct use.
Important safety information
Guidelines that require replacement, contact the place of
purchase or a bicycle dealer.
Be sure to observe the following in order to avoid burns or
other injury from fluid leakages, overheating, fire or
explosions.
To ensure safety
DANGER
Handling the battery
•
Do not deform, modify, disassemble or apply solder
directly to the battery. Doing so may cause leakage,
overheating, bursting, or ignition of the battery.
•
Do not leave the battery near sources of heat such as
heaters. Do not heat the battery or throw it into a fire.
Doing so may cause bursting or ignition of the battery.
•
Do not subject the battery to strong shocks or throw it. If
this is not observed, overheating, bursting, or fire may occur.
•
Do not place the battery into fresh water or sea water, and
do not allow the battery terminals to get wet. Doing so
may cause overheating, bursting, or ignition of the battery.
•
Use the battery and charger combination specified by the
company for charging and follow the charging conditions
specified by the company. Not doing so may cause
overheating, bursting, or ignition of the battery.
WARNING
To ensure safe riding
•
Do not give too much of your attention to the cycle computer
display while riding, otherwise accidents may result.
•
Check that the wheels are securely installed to the bicycle
before commencing riding. If the wheels are not securely
installed, the bicycle may fall over and serious injury may result.
•
If riding a power-assisted bicycle, make sure that you are
fully familiar with the starting-off characteristics of the
bicycle before riding it on roads with several vehicle lanes
and pedestrian footpaths. If the bicycle starts off
suddenly, accidents may result.
•
Check that the bicycle lights illuminate before riding at night.
Using the product safely
•
Always be sure to remove the battery before carrying out
any wiring and assembly work for the bicycle, otherwise
electric shocks may result.
•
When installing this product, be sure to follow the instructions
given in the user's manual. Furthermore, it is recommended that
you use only genuine Shimano parts at these times. If bolts and
nuts are left loosened or the product is damaged, the bicycle
may suddenly fall over and serious injury may result.
•
After reading the user's manual carefully, keep it in a
safe place for later reference.

EN-6
Handling the battery
•
If any liquid leaking from the battery gets into your eyes,
immediately wash the affected area thoroughly with
clean water such as tap water without rubbing your eyes,
and seek medical advice immediately. If this is not done,
the battery liquid may damage your eyes.
•
Do not recharge the battery in places with high humidity
or outdoors. Doing so may result in electric shock.
•
Do not insert or remove the plug while it is wet. If this is not
observed, electric shocks may result. If there is water leaking
out of the plug, dry it thoroughly before inserting it.
•
If the battery does not become fully charged after 6 hours of
charging, immediately unplug the battery from the outlet to
stop charging, and contact the place of purchase. Doing so
may cause overheating, bursting, or ignition of the battery.
•
Do not use the battery if it has any noticeable scratches
or other external damage. Doing so may cause bursting,
overheating or problems with operation.
•
The operating temperature ranges for the battery are
given below. Do not use the battery in temperatures
outside these ranges. If the battery is used or stored in
temperatures outside these ranges, fire, injury or
problems with operation may occur.
1. During discharge: –10 °C - 50 °C
2. During charging: 0 °C - 40 °C
Cleaning
•
The frequency of maintenance will vary depending on the riding
conditions. Periodically clean the chain using an appropriate chain
cleaner. Do not use alkaline or acidic cleaning agents for removing
rust under any circumstances. If such cleaning agents are used,
they may damage the chain and serious injury may result.
CAUTION
To ensure safe riding
•
Observe the instructions in the user's manual for the
bicycle, in order to ride safely.
Using the product safely
•
Examine the battery charger regularly for damage, especially
the cord, plug and enclosure. If the battery charger is
damaged, it must not be used until it has been repaired.
•
This appliance is not intended for use by persons (including
children) with reduced physical, sensory or mental
capabilities, or lack of experience and knowledge, unless
they have been given supervision or instruction concerning
use of the appliance by a person responsible for their safety.
•
Do not allow children to play near the product.
Handling the battery
•
Do not leave the battery in a place exposed to direct
sunlight, inside a vehicle on a hot day, or other hot
places. This may result in battery leakage.
•
If any leaked fluid gets on your skin or clothes, wash it
off immediately with clean water. The leaked fluid may
damage your skin.
•
Store the battery in a safe place out of the reach of
infants and pets.
Cleaning
•
If any malfunctions or other problems occur, contact the
place of purchase.
•
Never attempt to modify the system yourself, as it may
cause problems with system operation.
Note
Using the product safely
•
Be sure to install caps to any connectors which are not
being used.
•
For installation and adjustment of the product, consult a
dealer.
•
The Product is designed to be fully waterproof to
withstand wet weather riding conditions. However, do
not deliberately place them into water.
•
Do not clean the bicycle in a high-pressure wash. If water
gets into any of the components, operating problems or
rusting may result.
•
Handle the product carefully, and avoid subjecting it to
any strong shocks.
•
Although the bicycle still functions as a normal bicycle
even when the battery is removed, the light does not
turn on if it is connected to the electric power system. Be
aware that using the bicycle under these conditions will
be considered non-observance of the road traffic laws in
Germany.

EN-7
Handling the battery
•
When you carry a power-assisted bicycle in a car, remove
the battery from the bicycle and place the bicycle on a
stable surface in the car.
•
When attaching the battery, check that no water has
accumulated on the connector to the battery, then
connect it.
Disposal information for countries outside
the European Union
This symbol is only valid within the
European Union. Follow local regulations
when disposing of used batteries. If you
are not sure, consult the place of purchase
or a bicycle dealer.
Cleaning
•
The number found on the battery key is necessary when
purchasing spare keys. Keep it in a safe place.
•
Contact the place of purchase for updates of the product
software. The most up-to-date information is available
on the Shimano website. For details, refer to the
"Connection and communication with the PC" section.
•
Do not use thinner or other solvents to clean any of the
products. As such substances may damage the surfaces.
•
You should periodically wash the chainrings in a neutral
detergent. In addition, cleaning the chain with neutral
detergent and lubricating it can be an effective way of
extending the useful life of the chainrings and the chain.
•
Use a damp cloth, with the water well wrung out, when
cleaning the battery and plastic cover.
•
For any questions regarding handling and maintenance,
contact the place of purchase.
•
Products are not guaranteed against natural wear and
deterioration from normal use and aging.
•
For maximum performance we highly recommend
Shimano lubricants and maintenance products.
Assist
•
If the settings are not correct, for instance if the chain
tension is too tight, the proper assist force may not be
obtained. If this happens, contact the place of purchase.
•
Do not disassemble the product. Disassembling it may
cause injury to persons.
Label
•
Some of the important information contained in this
user's manual is also indicated on the battery charger
label.

EN-8
Features of SHIMANO STePS
Features
•
Lightweight, compact design
•
Silent, smooth ride
•
High shifting performance system (In the case of electronic gear shifting)
This system enables you to shift gears by providing the most appropriate level of power assistance carefully adjusted by a
computer control based on accurate sensing.
•
Walk assistance function
•
Start mode (In the case of electronic gear shifting)
This function allows automatic shifting down to a preset gear when you stop the bicycle such as at traffic lights so that
you can start traveling at a light gear.
Riding the bicycle
1.
Turn on the power.
2.
Select your preferred assist mode.
3.
Assistance will start when the pedals start turning.
4.
Change the assist mode in accordance with the riding conditions.
5.
Turn the power off when parking the bicycle.
Assist mode
You can select a SHIMANO STePS assist mode for each particular application.
HIGH NORMAL ECO
Use when powerful assistance is
required, such as when riding up steep
uphill slopes.
Use when an intermediate level of
assistance is needed, such as when you
want to enjoy riding comfortably on a
gentle slope or level ground.
Use when you want to enjoy long
distance riding on level ground. When
pedaling is not very strong, the
amount of assistance is reduced and
energy consumption is lessened.
When the battery level is running low, the level of assistance is lowered to increase the traveling range.
OFF
This mode does not provide power assistance when the power is turned on. Since there is no power consumption
associated with the power assistance, it is useful for reducing battery consumption when the battery is running low.
WALK
This mode is particularly useful when you walk the bicycle with heavy baggage on it or walk it out of a basement.

EN-9
Names of parts
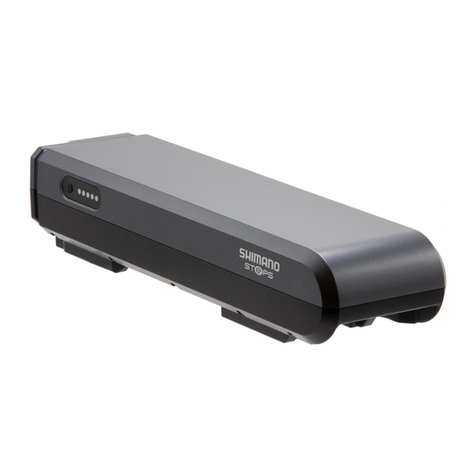
<BT-E6000 / SM-BME60>
< In the case of electronic gear
shifting >
A
Shifting
switch SW-E6000
B
Motor
unit MU-S705
Internal
geared
hub
SG-C6060
SG-S705
SG-S505
Motor unit
Internal geared
hub
8
B
1 2
3
5
6
A
B
4
7
<BT-E6010 / SM-BME61>
6
7
1
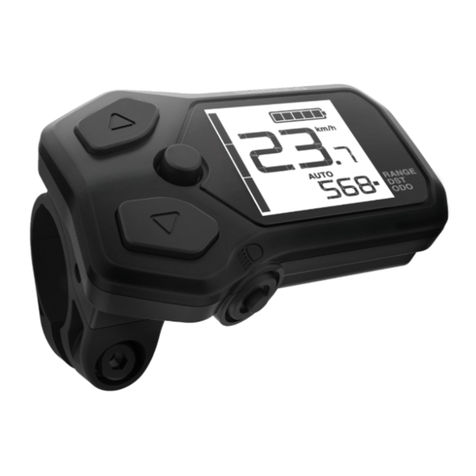
Cycle computer SC-E6000
5
Speed sensor
2
Assist switch SW-E6000
6
Battery BT-E6000 /
BT-E6010
3
Front gear / Crank arm FC-E6000 /
SM-CRE60
7
Battery mount SM-BME60 /
SM-BME61
4
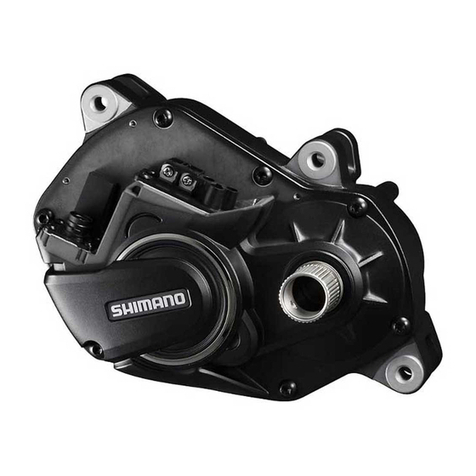
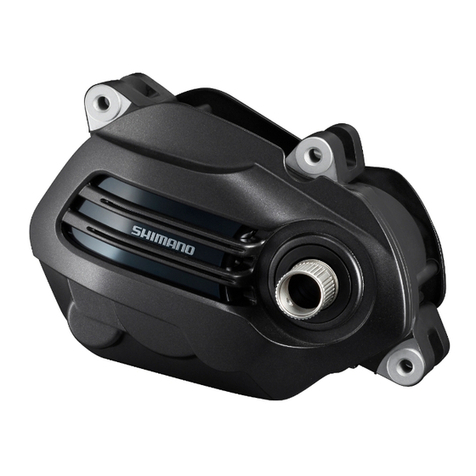
Drive unit DU-E6000 /
DU-E6001
8
Battery charger SM-BCE60

EN-10
Specifications
Operating temperature
range: During discharge -10 – 50˚C Nominal capacity 11.6 Ah
Operating temperature
range: During charging 0 – 40˚C Rated voltage 36 V DC
Storage temperature -20 – 70˚C Drive unit type Midship
Storage temperature
(Battery) -20 – 60˚C Motor type Brush-less DC
Charging voltage 100 – 240 V AC Rated drive unit power 250 W
Charging time About 4 hours Maximum drive unit power 500 W
Battery type Lithium ion battery

EN-11
Method of use
Charging the battery
1.
Attach the charger plug to the charger connector of the
battery.
Insert it with the groove side of the connector facing
up.
*
You cannot insert it with the groove side facing
down.
DANGER
•
Use the battery and charger combination specified by the
company for charging and follow the charging conditions
specified by the company. Not doing so may cause
overheating, bursting, or ignition of the battery.
•You cannot use the battery immediately after purchase. Before

riding, be sure to charge the battery until it is fully charged.
•If the bicycle is stored for an extended period of time
immediately after purchase, you will need to charge the
battery before using the bicycle. Once the battery is charged,
it starts to deteriorate.
<BT-E6000>
Battery
Groove
Charger connector
Backside (no groove)
<BT-E6010>
Groove
Charger connector
2.
After charging has started, the LED lamp on the charger
lights up.
You can check the current charging status on the
battery level lamp located on the battery.
Lights up
Charging (Within 1 hour after the
completion of charging)
Flashing Charging error
Turned
off
Battery disconnected
(1 hour or more after the completion of
charging)
Charger LED lamp
Battery level lamp indication

EN-12
Battery level indicator
Charging-in-progress indication
Battery level indicator*1 Battery level
0% - 20%
21% - 40%
41% - 60%
61% - 80%
81% - 99%
100%
*1 : No light : Lights up : Flashing
Battery level indication
Battery level indicator*1 Battery level
100% - 81%
80% - 61%
60% - 41%
40% - 21%
20% - 1%
0%
Power off / Shutdown
*1 : No light : Lights up : Flashing
Handling and charging the battery
Charging can be carried out at any time regardless of the amount of charge remaining, but you should fully charge the
battery at the following times. Be sure to use the special charger when recharging the battery at these times.
•
The battery is not fully charged at the time of purchase. Before riding, be sure to charge the battery until it is fully
charged.
•
If you will not use the bicycle for an extended period of time, charge the battery before storing the bicycle.
If the battery has become fully spent, charge it as soon as possible. If you leave the battery without charging it, it will
cause the battery to deteriorate.
•
If you will not ride the bicycle for an extended period of time, charge the battery periodically. Do not let the battery
discharge completely.

EN-13
Installing / removing the battery
How to use the key
The following description may not be applicable as different types of keys are available.
1.
Insert the key into the key cylinder in the battery
holder.
•The position of the key does not affect the insertion of the
battery. You can insert it regardless of the key position.
•You cannot remove the key when it is not in the inserting
position.
<BT-E6000>
Key Key cylinder
<BT-E6010>
Key
Key cylinder
2.
To unlock the battery turn the key until you feel some
resistance.
CAUTION
To prevent the battery from dropping off, do not ride the bicycle
with the key inserted.
<BT-E6000>
<BT-E6010>

EN-14
Removing the battery
<BT-E6000>
Turn off the power, then turn the key to the unlocking
position, and pull out the battery.
You can remove the battery only when the key is in the unlocking
position.
<BT-E6010>
Turn off the battery then turn the key to the unlocking
position. Hold the upper part of the battery and slide it
to the left to remove it.
Installation of the battery
<BT-E6000>
1.
Set the battery on the holder rail from behind and
slide it forward.
Push it in firmly.
2.
Return the key to the locking position, remove it, and
store it in a safe place.
CAUTION
Check that the battery is locked before riding the bicycle. Rail

EN-15
<BT-E6010>
1.
Align the indentation in the bottom of the battery
with the protrusion on the holder and insert the
battery.
2.
Slide the battery to the right starting from the point
where it is inserted. Push in the battery until you
hear it click.
3.
Return the key to the locking position, remove it,
and store it in a safe place.
CAUTION
Check to see that the battery is locked before riding the bicycle.
Turning the power ON / OFF
Press the power button once with the power turned ON or
OFF. All the indicators turn on when the power is on.
CAUTION
When turning on the power, check that the battery is firmly
attached to the holder.
When turning the power ON or OFF, do not place your foot on
the pedal.
Automatic power off function
If the bicycle has not moved for over 10 minutes, the power
will automatically turn off.
<BT-E6000>
Power button
Press once
<BT-E6010>
Power button
Press once

EN-16
Switching modes
XChanging the cycle computer display
Y
When switching assist modes: the level of
assistance becomes stronger
When shifting gears: pedaling becomes heavier
Z
When switching assist modes: the level of
assistance becomes weaker
When shifting gears: pedaling becomes lighter
X
Y
Z
Installing and removing the cycle computer
Slide the cycle computer onto the bracket as shown in the
illustration to install it.
Insert the cycle computer securely until it clicks into place.
Bracket
To remove the cycle computer, push the lever of the bracket
firmly while sliding out the cycle computer.
If the cycle computer is not correctly in place, the assist function
will not operate normally.
Lever

EN-17
Changing settings
Operating the cycle computer
You can operate the display of the cycle computer by using
the X, Y, and Z buttons on the right and left assist switches.
Assist Shift
Assist mode switching
Gear shifting
X
X
Y
Y
Z
Z
The operation procedure provided here refers to cases where the cycle computer is set to the default values.
SHIMANO STePS logo screen
This screen is displayed when the system is started up.
Other manuals for E6000 Series
3
Table of contents
Languages:
Other Shimano Steps Bicycle Accessories manuals

Shimano Steps
Shimano Steps E8000 Series User manual

Shimano Steps
Shimano Steps E6000 Series User manual

Shimano Steps
Shimano Steps E6000 Series User manual

Shimano Steps
Shimano Steps E6000 Series User manual

Shimano Steps
Shimano Steps SC-EM800 User manual

Shimano Steps
Shimano Steps E5003 User manual

Shimano Steps
Shimano Steps BT-E6000 User manual

Shimano Steps
Shimano Steps E6100 Series User manual