manuals.online logo
Brands
  1. Home
  2. •
  3. Brands
  4. •
  5. tubus
  6. •
  7. Bicycle Accessories
  8. •
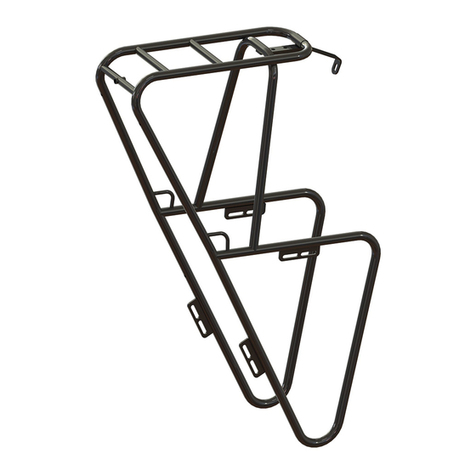
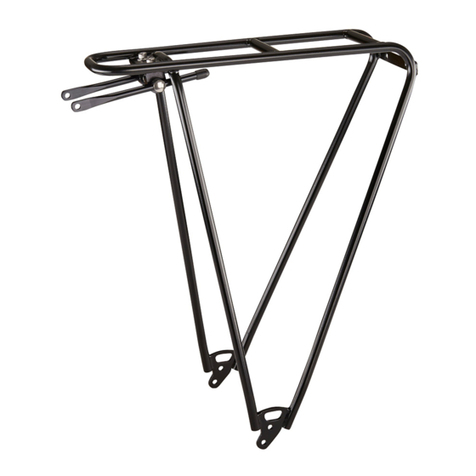
  9. tubus LOGO Expedition User manual

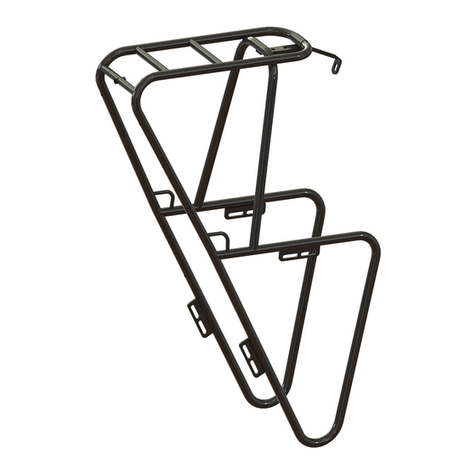
tubus LOGO Expedition User manual

2
1
max. Zuladung: 40 kg
Load-capacity: 40 kgs
max. Zuladung: 30 kg
Load-capacity: 30 kgs
Schrauben Sie den Gepäckträger unten an die
Gewindeösen Ihres Fahrradrahmens (Unterleg-
scheiben verwenden).
Ziehen Sie die Schrauben nur locker an.
Falls die Anschraubösen des Rahmens weiter als
die Trägerstreben auseinander liegen, biegen Sie
die Streben zu einer „S-Form“ um die Differenz
auszugleichen. Biegen Sie nicht am flach
gedrückten Ende der Strebe, um Bruchgefahr
zu vermeiden!
Kürzen Sie die Streben bei Überlänge (!):
Markieren Sie die Streben in Höhe des Pfeils mit
einem Bleistift. (ca.15mm hinter dem Klemmstück)
Nehmen Sie jetzt die Endkappen ab und ziehen
Sie die Streben ganz heraus. Sägen Sie die
Streben an der Markierung ab, montieren Sie sie
wieder und stecken Sie die Endkappen auf.
3
LOGO: Art. Nr. 80000 (schwarz), 80500 (silber)
LOGO: Art. No. 80000 (black), 80500 (silver)
COSMO: Art. Nr. 70000 (Edelstahl rostfrei)
COSMO: Art. No. 70000 (stainless steel)
extrem belastbar
tiefer Schwerpunkt
handgefertigt
extremely stable and durable
low center of weight
handmade
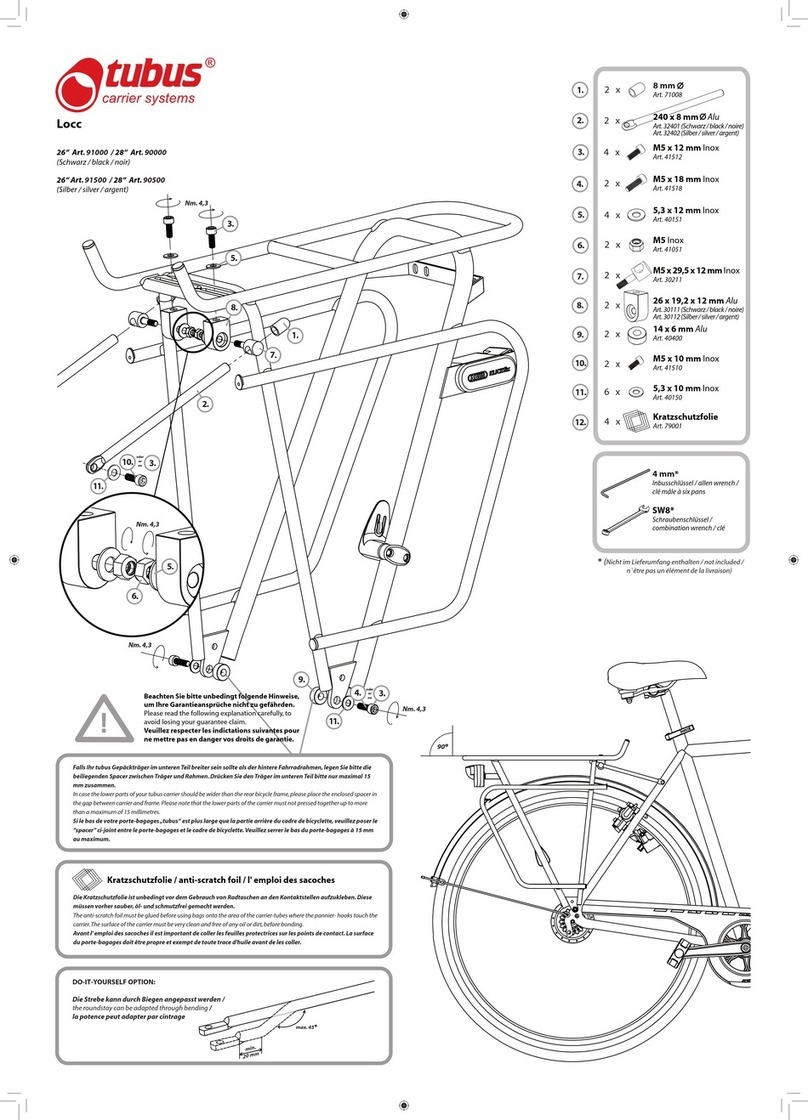
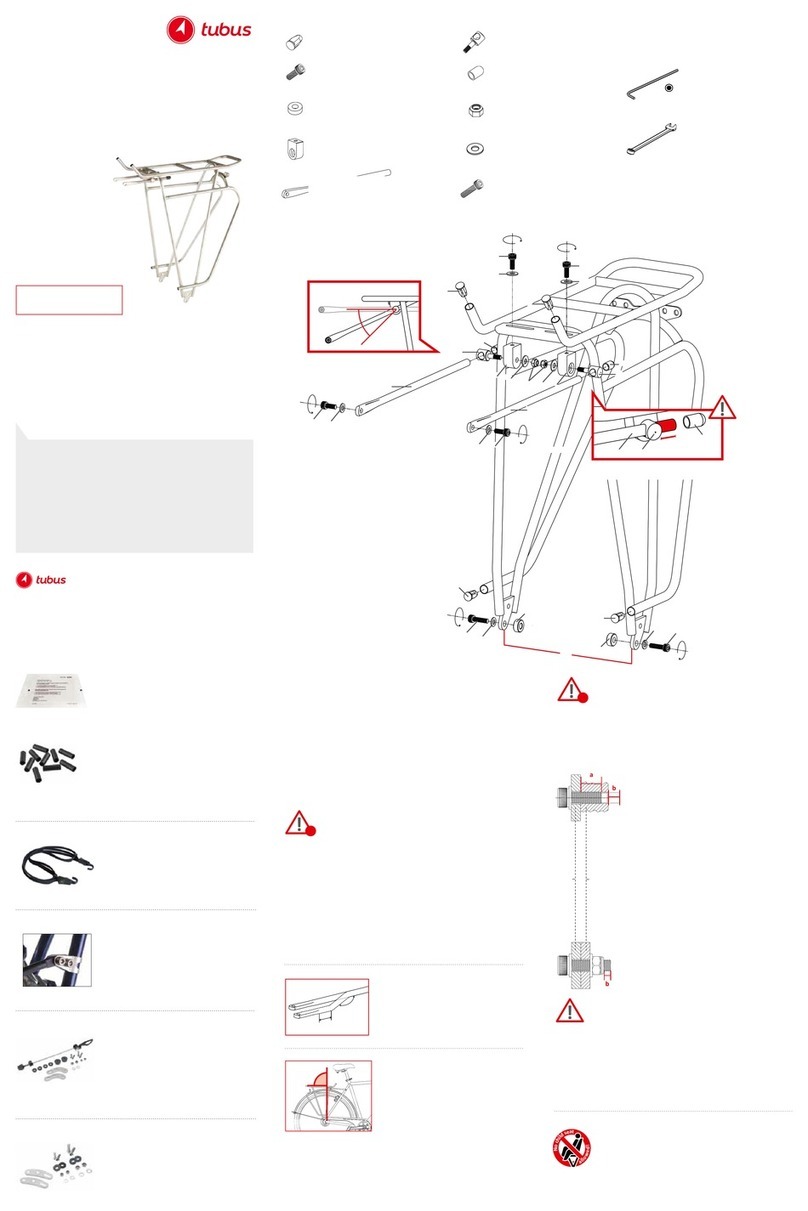
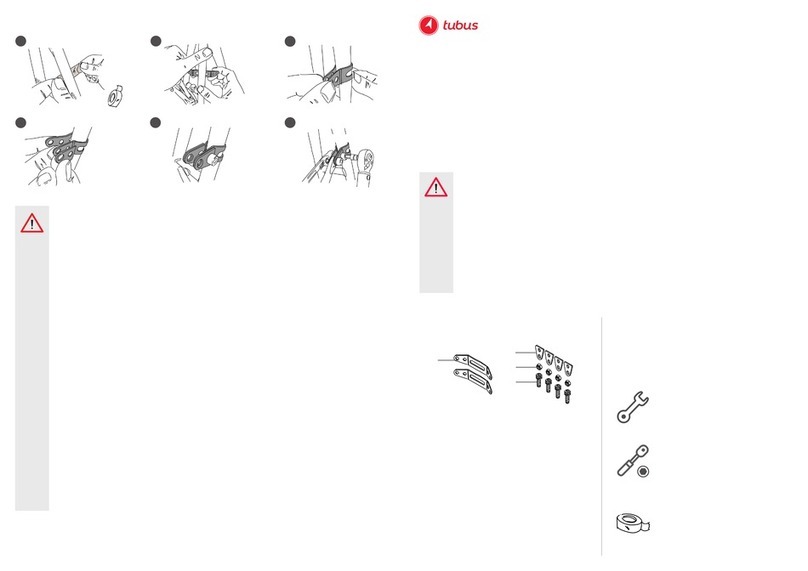
Attach the carrierlegs to the eyelets of the
rear dropouts using the screws and washers
provided. Do not tighten the screws yet, but
leave them loose to facilitate adjustment.
Pull out both premounted round rods
towards the carrier mounting points on the
seatstays of your frame. Temporarely fasten
the rods to the seat stays, and position the
carrier horizontal.
.
The excess length of the connecting rods
can be cut off with a hacksaw. Note the
length of the rods visible between roundstay
and clamping block, this has to be approx.
15mm (0,6 inch). Remove the endcap,
withdraw the rod and trim the rod to the
marked length. Remount the rods again
and press the caps on to the cutted
rod-ends.
Fitting instructions
Montageanleitung
für die Gepäckträger LOGO und COSMO
LOGO
und COSMO
Expedition
for the TUBUS carriers LOGO and COSMO
carrier systems
4
In case of wider mounting points of your
frame, bend both rods to an “S-shape” to fill
up the difference. To avoid cracks, please
do not bend the pressed end of the rods.
Die beiden Rundstreben sind am Gepäckträger
bereits vormontiert. Ziehen Sie sie nach vorne
heraus. Passen Sie die Rundstreben an Ihren
Fahrradrahmen an. Richten Sie dafür zuerst die
obere Fläche des Gepäckträgers waagerecht
aus. Ziehen Sie dann die Streben bis an die
Anschraubösen des Rahmens heraus.
Virnkamp 24 D-48157 Münster Tel: 0049 (0)251/ 76 19 688 Fax: 76 19 689
E-Mail: tubus@tubus.net Internet: www.tubus.net
Die Anpassungen sollen so genau erfolgen, dass
der Träger möglichst spannungsfrei angeschraubt
ist. Ziehen Sie danach die Inbusschrauben von
oben fest an.
Bei Bedarf können Sie einen Reflektor oder ein
Rücklicht mit einem Schraubenabstand von
50mm verwenden.
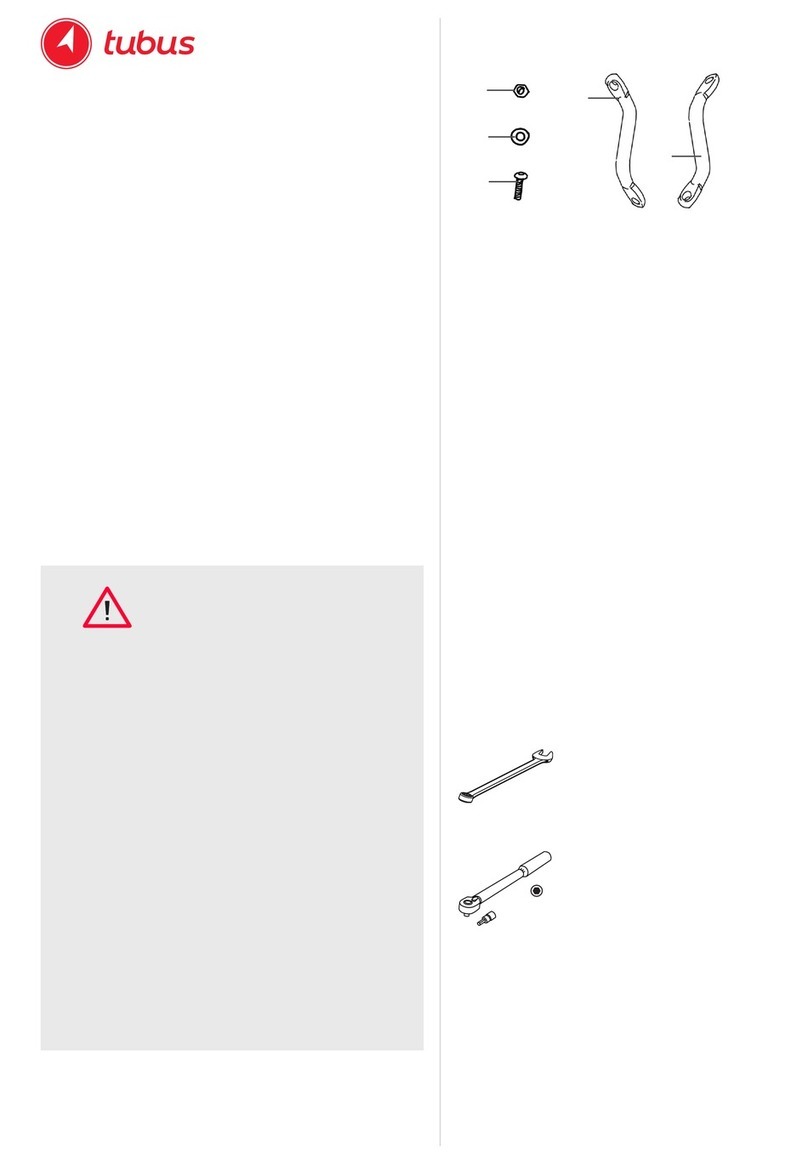
Tighten the nut with a wrench 8mm
and an allen key 4mm.
7
6
Schrauben Sie dann die selbstsichernden Muttern
auf den Klemmschrauben fest.
Inbusschlüssel gegenhalten !
Check that the carrier is indeed fitted
horizontal and unstressed., and finally
tighten all screws. A standard reflector or
a rearlight with a bolt-distance of 50mm
can be fitted to the carrier if required.
Bitte vor Fahrtantritt unbedingt beachten:
Überprüfen Sie alle Schraubverbindungen auf ihren festen und
einwandfreien Sitz.
Vergewissern Sie sich, daß der Gepäckträger unter keinen Umständen
Kontakt mit den Laufrädern bekommen kann.
Jede Art des Beladens bedeutet eine größere Belastung für alle
Fahrradteile.
Befestigen Sie die Fahrradtaschen so an Ihrem TUBUS Gepäckträger,
daß sie weder bei normaler Fahrt noch bei heftigem Bremsen verrut-
schen können. Verteilen Sie das Gewicht gleichmäßig rechts und links.
Das Befestigen von Kindersitzen an einen TUBUS Gepäckträger ist
nicht gestattet.
Ein beladenes Fahrrad erfordert eine höhere Aufmerksamkeit des Fahrers:
- Das Lenk- und Bremsverhalten ist träger
- Viele Bauteile des Fahrrades werden deutlich höher belastet
- Die meisten Seitenständer sind durch das hohe Gesamtgewicht
des Fahrrades überfordert. Achten Sie deshalb beim Abstellen
auf festen Untergrund und einen sicheren Stand des Rades.
Sämtliche Teile eines TUBUS Gepäckträgers sind als Ersatzteil zu
bekommen. Wenden Sie sich an Ihren TUBUS Fachhändler.
Before starting off please note:
Do not ride a bicycle with a loose or improperly fitted carrier.
Make sure that no part of the carrier or load can touch or
obstruct the wheels,
Ensure that all bicycle components are able to cope with
the increased load,
Ensure that the panniers stay firmly attached to the carrier,
especially under braking,
Divide the load equally to keep the bicycle balanced,
The fitting of a child carrier seat to a TUBUS carrier is not
permitted.
Riding a loaded bicycle requires extra attention:
- Steering and braking is impaired,
- Stresses on the bicycle are more severe,
- Most propstands are not able to support a loaded
bicycle, especially on sloping ground.
All spares for TUBUS carriers are available separately
through your local dealer.
Schrauben Sie jetzt die vorderen Enden der
Streben an Ihrem Rahmen fest.
(Unterlegscheiben verwenden)
Refit the rods, making sure that they are
adjusted in parallel and unstressed.
Use washers under the boltheads.
5
carrier systems
Gilt nur für LOGO Expedition (Art. Nr. 80000, 80500)
Um die Trägeroberfläche vor Abrieb zu schützen, benutzen Sie
bitte die beiliegende Kratzschutzfolie. Bei Mehrbedarf ist ein Set
von 8 Stck. unter der Art. Nr. Z 9000 bei Ihrem Händler erhältlich.
Only for LOGO Expedition (Art. No. 80000, 80500)
To protect the carrier surface use enclosed protection foil.
If additional pieces are required please contact your
tubus dealer and refer to Art. No. Z 9000.
This manual suits for next models

1

Other tubus Bicycle Accessories manuals

tubus Locc User manual

tubus

tubus Locc User manual

tubus Smarti User manual

tubus

tubus Smarti User manual

tubus Disco 42000 User manual

tubus

tubus Disco 42000 User manual

tubus 204060-001 User manual

tubus

tubus 204060-001 User manual

tubus VEGA CLASSIC User manual

tubus

tubus VEGA CLASSIC User manual

tubus DUO User manual

tubus

tubus DUO User manual

tubus 71600 User manual

tubus

tubus 71600 User manual

tubus 30004 User manual

tubus

tubus 30004 User manual

tubus GRAND EXPEDITION FRONT User manual

tubus

tubus GRAND EXPEDITION FRONT User manual

tubus Racktime User manual

tubus

tubus Racktime User manual

tubus COSMO Quick setup guide

tubus

tubus COSMO Quick setup guide

tubus 71614 Quick setup guide

tubus

tubus 71614 Quick setup guide

Popular Bicycle Accessories manuals by other brands

Polar Electro CS400 instruction manual

Polar Electro

Polar Electro CS400 instruction manual

Harbor Freight Tools 61231 owner's manual

Harbor Freight Tools

Harbor Freight Tools 61231 owner's manual

Syntace P6 quick start guide

Syntace

Syntace P6 quick start guide

Garmin Edge 800 owner's manual

Garmin

Garmin Edge 800 owner's manual

Powerfix Profi Z31845 Assembly and Safety Advice

Powerfix Profi

Powerfix Profi Z31845 Assembly and Safety Advice

CPE 100189 Owner's manual & operating instructions

CPE

CPE 100189 Owner's manual & operating instructions

Marzocchi Dirt Jumper 1,5 QR20 instructions

Marzocchi

Marzocchi Dirt Jumper 1,5 QR20 instructions

Klarfit Follower manual

Klarfit

Klarfit Follower manual

Brompton S Bag quick start guide

Brompton

Brompton S Bag quick start guide

Drag2Zero Cervelo P5 quick start guide

Drag2Zero

Drag2Zero Cervelo P5 quick start guide

PowerTap Joule GPS quick start guide

PowerTap

PowerTap Joule GPS quick start guide

Ciclo PROTOS 205 user manual

Ciclo

Ciclo PROTOS 205 user manual

Kody Technologies 1Up Equip-D installation instructions

Kody Technologies

Kody Technologies 1Up Equip-D installation instructions

Cube ACID FILink 93166 Assembly instruction and manual

Cube

Cube ACID FILink 93166 Assembly instruction and manual

RFR E-Bike Frontlight E 80 manual

RFR

RFR E-Bike Frontlight E 80 manual

Bike Friday Mid-drive e-assist Getting started guide

Bike Friday

Bike Friday Mid-drive e-assist Getting started guide

Shimano CJ-NX10 Service instructions

Shimano

Shimano CJ-NX10 Service instructions

SENDER RAMPS 125 ROOKIE manual

SENDER RAMPS

SENDER RAMPS 125 ROOKIE manual

manuals.online logo
manuals.online logoBrands
  • About & Mission
  • Contact us
  • Privacy Policy
  • Terms and Conditions

Copyright 2025 Manuals.Online. All Rights Reserved.