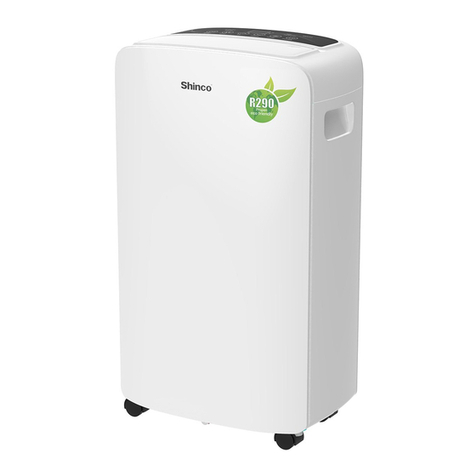
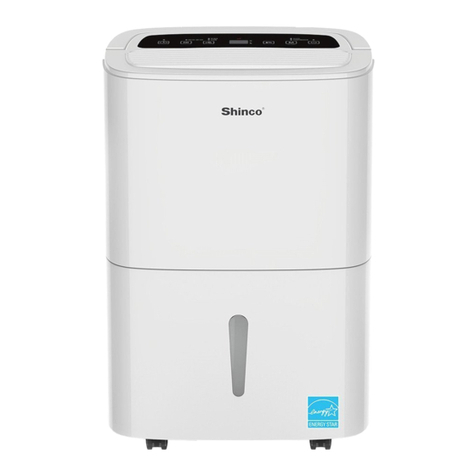
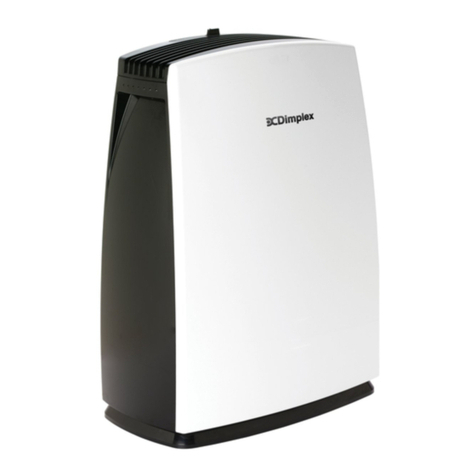
Shinco SDO-10D User manual

Model:
SDO-16D
SDO-20D
Dehumidifier
Déshumidificateur d'air
Luftentfeuchter
Deshumidificador
Deumidificatore
SDO-10D


,,
:0049-21751869828
Sales Support:[email protected]
Model number SDO-10D SDO-16D SDO-20D
Power supply 220-240 V ~ 50 Hz 220-240 V ~ 50 Hz 220-240 V ~ 50 Hz
Power consumtion 175 W 400 W 390 W
Dehumidifying 10 L/day (30°C, 16 L/day (30°C, 20 L/day (30°C,
capacity RH 80%) RH 80%) RH 80%)
Water tank 2 L 2 L 2 L
3
3
3
4
Notes On Refrigerant R290 6
8
8
9
11
12
12

EN
SAFETY INSTRUCTIONS
4
•Please read the operating instructions carefully
before using your dehumidifier for the first time and
keep it on a safe floor.
•Never immerse the appliance in water or other
liquids.
•Place the unit on a stable flat surface to avoid loud
noises and vibrations.
•Never operate the appliance if a cable or
connector has been damaged, after appliance
malfunction or if the appliance was dropped or
otherwise damaged.
•The appliance may only be repaired by qualified
personal, improper repair work can be a source of
considerable danger for the users.
•Pull out the power plug before transporting it and /
or before cleaning.
•Operate the appliance only at the voltage specified
on the rating label.
•The device may not be connected to a power strip
with other household appliances.
•Use the appliance only in the household, and only
for the purpose it was developed for.
•Do not operate this unit near heating appliances
and flammable or dangerous objects.
•If the dehumidifier is operated in a room with gas
driven devices, so the room must be aired regularly
and often.

•Please use the function of the internal drying, if the
device is not used for a long time. This will prevent
formation of mildew and unpleasant smell inside the
unit.
•Do not place heavy objects on the appliance.
•Do not hang curtains or wet clothes in front of the air
outlet, this will overload the device.
•The drainage hose may not be installed outdoors at
low temperatures.
•To prevent spillage, empty the water tank before
relocating the appliance.
•Do not tip the appliance to any side as escaping water
could damage the appliance.
•If the supply cord is damaged, it must be replaced by
a qualified person to avoid a hazard.
•If you smell the smoke during start-up or if you can see
the smoke, immediately disconnect the power plug out
and contact your dealer.
•The unit should be installed with a minimum distance of
20 cm from the wall or other obstacles.
•This appliance can be used by children aged from 8
years and above and persons with reduced physical,
sensory and mental capabilities or lack of experience
and knowledge if they have been given supervision or
instruction concerning use of the appliance in a safe
way and understand the hazards involved. Cleaning
and user maintenance shall not be made by children
without supervision.
5

NOTES ON REFRIGERANT R290
Warnings
•The air conditioning system must be kept and
transported upright. Otherwise, irreparable compressor
damage may occur. Leave the unit for at least 24 hours
before putting it into operation.
•Switch off the device and disconnect it from the power
supply before cleaning.
•Make sure that the product creates a steady stream of
air. Ensure the air inlets and outlets are not blocked.
•To prevent leaks, operate this unit on a horizontal
surface.
•Any person performing work on a refrigerant circuit
should have a current
certifi cate from an industry-accredited assessment
body. This ensures competence for the safe handling of
refrigerants according to an industry-recognised
assessment specifi cation.
•If the device stops working, dispose of it properly.
•Store the device in a well-ventilated place when not in
use.
•Store the device so that it is not damaged.
•Repairs may only be carried out by the manufacturer or
an authorised specialist company.
•The cables connected to the device may contain
potential ignition sources.
•Do not damage any components of the refrigerant
circuit. Escaping refrigerant may not be noticed
because it is odourless.
EN
6

Information for rooms with refrigerant pipes
•Limit the piping to a minimum.
•Be careful not to damage the piping.
•Appliances with fl ammable refrigerants may only be
installed in a well-ventilated room.
•Comply with national gas regulations.
•All mechanical connections must be freely accessible
for maintenance purposes.
CAUTION
Risk of fi re! This device contains the
flammable refrigerant R290. If the
refrigerant escapes and is exposed to an
external ignition source, there is a risk of fi re.
•Maintenance and repairs must be carried out under
the supervision of specialists in the use of fl ammable
refrigerants.
7

EN
8

High
Low
Auto
Cloth-dry
Waterfull
In standby state press the Power button to start, and during operation
of the dehumidifier press the Power button to shut down. For initial
startup the default is low wind, the display show the environment
temperature and the default set humidity is RH50%. If the dehumidifier
is not energized for the first time, after startup the state is kept the
same as that before shutdown. The LED is closed, only power light is
illuminated when standby.
In boot state or regular boot, press this button to chose autumatic
dehumidification or cloth dry function , each function have 2 second
confirmation delay time.
In boot state, press this button, the LED light and blink. In blink time,
press button to set the time of timing. press
buttom to add/reduce one hour . Keep pressing the button
to add/reduce time as well. The maximum is 24 hour, the minimum is
1 hour. LED blink 5 time to confirm the timing set. Press the timer
button again to reset the timing time in timing status.
Press button( each press for 5%RH to select humidity
from 30-80%RH only in automatic dehumidification.
Press this button to choose fan speed, high-low-high, only valid in
automatic dehumidification. Keep pressing fan speed button for 5s
to start inside dry.
9

Important Notes
• Do not use the machine when the environmental temperature is over 35°C or below 5°C.
• Pour the water when the water tank is full and the indicator will become red. Then
put the water tank to the original place so that the machine can work again.
• Restart the machine after at least 3 minutes when it stopped in order to avoid to
destroy the compressor.
Water drainage manually
1 The compressor and motor will stop
when the water tank is full and the
red indicator light will be on.
2 Take out the water tank and then
pour the water off.
3 Put the water tank to the original place
and restart the machine (three minutes
self-protect for compressor after stop).
Water drainage continuously
1 Cut off the power.
2 Cut the three seal of continuous drainage hose.
3 Connect the water pipe of inner diaineter (thickness = 9mm*2mm) to the drain
hose)
4 Route the other end of the hose into a drain that is deeper than the water outlet.
EN
1 0

CARE AND CLEANING
NOTE: Turn off the unit, and unplug it from the wall outlet before maintenance or
cleaning to avoid electric shock.
Daily maintenance
• When it is not in use for a long time, please pull the plug out of the socket.
•For a better dehumidifying effect, do not block the air inlet and outlet ventilation.
There should be no obstacle around the unit.
•Clean the air lter at least once every two weeks. Never use chemical solvent such
as alcohol, gasoline, benzene, etc. Use warm water (under 40°C) only.
•Empty the water tank when the water is full.
Cleaning the unit
1 Unplug the unit before any cleaning.
2 Clean the surface of the unit softly by a moist cloth. Do not use detergents or
3 abrasive sponge, which may cause damage to the plastic surface.
4 Don‘t sprinkle water into the unit or control panel.
Clean and change the lter
The appliance is equipped with an extractable washable air lter. the step of
uninstall as below:
1 Uninstall the lter as per the arrow in below picture.
2 Press the button in the side of lter to take out lter and clear the lter with water.
3 Replace the lter as before.
11

TROUBLESHOOTING
Problem Possible Cause Suggested Solution
Unit doesn’t
work.
Is the power plug connected? Put the plug in the socket.
Water tank is full or water tank
is not assembled well.
Pour away the water in water-
tank, and put water tank into
the unit.
Operation temperature is too
low or too high
Use this dehumidier under the
environment 5-32°C.℃
No outlet air. Operation temperature or
humidity is too low.
Under dry environment,
dehumidifying effect will be not
so obvious.
Is air outlet or air inlet
blocked?
Clean the air outlet or air inlet.
No outlet air. Is lter blocked? Clean the lters.
Water leakage. Drainage pipe is not tightly
connected.
Check the drainage pipe.
Pipe is blocked. Clean the debris in pipe.
HINTS ON DISPOSAL
If there is a legal regulation for the disposal of electrical
and electronic devices in your country, this symbol on the
product or on the packaging indicates that this product must
not be disposed of with household waste. Instead, it must be
taken to a collection point for the recycling of electrical and
electronic equipment. By disposing of it in accordance with
the rules, you are protecting the environment and the health of
your fellow human beings from negative consequences. For
information about the recycling and disposal of this product,
please contact your local authority or your household waste
disposal service.
EN
1 2

13
,,
:0049-21751869828
Support aux ventes:[email protected]
13
13
14
Remarques concernant le réfrigérant R290 16
18
18
19
21
22
22
SDO-10D SDO-16D SDO-20D
220-240 V ~ 50 Hz 220-240 V ~ 50 Hz 220-240 V ~ 50 Hz
175 W 400 W 390 W
2 L 2 L 2 L
Numéro d’article
Alimentation
Puissance
Puissance de
déshumidication
Réservoir d’eau
16 L/jour (30°C,
humidité relative 80 %)
20 L/jour (30°C,
humidité relative 80 %)
10 L/jour (30°C,
humidité relative 80 %)

CONSIGNES DE SÉCURITÉ
•Lisez attentivement toutes les consignes avant
d’utiliser l’appareil et conservez le guide
d’utilisation pour vous y référer
ultérieurement.
•Ne plongez jamais l’appareil dans l’eau ni
dans d’autres liquides.
•Posez l’appareil sur un support stable pour
éviter les bruits et vibrations.
•Les réparations ne doivent être effectuées que
par des professionnels et sont nécessaires
lorsque l’appareil, le câble secteur ou la
fiche ont été endommagés, si des liquides ont
coulé dessus, si des objets sont tombés
dessus, si l’appareil
a été exposé à la pluie ou à l’humidité, s’il est
tombé ou s’il ne fonctionne pas normalement.
•Avant de déplacer l’appareil ou de le
nettoyer, débranchez la fiche de la prise.
•Branchez l’appareil uniquement sur des
prises fournissant la tension prévue.
•L’appareil doit être branché seul sur sa prise,
sans autre appareil ménager.
•L’appareil n’est pas destiné à une utilisation
commerciale mais au cadre domestique et
dans des conditions similaires.
•N’utilisez pas l’appareil à proximité de
matériaux inflammables ou explosifs.
14
FR

•Si le déshumidificateur est utilisé dans une
pièce contenant des appareils fonctionnant
au gaz, la pièce doit être régulièrement et
suffisamment aérée.
•Si vous n’utilisez pas l’appareil pendant une
période prolongée, utilisez la fonction interne
de séchage. Vous éviterez ainsi la formation
de moisissures et l’apparition de mauvaises
odeurs.
•Ne posez aucun objet sur l’appareil.
•Ne séchez aucun objet sur l’appareil et
n’accrochez aucun rideau devant, car cela
ferait surchauffer l’appareil.
•Le tuyau d’évacuation ne doit pas être installé
à l’extérieur par des températures basses.
•Pour éviter de renverser de l’eau, videz le
réservoir avant de déplacer l’appareil.
•Si le câble secteur ou la fiche sont
endommagés, faites-les remplacer par le
fabricant, un spécialiste agréé ou une
personne de qualification équivalente.
•Si vous remarquez une odeur de fumée au
démarrage, débranchez immédiatement la
fiche et contactez un spécialiste.
•Laissez au minimum 20 cm d’espace entre
l’appareil et les autres objets ou les murs.
15

REMARQUES CONCERNANT LE RÉFRIGÉRANT
R290
Mises en garde
• Le climatiseur doit être entreposé et transporté à la
verticale. Faute de quoi, le compresseur pourrait
être endommagé de façon irréparable. En cas de
doute, laissez l‘appareil reposer pendant au moins
24 heures avant de le mettre en service.
•Éteignez l‘appareil avant de le nettoyer et
débranchez-le de l‘alimentation électrique.
•Vérifi ez que l‘appareil produit un fl ux d‘air continu !
Assurez-vous que les entrées et sorties d‘air ne
soient pas obstruées.
• Pour éviter les fuites, utilisez l‘appareil sur un
support horizontal uniquement.
•Toute personne effectuant des travaux sur un circuit
de fl uide frigorigène doit être titulaire du certifi cat à
jour d‘un organisme d‘évaluation accrédité par
l‘industrie. Cela garantit sa compétence pour la
manipulation des réfrigérants en toute sécurité selon
une spécifi cation d‘évaluation reconnue par la
branche d‘activité.
•Les enfants à partir de 8 ans ainsi que les
personnes dont les capacités physiques, mentales
ou sensorielles sont réduites peuvent utiliser
l’appareil uniquement s’ils ont assimilé les
consignes d’utilisation et de sécurité de l’appareil
que cette personne leur a fournies. Les enfants sont
autorisés à nettoyer l’appareil uniquement sous
surveillance
16
FR

Informations pour les pièces contenant des
conduites de réfrigérant
• Encastrez le moins possible les conduites de
réfrigérant.
•Veillez à ne pas endommager les conduites.
•Les appareils contenant du réfrigérant infl
ammable ne doivent être installés que dans des
pièces bien ventilées.
• Conformez-vous à la réglementation nationale
sur le gaz.
• Toutes les connexions mécaniques doivent rester
librement accessibles pour la maintenance.
•Si l‘appareil ne fonctionne plus, éliminez-le en
respectant les règles d‘usage.
•En cas de non-utilisation, conservez l‘appareil
dans un endroit bien ventilé.
•Rangez l‘appareil de façon à ne pas
l‘endommager.
•Les réparations ne doivent être effectuées que
par le fabricant ou par un spécialiste agréé.
•Les conduites connectées à l‘appareil peuvent
contenir des sources d‘infl ammation potentielles.
•N‘endommagez aucun des composants du
circuit réfrigérant. La fuite de réfrigérant peut
passer inaperçue car le produit est inodore.
•La maintenance et les réparations doivent être
effectuées sous la surveillance de spécialistes de
l‘utilisation des réfrigérants infl ammables.
17

INSTALLATION
• Videz le réservoir d’eau avant d’allumer l’appareil.
• Pendant le fonctionnement, laissez les portes et fenêtres fermées pour économiser
de l’énergie.
• Veillez à ce que les entrées et sorties d’air ne soient pas bloquées.
• Installez l’appareil sur un support stable et laissez au moins 20 cm tout autour de
l’appareil et 50 cm minimum au-dessus, pour que l‘air puisse circuler librement.
APERÇU DE L’APPAREIL
1 Cache avant 7 Filtre
2 Fente d’aération 8 Evacuation d’eau
3 Panneau de commande 9 Réservoir d’eau
4 Cache de gauche 10 Câble secteur et che
5 Roulettes 11 Cache arrière
6 Cache de droite
18
FR ATTENTION
Risque d‘incendie ! cet appareil contient
du liquide réfrigérant infl ammable R290.
S‘il y a une fuite de réfrigérant et que le
gaz est exposé à une source d‘ignition
externe, il y a risque d‘incendie.

PANNEAU DE COMMANDE ET TOUCHES
19
High
Low
Auto
Cloth-dry
Waterfull
En mode veille, appuyez sur cette touche pour démarrer l’appareil.
pendant le fonctionnement appuyez sur la touche pour éteindre
l’appareil. Si vous utilisez l’appareil pour la première fois, il démarre
avec les réglages suivants : le ventilateur fonctionne lentement,
l’écran affiche la température ambiante et l’humidité est réglée à
50%. Si vous utilisez l’appareil pour la première fois, vous devez
appuyer sur la touche pour l’allumer après l’avoir branché.
Sinon, seul le témoin de veille s’allume.
Après avoir allumé l’appareil, appuyez sur la touche pour
choisir entre les modes de déshumidification automatique (Auto)
et mode de séchage. Lorsque vous avez sélectionné le mode
voulu, patientez 2 secondes pour qu’il soit pris en compte.
Après avoir allumé l’appareil, appuyez sur la touche , la
LED s’allume et clignote. Pendant que la LED clignote, appuyez sur
la touche ou pour régler la minuterie. La minuterie se
règle entre 1 et 24 heures. La LED clignote 5 fois pour confirmer. Si
vous appuyez sur la touche
réglée, vous l’interromprez.
alors que la minuterie est déjà
Appuyez sur la touche pour régler l’humidité
relative entre 30 et 80% par intervalles de 5%.
Cette touche vous permet de régler la vitesse du ventilateur en
mode Auto. Maintenez la touche 5 secondes pour démarrer la
fonction de séchage interne.

Remarques importantes
• Utilisez l’appareil uniquement à des températures comprises entre 5 et 32°C.
• Lorsque le réservoir d’eau est plein, le témoin „Waterfull“ s’allume. Videz l’eau et
remettez le réservoir en place.
• Si l’appareil s’arrête ou si vous l’avez éteint, patientez 3 minutes avant de le
rallumer.
Vider le réservoir d’eau manuellement
1 Lorsque le réservoir d’eau est
plein, le moteur s’arrête et le témoin
„Waterfull“ s’allume en rouge.
2 Retirez le réservoir d’eau et videz-
le.
3 remettez le réservoir en place,
patientez 3 minutes et redémarrez
l’appareil.
Evacuation d’eau permanente
1 Débranchez la che de la prise.
2 Retirez la fermeture du tuyau d’évacuation d’eau.
3 Fixez un tuyau d’évacuation d’eau (9 mm*2 mm) sur la sortie d’eau.
4 Installez l’autre extrémité du tuyau dans une évacuation qui doit se trouver plus bas
que la sortie d’eau.
2 0
FR
Other manuals for SDO-10D
1
This manual suits for next models
2
Table of contents
Languages:
Other Shinco Dehumidifier manuals
Popular Dehumidifier manuals by other brands
GE
GE AHM30 owner's manual
CLIMIA
CLIMIA CTK 240 operating manual
Cellini
Cellini CD25W user manual
Abestorm
Abestorm Water Damage Series user manual
Quest Engineering
Quest Engineering HI-E Dry 100 Installation, operation and maintenance instructions
ALORAIR
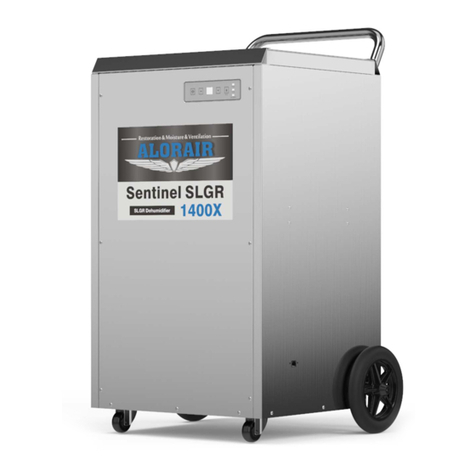
ALORAIR Sentinel SLGR 1400X Installation & operation manual

