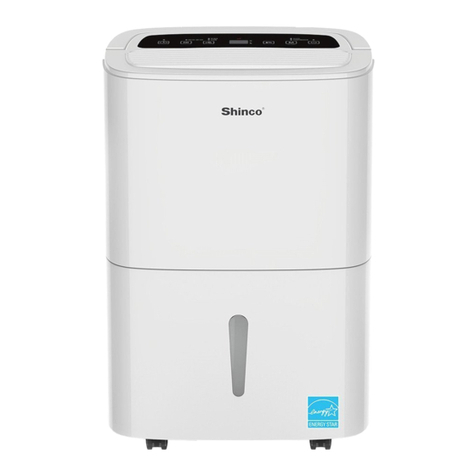
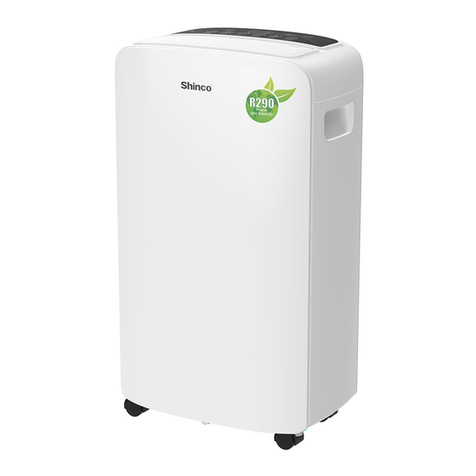
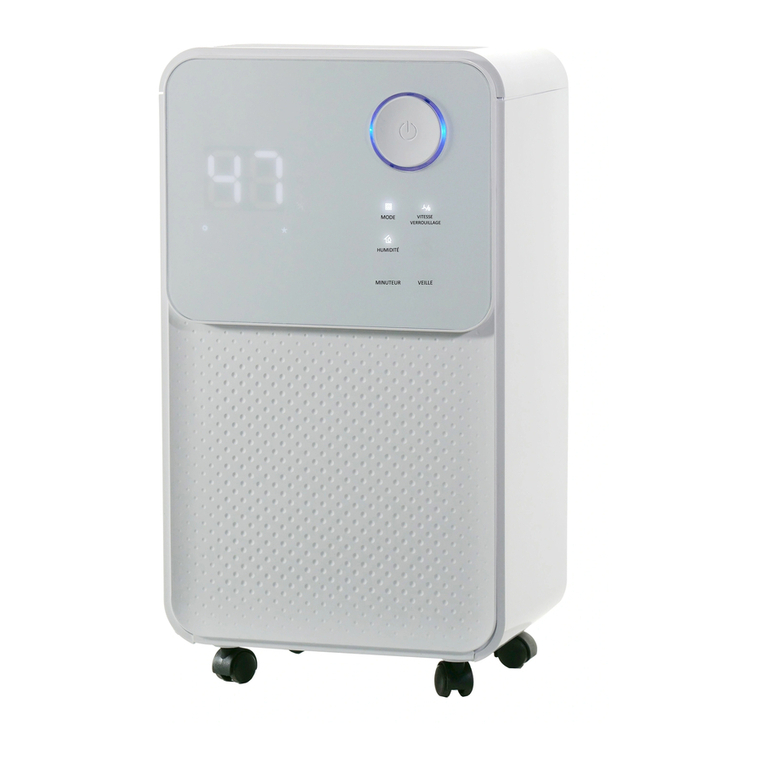
Shinco SDO-10D User manual

Manual of dehumidifier
Model No. SDO-1 D
EN Dehumidifier
DE Luftentfeuchter
FR Déshumidificateur
ITDeuDeumidificatore
ES Deshumidificador


1
Thank you!
Weare convinced that this appliance
will exceed your expectations and
wish you joy while using it.
Please read this user manual com-
pletely and observe the safety in-
structions.
Scope of delivery
1x Air dehumidifier
1x Hose
If any parts are missing or
damaged, please contact us.
Sales support: [email protected]
Symbols
The appliance contains the re-
frigerant R290, which is a
flammable product. It shall be
installed, operated and stored
in a room with a floor area
larger than 4.2 m2.
Please read this user manual
carefully and keep it for fur-
ther reference.
Service personnel should
handle the equipment accord-
ing to the installation manual.
1
1
2
4
4
6
8
9
9
10
10
10
11
11
Table of content
Scope of delivery
Symbols
Safety Instructions
Product overview
Intended Use
Using the appliance
Care & Maintenance
Troubleshooting
Error and safety codes
Technical Data
Noise
Replacement Parts
Storage
Disposal
Warranty 12
EN

2
Safety Instructions
Important safety instructions.
Please read these safety in-
structions carefully before us-
ing the appliance. Keep this manual
in a convenient place so you can al-
ways refer to it for the safe and prop-
er use of the appliance. Please make
sure to pass it on to any new owner
of this appliance so he can become
familiar with it and the safety warn-
ings.
Always observe the safety instruc-
tions. Failure to follow the warnings
and instructions may result in electric
shock, fire and/or serious injury. The
producer is not responsible for any
damage or injuries that may result of
it.
1. This appliance can be used by
children aged from 8 years and
above and persons with reduced
physical, sensory or mental capa-
bilities or lack of experience and
knowledge if they have been giv-
en supervision or instruction con-
cerning use of the appliance in a
safe way and understand the haz-
ards involved. Cleaning and user
maintenance shall not be made
by children without supervision.
Children shall not play with the
appliance.
1. Ensure to always transport the
appliance in an upright position.
2. Before using for the first time, en-
sure that the appliance has been
positioned upright on its final
position for at least 4 hours. Not
doing so will void your warranty
claim.
3. The appliance is not intended for
commercial use.
4. This appliance fulfils all current
safety standards and must be
treated with care.
5. Always use the appliance as de-
scribed in the intended use. Do
not use the appliance in the fol-
lowing cases:
•near a fire
•with defective main plugs
•outdoors or in direct sunlight
•near water and spraying wa-
ter like bath tubs, showers or
pools.
•with extension cords or frame
connectors
•when the appliance is defec-
tive
•as construction dryer or in
rooms with strong particulate
pollution
6. Always plug the appliance into a
mains outlet meeting the require-
ments described in the technical
data or the rating plate on the
back of the appliance.
7. Ensure to connect the appliance
only to a grounded mains plug.
8. Do not use the appliance in an al-
titude of more than 2000 m above
sea level.
9. During installation, always ob-
serve the national installation
regulations.
10. The appliance shall only be stored
in rooms without permanent igni-
tion source.
11. Escaping refrigerant can cause
frostbite, irritate the respiratory
passages or lead to a loss of con-
sciousness andtosuffocation.
•Avoid contact with the re-
frigerant.
•Prevent damage torefrigerant
lines.
12. The appliances are provided with
the refrigerant R290. This
refrigerant is an ecologically
friendly, but flammable product.
The appliance is only to be oper-
ated or stored in a room with a
floor area of min. 1.9 m2(for No-
tos 10 L) .
EN

3
The appliance must only be
operated within the temperature
range of 5 ° to 32 °C. Additionally,
the following indications con-
cerning appliances containing
refrigerant R290 need to be fol-
lowed:
•Do not damage the refrigerant
circuit. Escaping refrigerant
can catch fire.
•In case of escaping refriger-
ant, keep any kind of open fire
sources well away and venti-
late the room thoroughly. Turn
o the appliance immediately.
Do not pull the plug out of the
mains, as this can become a
source of ignition.
•Operate the appliance only
in well ventilated areas. Keep
ventilation openings clear
of obstruction. Without ad-
equate ventilation there is a
danger of explosive gas mix-
tures.
13. The system contains refrigerant
under high pressure and shall
only be maintained by the manu-
facturer or similarly qualified per-
sons.
14. Warning: Refrigerants can be
odourless!
15. Before cleaning or maintaining
the appliance, please turn it o
and pull the power plug.
16. Always clean the appliance with
cleaning agents recommended
by the manufacturer.
17. Do not insert or pull out the pow-
er plug with wet hands.
18. If the supply cord is damaged, it
must be replaced by the manu-
facturer or its service agent or a
similarly qualified person in order
to avoid a hazard. Never operate
the appliance with a defective
supply cord.
19. Never cover the appliance with a
towel or anything similar. Keep
air inlet and air outlet clear of ob-
stacles.
20. Keep children from playing or
climbing on the appliance.
21. Do not repair or disassemble the
air conditioner by yourself.
22. Always keep the appliance in an
upright and stable position. Do
not place any objects on the ap-
pliance.
23. Prohibit inserting any fingers or
objects into the appliance. Take
special care with children. The
functionality of the appliance
could be damaged.
24. Children and disabled people are
not allowed to use the unit with-
out supervision.
25. Close doors and windows when
operating the appliance, so that it
can work eectively.
26. Empty the water tank regularly.
Please observe, that high humid-
ity can cause the water tank to fill
quickly.
27. The filter on the backside of the
appliance must be cleaned regu-
larly to guarantee an optimal air
inlet.
EN

4
Product overview
Air dehumidifier
1 Control panel
2 Air outlet grille
3 Handle
4 Housing
5 Rolls
6 Water tank
7 Power supply cord
8 Condensation drain
9 Intake grille
Control panel
A Display
B Control UP
C Fan speed
D Timer
E On/ o button
F Water level control
G Mode button
H Control DOWN
Intended Use
This tool is
– used to prevent moisture damage
to objects or dwellings;
– used to support drying wet laun-
dry;
– only allowed to be used indoors,
e.g. in living rooms, cellars, bath
rooms, laundry rooms etc.;
– to be operated at temperatures
from 5 °C to 32°C;
– to use according to the descrip-
tions and safety instructions indi-
cated in this operating manual.
The appliance is not intended for
commercial use. Any other use or
modification to the appliance is
considered as improper use and
could cause considerable dangers.
Setup
Use the handles 3. to carry the
dehumidifier
Note: Close all doors, win-
dows and other openings for
ecient usage.
The dehumidifier can also be
rolled by its rolls 5.
Caution! Make sure that the dehu-
midifier stands on a flat and even
floor.
1 2
EN

5
Empty the water tank
Carefully pull out the water
tank 6 to avoid spilling water.
Caution! If water appears to be in-
side the appliance, empty the wa-
ter tank and let the appliance dry.
Empty and reinstall the water
tank 6. Make sure it is installed
properly.
1 2
Close the air outlet grille
Close the air outlet grille 2by
pushing down the flap.
Open the air outlet grille
When putting the appliance
into operation, open the flap
of the air outlet grille 2 by
pushing it open at the mark la-
belled with PUSH.
1 2
Switch o
Press the on/ o button Eto
switch o the appliance.
Note: Wait 3 minutes until
switching on the appliance
again.
Switch on
Insert the power supply cord
7into a suitable wall socket.
Press the on/ o button E.
Caution! Do not plug the appliance
into a multiple socket with other
devices.
1
1
2
2
Remove intake grille
For cleaning the intake grille 9
(see “Care and Maintenance”),
push the two flaps holding it
and remove it.
1Install intake grille
Push the intake grille 9gently
onto the housing until it clicks
into place.
2
Use the condensation drain
Condensation water can per-
manently be derived with a
drainage hose.
Make sure that the hose is at-
tached firmly and ensure an
unhindered water drain.
EN

6
Using the appliance
Warning! Never cover the appliance during operation. This could
lead to heat accumulation or fire and damage to your appliance.
Make sure no water can drop into the appliance.
Switch On/O
Press ON/OFF button (E). The current
humidity level in the room shows in
the display (A).
Mode
Press MODE (G) to switch between
automatic and continuous dehumidi-
fication.
Setting humidity level
Ensure that the appliance is in Auto
mode. Press UP (B) or DOWN (H) to
set the desired humidity level. The
appliance will start to work until the
desired level is reached.
Fan speed
Press WIND (C) to switch between
highly ecient (hi-ecient) and
silent (Silence) fan speed.
EN

7
≥ 50 cm
≥ 50 cm
≥ 50 m
≥ 50 cm
≥ 40 cm
Set timer
To run the dehumidifier for a pre-
set amount of hours, press TIMER
(D)."0" blinks on the display. Set the
time you wish the appliance to oper-
ate between 1 and 24 hours.
Empty the container
If "Water full" lights up and the
display shows "FL", the water tank
needs to be emptied (see "Empty
the water tank") After reinstalling the
emptied water tank, the dehumidi-
fier restarts automatically after three
minutes.
Placement guidelines
The dehumidifier should be used in
closed rooms for ecient work.
When operating the appliance,
keep doors, windows and other
openings closed.
Make sure to maintain distances of
40 cm upwards and 50 cm side-
swards for free air circulation
The dehumidifier can support dry-
ing laundry. Make sure to maintain
distances of ≥50 cm on all sides to
the wet laundry.
Do not operate the dehumidfier
near dryers, heaters or radiators.
EN

8
Care & Maintenance
Cleaning the housing
- Clean the housing regularly with
a moist cloth and a mild cleaning
detergent.
- Check and clean the grille month-
ly to avoid performance reduction
due to dust and dirt.
- Never use solvents; these could
attack the plastic parts of the
equipment.
- Ensure that no water can seep
into the device.
Cleaning the water tank
- Clean the water tank every 2
weeks to avoid deposit of algae,
mould or bacteria.
- Gently pull out the water tank
from the dehumidifier and fill the
tank partly with water and a mild
cleaning detergent. Clean, empty
and rinse the water tank thoroug-
ly.
- Do not put the water tank into
the dishwasher.
- The water tank has to be inserted
correctly into the dehumidifier.
Cleaning the filter
- Make sure that no dirt gets into
the appliance: Clean the supply
air grille once a month using a
soft brush.
- Ensure that the grille is complete-
ly dry before inserting it into the
dehumidifier.
- Do not put the grille into the dish-
washer.
Warning! Make sure the appliance is switched o and unplugged.
EN

9
Troubleshooting
Problem Solution
The appliance doesn't
start. -Check if the power supply cord is inserted cor-
rectly.
-Environmental temperature is too high or too
low.
-The dehumidifier has reached the preset humid-
ity setting.
-The water tank is not inserted correctly.
The appliance doesn't
dry the air as expected. -Time was too short.
-Make sure the appliance is free from obstacles.
-The humidity setting isn't set low enough.
-Check if all windows and other openings are
closed.
-The room temperature is too low (lower than
5 °C).
-There is an appliance which emits water vapour
Loud sounds from the
appliance. -The appliance stands tilted and not upright.
-The floor is not flat.
-Filter is blocked. Clean filter.
Ice appears on the spools-This is a normal process. The appliance has an
automatic defrost.
Error and safety codes
Code Meaning Solution
E2 Temperature sensor is defec-
tive Disconnect andconnect thepower
supply cord. If error still occurs, con-
tact us.
P1 Appliance is defrosting Code will disappear automatically
when the appliance has defrosted
FL Water tank is full or not insert-
ed correctly Empty the water tank and insert it
correctly into the appliance
In case of service requests please write anemail to: service@shinco.net
EN

10
Replacement Parts
Warning! Replacement parts
must conform with the re-
quirements specified by the man-
ufacturer. Therefore use original
replacement parts only or spare
parts authorised by the manufac-
turer.
In case of service requests please
write an email to: [email protected]
SDO-10D
Nominal voltage 220-240 V~
Nominal frequency 50 Hz
Rated input 175 W
Degree of protection IPX1
Permissible operation pressure (high/ l ow)
2.8/ 0.8 Mpa
Max. allowable pressure (high/ low) 3.8/ 1.3 Mpa
Weight net/ gross 10 kg/ 12 kg
Capacity per day
10 L(30 °C /80% RH)
Water tank capacity 2 L
Operating temperature 5-32 °C
Refrigerant R290/ 40g
Application floor area 15-18 m2
Noise 42 dB(A)
Dimension (W x H x D) 292 x 501 x 190 mm
Technical Data
Noise
The values given in these instruc-
tions have been measured in ac-
cordance with a standardized
measurement procedure and can
be used to compare appliances.
It may be used for a preliminary as-
sessment of exposure.
EN
Model SDO-16D
220-240V~
2 L
5-32 °C
R290/ 70g
20-25 ㎡
44 dB(A)
292 x 501 x 190 mm
50 Hz
400W
IPX1
2.8/ 0.8 Mpa
3.8/ 1.3 Mpa
10 kg/ 12 kg
16 L(30 °C / 80% RH)

11
Clean the appliance, the water tank
and the grilles before covering it
with plastic foil.
Store the appliance in a dry and
frost-proof place. Ensure to store
the appliance in a room with a di-
mension of min. 25 - 30 m3. The
appliance shall only be stored in
rooms without permanent ignition
source.
The crossed-out wheeled bin logo
requires the separate col-lection of
waste electric and electronic
equipment (WEEE).
Such equipment may contain dan-
gerous and hazardous substances.
These appliances must be returned
to a designated collection point for
the recycling of WEEE and must not
be disposed as unsorted municipal
waste. By doing so, you will help to
conserve resources and protect the
environment. Contact your local au-
thorities for more information.
The dismantling and disposal, espe-
cially the disposal of the refrigerant,
is to be carried out exclusively by the
manufacturer or by similarly qualified
persons.
Children must not play with plastic
bags and packaging material, due to
possible injury or danger of suoca-
tion. Store such material safely or
dispose of environmentally friendly.
EN
Storage
Disposal

12 EN
Warranty
TO OBTAIN WARRANTY SERVICE:
Sales support: [email protected]
Working Time : From 8:30AM to 5:00PM Monday through Friday
WARRANTY PERIOD:
Labor: 1 Year from the Date of Purchase.
Parts: 1 Year from the Date of Purchase.
YOAU Electric Co., Ltd reserve rights to upgrade products without user
notice.

DE
13
Vielen Dank!
Wir sind überzeugt, dass dieses Pro-dukt
Ihre Erwartungen übertreffen wird,
und wünschen Ihnen viel Freu-de damit.
Bitte lesen Sie diese Bedienungsan-
leitung vollständig durch, und beach-ten
Sie die Sicherheitshinweise.
Lieferumfang
1x Luftentfeuchter
1x Schlauch
Sollten Teile fehlen oder beschädigt sein,
wenden Sie sich bitte an uns.
Verkaufsunterstützung:[email protected]
Zeichenerklärung
Das Gerät enthält das entzünd-
liche Kältemittel R290. Es darf
nur in Räumen installiert, be-
trieben und gelagert werden,
deren Grundfläche größer als
4,2 m2ist.
Bitte lesen Sie diese Bedie-
nungsanleitung aufmerksam
durch, und bewahren sie die
Anleitung für späteren Ge-
brauch auf.
Das Gerät darf nur von Fach-
personal entsprechend der
Betriebsanleitung gewartet
werden
Inhaltsverzeichnis
Lieferumfang 13
Zeichenerklärung 13
Sicherheitshinweise 14
Produktübersicht 16
Bestimmungsgemäße Verwendung16
Betrieb 18
Pflege und Wartung 20
Fehlerbehebung 21
Fehler und Sicherheitsmeldungen 22
22
22
22
23
23
Technische Daten
Schallemission
Ersatzteile
Lagerung
Entsorgung
Garantie 24

DE
14
Sicherheitshinweise
Wichtige Sicherheitshinwei-
se. Bitte lesen Sie die Bedie-
nungsanleitung aufmerksam
durch bevor Sie Ihr Gerät in Betrieb
nehmen. Bewahren Sie die Bedie-
nungsanleitung für zukünftiges
Nachlesen immer gribereit an ei-
nem sicheren Ort auf. Geben Sie
die Anleitung zusammen mit dem
Gerät an den nachfolgenden Besit-
zer weiter, so dass dieser sich mit
Gerät und Sicherheitshinweisen
vertraut machen kann.
Befolgen Sie immer die Sicher-
heitshinweise. Versäumnisse bei
der Einhaltung der Sicherheitshin-
weise und Anweisungen können
elektrischen Schlag, Brand und/
oder schwere Verletzungen verur-
sachen. Der Hersteller haftet nicht
für Schäden oder Verletzungen in
Folge unsachgemäßer Verwen-
dung.
1. Dieses Gerät ist für den Ge-
brauch durch Kinder ab 8
Jahren und Personen mit ein-
geschränkten körperlichen, sen-
sorischen oder mentalen Fähig-
keiten oder mit mangelhafter
Erfahrung und Kenntnissen ge-
eignet, sofern sie beaufsichtigt
werden oder hinsichtlich der
sicheren Verwendung des Gerä-
tes unterwiesen wurden und die
bestehenden Gefahren verstan-
den haben. Reinigung und Pfle-
ge dürfen nicht von Kindern un-
ter 8 Jahren bzw. ohne Aufsicht
durchgeführt werden. Das Gerät
ist kein Spielzeug für Kinder.
2. Transportieren Sie das Gerät
immer aufrecht.
3. Um Ihre Gewährleistungsan-
sprüche nicht zu gefährden,
muss das Gerät vor Inbetrieb-
nahme mindestens vier Stun-
den an seinem endgültigen
Platz aufrecht stehen.
4. Das Gerät ist ausschließlich für
den privaten Einsatz hergestellt.
5. Das Gerät erfüllt die gängigen
Sicherheitsbestimmungen und
muss wie alle Elektrogeräte
sorgfältig behandelt werden.
6. Verwenden Sie das Gerät nur
bestimmungsgemäß. Verwen-
den Sie das Gerät nie in folgen-
den Fällen:
•in der Nähe eines Feuers
•bei defekten Steckdosen
•im Freien oder unter direkter
Sonneneinstrahlung
•in der Nähe von Wasser und
Spritzwasser z.B. Badewan-
ne, Dusche, Pool
•mit Verlängerungskabel oder
Mehrfachsteckerleisten
•bei Fehlfunktionen
•als Bautrockner oder in Räu-
men mit starker Feinstaubbe-
lastung
7. Betreiben Sie das Gerät immer
an einer Stromquelle, die den
Angaben zu Spannung, Fre-
quenz und Leistung auf dem
Typenschild auf der Geräterück-
seite entspricht.
8. Nutzen Sie zum Betrieb nur eine
geerdete Steckdose.
9. Das Gerät nicht höher als
2000m über Meeresspiegel ver-
wenden.
10. Bei der Installation die örtlichen
Sicherheitsvorschriften beach-
ten.
11. Das Gerät nicht in Räumen mit
Zündquellen lagern.
12. Entweichendes Kältemittel
kann zu Erfrierungen führen,
die Atemwege reizen oder zu
Bewusstlosigkeit und Ersticken
führen.
•Kontakt mit dem Kältemittel
vermeiden.

DE
15
•Kältemittelleitungen vor Be-
schädigungen schützen.
13. Das Gerät enthält das Kälte-
mittel R290. Dieses Kältemittel
istumweltfreundlich, aber ent-
zündlich. Das Gerät darf nur in
Räumen betrieben und gelagert
werden, die eine Grundfläche
von mindestens 1,9m2(bei No-
tos 10 L) aufweisen. Das Gerät
darf nur bei Temperaturen zwi-
schen 5 ° und 32 °C betrieben
werden. Zusätzlich müssen fol-
gende Hinweise zum Kältemittel
R290 beachtet werden:
•Beschädigen Sie niemals Tei-
le des Kühlkreislaufes. Aus-
tretendes Kältemittel kann
sich entzünden.
•Im Falle von austretendem
Kältemittel halten Sie Wär-
mequellen und offene Flam-
men fern und lüften Sie den
Raum gründlich. Schalten
Sie das Gerät umgehend aus.
Ziehen Sie nicht den Stecker
aus der Steckdose, da dies
zu einer Zündquelle werden
könnte.
•Betreiben Sie das Gerät aus-
schließlich in gut belüfteten
Räumen. Ventilationsschlit-
ze dürfen niemals zugestellt
oder blockiert werden. Ohne
ausreichende Belüftung kön-
nen sich gefährliche, explosi-
ve Gasgemische bilden.
14. Das System enthält Kältemittel,
das sich unter großem Druck
befindet und darf ausschließ-lich
vom Hersteller oder ähnlich
qualifiziertem Fachpersonal ge-
wartet werden.
15. Warnung: Kältemittel können
geruchlos sein!
16. Vor dem Reinigen oder Warten
des Geräts den Netzstecker zie-
hen.
17. Das Gerät ausschließlich mit
den vom Hersteller empfohle-
nen Mitteln reinigen.
18. Den Netzstecker nicht mit feuch-
ten Händen einstecken oder zie-
hen.
19. Falls das Netzkabel beschädigt
ist, muss es vom Hersteller, des-
sen technischen Kundendienst
oder von ähnlich qualifizierten
Personen ersetzt werden, um
Gefahren zu vermeiden. Das Ge-
rät nie mit einem beschädigten
Netzkabel verwenden.
20. Das Gerät nicht mit einem Tuch
oder ähnlichem abdecken. Zu-
luftgitter und Luftauslass immer
frei von Hindernissen halten.
21. Kinder davon abhalten, mit dem
Gerät zu spielen oder es zu be-
steigen.
22. Den Luftentfeuchter nie selber
reparieren oder zerlegen.
23. Das Gerät immer aufrecht und
stabil aufstellen. Nichts auf dem
Gerät ablegen.
24. Unterbinden Sie, dass Finger
oder andere Objekte in das Ge-
rät gesteckt werden. Das Gerät
kann dadurch beschädigt wer-
den. Achten Sie dabei beson-
ders auf Kinder.
25. Kinder und Personen mit einge-
schränkten Fähigkeiten dürfen
das Gerät nur unter Aufsicht
verwenden.
26. Für den eektiven Einsatz alle
Türen, Fenster und andere Ö-
nungen geschlossen halten.
27. Den Wassertank regelmäßig
leeren. Hohe Luftfeuchtigkeit
kann dazu führen, dass sich der
Tank schnell füllt.
28. Das Zuluftgitter auf der Rücksei-
te muss regelmäßig gereinigt
werden, um eine optimale Luft-
versorgung zu gewährleisten.

DE
16
Produktübersicht
Luftentfeuchter
1 Bedienfeld
2 Luftauslassklappe
3 Tragegrie
4 Gehäuse
5 Räder
6 Wassertank
7 Netzkabel
8 Kondensat-Ablass
9 Zuluftgitter
Einstellung
Den Luftentfeuchter an den
Tragegrien 3tragen.
Hinweis: Für den eektiven
Einsatz alle Türen, Fenster und
andere Önungen geschlos-
sen halten.
Der Luftentfeuchter steht auf
Rädern 5und kann auch ge-
rollt werden.
Vorsicht! Stellen Sie sicher, dass
der Luftentfeuchter auf einer ebe-
nen waagrechten Fläche steht.
1 2
Bedienfeld
A Anzeige
B Kontrolltaste UP
C Ventilatorgeschwindigkeit
D Timer
E Ein/Aus-Taste
F Wasserstand-Warnleuchte
G Betriebsart-Wahltaste
H Kontrolltaste DOWN
Bestimmungsgemäße
Verwendung
Dieses Gerät:
– dient zur Vermeidung von Feuch-
tigkeitsschäden an Gegenständen
und Wohnungen;
– hilft beim Trocknen von feuchter
Wäsche;
– darf nur in Innenräumen verwen-
det werden, z.B. in Wohnzimmern,
Kellern, Badezimmern etc.;
– darf bei einer Umgebungstempe-
ratur zwischen 5°C und 32°C ein-
gesetzt werden;
– muss entsprechend der Hinweise
und Warnhinweise in dieser An-
leitung verwendet werden.
Das Gerät ist nicht für den gewerb-
lichen Gebrauch bestimmt.
Jegliche anderweitige Verwendung
oder Veränderung des Geräts wird
als unsachgemäße Verwendung
betrachtet und kann erhebliche Ge-
fahren verursachen.

DE
17
Luftauslass schließen
Schließen Sie den Luftauslass,
indem Sie die Luftauslassklap-
pe 2 herunterdrücken.
Luftauslass önen
Bevor Sie das Gerät in Betrieb
nehmen, önen Sie die Luft-
auslassklappe 2, indem Sie
auf die Stelle drücken, die mit
PUSH gekennzeichnet ist..
1 2
Ausschalten
Zum Ausschalten erneut die
Ein/Aus-Taste Eauf dem Be-
dienfeld 1 drücken.
Hinweis: Vor einem erneuten
Einschalten min. 3 Minuten
warten.
Einschalten
Das Netzkabel 7an eine pas-
sende Steckdose anschließen.
Zum Einschalten die Ein/Aus-
Taste Edrücken.
Vorsicht! Das Gerät nicht mit an-
deren Geräten an einer Mehrfach-
steckdose anschließen.
Wassertank leeren
Den Wassertank 6 vorsichtig
herausziehen, damit kein Was-
ser herausschwappt.
Vorsicht! Bei Wasser im Geräte-
inneren den Tank leeren und das
Gerät trocknen lassen.
Den Wassertank 6leeren und
wieder einsetzen. Sicherstel-
len, dass er richtig sitzt.
1 2
1
1
2
2
Zuluftgitter abnehmen
Zum Reinigen des Lufteinlas-
ses (siehe "Pflege und War-
tung") die beiden Halter nach
unten drücken und das Zuluft-
gitter 9 entfernen.
1Zuluftgitter einsetzen
Das Zuluftgitter 9unten ein-
setzen und dann leicht andrü-
cken, bis es einrastet.
2
Drainageschlauch verwenden
Das Kondenswasser kann mit
dem Drainageschlauch konti-
nuierlich abgelassen werden.
Sicherstellen, dass der
Schlauch festsitzt und das
Wasser ungehindert abläuft.

DE
18
Betrieb
Warnung! Das Gerät niemals abgedeckt verwenden. Gefahr von
Hitzestau, Feuer und Beschädigung des Geräts. Sicherstellen, dass
kein Wasser ins Gerät tropfen kann.
Ein/Ausschalten
Die Ein/Aus-Taste (E) drücken. Auf
der Anzeige (A) erscheint die Luft-
feuchtigkeit im Raum.
Betriebsart
Mit der Taste MODE (G) wird zwi-
schen automatischer und kontinuier-
licher Luftentfeuchtung gewechselt.
Ziel-Luftfeuchtigkeit
Sicherstellen, dass das Gerät auf
automatischen Betrieb eingestellt
ist. Mit den Kontrolltasten UP (B)
oder DOWN (H) die gewünschte Ziel-
Luftfeuchtigkeit einstellen. Das Gerät
läuft, bis die Ziel-Luftfeuchtigkeit
erreicht ist.
Ventilatorgeschwindigkeit
Drücken Sie die Taste für die Ventila-
torgeschwindigkeit (C) um zwischen
hoher Geschwindigkeit (hi-ecient)
und niedriger Geschwindigkeit (Si-
lence) zu wechseln.
Other manuals for SDO-10D
1
This manual suits for next models
3
Table of contents
Languages:
Other Shinco Dehumidifier manuals
Popular Dehumidifier manuals by other brands

thermastor
thermastor Quest PowerDry 4000 Pro Installation, operation and maintenance instructions
Cooper & Hunter
Cooper & Hunter CH-D008WDN6-20LD owner's manual
Silvercrest
Silvercrest SLE 420 A1 operating instructions
German pool
German pool DHM-911-SC user manual
Magic Chef
Magic Chef MC4PDH user manual
Silvercrest
Silvercrest SLE 500 A1 operating instructions

