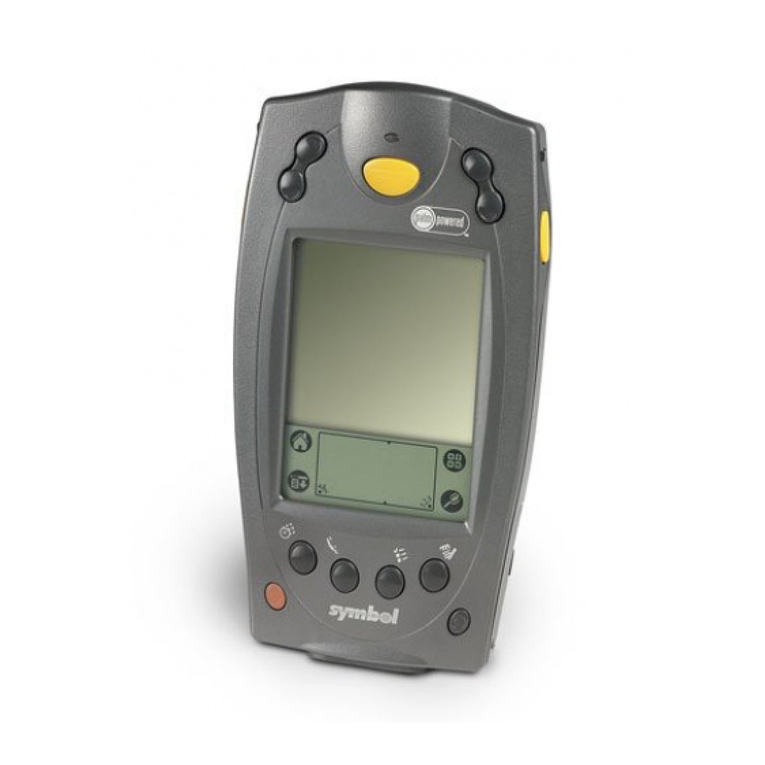
Shinheung Precision STM-7100 User manual

S
ST
TM
M-
-7
71
10
00
0™
™
U
Us
se
er
r
G
Gu
ui
id
de
e
Shinheung Precision Co.,Ltd.
- 1 -

User Guide& Copyright
The information in this document is provided “as is” without warranty of any kind, including, but
not limited to, the implied warranties of merchantability and fitness for a particular purpose, and
is subject to change without notice for improvement of the product.
Shinheung Precision makes no warranty of any kind with regard to this manual, including, but
not limited to, the implied warranties of merchantability and fitness for a particular purpose.
This document contains proprietary information that is protected by copyright. No part of this
document may be photocopied, reproduced, or translated to another language without the prior
written consent of Shinheung Precision Company.
This User Guide is basically available for those who are familiar with Windows OS. You can refer
to your PC manual or User guide for further information on PC operation.
Programs included in the product are protected by copyright. No programs may be produced,
remade, or translated to another language without the prior written consent of Shinheung
Precision Company.
Microsoft, ActiveSync, Windows, the Windows logo and Windows CE.NET logo are either
registered trademarks or trademarks of Microsoft Corporation in the United States and /or other
countries. License of Microsoft Products OEM is offered by Microsoft Licensing Inc.
All other product names mentioned herein may be trademarks of their respective companies.
Shinheung Precision Co., Ltd.
7rd Floor JEI Platz Bldg., Gasan-dong Geumcheon-gu, 153-792 Seoul, Republic of Korea
Tel 82-2-6749-4700
Fax 82-2-6749-4699
- 2 -

Caution
1 ). Fully be aware of User Guide and Safety directions before use your product.
2). Only use included or recommended accessories. Shinheung Precision Company is not
responsible for using not authorized accessories.
3). Stay away your eyes from Bar-code reader.
4). Turn off your terminal before removing the battery.
5). Do not attempt to disassemble or modify your product. It can cause fire, injury, electric
shock and other damages to you and your product.
6). Do not use your product in an area where a potentially explosive atmosphere exits.
7). Do not use when it storms or lightning.
8). Do not use in the pool, bathroom or where are wet. And do not deal with it with wet hands
not to be get electric shock.
9). Do not leave your product in hot or cold places, such as in a car. Direct rays of the sun can
also cause harmful influences on your product.
10). Use only designated battery charger. Other chargers may not be designed to the same
safety and performance standards.
12). Do not use your product near medical equipment, when in, or around aircraft, and when
you driving.
13). Do not expose your product to the security inspection in the airport.
14). Do not use it in high and humid temperature. It can harm your device.
15). Do not drop, throw or try to bend your product. It can cause serious damages. Use the
leather case for protection.
16). Charge the battery fully before the initial use
- 3 -

Contents
1. Basic Unit -------------------------------------------------------------------------------------------------- 8
Parts Name --------------------------------------------------------------------------------------------------------- 8
Using the Stylus -------------------------------------------------------------------------------------------------- 11
Reset ------------------------------------------------------------------------------------------------------------- 12
2. Getting started ------------------------------------------------------------------------------------------------- 14
Status Icon ---------------------------------------------------------------------------------------------------- 14
Running Programs ------------------------------------------------------------------------------------- 14
Switching Programs----------------------------------------------------------------------------------------- 15
Text input with input panel -------------------------------------------------------------------------------- 16
Using WLAN ------------------------------------------------------------------------------------------------- 17
3. Connect to the PC --------------------------------------------------------------------------------------------- 19
ActiveSync installation and partnership establishment ------------------------------------------ 19
ActiveSync Installation------------------------------------------------------------------------------------ 19
Driver Installation------------------------------------------------------------------------------------------- 20
Synchronize the terminal and PC with ActiveSync---------------------------------------------- 22
Synchronize the data----------------------------------------------------------------------------------------- --- 24
4. Shell and File Explorer -------------------------------------------------------------------------------------- 28
Shell -------------------------------------------------------------------------------------------------------------- 28
File Explorer----------------------------------------------------------------------------------------------------- 30
5. Device setting and Optimizing---------------------------------------------------------------------------- 32
Date/Time ------------------------------------------------------------------------------------------------------- 32
Network Setting and Dial up connection----------------------------------------------------------------- 33
Display ----------------------------------------------------------------------------------------------------------- 33
Brightness------------------------------------------------------------------------------------------------------- 34
Volume and sound-------------------------------------------------------------------------------------------- 34
Scanner setting------------------------------------------------------------------------------------------------ 34
Stylus ---------------------------------------------------------------------------------------------------------- 35
System Property----------------------------------------------------------------------------------------------- 36
Storage management---------------------------------------------------------------------------------------- 37
Power Property------------------------------------------------------------------------------------------------ 40
Printer Setting-------------------------------------------------------------------------------------------------- 41
MSR Setting---------------------------------------------------------------------------------------------------- 42
WLAN Power On/Off -------------------------------------------------------------------------------------- 42
Memory management---------------------------------------------------------------------------------------- 42
6. Trouble Shooting---------------------------------------------------------------------------------------------- 45
- 4 -

ActiveSync ------------------------------------------------------------------------------------------------------- 45
Reset -------------------------------------------------------------------------------------------------------------- 46
Fundamental Problems --------------------------------------------------------------------------------------- 46
Appendix A. Additional Information------------------------------------------------------------------------- 49
Usage and maintenance ------------------------------------------------------------------------------------- 49
Device Handling ------------------------------------------------------------------------------------------------ 49
Specification------------------------------------------------------------------------------------------------------ 50
- 5 -

1. Basic Unit ---------------------------------------------------------------- 8
Parts Name ---------------------------------------------------- 8
Using the Stylus ------------------------------------------------------- 11
Reset ------------------------------------------------------------------- 12
- 6 -

Introduction
This chapter explains you each parts of STM-7100.
Parts Name
Please find each parts name of STM-7100™
Front Side
LCD Display
Printer Cap
IC Card Hole
MSR
Power LED
Keypad
- 7 -

MSR
UP Button
Down Button
Battery Cap
Left Side
Right Side
Feed Button
Scanner Button
Paper check Window
Paper Open Button
- 8 -

Hand strap Holder
Battery Cover
Battery Locker
Speaker
Camera
Scanner
DC Connector
24Pin Connector
USB port
Headset Jack
Bottom Side
Top side
- 9 -

Using Stylus
We provide a stylus for selecting items and entering information on the screen.
3 Functions you can use with Stylus
Tap
Touch the screen once with the stylus for selecting or open items
Drag
To move the text or images on the screen, you can drag with the stylus. You can select several items also.
Tap and hold
To see the available actions for the items, you can tap and hold the item with stylus. Once you see the
pop-up menu, you can select the action that you want.
※Notice: Please use the provided stylus. If you use other materials instead of the provided stylus, it may
cause the serious damage to the unit.
▶Pop-up Menu
You can select the available actions on the pop-up menu. For example, you can delete or copy the specific
files on Note. To open the pop-up menu, hold the item 2~3 seconds. Once pop-up menu open, remove the
stylus from the item and select the function. If you want to close the pop-up menu without selecting
functions, you can tab out of the pop-up menu screen.
Reset
To reset the system, push the reset button with the stylus. Unsaved file will be lost and all of the
- 10 -

applications will be closed. It is same as the reset of Desktop PC. This is the Reset function.
Before HARD RESET, you should try RESET to recover your device. Do not try HARD RESET
indiscreetly. HARD RESET does not delete files and documents in FileBox folder. Back up important
data to FileBox folder. When FileBox folder is full, you can buy additional SD/MMC Cards for back-up.
.
- 11 -

2. Getting started --------------------------------------------------------------- 14
Status Icon ----------------------------------------------------------------- 14
Running Programs --------------------------------------------------------- 14
Switching Programs----------------------------------------------------------- 15
Text input with input panel --------------------------------------------- 16
Using WLAN ------------------------------------------------------------- 17
- 12 -

Starting
This chapter explains you basic functions of STM-7100.
When you turn on the unit, basic screen will be displayed.
Functions of Icons in the basic screen are explained as bellows.
You need to install theActiveSync program for connecting this unit to the Computers.
Please refer the “Connect to the PC” pages for installation and how to use ofActiveSync.
▶Screen Icon
Like PC Windows, you can see the Task bar on the lower part of the main screen.
Icon Description
Battery is charging
Battery is full (connect to theAC power)
Remaining battery status
Connecting to the PC (ActiveSync)
Show/ Hide the input panel
Wireless LAN status( On/Off)
Wireless LAN Off
Wireless LAN is On, but not connected to the AP
Network connection status
▶Access the Program
①Tab the “Start” button.
②You can access the program with selecting the program on “Start” menu or main screen. Also
you can use the file explorer.
- 13 -

▶Switch the programs
If you want to swich programs that are running, you can use the “Switch the programs” menu. When you
select the programs that you want to switch, the selected program comes to the front.
Number Description
①Start button
②Start Menu
③Current running program display
④Connection to the PC (Active Sync)/ WLAN On/Off status
⑤Hidden menu move
⑥Time
⑦keyboard
⑧Switch the programs
- 14 -

Select the icon that you want. Selected program appear to the front side
▶Text input with Input panel
To input the information on the certain application, you can use the input panel. You can input the text via
Keyboard or writing. If you tab the arrow besides of input panel, you can choose the input way Keyboard
input or writing input.
▷Keyboard
- 15 -

①Select the Keyboard after tab the arrow just besides of input panel.
②Input the Key with stylus on the Keyboard
▶How to use WLAN
From the Start menu, run Internet Connector to connect with network through WLAN. Then you can use
internet explorer to browse the internet.
You can turn On/Off the WLAN
WLAN ON WLAN Off
- 16 -

3. Connect to the PC -------------------------------------------------------- 19
ActiveSync installation and partnership establishment --------------------- 19
ActiveSync Installation---------------------------------------------------- 19
Driver Installation-------------------------------------------------------- 20
Synchronize the terminal and PC with ActiveSync--------------------------- 22
Synchronize the data-------------------------------------------------------- 24
- 17 -

Connect to the PC
Microsoft ActiveSync Installation and establish the partnersip.
Using Microsoft ActiveSync, you can synchronize the information on your personal computer with
information on your IMP-600. Synchronization compares the data on your PDA with your personal
computer and updates both devices with the most recent information
To establish a partnership with a PC, you need to install MicrosoftActiveSync on your PC.
You can downloadActiveSync at www.microsoft.com/korea
▶ActiveSync Installation.
①Please click the Next button if you are ready to Set-up ActiveSync.
②You’re prompted to select the installation folder for ActiveSync. Click Next to install ActiveSync to the
default folder, or click Change to select a different destination for the program.
③Click Next.
- 18 -

④ActiveSync installation is finished. Please turn on and put the STM7100 unit to the cradle with
USB cable connected to the PC. We will start the drive installation.
▶Driver Installation
①After you connect this unit to the PC, Select List or specific location installation and click Next on the
New H/W explorer Wizard.
②Select “ Search for the best driver in these location” and check the “Include this location in the search”
and click Next
- 19 -

③Click Next
④If you click Finish, driver installation will be finished. Once you finish installing drivers, it is
ready to synchronize the unit and PC viaActivSync.
- 20 -
Table of contents
