SHONAQUIP Madiba2go User manual

Your guide to handling and care
Cape Town Head Oce
Tel / Fax: +27 21 797 8239
[email protected]g.za www.ShonaquipSE.org.za
Warranty
As part of its commitment to clients for life, Shonaquip will make every attempt
to support its products throughout the life of the product given normal use and
reasonable wear and tear. Warranty is provided on all products for varying periods
(from 6 months for batteries to 3 years for Buggies, Posture and Active Wheelchairs).
Please contact client services for further details.
Date of receipt of the Madib2go buggy:
____________/__________/__________ (yyyy/mm/dd)
This booklet was designed by The Shonaquip Social Enterprise for use in training. The use of modied text
any queries or feedback regarding the booklet or its use.
Date of publication: December 2012
I have noted the manual
with information about how
to care for my device
I have been shown all the
working parts of the device
I have seen the warranty
information for my device
Tick User or carer Therapist
Name (printed): Name (printed):
Signature: Signature:
Name (printed): Name (printed):
Signature: Signature:
Name (printed): Name (printed):
Signature: Signature:
Know your
SHONAQUIP
SOCIAL ENTERPRISE
Enabling inclusion
Contents
Contact us
Parts of your Madiba2go
How is a Madiba2go dierent from a Madiba buggy?
How do I transport the Madiba2go?
How do I seat the Madiba2go user?
How do I handle and adjust the Madiba2go? (Carer)
How do I handle and adjust the Madiba2go? (Therapist)
How do I use the tilt in space?
How do I use the lap tray?
How should the Madiba2go be used in daily activities?
How do I use the Madiba2go outdoors?
How do I care for my back by safe lifting?
Health and safety for the user
How do I clean the Madiba2go?
How and when do I service the Madiba2go?
Has your Madiba2go been changed in any way?
Has your lap tray been changed in any way?
Follow up records
Warranty
1
2
3
4
5
7
10
13
13
14
15
16
17
18
18
20
21
22
back page
1
Contact us
Cape Town Head Oce
Your therapist
Phone number
Other useful numbers
Name How they can help? Contact number
021 797 8239

13
5
8
10
12
42
1
67
11
16
15
3
9
14
Parts of your Madiba2go
(without cushion and covers)
2 3
How is a Madiba2go dierent from
a Madiba buggy?
It is able to fold and dismantle for easier, at transport.
It is less restrictive and bulky for the user and less bulky for the carer.
It is lighter for the carer to push and the handle is adjustable for height.
The seat to back angle can be opened up into recline by a therapist
if necessary.
The backrest height and seat length can be adjusted.
There is less need for multiple cushions and
modications of cushions.
Laterals can be height and width adjusted
(instead of long xed laterals of the
Madiba buggy).
Upholstery includes waterproof cover
for seat cushion and lightweight
gauze covers on sides
(triex fabric which will lessen
sweating in the buggy).
A headrest is included
with the Madiba2go.
With the Madiba this
is an option.
1 front castor
2 rear wheel
3 brakes
4 tilt in space adjustment
5 push handle
6 footbox
7 footbox hanger
8 seat side support
9 trunk side
10 backrest
11 seat to back angle adjustment nuts
12 headrest adjustment (centre/off centre)
13 headrest
14 lap tray
15 lap tray bracket
16 lap belt
Madiba buggy

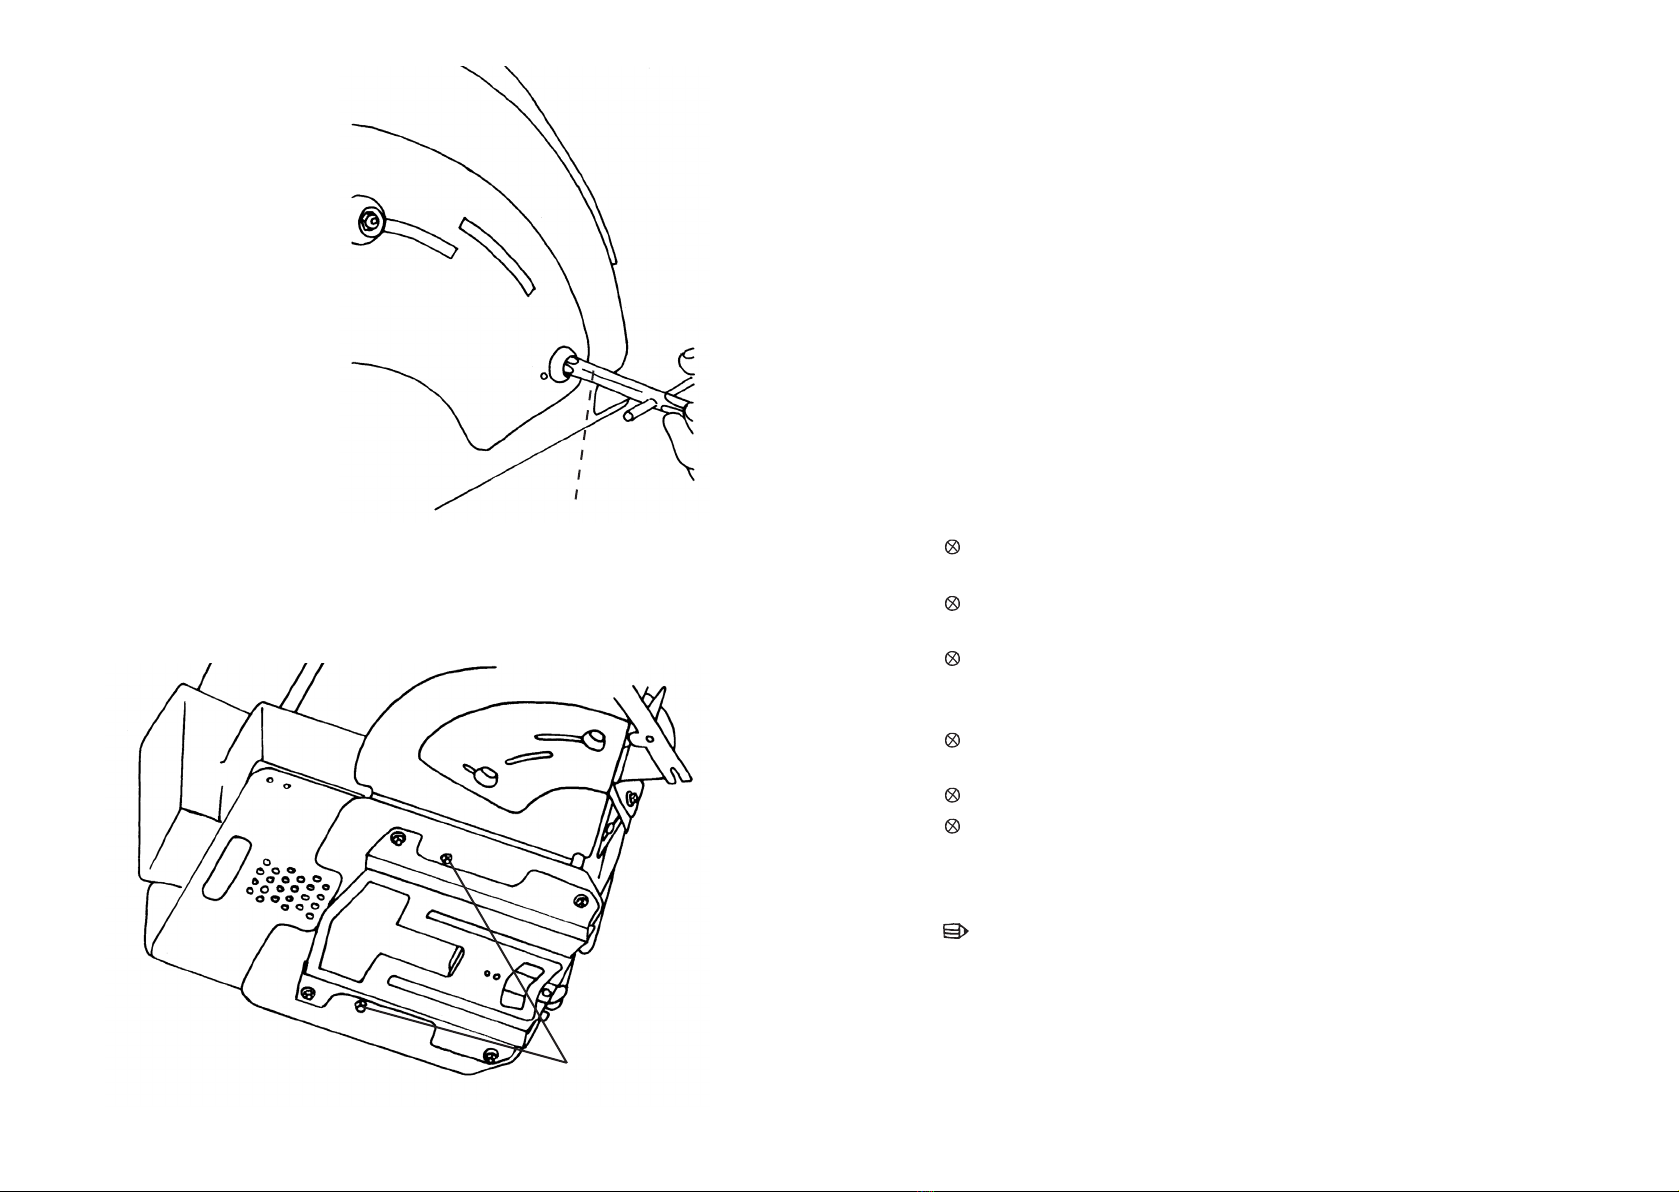
How do I transport the Madiba2go?
The Madiba2go can be dismantled easily and folded at for convenient
storage and transport. The seat can be slid off the frame and the
footbox removed from the frame. The headrest will usually remain
on the buck during transport. If necessary, remove the headrest
using the allen key.
Steps to dismantle for transport:
1. Apply both brakes.
2. Remove lap tray from the brackets.
3. Remove the seat cushion.
4. Shorten the push handles if necessary.
5. Slide the seat forward by lifting the buck release tab behind the buck.
(See drawing on pg 10)
6. Remove hanger from seat.
7. Fold frame by pulling on lanyard (cord) above the rear wheels
which releases a pin; push handle upwards/forwards to fold.
8. Lift the frame and seat into the boot/van.
9. Remember to pack the seat cushion; footbox; lap tray and any
extra cushions you may have been given for support.
1. Make sure all the covers are in place on the buggy.
2. Put both the brakes on.
3. Make sure the prepared seat cushion is placed rmly against the
backrest of the Madiba2go with the pommel in front.
The soft side of the cushion is on top and the shelf is towards
the back of the buggy. The shelf in the cushion should have been
cut by the therapist
during tting.
4. Transfer the buggy
user into the seat so
that his/her bottom
is right against the
backrest. You may
need an extra
helper if the user is
difcult or heavy to
lift or move.
5. Check the user is
sitting straight up in
the Madiba2go.
6. Check the thighs are
fully supported on
the seat cushion.
7. Fasten the lap belt
rmly in place.
45
How do I seat the Madiba2go user?
Madiba2go dismantled and ready for transport.
Pommel

6 7
8. Clip the laptray rmly in place.
9. Ensure the feet are well supported and at on the footbox.
10. If the therapist has provided you with any additional support
cushions (see page 20), place these in the position shown to you.
11. Tilt the Madiba 2go into the position only if shown to you by the
therapist. The picture on p8 shows the fully tilted position
of the Madiba2go. Use recline when advised by the therapist
tting the user.
Tilt adjustment
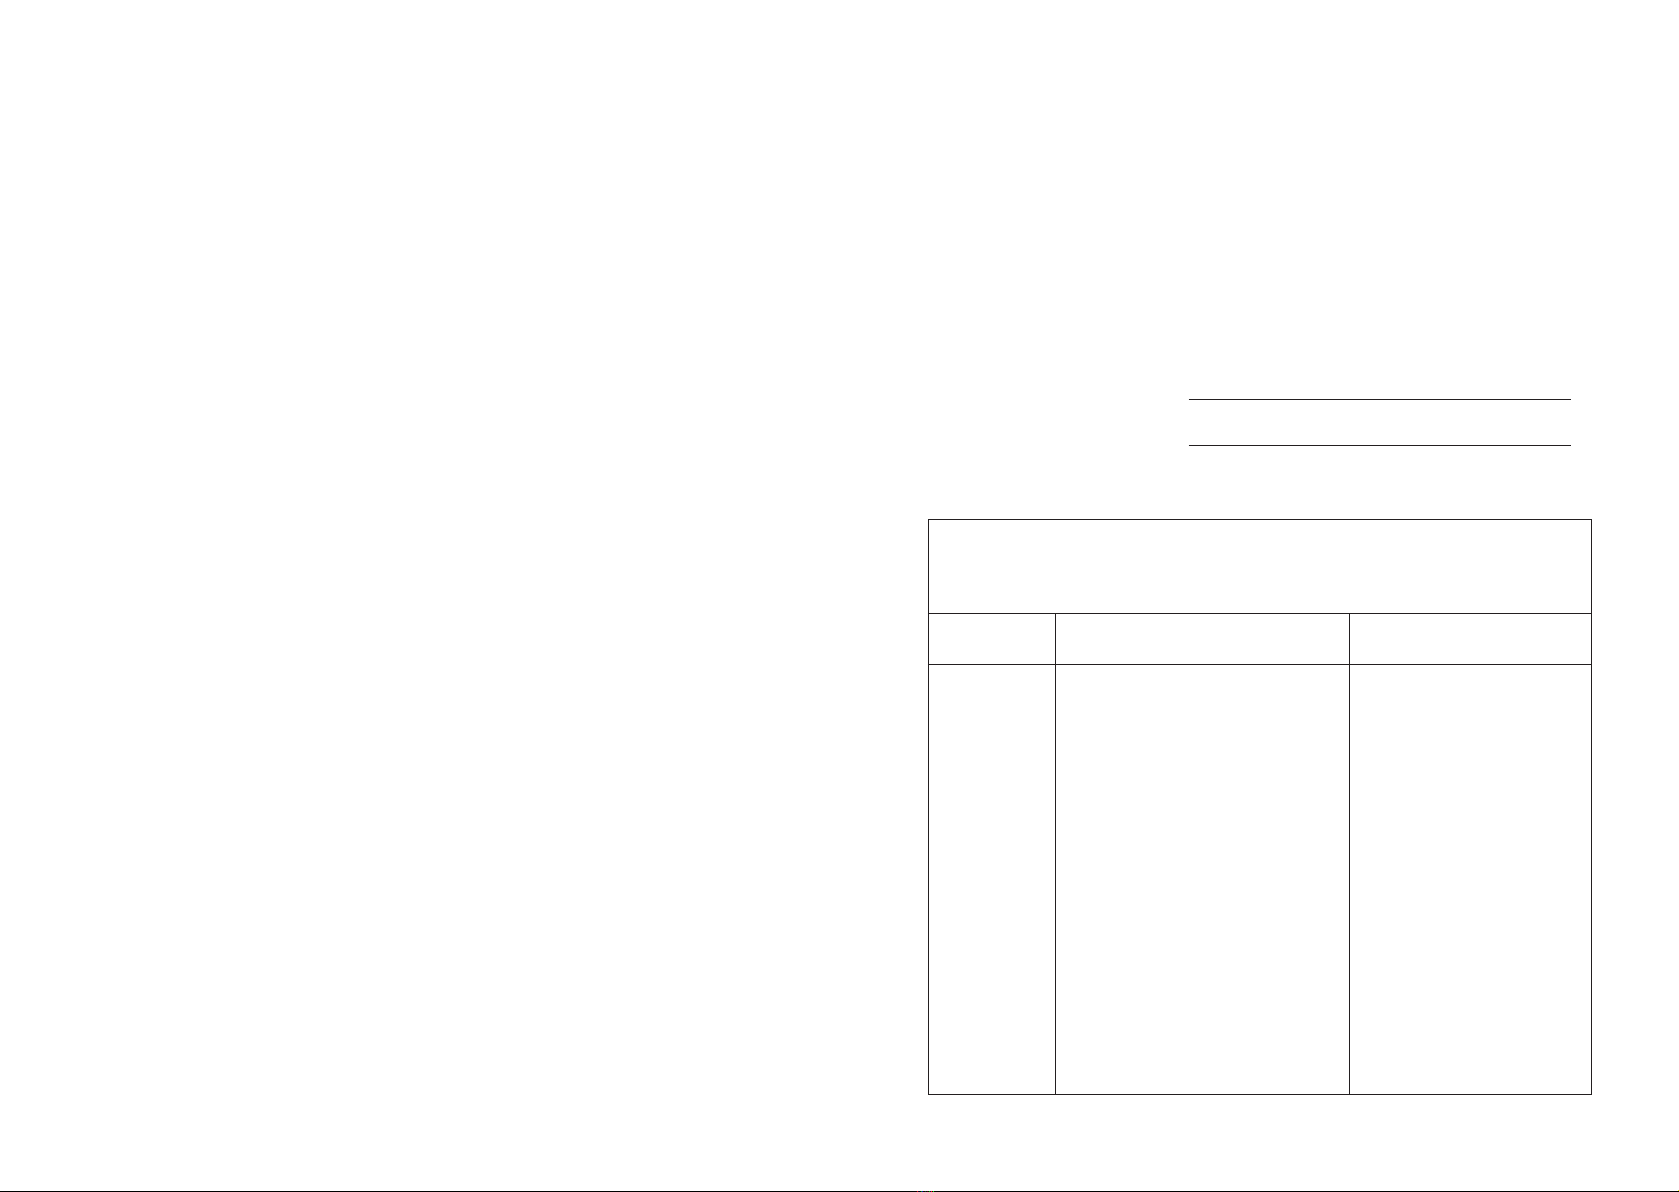
How do I handle and adjust the
Madiba2go? (Carer)
Apply brakes:
These are pushed forwards (to apply) and backwards (to release).
Adjust brakes with a no 10 spanner.
Adjust push handle height:
This can be done by pressing the crutch
clip button on the inside of the handles,
then changing length to a comfortable
height for the person pushing.
Ensure the clips of the push handle
are rmly slotted in the holes.
Adjust tilt in space:
This is done by turning the hand knob underneath the buggy as
shown on opposite page.
Crutch clip button
Always tell the user if you are going to adjust the tilt backwards.
It is better to tilt the Madiba2go once the user is in the buggy so that
you can check for the best position. Someone should stand behind
the user while the buggy is being placed in tilt. Turn the black screw
as shown to tilt the buggy while at the same time holding the footbox
hanger as you move the buck backwards.Tilt the buggy slowly and
gently into the position marked by the therapist.
See next page for full illustration.

8 9
Madiba2go fully tilted position
User seated in a fully tilted position.
Lap tray
Lap tray
brackets
Raise/lower footbox height:
The footbox height can be changed to keep the user’s feet at and
fully supported on the footbox. Feet should not be dangling above
the footbox or sliding forwards off the footbox. You will need to use
a no 10 spanner to change the position of the footbox. The 2 nuts
allow the footbox to slide up and down once loosened.
Attach and remove lap tray: (refer to drawing on opposite page)
The lap tray arms are slotted into the brackets on the back of the
Madiba2go as shown.
The lap tray should always be tted when the buggy is in use.
The arms should rest comfortably on the lap tray and the user’s
body should always be well supported.
Footbox height
adjustment
View from behind footbox.
Lap tray bracket and
height adjustment
10 11
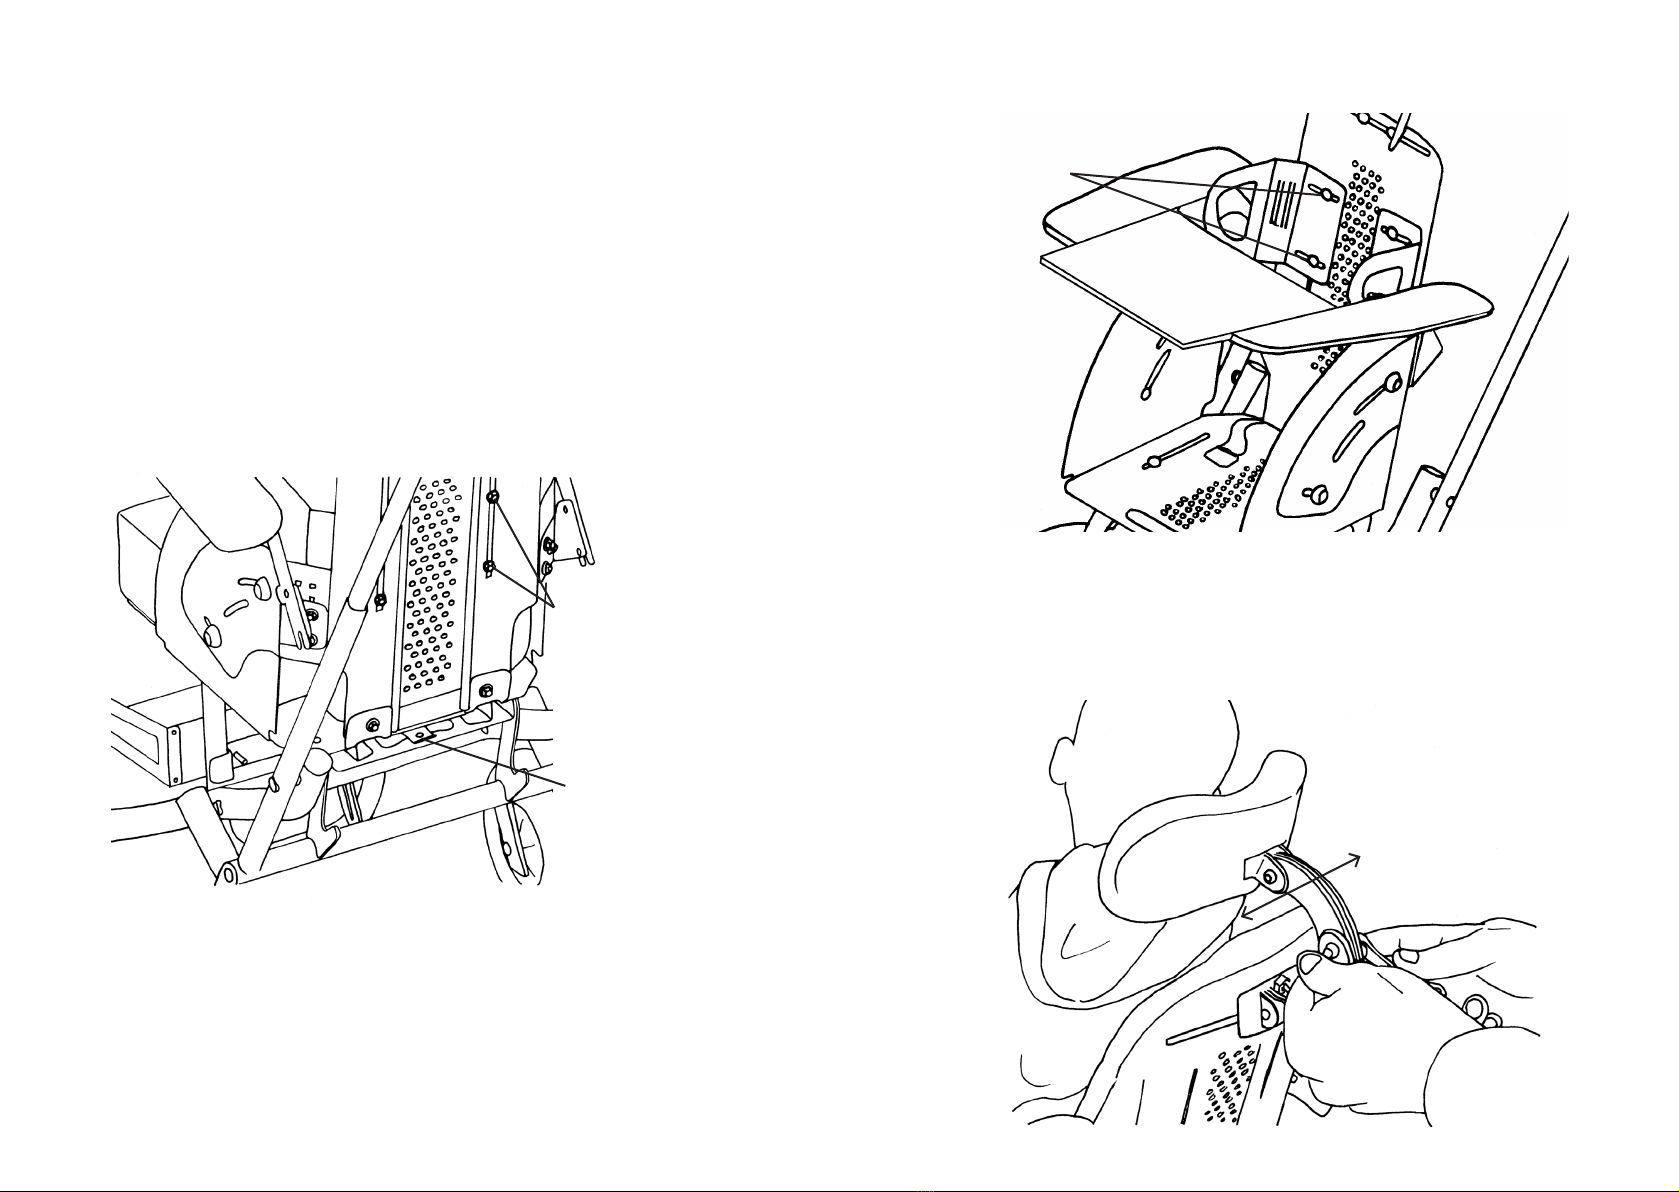
It is recommended that the therapist ONLY make the following
adjustments should the needs of the child change as he grows and
develops. Tighten the nuts if they work loose.
Backrest height:
Adjust the backrest and laterals by adjusting the nuts with your
spanner on the back of the buck as necessary (therapist).
The laterals can be raised upwards/downwards and inwards/outwards.
Adjust position of headrest:
The headrest is attached onto the backrest of the buggy and can be
moved/angled upwards or downwards, forwards or backwards.
This can be done so that the user’s head is supported upright and with
eyes facing forward. Use a no 10 spanner and a 4mm allen key.
How do I handle and adjust the
Madiba2go? (Therapist)*Trunk laterals
adjustment
Backrest & laterals
adjustments
Buck release tab
Height/Width of trunk laterals: (See drawing on opposite page.)
This can be changed by adjusting the nuts on the side nearest
the lateral and adjusting the position of the lateral to support the user
snugly. The trunk laterals should support the user but not be too tight
to prevent movement altogether. The trunk laterals should not be
causing pressure under the child’s arms and should provide enough
support to block the user’s pelvis and stop it from shifting.
(size 10 spanner)
* This is a brief guide only. For additional information on tting and adjustment of the Madiba2go,
12 13
The lap tray helps to support the user’s arms and makes his/her
body more stable.
It offers a useful play surface for a child or a working surface for
feeding, reading and interaction. It also helps the user to sit upright.
When the buggy is tilted back, the lap tray will no longer be a at
surface so you may need to add a towel/wedge placed onto the tray
to make it level again.
The lap tray can be replaced with a custom made lap tray (with a lip
or larger) if needed. Please contact Shonaquip for options and costs.
The lap tray should be used at all times when user is in the buggy.
The position of the central part of the lap tray can be adjusted using
a 4mm allen key (4 bolts underneath lap tray).
Play idea:
A strip of soft Velcro can be glued to the lap tray with the matching
Velcro attached underneath toys to keep them within reach of a child.
How do I use the lap tray?
The purpose of the adjustable tilt is to help the buggy user to keep
good postures and to stop the user from slumping in the buggy. If the
user can’t hold his/her head and body upright, tilting the Madiba2go
helps to support the head against the headrest. It is a useful position
for rest. Change the tilt according to the activity of the user e.g. if needing
to work on a tray table, the user may be placed more upright;
if watching TV or resting in the buggy, it can be tilted slightly.
Please refer to drawings on pages 6 and 8 (tilt).
How do I use the tilt in space?
Back to seat angle:
Recline: The back seat
angle can recline from
0-40 degrees. You will
need a size 10 pipe
spanner for bolts and a
sharp object to lift off
the cap.
Seat length:
The seat length can be adjusted by 100mm. This is done by adjusting
two nuts underneath the seat and extending the seat to the appropriate
length and securing again once adjusted. (size 10 spanner)
pipe spanner
Seat length
adjustments
View from underneath the seat.

14 15
How do I use the Madiba2go outdoors?
How should the Madiba2go be
used in daily activities?
The Madiba2go and lap tray together provide a stable position for a
child who can’t sit up on their own and is often a better position for
learning and play activities in the classroom or at home.
Using the lap tray will enable the user to do activities more
comfortably and should make helping easier for the carer. The lap
tray must be used at all times when the user is in the Madiba2go.
Work out which daily activities e.g. feeding, watching TV, reading,
board games, socializing work well for the user in the buggy using the
lap tray. Ensure that the activities chosen when the user is rst in the
buggy are fun and that the user feels safe while doing them.
Even if a child is not able to physically participate in some of the
activities of peers, always look for ways to include the user in other
ways in the group. Remember always to position the buggy where the
child can feel part of the rest of the family or group.
Speak to your therapist about other positions you can place the
user in when out of the buggy to make sure that good postures are
maintained e.g. use leg supports or a side positioner like below.
The Madiba2go is suited to both indoor and outdoor use.
Going over rough ground:
The Madiba2go can be tilted onto its rear wheels and pushed over
rough, wet or uneven ground. It can also be pulled behind you if the
ground is soft e.g. sandy.
Going up or down steep slopes:
When coming down a steep slope, it is safer to have an extra helper
holding onto the front of the buggy (footbox frame). When going up a
slope, push the Madiba2go with 2 hands in front of you or go up
the slope backwards as you pull it up the slope.
Going up or down a curb:
Tip the buggy onto its rear wheels to go up a curb or step facing
forwards; you may reverse going down the step or curb.
Going up or down steps:
Always tell the user what
you are planning to do before
moving him/her. If the user
needs to go up more than
one step, it is best to go
with the back wheels rst.
Have one person hold the
hanger while the other holds
the push handle. Ensure that
the lap belt is secure. If there
are more than a few steps,
the user should be taken
out of the buggy while it is
being moved.

16 17
Health and safety for the user
Sitting upright in the buggy is good for the user and may improve
his/her digestion, bowel/bladder function and breathing. It also helps
the buggy user to take part in other activities and to interact with
others more easily.
How long should the buggy user spend in the Madiba2go?
New user:
It is a good idea to limit the time in the buggy in the beginning
(e.g. to an hour); then gradually increase the time spent in it as the
user becomes used to being in the buggy.
Remember to check for pressure marks on the user’s body,
especially on the backbone, shoulder, pelvis, sides, bottom and feet.
The older user may spend up to 8 hours in the Madiba2go once used
to it, however some change in position is important during the day.
Speak to your therapist about how you should do this. The young
child should change position more regularly.
IMPORTANT: The following signs may mean that the user needs to
change position or come out of the buggy for a while:
user’s head hangs
he/she starts dgeting or complaining about being tired
loses interest in activity
Safety tips:
No person should sit or stand on the footbox as this may cause it to
break or tilt backwards which may cause injury to the user.
Siblings and other children should be discouraged from standing on
the frame between the user and the push handles as this may weaken
or add wear to the frame.
Always have brakes on when lifting the user to and from the buggy.
A growing child should have a review done at least every 2 - 3
months to make sure the Madiba2go is still tting well and is safe
to use.
How to care for my back by safe lifting?
It is important for you to look after your back whenever you are lifting.
1. Plan your lift
Where are you going?
Where will you put the
person down again?
Get as close as possible to
surface you are moving user
towards.
2. Check the weight
before you lift alone.
Do you need help?
3. Keep your feet apart,
stand closer to the user.
Wear solid shoes.
4. Keep your knees bent.
Take the weight through
your leg muscles as you
straighten up again.
5. Don’t twist your body
when turning. Move your
feet instead.
6. Keep your back straight
and your chin tucked in.
7. Tell the user
what you will be doing
during the lift.
When lifting with helper,
count 1..2..3...lift together.
Decide who will lead
the lift.
Madiba2go tips
It is important to take care to avoid
injuring your back when dismantling
the buggy or when lifting or moving
the user.
If the user is very heavy or stiff
(spasms), tilt the buggy onto its rear
wheels and rest the push handle
safely onto the bed or seat of a
chair before lifting.
If the user moves a lot, tuck the
arms in against their body with legs
together and their body as close as
possible to you.

Recommendations:
Every buggy should be brought in for a service at least once per year.
Contact your therapist for a 6 montly check if your buggy has had heavy
outdoor use.
Make an appointment to bring the Madiba2go in as soon as
possible if the frame is damaged or if parts need replacement.
Your local bicycle shop or garage may be helpful if you live very far from
your supplier.
Tools - Please note:
A no 4 Allen key and no 10 spanner
and pipe spanner (therapist) will be
needed for doing adjustments.
(For pipe spanner see page 12.)
19
18
How and when do I service
the Madiba2go?
Basic maintenance:
Looking after your buggy will increase its lifespan and ensure the
safety of the user.
- Check regularly that brakes are working. (size 10 spanner)
- Check cushion at least once every 3 months.
- Tighten screws/knobs as soon as you see they are loose to stop
them getting lost.
- Repair/replace broken or lost parts as soon as possible to avoid
more serious damage.
- If any foam or rubber needs re-gluing (e.g. lap strap or footbox),
bring parts with the buggy for service.
- Keeping the user dry will make the foam cushion last longer.
- The construction of the buggy is strong, but if the folding mechanism
weakens, it may make the buggy feel unstable and harder to push
and should be serviced.
How do I clean the Madiba2go?
Shake out any dirt or crumbs daily from the buggy seat.
The 7 covers (2 x wheelchair laterals, 1 x wheelchair cushion; 2 x trunk
lateral covers; 1 x head cushion; 1 x backrest) can be washed with
lukewarm water and mild detergent. They may be washed in a washing
machine but not with foamy soap. If the foam cushion has become
soiled, use mild soap and rinse it off. Cover foam with a towel and
press/stamp out water from the foam. Leave the foam to dry in an
airy place.
Keep buggy cushion out of the sun for long periods and never leave
it to stand in the rain.
Buggy covers:
Tears may be repaired by a seamstress.
Tyres:
Keep pneumatic tyres inated to prevent wear and tear. Replace
smooth tyres as soon as tread is worn. A puncture kit may be used
to repair punctures.
Wheels:
Make sure the wheels are not wobbling. Bring the buggy in to your
therapist if they become loose. Brush dust and dirt from the hub and
axle with a small brush.
Footbox:
Make sure all nuts are kept tight. Padding may be replaced when it
becomes worn.
21
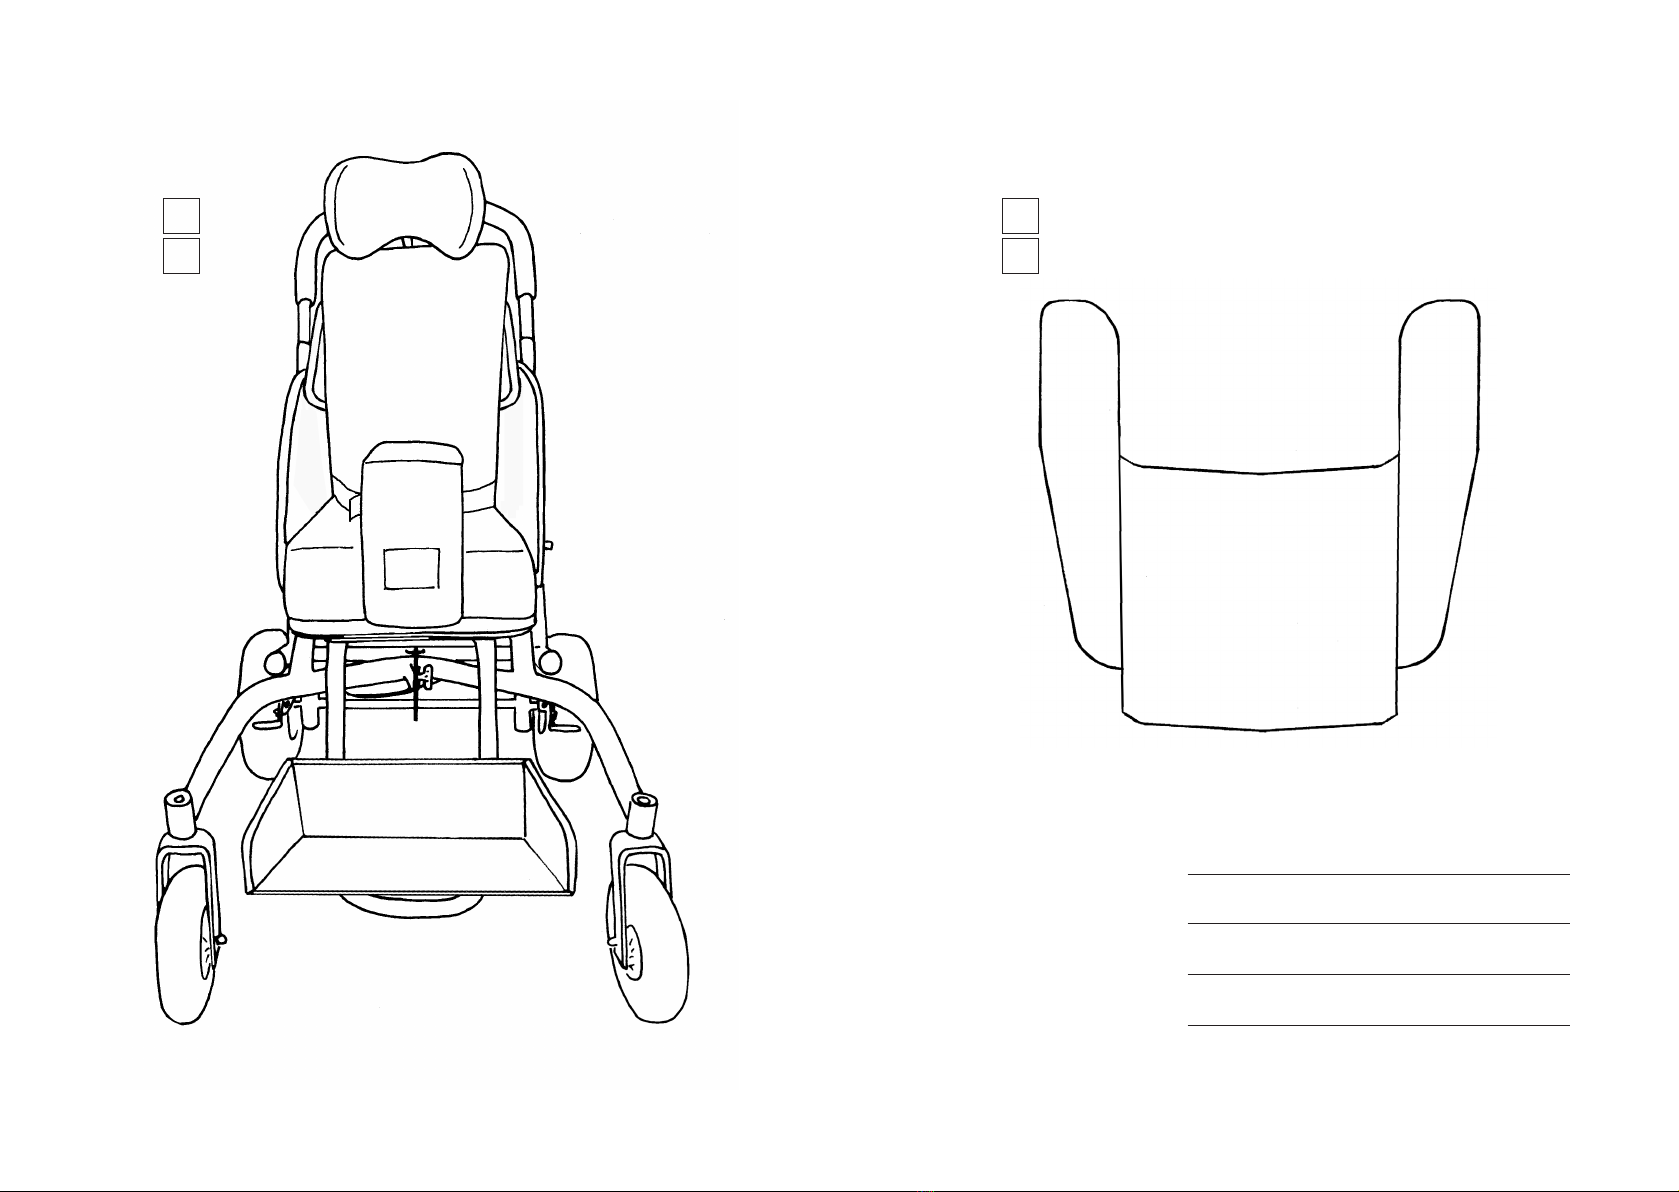
Has your lap tray been changed
in any way?
Therapist’s name
Signature
User/carer’s name
Signature
Yes
No
Has your Madiba2go been changed
in any way?
Yes
No
Changes or extras are marked on this drawing.
20
Changes or extras are marked on this drawing.

23
Madiba2go adjustments
Date seen: ________/_______/______ Therapist: ___________________________
Phone number: _______________________
Special recommendations
for user/carer
Your next appointment is with:
Date:
Time:
Place:
_______________________(therapist)
____/____/____
_____________
_____________
Additional carer training
22
Madiba2go adjustments
Date seen: ________/_______/______ Therapist: ___________________________
Phone number: _______________________
Special recommendations
for user/carer
Your next appointment is with:
Date:
Time:
Place:
_______________________(therapist)
____/____/____
_____________
_____________
Additional carer training

25
Madiba2go adjustments
Date seen: ________/_______/______ Therapist: ___________________________
Phone number: _______________________
Special recommendations
for user/carer
Your next appointment is with:
Date:
Time:
Place:
_______________________(therapist)
____/____/____
_____________
_____________
Additional carer training
24
Madiba2go adjustments
Date seen: ________/_______/______ Therapist: ___________________________
Phone number: _______________________
Special recommendations
for user/carer
Your next appointment is with:
Date:
Time:
Place:
_______________________(therapist)
____/____/____
_____________
_____________
Additional carer training
Other manuals for Madiba2go
1
Table of contents
Popular Mobility Aid manuals by other brands

Sunrise Medical
Sunrise Medical Guardian 05160 User Instructions & Warranty

Bischoff & Bischoff
Bischoff & Bischoff RL-smart instruction manual

Vitea Care
Vitea Care BMW02 Instructions for use

human care
human care 90222 user manual

Dolomite
Dolomite FUTURA operating instructions

Antar
Antar AT51112R user manual


