ShopBot Desktop MAX ATC V2 User manual

Desktop MAX ATC V2 User Manual SBG00609
Desktop MAX Automatic Tool Changer
(ATC) V2 User Manual
© Copyright May, 2023 ShopBot Tools, Inc.
page 1

Desktop MAX ATC V2 User Manual SBG00609
© Copyright May, 2023 ShopBot Tools, Inc.
page 2

Desktop MAX ATC V2 User Manual SBG00609
Table of Contents
Desktop Tools Safety and Precautions .......................................................................................... 5
Getting Started ................................................................................................................................. 6
What’s in the Crate? ..................................................................................................................... 6
Uncrating ...................................................................................................................................... 8
Connecting the Dust Hose ............................................................................................................ 9
Connecting the Pneumatics .......................................................................................................... 9
Software and Computer Configuration ............................................................................................. 10
Introduction ................................................................................................................................. 10
Computer Recommendations ..................................................................................................... 11
Computer Configuration .............................................................................................................. 11
Conclusion .................................................................................................................................. 16
Machine Setup ................................................................................................................................ 19
Plug in Pendant and Connect Power ......................................................................................... 19
Launch Software ....................................................................................................................... 20
ATC Software Setup ....................................................................................................................... 21
Starting the Software .................................................................................................................. 21
Square the Machine ................................................................................................................... 21
Setting up your XY Home Position ............................................................................................. 22
Zero the X- and Y-axes ............................................................................................................... 23
Machine Features ........................................................................................................................... 24
The Position Window .................................................................................................................. 24
The Keypad ................................................................................................................................ 24
Z Zero Plate ................................................................................................................................ 24
Zero the Z-Axis ........................................................................................................................... 25
Tool Draw Bar ............................................................................................................................. 25
Inserting a Tool into a Tool Holder ................................................................................................ 26
Calibrating the ATC (CN,74) .......................................................................................................... 28
Your Calibration Numbers from the Factory: .............................................................................. 28
Measuring Tool Lengths (CN,72) .................................................................................................. 30
Plate Offset Measurement (CN,73) ................................................................................................ 31
Creating a Tool Change File .......................................................................................................... 32
Spindle Warmup Routine (C5) ....................................................................................................... 33
Run the File ..................................................................................................................................... 33
Advanced Techniques ................................................................................................................... 34
Going Above Tool #7 .................................................................................................................. 34
Setting Up for Oversized Material ............................................................................................... 35
Performing Bit Measurements with the Toolbar Removed ......................................................... 36
Using Extra Toolbars/Reinstalling Toolbars ................................................................................ 37
Troubleshooting ............................................................................................................................. 38
© Copyright May, 2023 ShopBot Tools, Inc.
page 3

Desktop MAX ATC V2 User Manual SBG00609
© Copyright May, 2023 ShopBot Tools, Inc.
page 4

Desktop MAX ATC V2 User Manual SBG00609
Desktop Tools Safety and Precautions
WARNING! Read all safety warnings, instructions, illustrations and specifications provided with this
power tool. Failure to follow all instructions listed below may result in electric shock, fire, and/or
serious injury.
Save all warnings and instructions for future reference. Refer to the General Power Tool Safety
Warnings document sent with the User’s Guide.
Learn and understand safe use of the machine. Do not allow untrained individuals to
operate the machine without supervision. Be aware of the location of the Emergency
Stop switches at all times.
Eye and ear protection MUST be worn by the machine operator as well as any
bystanders or observers. Flying sawdust, material chips, and other debris can cause
serious eye injury.
Wear closed-toe shoes at all times.
Make sure that your material is properly secured before cutting, and be aware of any
small parts that may come loose after being cut. If a small part catches the edge of a
spinning bit, it can be thrown forcefully in any direction, causing injury or damage.
Never place your hands on the rails of the ShopBot. Be aware that the machine may
move unexpectedly in any direction, which can cause serious injury if your hands are
in the path of movement.
Never wear gloves while operating the machine. As with any power tool, a glove can
get caught in moving or spinning parts and pull your hand into the machinery.
Never leave a machine running and unattended. Understand that a spinning tool
generates friction and heat, creating a risk of fire. This risk is minimized by using
correct chip load, using sharp bits, and by always double-checking your files before
cutting. Be prepared to pause or stop the cut if something seems incorrect or unsafe.
Keep a working fire extinguisher within reach of the machine, for the reasons listed
above.
© Copyright May, 2023 ShopBot Tools, Inc.
page 5

Desktop MAX ATC V2 User Manual SBG00609
Getting Started
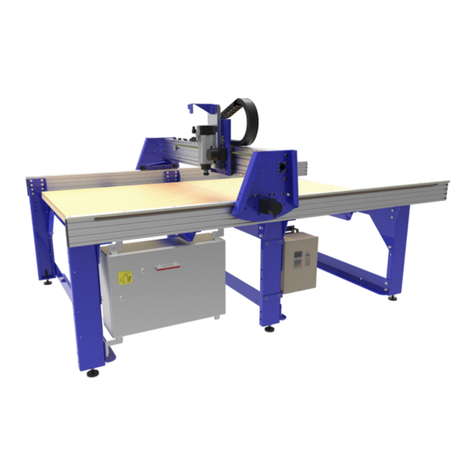
Desktop MAX ATC with T-Slot Aluminum Deck option
What’s in the Crate?
The ShopBot Automatic Tool Changer (ATC) automates the bit changing process during projects
that require multiple tool changes. The ATC reduces the time a project must remain on the
machine by automatically changing bits between cuts, thus eliminating the need to change and
calibrate tools by hand.
The ATC system includes:
● 1HP Teknomotor spindle
● Variable Frequency Drive (VFD) spindle controller
● Filter/regulator for pneumatics
● Seven-position tool bar
● Removable dust skirt
● ATC interface circuit board (inside machine)
● Machine and Accessory documentation
● USB drive loaded with SB3 control software
The 1HP Teknomotor spindle assembly is fan-cooled. The ATC requires 4 scfm at 90 psi of clean,
dry, un-oiled compressed air.
It is not recommended to leave a tool holder in the ATC spindle when not using the machine. When
you are done using the machine all tool holders should be removed and stored in the tool rack at
the rear of the tool.
© Copyright May, 2023 ShopBot Tools, Inc.
page 6

Desktop MAX ATC V2 User Manual SBG00609
What’s in the Crate (cont.)
© Copyright May, 2023 ShopBot Tools, Inc.
page 7

Desktop MAX ATC V2 User Manual SBG00609
Uncrating
Your Desktop MAX ATC has arrived on a wooden pallet wrapped in a heavy cardboard crate. To
open the crate, cut the steel banding and remove any accessory boxes from the top of the crate
then lift the lid off of the top of the crate.
Inside, you will find a cardboard frame resting on top of your machine. On top of this frame will be
some additional accessory boxes as well as the box containing this document. Remove these
additional boxes and lift the cardboard frame off of the machine. Next, remove the sides of the
crate – there may be some screws driven through the cardboard at the base of the crate, securing
it to the wooden pallet below; remove these screws to allow the crate sides to be removed from the
pallet. With the crate sides removed, it will be easier to lift the machine off of the foam supports
between it and the wooden pallet.
CAUTION! The Desktop MAX ATC can weigh up to 180lbs depending on which options have been
selected for the machine, please use at least two people to lift the machine off of the pallet to
transfer it to your work area.
Once the tool is in place on your work bench, adjust the leveler feet so that the machine is level
and does not rock. The feet can be raised and lowered by using a 5/8" wrench to rotate the hex
collar just above the black plastic foot. Once the machine is confirmed level and stable, lock the
position of the feet by using a 9/16” wrench to tighten the lock nut on the threaded stud.
© Copyright May, 2023 ShopBot Tools, Inc.
page 8

Desktop MAX ATC V2 User Manual SBG00609
Connecting the Dust Hose
The dust hose included with your machine should first be connected to the upper portion of your
dust shroud assembly. Slide one end of the hose over the clear acrylic tube next to your spindle.
Run the tube up to the blue dust hose bracket and secure it to the bracket with the included hose
clamp by passing the clamp through the two slots in the bracket and tightening it around the dust
hose. The other end of your dust hose can now be attached to your dust collection vacuum.
Connecting the Pneumatics
Locate the filter/regulator included with your tool. Inside the bag will be a mounting bracket and two
M5x12mm Button Head Screws. First, attach the mounting bracket to the rear of the tool on the
corner opposite the red power switch. Remove the plastic nut from the regulator and drop the
regulator into the bracket and thread the nut onto the regulator to lock it in place. Pull the blue main
pneumatics hose from under the tool and insert it into the orange quick-connect fitting. Plug your
shop’s air-line into the fitting on the left side of the filter.
© Copyright May, 2023 ShopBot Tools, Inc.
page 9

Desktop MAX ATC V2 User Manual SBG00609
Software and Computer Configuration
Introduction
The PC running ShopBot 3 will require special setup to prevent normal Windows and background
processes from interfering with tool communication and operation. All new PCs will require these
changes to their out-of-the-box state in order to optimize performance.
It is highly recommended that you exclusively run the ShopBot software from a dedicated PC. If the
PC running your tool is managed by an IT department or other group, we also advise a clean install
of Windows without any management software or settings. This will ensure that the computer is at
minimal usage.
Refer to the previous page for links to videos on how to configure your computer with Windows.
ShopBot tools are shipped with three software programs that can program, edit, and run part files.
This section covers the configuration of your Windows computer, installation of all software and
provides a basic overview of the ShopBot control software. Additional information and training can
be found in the control software “Help” menu as well as ShopBottools.com and Vectric.com.
The following software will be installed during this section:
ShopBot 3: Control software used to operate the ShopBot tool and run part files.
ShopBot Editor: Enhanced text editing software used to view and edit ShopBot part files.
VCarve Pro – ShopBot Edition: CAD/CAM software used to create and edit designs, and assign
tool paths to create part files.
© Copyright May, 2023 ShopBot Tools, Inc.
page 10

Desktop MAX ATC V2 User Manual SBG00609
Computer Recommendations
A PC running Windows XP to the current version of Windows is required. The equivalent of a dual
core or higher processor, and a minimum of 4GB RAM (8GB preferred) is recommended.
A graphics display of 1024 x 768 will provide a good display, although a higher resolution may be
preferable.
Computer Configuration
Important: Some programs and features will interrupt the proper installation of ShopBot 3 control
software. To ensure trouble free installation and operation, ShopBot recommends performing the
following actions before installation.
_____ 1. Install the software using an administrative account.
_____ 2. Set User Account Control (UAC, not applicable to Windows XP) to “Never Notify.”
_____ 3. Set power options
_____ 4. Windows update settings/Disable network connection.
_____ 5. Disable background tasks.
_____ 6. Make sure the USB cable from the ShopBot is not plugged in.
Before continuing, open the Windows Task Manager and click on the “Performance” tab. Below is
an example of a good setup. There are no processes greatly affecting CPU usage and 4GB RAM
is available.
© Copyright May, 2023 ShopBot Tools, Inc.
page 11

Desktop MAX ATC V2 User Manual SBG00609
1. Install the software using an administrative account
When it comes time to install SB3 and VCarve Pro (later steps) make sure you are using an
administrative account.
2. Set User Account Control (UAC, not applicable to Windows XP) to “Never Notify.”
The first process to change is User Account Control. This can be found by performing a search
from the Start Menu in Windows 7 & 10, or by swiping in from the right edge of the screen and
selecting the “Search” icon in Windows 8. Then, type “User Account Control” or “UAC” into the
search box and press Enter. This will bring up the User Account Control Settings window,
containing a slider. You should ensure that this is set to “Never Notify”, as it will prevent popups
from interrupting software.
This is what the UAC settings window should look like. Note the slider is set to “Never Notify”.
© Copyright May, 2023 ShopBot Tools, Inc.
page 12

Desktop MAX ATC V2 User Manual SBG00609
3. Set power options
Next, you will want to change the Power Options. To begin, open the Start Menu (for Windows 7 &
10, click “Start”; for Windows 8, swipe from the right). Type “Power Options” in the search box and
press Enter. This will bring up a menu in which you are asked to “Select a power plan”(see image
below, left side).
Under “preferred plans”, you will see multiple options. Click “Change plan settings” to the right of
one of these options to bring up the Power Options menu (see image above, right side). Expand
the “Sleep” option by clicking the plus sign to its left, and set the values to the following:
Sleep after: Never
Hibernate after: Never
Allow hybrid sleep: Off
Next, expand the “USB Settings” option and set the values to the following:
USB selective suspend: Disabled
Click the “OK” button to save these settings.
© Copyright May, 2023 ShopBot Tools, Inc.
page 13

Desktop MAX ATC V2 User Manual SBG00609
4. Windows update settings/Disable network connection.
To disable Windows Updates, open the Start Menu* (for Windows 7, click “Start”; for Windows 8,
swipe from the right). Type “Windows Update” in the search box and press Enter. This will bring up
the Windows Update settings. In the left-hand pane, select “Change settings”. Under “Important
updates”, select “Never check for updates (not recommended)” and click “OK”.
Set Windows Updates settings to “Never check for updates”. This will disable automatic checks
and allow you to manually update at your convenience.
*NOTE: Windows 10 does not have this same functionality. To disable updates, you can
place the machine into Airplane Mode or disable the computer's Wireless Adapter.
© Copyright May, 2023 ShopBot Tools, Inc.
page 14

Desktop MAX ATC V2 User Manual SBG00609
5. Disable background tasks.
Next, you should disable any conflicting background tasks. To access the Task Manager, press
“Ctrl+Alt+Delete” and select “Task Manager”.
With the Task Manager open, click on the “Processes” tab, which will bring up a list. Click on the
“Memory” column header to organize the list by physical memory used. Make a list of any
programs that are utilizing excess memory and are unnecessary to the function of ShopBot 3.
Then, sort the list by “CPU” column and do the same.
Next, we will uninstall unnecessary programs. To access the Uninstall window, search from your
Start menu, type in “Uninstall”, and press Enter. Then select “Programs and Features” (you can
also navigate directly to Control Panel > Programs and Features > Uninstall or change a
program ) and sort the results by name or date installed.
© Copyright May, 2023 ShopBot Tools, Inc.
page 15

Desktop MAX ATC V2 User Manual SBG00609
Using the list created in the previous step, address any programs that are not essential to ShopBot
3 operation. Most specifically, you will want to remove or disable any programs that perform scans
or update automatically in the background.
Be sure to uninstall any third party antivirus, firewalls, anti-spyware, iTunes, file sharing, and game
services. If an antivirus software is needed, Windows Security Essentials (comes with Windows 7
& 8) or Windows Defender (Windows 10) should not affect the communication of the tool.
6. Make sure the USB cable from the ShopBot is not plugged in.
Having the USB cable plugged into the tool while installing the SB3 software can cause issues with
the installation, so keep the cable unplugged until all installation is done.
Conclusion
Following the preceding steps are meant for those running a ShopBot on a computer for the first
time. Note that the procedure for disabling tasks and programs can vary depending on the version
of Windows and software being run. It is recommended that you consult with your operating system
guide, software documentation, or systems administrator before making any major changes to
software. If you are unable to find a specific setting or process mentioned anywhere in this guide, a
search on the TalkShopBot forums or Google can generally give the results you need.
Installing ShopBot 3 Control Software and VCarve Pro Software
Note: Make sure USB cable from the control box and VFD are not plugged into the computer.
© Copyright May, 2023 ShopBot Tools, Inc.
page 16

Desktop MAX ATC V2 User Manual SBG00609
ShopBot 3 Control Software: The SB3 Control Software is located on the blue thumb drive,
which should be hooked to one of the rings in your ShopBot Handbook.
Open the drive, and then open the “ShopBot CONTROL Software” folder. Right click the Setup file
and click “Run as administrator”, then follow the instructions.
Note: Once the SB3 software is installed, you will need to right click the SB3 icon and choose “Run
as administrator” the first time you run it to complete the installation.
VCarve Pro Software: ShopBot customers are now able to register their Vectric software license
directly and receive a V&Co. portal account.
© Copyright May, 2023 ShopBot Tools, Inc.
page 17

Desktop MAX ATC V2 User Manual SBG00609
Note: Any ShopBot customer wishing to later update or upgrade their software must do so via
their Vectric customer portal (not through ShopBot).
You should have received an email after purchasing the ShopBot tool with the link to the Vectric
portal and your registered username and license number.The software should be registered by the
individual who will control the license and will be tied to that single contact person and the email
address used to register. Any change in contact or registered email address can only be done by
emailing [email protected] .
Note: Reach out to ShopBot if you did not receive an email with your Login info
After registering your license, you can log into your Vectric V&Co. portal again by:
1. Go to the URL: https://portal.vectric.com/
2. Enter the email address you used to register the software and the password you picked
How can I download my software, clipart and license details?
Your V&Co. account will always hold your license information, and the latest version of software
(including patch upgrades) you are entitled to, so you don’t have to worry about losing your details
or re-installing your software if you get a new computer, but you will need to use the credentials
including the email address you used to register.
1. Log into your V&Co. portal account (see above)
2. Scroll down to the section ‘your latest software, clipart and licenses and click ‘view
downloads’
3. Click ‘view license and download’ for the required product
4. From the ‘downloads’ section click ‘download’ for the item you wish to download and install
Software Overview
All programs included with the ShopBot are now installed. The icons below represent how they will
appear on the computer desktop.
© Copyright May, 2023 ShopBot Tools, Inc.
page 18

Desktop MAX ATC V2 User Manual SBG00609
Machine Setup
Plug in Pendant and Connect Power
Plug the pendant into the connector on the tool
located on the right side of the machine.
The pendant has three functions:
1) A keyed interlock switch to cut power to the
router or spindle. The machine can still be moved
with the interlock turned off, but the cutting head will
not be able to spin.
2) A start/stop button. For non-emergencies, simply
hit the spacebar on the computer keyboard or the
start/stop button on the pendant. This will pause the
tool while maintaining XYZ coordinates, allowing the
cut file to resume without starting over.
3) An emergency stop switch. Pressing the emergency stop is the same as turning off the main
power switch. The tool will immediately stop moving and the cutter will turn off. Machine position
WILL be lost during an emergency stop. To release the emergency stop on the pendant, turn the
red button clockwise until it releases and pops up.
The presence of an emergency stop switch
does not alter the need for good safety
procedures while operating the ShopBot
tool.
Also note that if the pendant is not plugged
into the machine, the machine will not
power on. If the pendant comes unplugged,
the emergency stop will automatically
trigger and the machine will shut down.
Install power cord into the back of the tool.
© Copyright May, 2023 ShopBot Tools, Inc.
page 19

Desktop MAX ATC V2 User Manual SBG00609
Plug the power cord into a standard 110 volt 15 amp
receptacle. (International tools 220v)
Note: Do not use a ground fault circuit interrupter. (GFCI)
Install USB Cable into the back side of the machine.
Connect USB cable to computer and Windows will
recognize a “New Device.”
Note: Ensure the port is a USB 2.0 port. It is best to
use the same USB port every time the ShopBot is
attached to the computer.
Launch Software
Right-click the ShopBot 3 icon and select Run as
Administrator to open the machine’s control program for the
first time.
© Copyright May, 2023 ShopBot Tools, Inc.
page 20
Table of contents
Other ShopBot Tools manuals

