Shorai LFX 3 Series User manual

Do NOT remove any of the QC or Serial# decals on the boom
of the baery, nor cover the boom with the supplied foam.
Install any needed boom foam into the BATTERY BOX, not the
baery boom, please! REQUIRED for warranty coverage.
CAUTIONS
Do not short terminals together!
Do not short, nor aach anything to the 5-pin, BMS port
except Shorai BMS01 Chargers.
Do not open or damage the battery
case
Use an-corrosion spray or grease on terminals during
use in salty and/or wet environments
Keep batteries away from pets and
children
Do not allow over discharge (minimum 13.0V
for 12V types, 6.5V for 6V types)
Do not allow charge voltage in excess
of
14.8V
(7.4V for 6V types)
Standard lead-acid chargers with peak charge voltage of
14.8V or less may be used.
Fully discharge before disposal
CONTENTS
LFX Starter Baery, with one set terminal screws/nuts
and one set spares
Type#3 Only: Series Bar, 2xM6 screws, cover, 4x cover
screws. “L” Terminals, with 2 ea. M2.5 & M6 screws
Shorai Decals (+1 reflecve helmet decal)
Various sheets of high-density, adhesive- backed
foam sheets for LFX fitment to stock
baery box (if needed)
Outer packaging, with battery specificaons and
dimensions listed
INSTALLATION
First, remove the original lead-acid battery from your
vehicle, according to the maker’s guidelines.
Compare the original baery side-by-side with the new
LFX baery. First check that the Polarity
(+/-) arrangement is the same on both. If not, contact us
directly for advice. Next check that the LFX battery does not
exceed the size of the original in any dimension (length,
width, height). If the LFX is larger in any dimension, and
therefore will not fit into the stock battery box, please contact
us.
Now compare the original baery to find any dimension in
which it is larger than the LFX replacement. For example, the
two may have the same width,
but
the original is 25mm taller,
etc. For any such difference, apply the appropriate thickness
of the included adhesive-backed foam pieces to
the
vehicle’s
battery box, so the LFX battery fits snugly inside and can aach
to the baery cables. (never remove or cover the decals on
boom of baery!)
The LFX baeries can bolt cable
eyelets to
either
the top or front
sides of the terminals. Choose
whichever allows best cable fit.
Max torque for the terminal
screws (all but case #3 type) is
30kg/cm (27 inch/lb.). Do not
over-tighten. Apply an-corrosion
spray or grease to the terminals if
used in salty or wet environment.
Check that the positive terminal
of the
LFX
battery cannot short against any part of the vehicle;
and be sure that the original positive terminal cover, if any, is
re-installed on the LFX baery before the battery box cover is
fitted.
CASE TYPE #3 SETUP
Required: The LFX #3 series baery hardware pack contains the
items pictured at le: A “series”
bar, 2x washers, 2x M6 bolts,
plasc cover, and 4x screws for
the cover. The Series bar remains
disconnected during shipping,
which allows the LFX batteries to
be legally shipped. You must
assemble the series bar as shown,
and torque the bolts to 75kg/cm
(7.3nm, 68 inch/lb).
The LFX #3 batteries can bolt
cable eyelets to either the top of
the terminals directly, or top
using the supplied Z-brackets
(not pictured), or vertically using
the “L” brackets, as shown (pic
below). Choose whichever allows
best cable fit. Note: for the L or Z
terminals the small taper-head
screw is installed first, and then
the M6 bolt. The adapters can
face forward or to the sides.
Install the Posive Cable first,
then the Negave. Max torque
for the M6 terminal screws is
75kg/cm (7.3nm, 68 inch/lb.).
USAGE
The most damaging two conditions for any starter battery
are prolonged storage at high temperatures, or allowing the
baery to be deeply discharged.
Compared to lead-acid batteries, LFX have less than 1/4
the average self-discharge rate, and therefore can be stored
much longer without a charge. In fact, if there is no current
flow in the system when your vehicle’s key is OFF, Shorai LFX
can be stored one year or more, without damage.
Vehicles which do have a current drain while turned offwill
need the battery periodically charged, depending on the rate of
current drain. If you ride at least two hours per month year-
round, that is usually sufficient.
For storage in excess of a month,
the Shorai
BMS01 Battery
Management System is highly recommended, as it has a
dedicated STORE mode which monitors battery voltage levels
and automacally restores ideal voltage levels for best battery
life, while also balancing the internal cells and monitoring
baery condition. Seasonal storage can also be achieved by
disconnecng the negave battery cable, to eliminate any key-
offdraw on the battery.
High temperatures accelerate aging for any battery type.
If you know that your vehicle will be unused for an extended
period of time - and during that me it will be exposed to high
temperatures - you may remove the LFX and store it in a cool
place - even a refrigerator. If so, do be sure that the terminals
are taped and the baery bagged in plasc to avoid possibility
of shorting or corrosion.
Again, these temperature notes generally apply to
batteries of any type. This storage advice is for those who
want the longest possible lifespan from their new Shorai LFX
batteries.
The Serial# and QC decals on the boom of your LFX baery
MUST be retained in order to receive warranty service according
to the purchased warranty level. Do not remove or cover these
decals, please.
Please do NOT return any product without an RMA#, or before
Shorai Direct has contacted you to perform some simple
diagnoscs. In many cases issues can be solved prior to return.
Conditions which may not be covered
•Physical Damage to the baery after purchase
•Over-voltage or over-current charging
•Other errors by charger or user setting of charger
•Current draw in excess of CCA specification
•Cranking cycles >10 sec duration
•Short circuit of main terminals or BMS port
•Improper connecons to the 5-pin BMS port
•Damage due to OVER DISCHARGE
SHIPPING
DAMAGE
Any item damaged in transit must be reported to the SHIPPER
IMMEDIATELY upon opening of the package, and also Shorai
Direct. All original packaging must be retained until further
noce.
Shorai Direct will respond with instrucons aer consultaon
with the shipping agent.
Thank you for choosingShorai LFX! We hope and expect that
you’ll be pleased with the performance of our products, for
years to come.
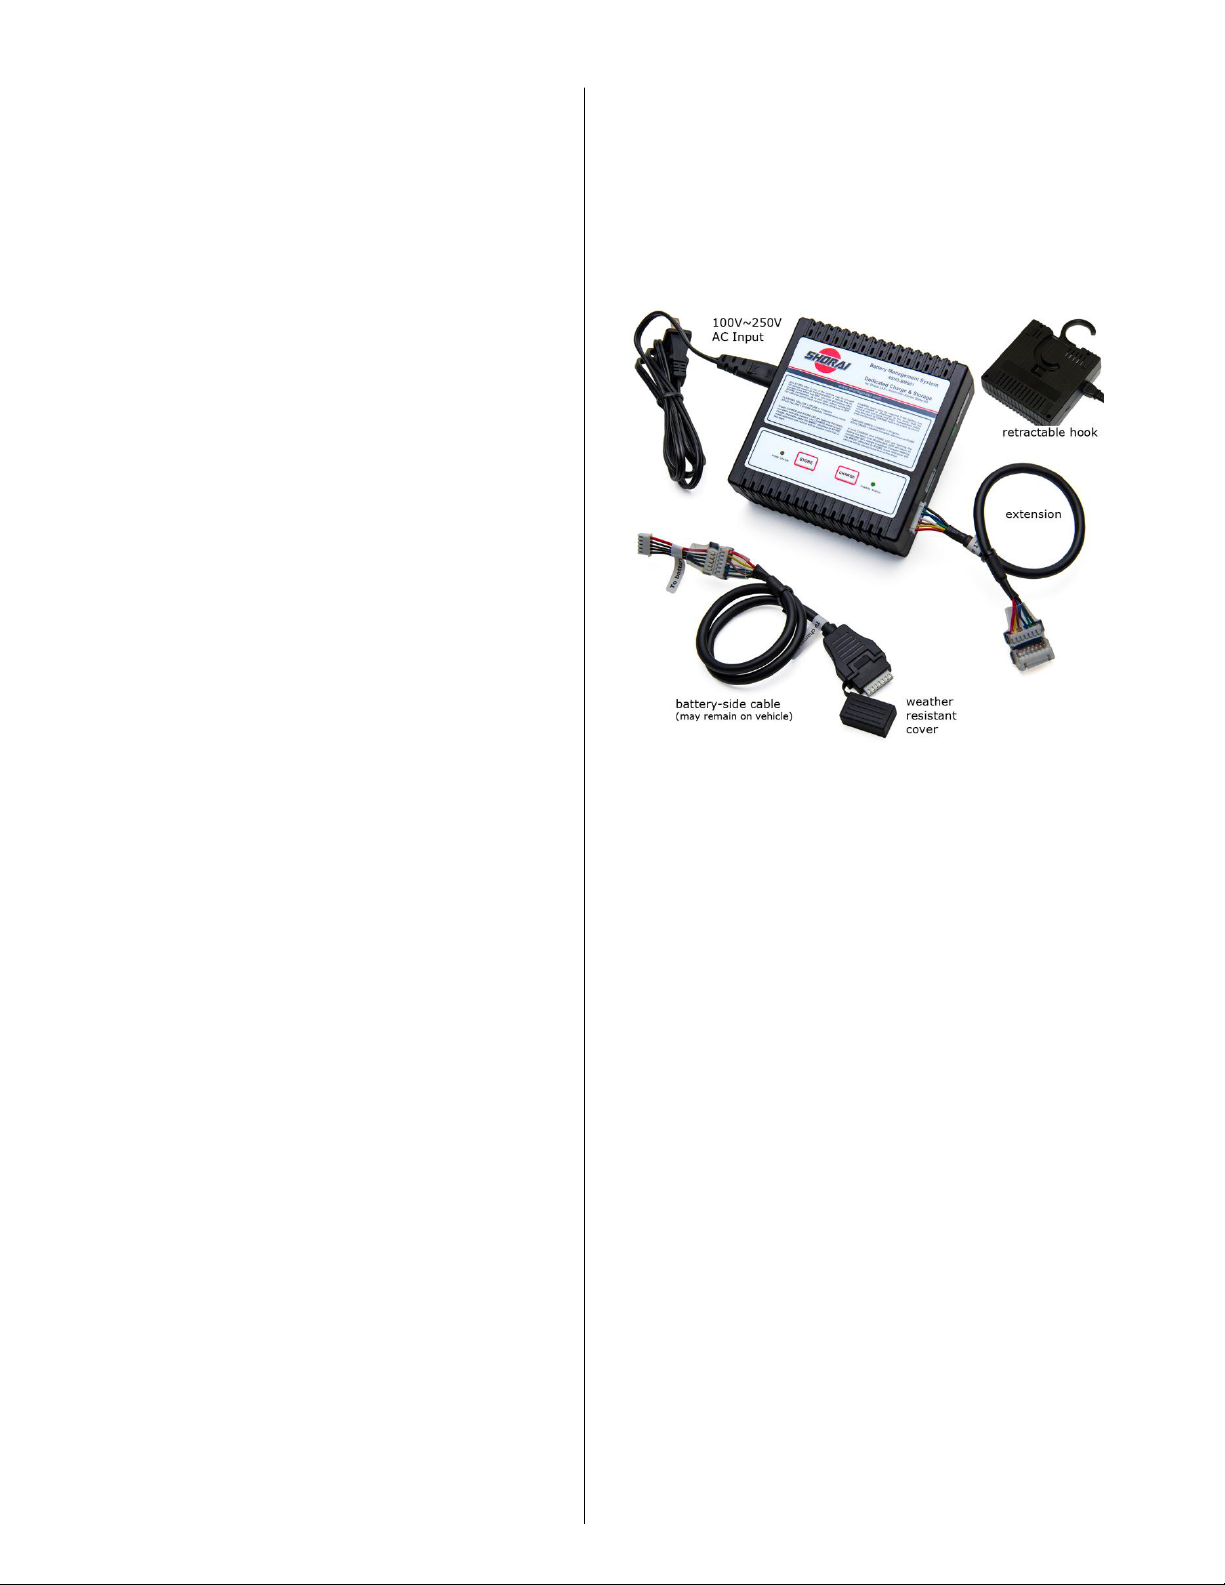
BMS 0 1 Char g e r/Stora
The BMS01 Charger connects via the 5-Pin Data Port on the LFX
Baeries, allowing Charge, Balance, Maintenance and Diagnosc
modes. Users who ride frequently may never need any charger,
but vehicles which sit unused for long periods may benefit greatly
from the Store (maintenance, trickle) and Advanced Charge
modes of the BMS01 charger.
Other Shorai Camera Accessories manuals


