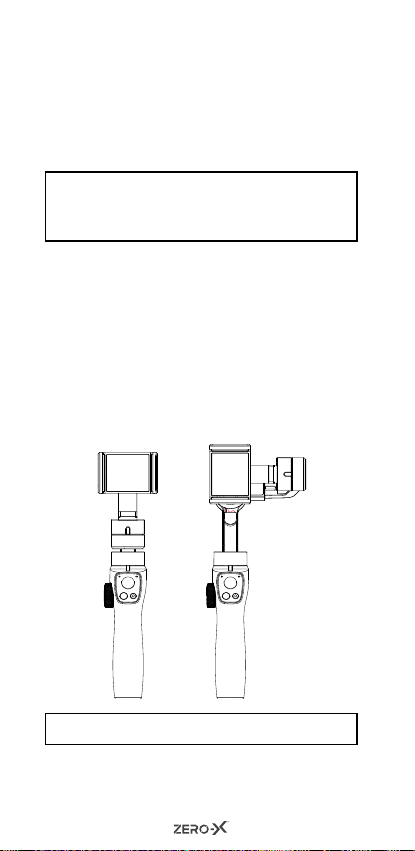
ZERO-X ZX-G1 User manual

USER MANUAL
ZX-G1


3
CONTENTS
1.0 ABOUT THE ZX-G1............... 5
2.0 COMPONENTS..................... 5
3.0 GETTING STARTED .............. 6
4.0 HOW TO CHARGE YOUR
ZX-G1........................................... 7
4.1 TO START.................................. 7
4.2 HOW TO USE AND CALIBRATE
THE ZX-G1 ................................ 8
5.0 ZX-G1 CONTROLS AND
FUNCTIONS ......................... 8
5.1 POWER / MODE BUTTON...... 8
5.2 CAMERA SHUTTER BUTTON . 9
5.3 BATTERY LEVEL INDICATOR .. 9
5.4 MODE INDICATOR................ 10
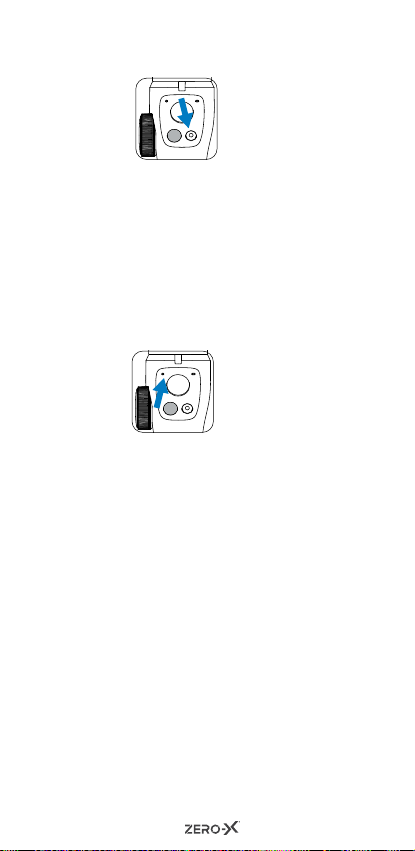
5.5 JOYSTICK................................ 11
5.6 ZOOMING WHEEL ................ 11
5.7 TRIGGER BUTTON ................ 11
6.0 FUNCTIONS ....................... 12
6.1 ORIENTATIONS...................... 12
6.2 VERTICAL SHOOTING MODE
................................................. 12
6.3 INCEPTION MODE................ 13
6.4 UNDERSLUNG ....................... 13
6.5 OPERATION ERRORS ............ 14

4
6.6 CONTROLLING THE CAMERA
................................................. 14
7.0 INSTALLING AND USING THE
ZERO-X GIMBAL APP......... 14
8.0 MANUAL STEPS FOR
CONNECTING TO THE
ZERO-X GIMBAL APP......... 15
9.0 ZERO-X GIMBAL APP MAIN
USER SCREEN .................... 16
10.0 UPGRADE YOUR FIRMWARE
........................................... 20
11.0 SPECIFICATIONS ................ 21
12.0 WARRANTY........................ 22
13.0 NOTES................................ 28

5
1.0 ABOUT THE ZX-G1
The ZX-G1 has been designed to turn your
smartphone into a stable, smooth and
lightweight 3 axis-camera. High precision
motors make this gimbal exceptionally
stable.
2.0 COMPONENTS
1. Mobile Phone Holder
2. Handle
3. Pitch Motor
4. Adjustable Arm
5. Pan Motor
6. Mode Indicator
7. Battery Indicator
8. Power/Mode Button
9. Joystick
10. Shooting Button
11. Trigger Button
12. Zooming Wheel
13. Micro USB
14. Roll Motor
1
5
7
8
2
9
14
13
11
12
6
10
4 3

6
3.0 GETTING STARTED
Make sure your smartphone and ZX-G1
are fully charged and you have the App
installed and running (see QR code on
page 14). You might need to manually
connect to Bluetooth.
CAUTION: Please ensure your smartphone is
attached to the ZX-G1 before you
turn the gimbal on.
UNFOLD THE ZX-G1
To operate the ZX-G1, you will need to
unclip the arm. To do this, hold the
handle with one hand as shown. Rotate
the gimbal arm by 180 degrees (again, as
shown in the diagram). It is normal for the
arm to be stiff during first use. When you
hear a click, this means the gimbal is
steady.
NOTE: Please ensure to extend arm.
If your smartphone is unbalanced, you can
use the counterweight to balance it.

7
If required, place the counterweight onto
the gimbal motor (as shown in the
diagram below). Always make sure that
the gimbal motor is on your right side.
NOTE: Make sure the ZX-G1 stabiliser is
off when you fold or unfold it (the
stabiliser main unit with buttons).
4.0 HOW TO CHARGE YOUR ZX-G1
•
Charging time: 3 hours
(approx, with 5V 2A
power adaptor).
• Operating time: 12
hours (approx).
• Charging port
(Micro USB).
4.1 TO START
1. To use the ZX-G1 gimbal you will
need to secure your smartphone to
clamp and turn it on.
Gimbal Motor Counterweight
Placement

8
NOTE:
The clamp needs to be 5mm from the
centre of the smartphone to achieve
balance. The lens of the smartphone
camera should always be to the left of
the clamp.
3. To turn on, press
and hold the power
button for three
seconds.
Your smartphone needs to be
balanced for the ZX-G1 gimbal to
maneuver it.
4.2 HOW TO USE AND CALIBRATE
THE ZX-G1
If the gimbal starts to drift slowly,
press this icon to calibrate the sensors.
5.0 ZX-G1 CONTROLS AND
FUNCTIONS
5.1 POWER / MODE BUTTON
• When power is
OFF, tap the ON/
OFF button once to
view battery level.
• When power is ON, tap the
ON/OFF once to switch the
smartphone camera between
portrait and landscape.
• Press the OFF button for three
seconds to completely turn off
ZX-G1.

9
5.2 CAMERA SHUTTER BUTTON
Depending on what
mode it is in (i.e-
photo or video) a
single tap will take a
photo or start / stop
recording.
• Double tap: Switch between the
front or rear camera
(when using the App).
• Press and hold: Switch between
photo / video
mode.
5.3 BATTERY LEVEL INDICATOR:
Battery health
will be shown by
the left LED light.
Green is healthy, red
indicates the ZX-G1
needs charging.

10
5.4 MODE INDICATOR
The ZX-G1’s function is indicated by
flickering lights, as set out below.
“M”
Indicator
Status
Gimbal
Mode
Triggered
By
Description
Solid
green
light
Follow Default
Your smartphone camera
will follow the pitch
and yaw of the ZX-G1
smoothly. During this
mode, the roll is locked.
Flashing
green
light
Phone
GO
Press and
hold the
trigger
button
Best for filming sporting
events, the ZX-G1
gimbal will move your
smartphone quickly to
record.
Solid blue
light FPV
Double tap
the power
button
This mode is best for
first-person-view. Your
smartphone will follow
the pitch and yaw of the
gimbal.
Flashing
blue
light
Inception
Triple tap
the power
button
Used to film a 360° view.
This function works when
locked in roll, pitch and
yaw movement of the
gimbal. The joystick
can be used to control
the pitch and roll of the
gimbal.
Solid red
light Lock
Press and
hold the
trigger
button
In this mode, the camera
does not follow the
movement of the gimbal.
However, the joystick
can be used to control
the pitch and yaw of
the gimbal. This mode
in used when shooting
linear movements.
Flashing
red light
Gimbal
Motor
Protection
Malfunction
button
When flickering, this is a
clear sign that the ZX-G1
is malfunctioning. Turn off
the gimbal and reset. If
light is still flicking consult
your manual.

11
5.5 JOYSTICK
Move up and down to
control the gimbal
pitch.
Move left and right to
control the gimbal yaw.
BEGINNERS TIP: The three axes of rotation
in the ZX-G1, as controlled by the joystick
are referred to as pitch, roll and yaw. When
the joystick is used, the default movement of
your smartphone will appear opposite to what
is intended. However, the gimbal is moving
your smartphone to orientate the camera to
the intended position. This can be changed
through gimbal settings in the App.
5.6 ZOOMING WHEEL
Move the wheel
clockwise to zoom in
and anti-clockwise to
zoom out. Specific
functions can also
be defined and
functions set in the
App (i.e: pan the
mobile phone via the
wheel).
5.7 TRIGGER BUTTON
This button can
be used to do the
following:
• Press down and hold for several
seconds to switch into lock mode.
• Release it to return to the previous
mode.

12
• To reset, double click quickly.
• Click once then, quickly hold it “M”
light flashes green, this is “Phone
Go” mode. (quickly press once, then
press again and hold).
6.0 FUNCTIONS
The ZX-G1 has several photography
functions you can use to take great photos
or film videos. To use these functions,
please open to the App. These functions
are described on page 16.
6.1 ORIENTATIONS
The ZX-G1 can be used in a standard,
upright position.
6.2 VERTICAL SHOOTING MODE
To shoot vertically, click the power
button twice quickly. Double click the
power button again to exit this mode.

13
6.3 INCEPTION MODE
Inception mode allows you to take
great spinning 360° shots. To use this
mode, tap the power button (quickly)
three times and then use then use the
joystick to rotate the phone 360°.
6.4 UNDERSLUNG
If you hold the ZX-G1 upside down, it
will transition to ‘underslung’ mode
and will record footage close to the
ground.
Inception will not work
in this position.

14
6.5 OPERATION ERRORS
If light flashes red, check the following
Operations:
1. The arm won’t unlock, as per the
picture.
2. The balance of gimbal arm hasn’t
been adjusted.
Please extend the arm and adjust the
phone re-balance and then reset the
gimbal.
6.6 CONTROLLING THE CAMERA
The ZX-G1 can be connected to your
phone via Bluetooth. The Zero-X
Gimbal App also allows for the ZX-G1
gimbal to be operated wirelessly.
7.0 INSTALLING AND USING THE
ZERO-X GIMBAL APP
Please scan the below QR code.

15
OR
Please search the App Store for ‘Zero-X
Gimbal’.
The Zero-X Gimbal App requires iOS 11.0
and above on iPhone or Android device
to run.
8.0 MANUAL STEPS FOR
CONNECTING TO THE ZERO-X
GIMBAL APP
1. Turn on your phone and scan the
QR code or search the App store for
Zero-X Gimbal.
2. Turn Bluetooth on the phone and run
Zero-X Gimbal App. Connect to the
device called ZX-G1.
4.
After connecting successfully, you can
now use and control the smartphone
camera and gimbal from the App.

16
9.0 ZERO-X GIMBAL APP MAIN USER
SCREEN
1. Home
Press to go back to the home page.
2. Bluetooth Connection Status
Indicates the current operation mode
of the ZX-G1.
If it drops out there will be a cross
through this icon, and you will need
to reconnect to Bluetooth to operate
the ZX-G1.
3. Gimbal Operating Mode
Indicates the current operating mode
of the ZX-G1.
4. Gimbal Battery Level
As shown by battery icon on App
screen.
5. Smart Tracking Indicator
This has two modes- face tracking and
object tracking.
Face / Object Tracking Mode:
The Zero-X Gimbal App will recognise
the closest face or object and calibrate
the ZX-G1 gimbal to follow it.
1
2
5
6
7
8
9
10
13
12
43
11

17
BEGINNERS TIP:
A green, rectangle frame will
appear on your phone screen/ Zero-X Gimbal
App, once a face or object has been identified.
If the object or face is not recognised the
rectangle will become red, and you will need to
start the tracking recognition process again.
If the user wants to stop tracking, press
the cross icon on the top right-hand
corner of the rectangle.
6. Gesture Control Mode
This mode allows you to make certain
hand gestures that will help control
functions of the camera.
Recognised gestures:
• Scissor Gesture: 3 second delay
before photo is
taken.
• Palm Gesture: The camera will
switch between
photo and video
mode.
7. Shooting Modes/ Functions
Slide to select different shooting
modes:
• Panorama: There are three sub-
modes: 180°, 320° and 3x3 modes.
In 180° mode 3 photos are taken
and fused together. In 320° mode, 8
photos are taken and fused together.
In 3x3 mode, 9 photos are taken and
fused together.
• Photo: Takes a single photo or is used
as a timer.
• Video: Shoots a video.
• Beauty Mode: Allows for softer lights

18
and filters.
• Slow-Motion: Shoots 8 times slower
than usual.
• Timelapse: There are 2 sub-modes –
static timelapse and waypoint lapse.
When in static Timelapse Mode, select
the interval and time length on the
top of the screen and press the record
icon. In this mode, you can also use
the tracking feature, while shooting
timelapse videos simultaneously.
When in Timelapse Mode, besides the
interval and time length, the user can
also set up to 5 waypoints by using the
joystick.
The ZX-G1 will move to the pre-
selected waypoints in sequence after
shooting starts.
In hyperlapse mode, only motion will
be recorded by the ZX-G1.
8. Shutter
Button which will take photos or begin
recording.
9. Album
Access your footage and photos.
10.Switch between front and rear
camera
Easily transition between both
viewpoints.
11.Switch between Zoom or Focus
Mode
‘Z’ stands for ‘zoom’. In this mode, the
slider on the gimbal controls the zoom
of the image. ‘F’ stands for ‘focus’.
In this mode, the slider on the ZX-G1
controls the focus of the image.

19
12.Settings
Camera settings: In this setting you
can set flashlights, grids and image
aspect ratios.
• Joystick sensitivity: You can adjust
the sensitivity of the joystick. The
user can also reverse the up/ down
and left/ right control of the joystick.
13. Parameters of the ZX-G1 App
• The image resolution for
panorama: There are 3 grades:
low, medium and high. If necessary,
try reducing the image resolution
setting in your smartphone to
improve the quality of your
panorama shot.
• Calibrating sensors: If the gimbal
starts to drift slowly, press this icon
to calibrate the sensors. Reboot the
ZX-G1 after the calibration.
• Horizontal adjustment: Calibrate
the horizon of the ZX-G1.
• Live Face tracking: Enable live face
tracking while using other streaming
apps.
• Firmware upgrade: Press to
upgrade the firmware of the ZX-G1.
When there is a blue dot on this icon
an upgrade to the latest firmware
version is required.

20
10.0 UPGRADE YOUR FIRMWARE
Check the battery level has capacity for
the upgrade- it should show 2 lights or
more.
Connect to Bluetooth, select ‘Firmware
upgrade’ from the menu at the left side of
the app interface to start.
Please keep note of the progress bar
during upgrade.
Do not quit the app or minimise until
upgrade is complete.
The ZX-G1 will turn off once upgrade has
finished.
The user needs to turn on the ZX-G1
manually. If the upgrade fails, the user
needs to reboot the ZX-G1 and reopen
the Zero-X Gimbal App and try again.
Table of contents
Other ZERO-X Camera Accessories manuals
Popular Camera Accessories manuals by other brands

Photogenic Professional Lighting
Photogenic Professional Lighting PM400 Operator's manual

SES
SES SE-2057-1 user manual

Miles Research
Miles Research CRCS-FH4 user guide

GPX
GPX TPD108 user guide

Sony
Sony FA-HS1AM operating instructions

Generac Power Systems
Generac Power Systems PWRcell M3 installation manual

Manfrotto
Manfrotto MKBFRTA4BK-BH instructions

Gates
Gates C300 Setup, use and care guide

eisenblatter
eisenblatter 50463 Original instructions

White Lightning
White Lightning Ultra 1800 operating instructions

Moog
Moog FusionDome FDW75C8N Installation and operation instructions

Pixel
Pixel ROOK instruction manual