Showcases Direct DL400 User manual

Ph:
027
2937193
Fax: (09) 6290900
Email: info@showcasesdirect.co.nz
www.showcasesdirect.co.nz
ASSEMBLY INSTRUCTIONS FOR DL400 and DL400LS
May 2017
The DL400, and the version with lights, the DL400LS, is a square upright frameless
glass cabinet with a single swinging door. Its shelves are fully adjustable up and
down the support poles or, in the case of the DL400LS, between the light fittings.
Extra shelves are available.
It is designed to be placed on a table or counter. It is a useful cabinet where limited
space is available, where only a few things need to be displayed, or where it is
desired the cabinet be placed on top of another surface.
The box contains all the parts necessary for its assembly, including tools.
ASSEMBLY
Assembly of the DL400 and DL400LS is by way of brackets, screws (nuts) and bolts.
The cabinet can, for the most part, be assembled upright.
One person can assemble the cabinet, but it can be helpful to have a second person
for various tasks.
It can be easier to clean the glass before, or as, the cabinet is assembled.
It is intended that the screw heads be placed on the outside of the cabinet, and that
the nuts go on the inside.
In general, the brackets should go on the inside of the cabinet.
Due to design improvements, the cabinet you have may differ in small ways from that
described in these instructions.
1. After unpacking the box, place the base board on the ground. The base is the
only piece made of wood.
2. The cabinet is essentially held together by the four poles supplied. These
poles, in combination with the glass, give the cabinet structural integrity. They
also support the shelves. The shelves are supported by the shelf supports that
run up and down all four of these poles.
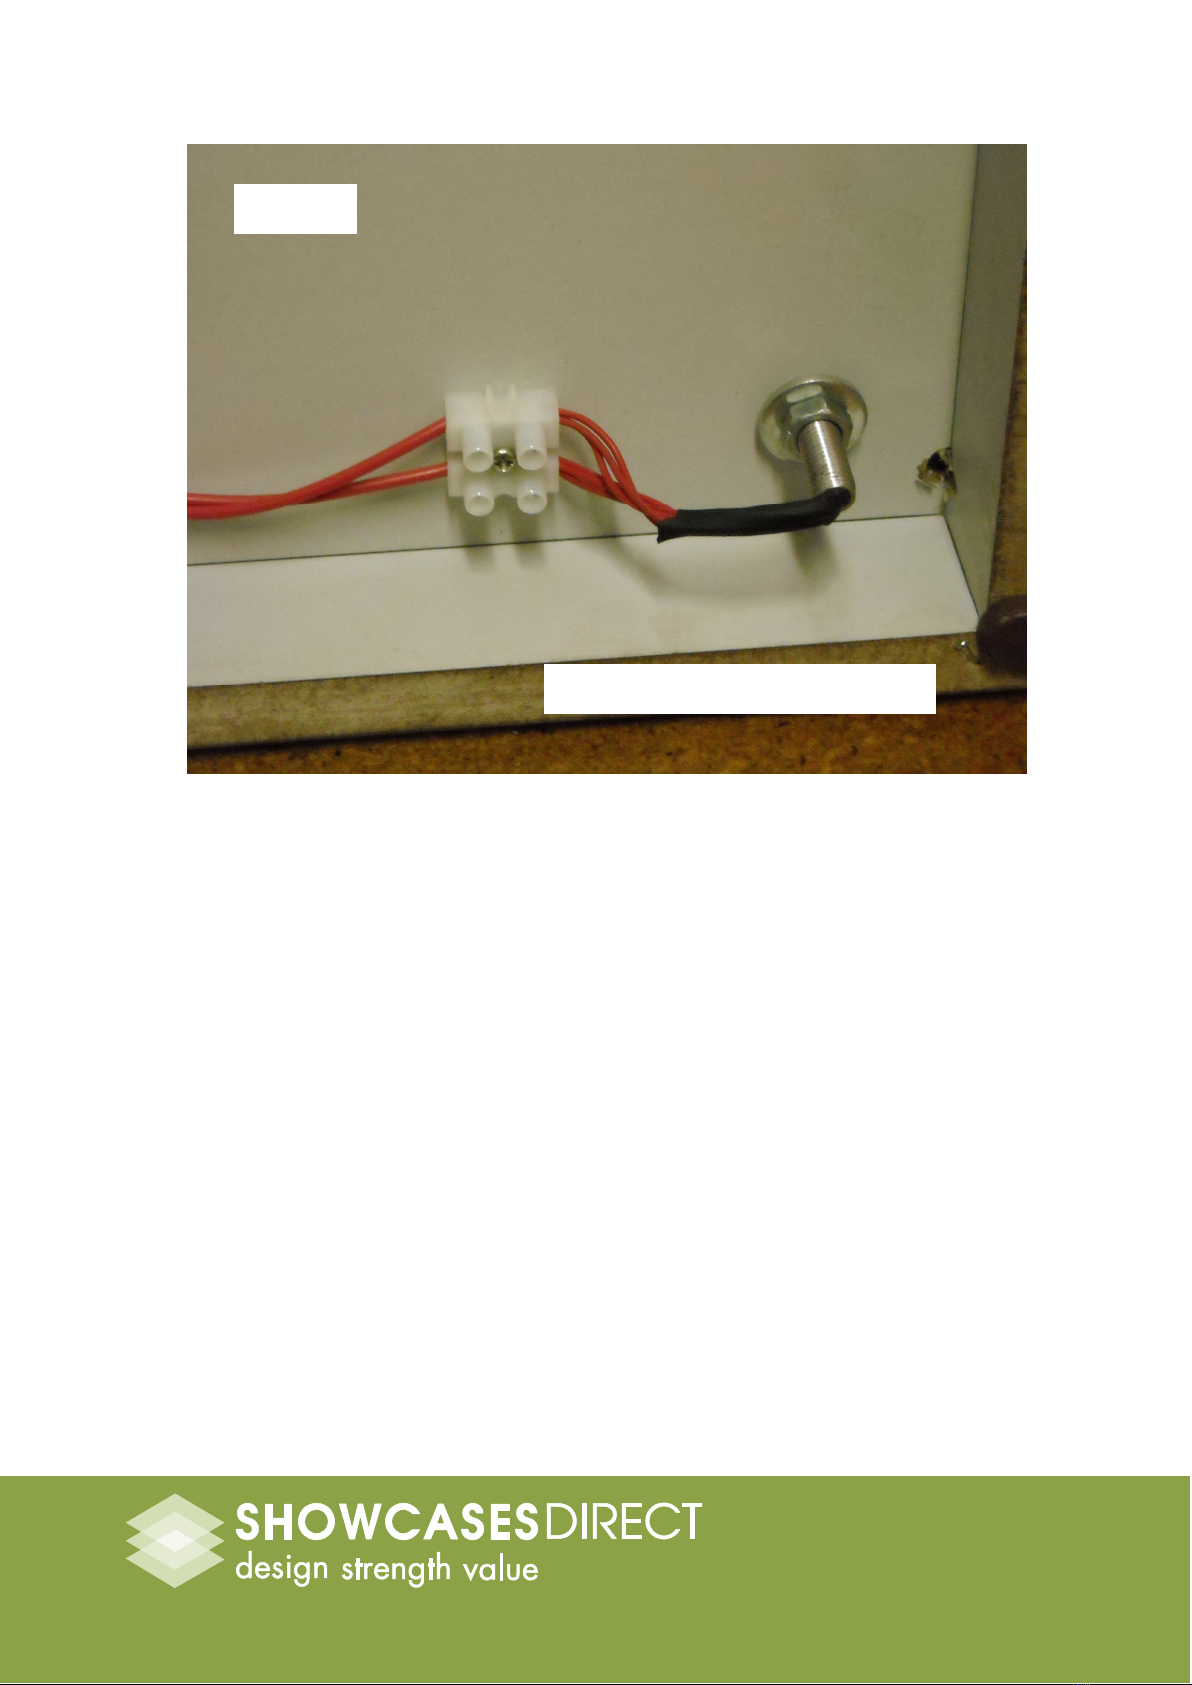
3. On the DL400LS model, one of the poles will have light fittings attached to it.
Some older models have lights on two poles, but these are no longer common.
The lighting pole can, in theory, be placed in any of the four pole positions i.e.
front right, front left, rear right, rear left. It is, however, designed to go in the
front right position. Placing the pole in one of the other three positions will not
cause a problem, although the wires may not reach the connector block under
the base. Repositioning the connector block is usually possible however.
NOTE: The front of the base is the side with no routered groove. It will also be
the location of the hole for the door hinge.

Ph:
027
2937193
Fax: (09) 6290900
Email: info@showcasesdirect.co.nz
www.showcasesdirect.co.nz
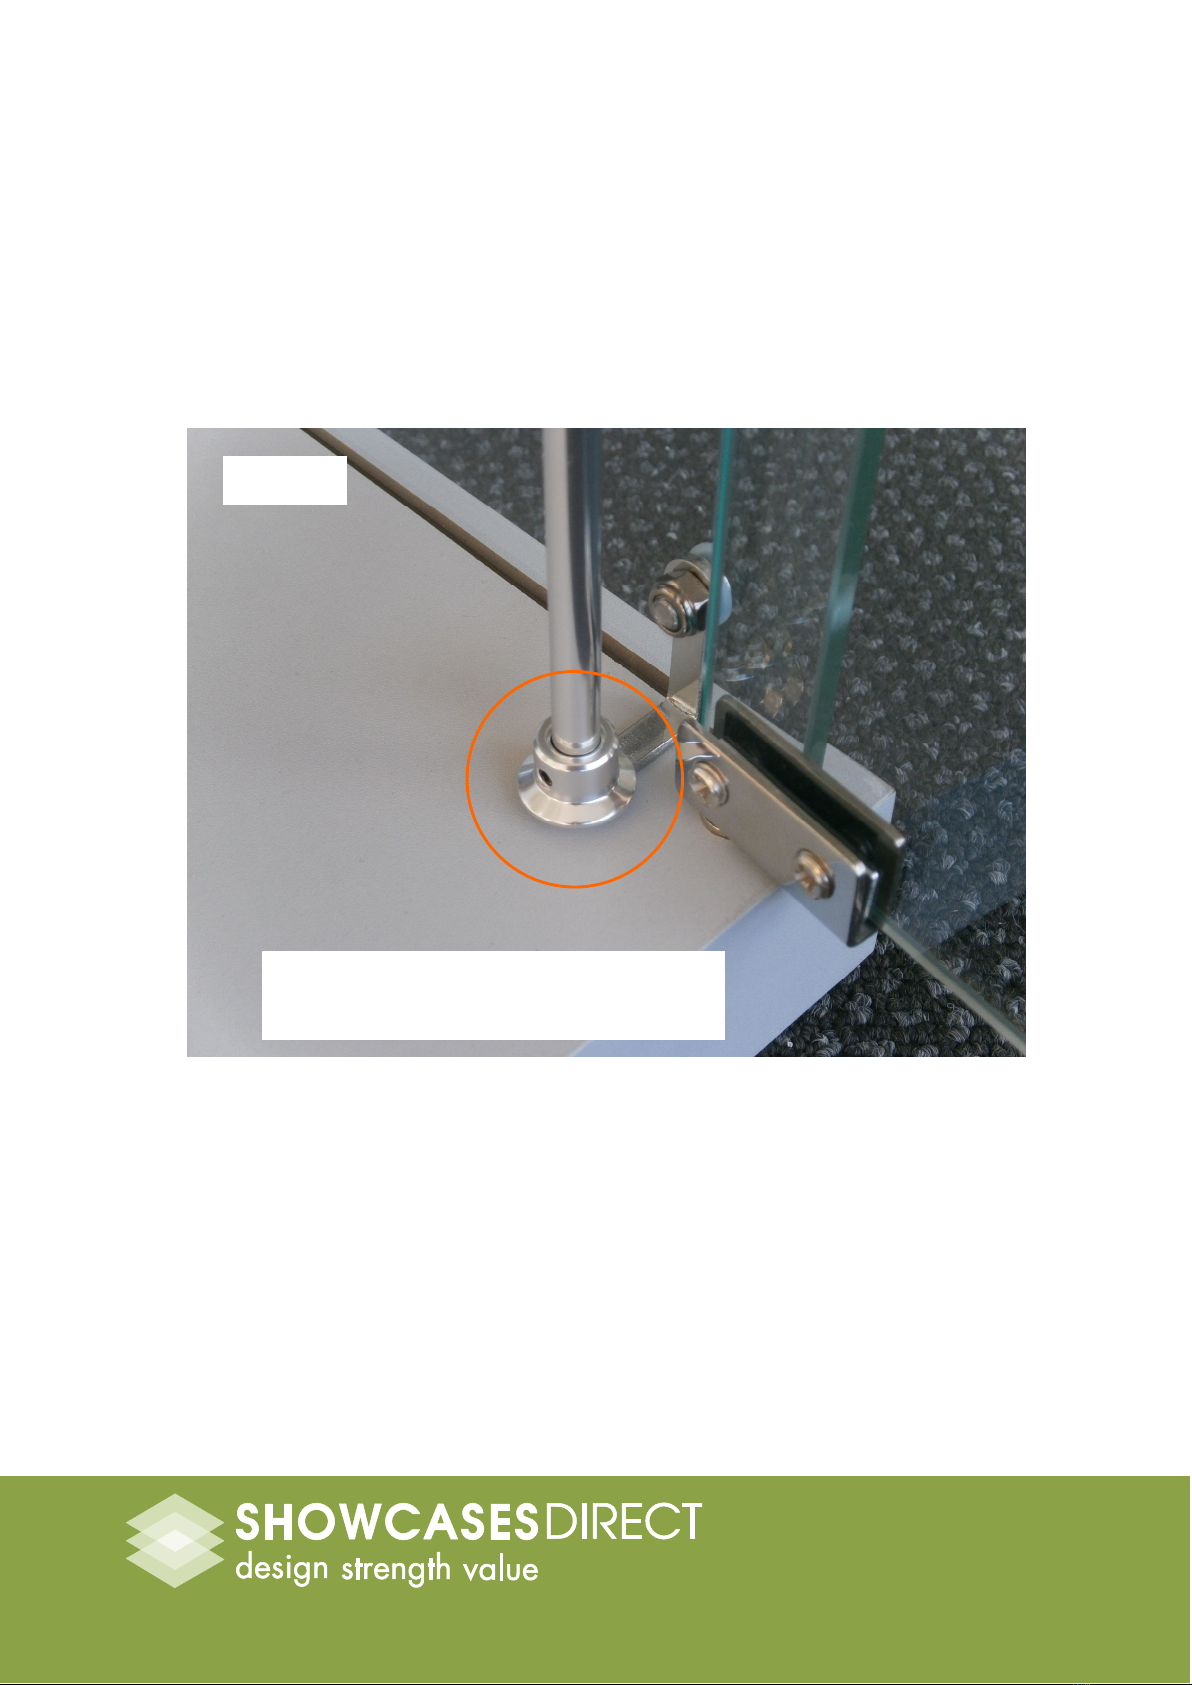
4. Install the poles first. The poles should go through either a two or a three
pronged bracket, like the ones shown in Photos 1 and 5. The nut holds the
pole in place under the base (Photos 2 and 3). Screw the nut only part way up
the thread at this point – it will need to be tightened later, once the glass and
top is in place.
5. Place the cabinet upright on its base. It is useful at this point to place the shelf
supports (that will hold the shelves) on the poles. Each pole requires a flange,
then two shelf supports.
6. Take the back glass panel (the largest of the glass panels), and place it in the
appropriate slot on the base board. You may need a second person to hold it.
If no second person is available, lean it against a wall.
7. The side panels go in the side grooves, as appropriate. Hold these panels
together with the three and two-pronged brackets as appropriate. The three
pronged brackets go at the back of the cabinet, and the two-pronged go
towards the front. Note that the poles will go through the brackets at top and
bottom. As such, (at least) one of the holes in each bracket will be larger, to
allow the pole to pass through it.
8. Place the top over the cabinet, ensuring the holes in the glass line up with the
poles underneath.
9. The shelf supports that will hold the shelves in place can be positioned where
you desire them. They are adjustable up and down the poles. There is a screw
on the inside of the shelf support that tightens against the pole. Use the small
Allen key for this. You will need a ruler or similar to ensure all four shelf
supports are level. See Photo 9.
NOTE: the shelves (and thus shelf supports) can be positioned either north-
south or east-west.
10. Put the shelves in place, resting them on the rubber pads in the shelf supports.
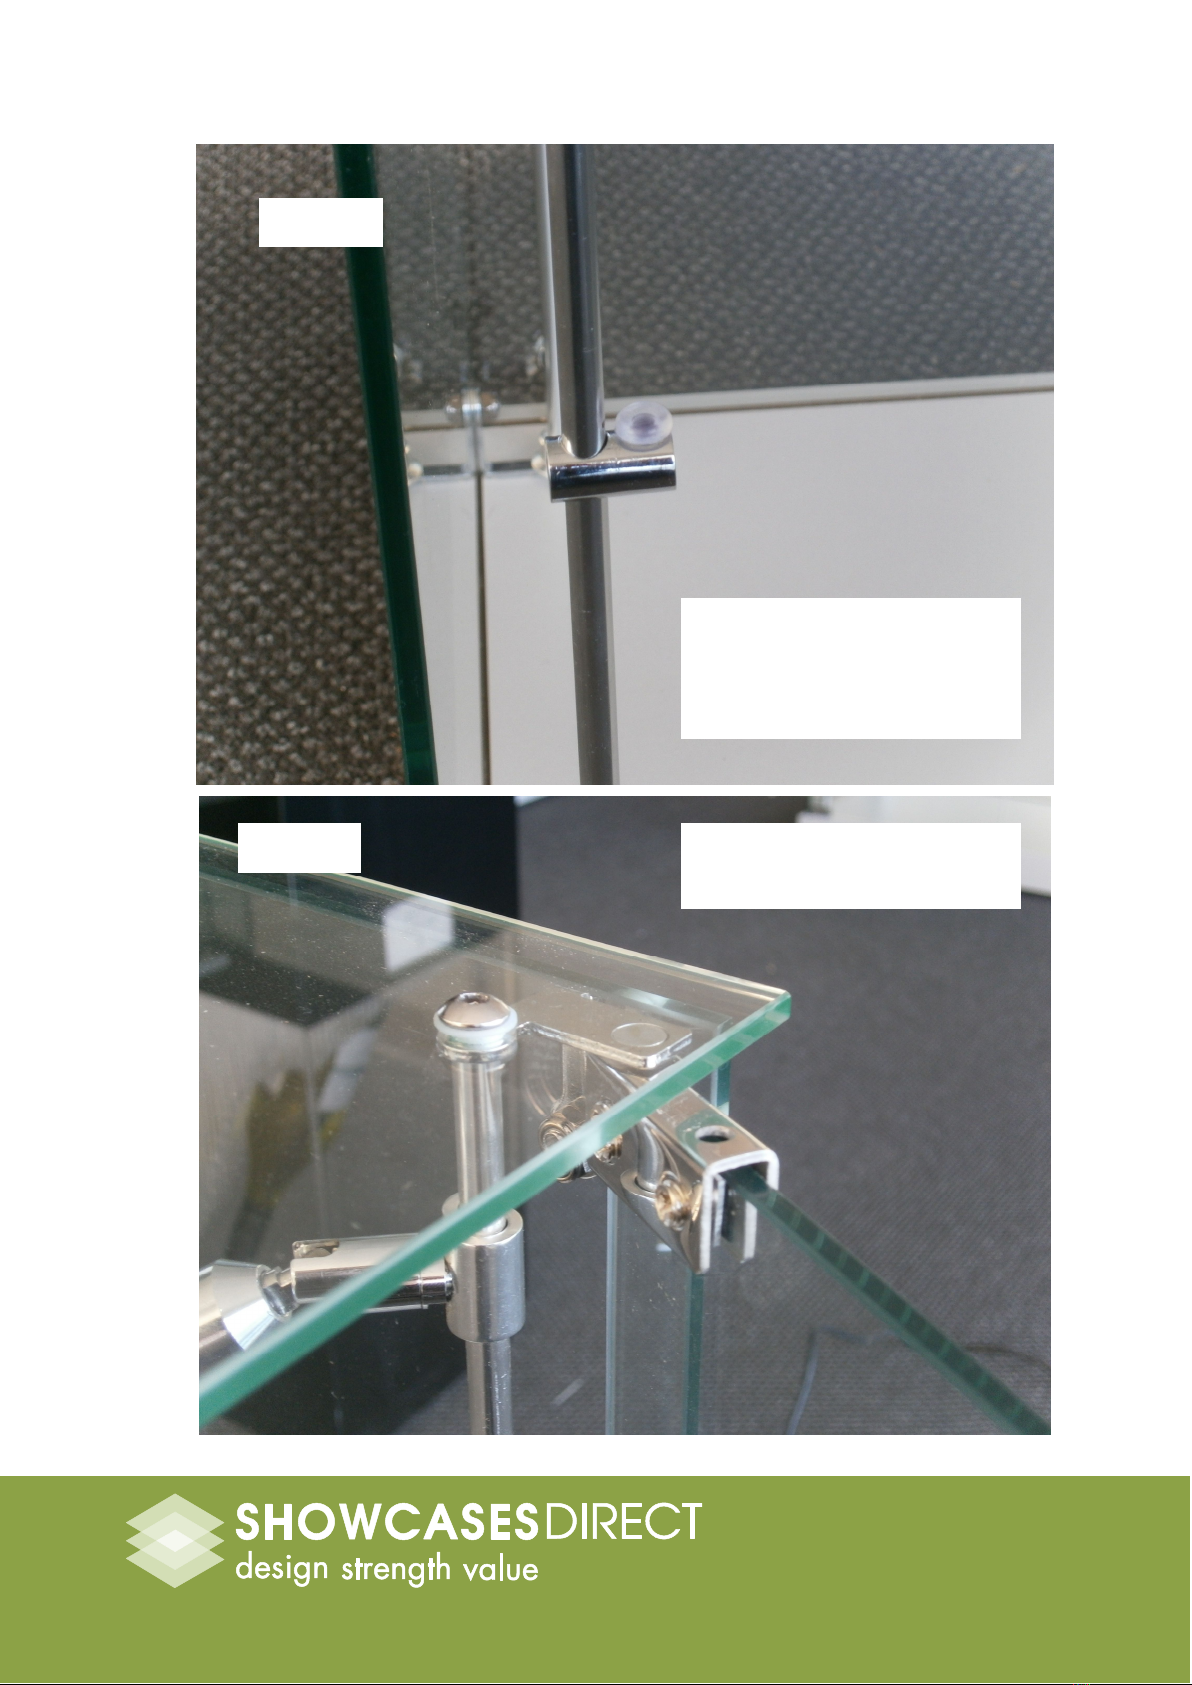
11. The last task is to fit the door. The door is the smallest of the four large panels
of glass, and should be the only panel you have remaining. The hinge at the
bottom of the door is stand-alone (Photo 6), but at the top the hinge is
incorporated into the bracket (Photo 7). In both cases, the inside of the hinges
have two screws on one side and double sided adhesive foam on the other
side.
12. Ensure the door glass is clean. Remove the yellow (or white) waxed paper
from the adhesive foam which is already in place on the inside of the hinge.
Place the hinge on a corner of the door, and allow the adhesive foam to hold it
in place. The door and hinges are designed to have approximately 1mm
margin between the edge of the hinge and the edge of the door.
Ph:
027
2937193
Fax: (09) 6290900
Email: info@showcasesdirect.co.nz
www.showcasesdirect.co.nz
13. Place one of the supplied pieces of flat metal between the screws on the other
side of the hinge and the glass, such that the screws do not touch the glass.
Gently tighten the screws in tandem until they hold the hinge in place. Ensure
the two screws are firm, but do not overtighten. UNDER NO
CIRCUMSTANCES SHOULD THE SCREWS MAKE DIRECT CONTACT
WITH THE GLASS. For the finished hinge, see Photos 6 and 7.
14. Finally, place the lock in the appropriate position on the door, and tighten with
the supplied screwdriver (Photo 8).
Photo 1
Place flange and bracket on pole before
threading wires through base
Ph:
027
2937193
Fax: (09) 6290900
Email: info@showcasesdirect.co.nz
www.showcasesdirect.co.nz
Photo 2
Basic wiring for pole with lights

Ph:
027
2937193
Fax: (09) 6290900
Email: info@showcasesdirect.co.nz
www.showcasesdirect.co.nz
Photo 3
Nut for pole without
lights
Photo 4 Basic cabinet
construction
Ph:
027
2937193
Fax: (09) 6290900
Email: info@showcasesdirect.co.nz
www.showcasesdirect.co.nz
Door hinge assembly. Fit
the doors last.
Photo 5
Photo 6
Place two shelf supports on
each pole. Position them all
at the same level so shelf is
level

Ph:
027
2937193
Fax: (09) 6290900
Email: info@showcasesdirect.co.nz
www.showcasesdirect.co.nz
Photo 7
Photo 8
Door hinge assembly. Fit
the doors last.
Fit lock onto door

Ph:
027
2937193
Fax: (09) 6290900
Email: info@showcasesdirect.co.nz
www.showcasesdirect.co.nz
Photo 9 Tighten them with the small
allen key supplied.
This manual suits for next models
1
Table of contents
Popular Indoor Furnishing manuals by other brands


Habitat
Habitat ALTO-TA-SS15-A Assembly instructions

Safco
Safco 3434 Assembly instructions

Teknion
Teknion hiSpace operation instruction

Courtyard Creations
Courtyard Creations KVS945Y 299-9911 Assembly instructions

Office Star Products
Office Star Products S2721 operating instructions

Relita
Relita SINA manual


