Shyam ES400 User manual

NETWORKS
www.shyamnetworks.com
ES400
Enterprise Gateway
Quick Start Guide
For advanced settings and more detailed information, download the user
manual from www.shyamnetworks.com.
Package Contents
Enterprise Gateway (main unit) 1
Power Adapter 1
Ethernet Cable 1
Quick Start Guide 1


3
NETWORKS
ES400
INTERFACE DESCRIPTION
Two Antennas Up to 5 dBi integrated high gain antennas.
LAN 1-4 Four local area network (LAN) ports providing connection through
Cat5e cables.
WAN (Copper/Fiber) Allows WAN connection through Cat5e/optical ber cable.
USB Allows connecting USB devices such as pen drive or data card.
LED Indicates the working status.
RESET • Single press reboots the system.
• Press till all lights go off once, restores to factory default settings.
Available Models
Interface Description
1. Hardware Overview
MODEL DESCRIPTION
EG-4C-1C-UVP-17 17dBm, WAN - Copper (100 Mbps)
EG-4C-1GF-UVP-17 17dBm, WAN - 1G Fiber TX:1310nm, 20Km
Antennas
Telephone
Ports
USB Port
Line Ports
4 LAN Ports
EG-4C-1C-UVP-17
LEDs RESET Button

4
NETWORKS
ES400
LED Behavior
Caution and Warnings
• Use the power adapter included with the product. Using a different power adapter
may damage the product.
• Ensure there is no direct exposure to heat or sunlight.
LED COLOR STATUS DESCRIPTION
WLAN Green Blinking This indicates that the wireless mode
is enabled. By default it glows.
WAN Green Blinking This indicates that data is being
transferred.
On This indicates that WAN link is up.
LAN 1-4 Green On The corresponding LAN port is
connected and working.
5
NETWORKS
ES400
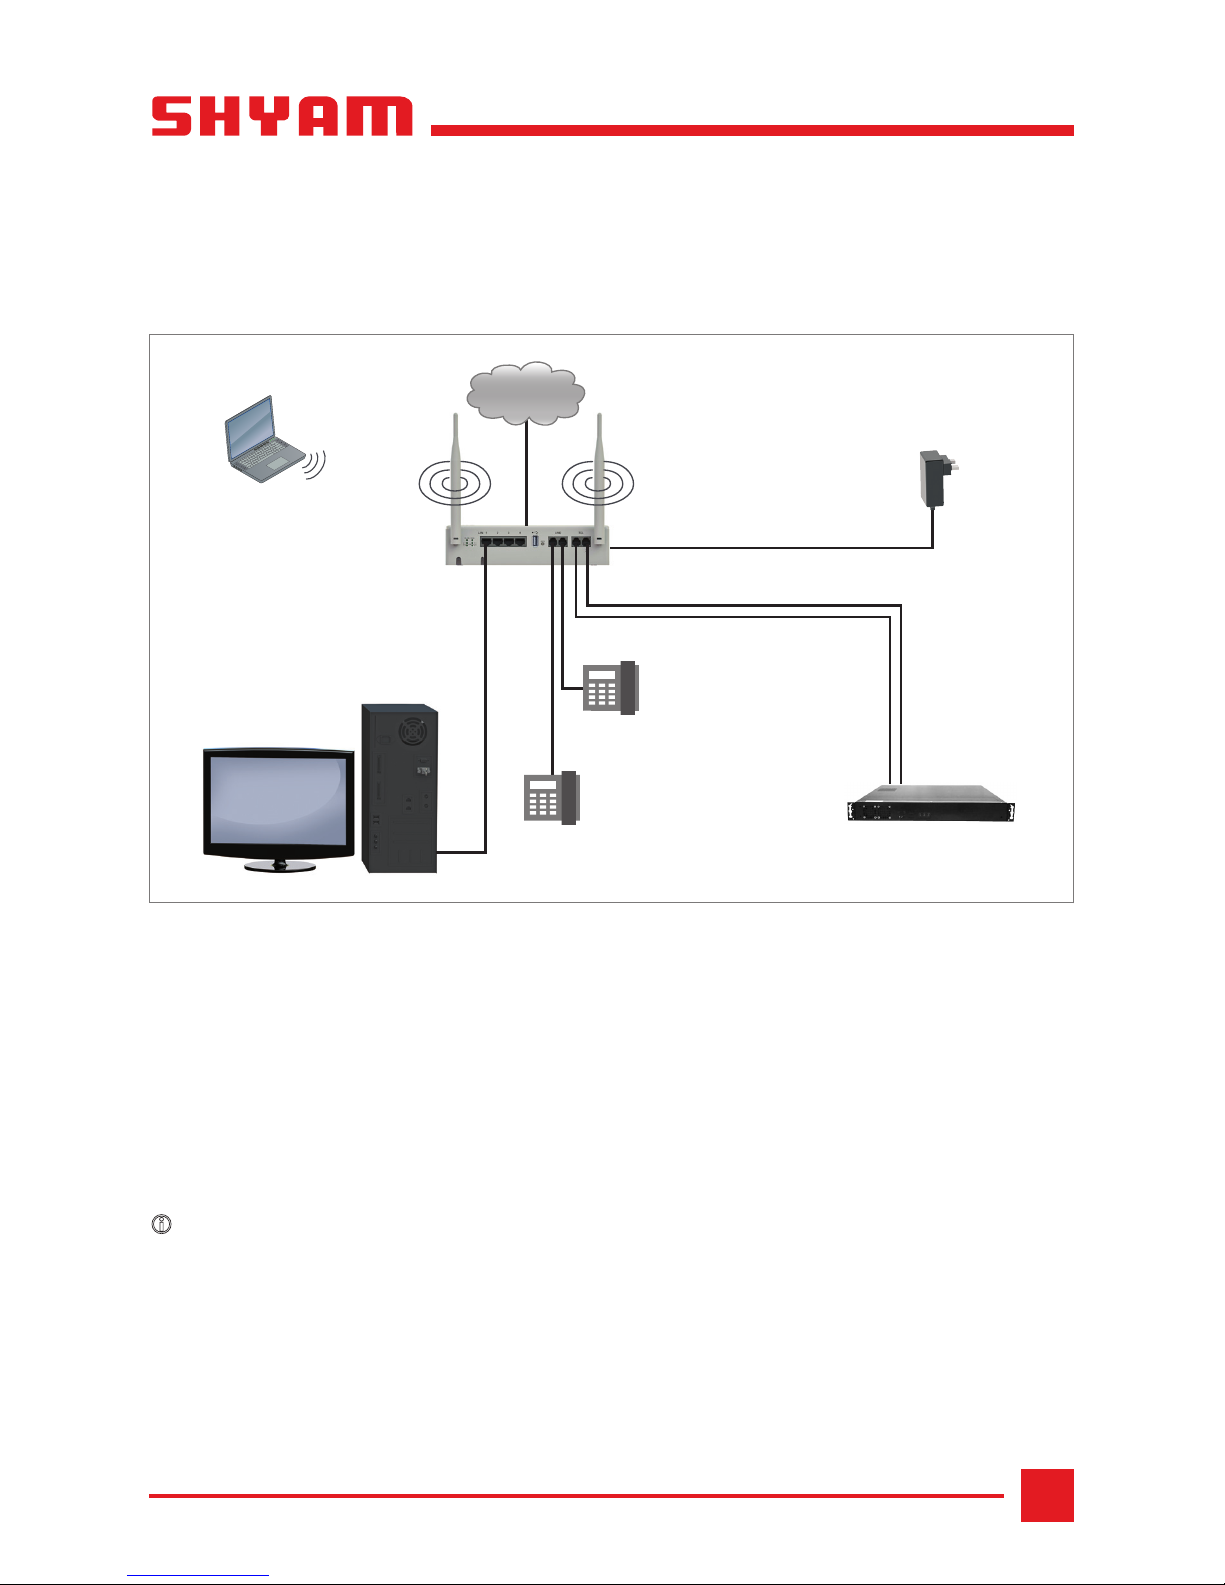
2. Installing the Enterprise Gateway
STEP 1 Place the enterprise gateway on a at surface.
STEP 2 For each device you want to connect to the enterprise gateway, insert one end of
an Ethernet cable into the port in the device and other end into the enterprise
gateway’s LAN port.
STEP 3 Connect the power adapter cord into the front of the enterprise gateway and
then plug it into a power source. The LED corresponding to the port should light up.
iNote: In case any LED does not operate, then refer to the “Quick Troubleshooting” section.
Congratulations! The installation of ES400 is complete.
ES400
Power Adapter
Fiber
FXS
Telephone
Telephone
Computer
Internet
PBX
6
NETWORKS
ES400
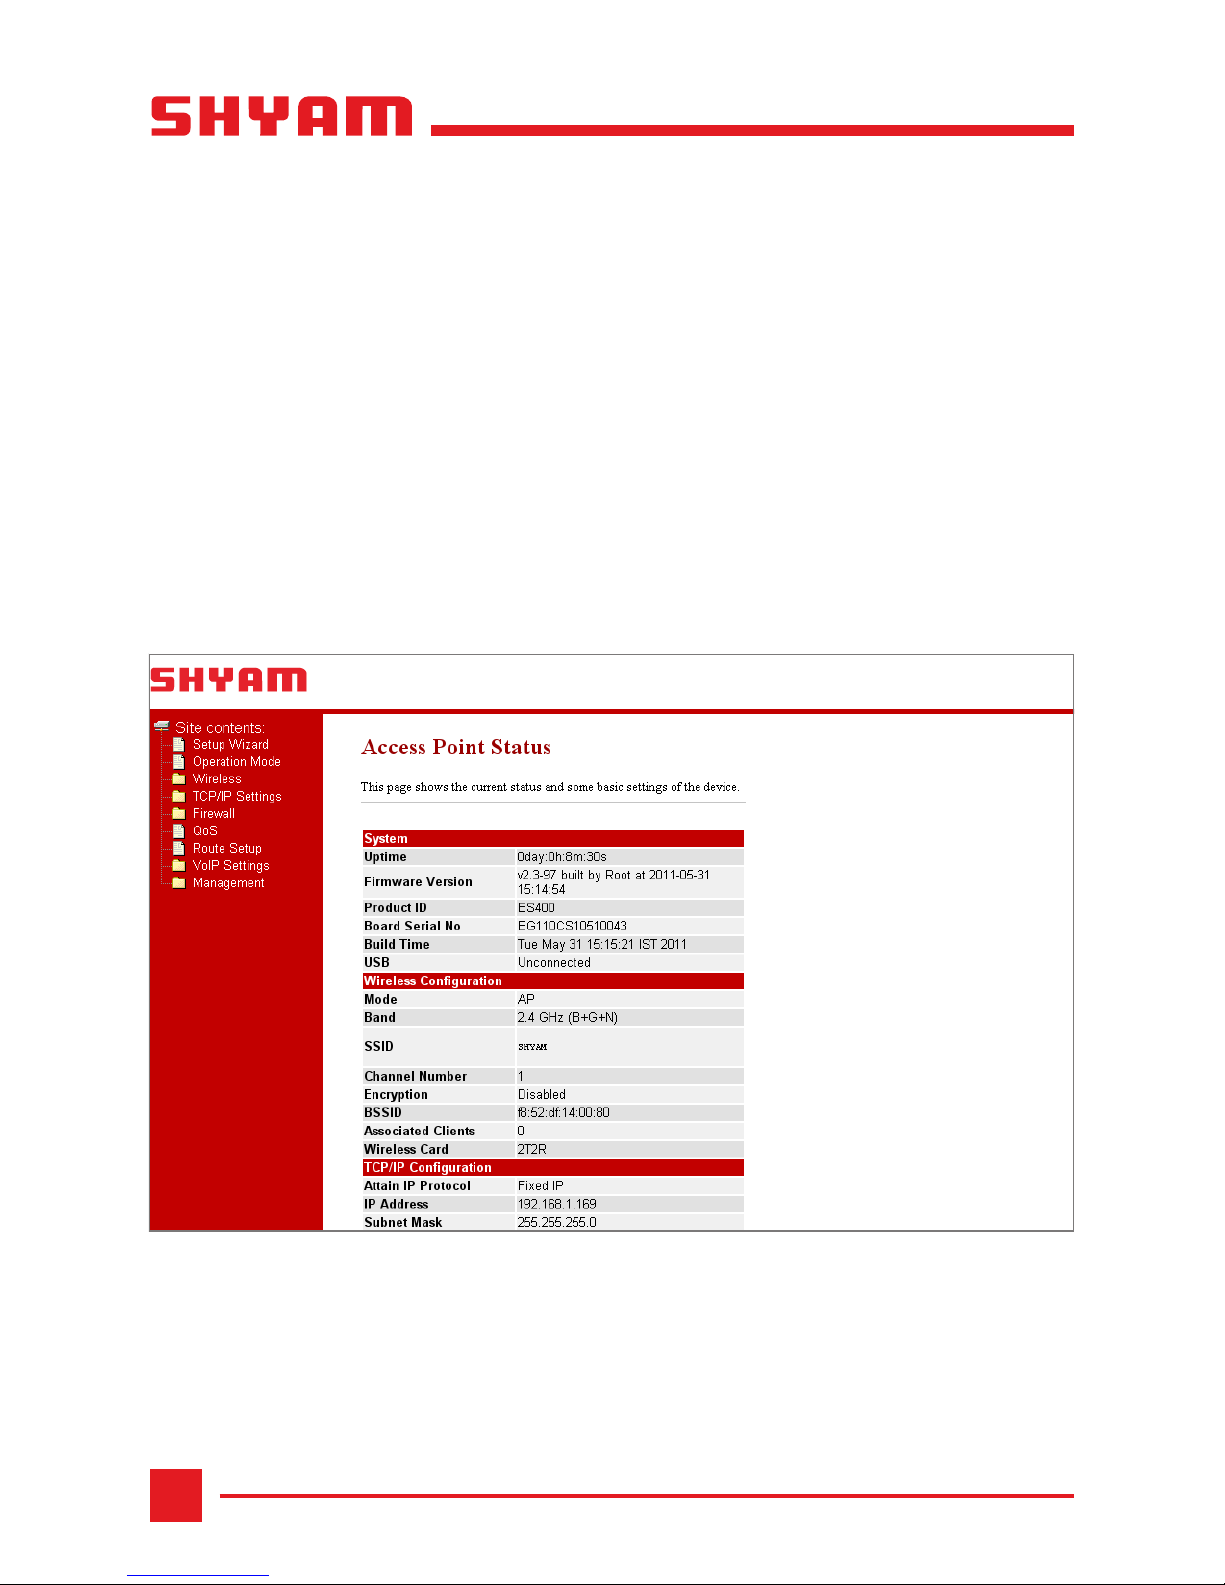
3. Configuring the Enterprise Gateway
STEP 1 Power-up the enterprise gateway.
STEP 2 Congure your system with IP address between 192.168.1.2 to 192.168.1.253
and subnet mask to be 255.255.255.0.
STEP 3 Type the http://192.168.1.2 URL in the Internet Explorer 6.0 or above version to
access the web interface.
STEP 4 Provide user name as admin and password as password.
STEP 5 Click Setup Wizard in the navigation panel to view the Setup Wizard page.
Please refer to “ES400 Conguration and User Guide” for more details.

7
NETWORKS
ES400
4. Quick Troubleshooting
PROBLEM PROBABLE REASON RESOLUTION
The WLAN LED is not
blinking when the
enterprise gateway is
powered-up.
The WAN connectivity is
down.
Press the RESET button on the
front panel of the enterprise
gateway.
The LED corresponding
to a specic port is Off.
The enterprise gateway has
no power.
• Ensure that the power cord
is properly connected to the
enterprise gateway.
• Ensure that the power adapter
is properly connected to the
functioning power outlet.
• Ensure that you are using the
same power adapter supplied
with the enterprise gateway.
iNote: If none of the above
works, press the RESET button on
the enterprise gateway to restore
the factory default settings.

8
NETWORKS
ES400
Warranty
This warranty is valid upto 12 months from the date of purchase.
Any manufacturing defect will be repaired by the company free of charge within the period of
warranty subject to the following conditions:
1. This warranty card must be duly lled in, stamped & signed by the dealer. The card and the
relevant cash memo must be preserved & produced along with the defective unit.
2. Once the defective unit is repaired during the said warranty period, the warranty shall thereafter
continue only for the unexpired period to the original warranty.
3. This warranty is not valid for
• Damage resulting from accidents, mishandling, negligence, tampering, unauthorized repair,
failure to follow instructions, lightning, re and act of God.
• Items not purchased from Authorized Dealers of the Company.
• Batteries (including rechargeable) wherever applicable.
• Damage to the tamper proof seal.
4. In case of a problem with your unit, please contact Customer Care. In the event that you are
advised to send and collect the unit from the Service Center of the Company – the same will be
done at your expense.
5. While Company or its Authorized Service Dealer will make every effort to carry out repairs under
this warranty as soon as possible, it is expressly made clear that the company shall not be held
liable for any direct or indirect loss to user due to delay in providing this service.
6. This warranty excludes every condition/warranty/liability not expressly set out therein.
7. Claims, if any to this warranty shall be subject to the courts having jurisdiction in Delhi, India.
Product ______________________________________________________________________
Model No. _______________________________ Serial No. ___________________________
Dealer’s Stamp & Signature Customer Care,
Shyam Networks (A Division of Vihaan Networks Ltd.)
21-B, Sec-18, Udyog Vihar, Gurgaon-122015
Haryana, India
Email: customer[email protected]
All India Helpline No. - +91 124 309 2000 Ext. 2009,
+91 9873573710
Manufactured by Vihaan Networks Ltd. Gurgaon, Haryana, India
109.00017.00
SN/QS/ES400/06/11/R2
Table of contents
Popular Gateway manuals by other brands


Cisco
Cisco Expressway CE1000 Appliance installation guide

Soca
Soca ST-725 Series Operation and installation manual

THOMSON
THOMSON TWG870 user manual

UfiSpace
UfiSpace Outdoor R1 Series Installation quick guide

Tekon
Tekon WGW420 installation guide

ZyXEL Communications
ZyXEL Communications VMG3312-T20A user guide


