manuals.online logo
Brands
  1. Home
  2. •
  3. Brands
  4. •
  5. Siemens
  6. •
  7. Dryer
  8. •
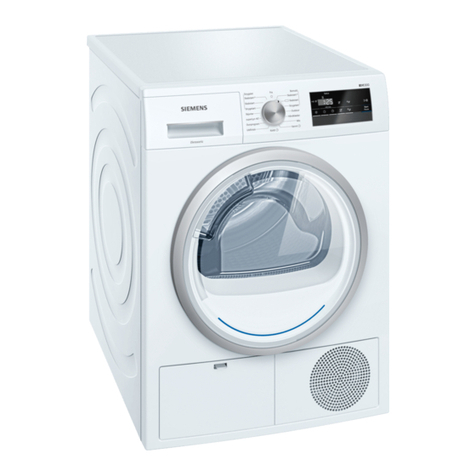
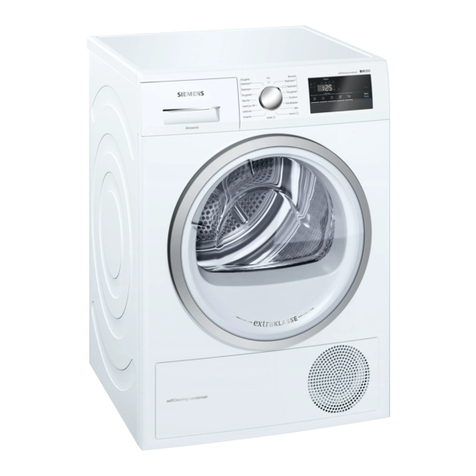
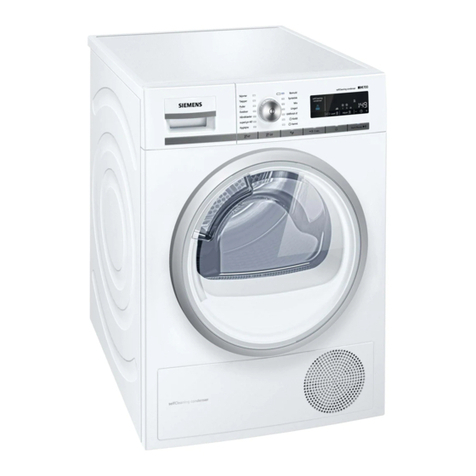
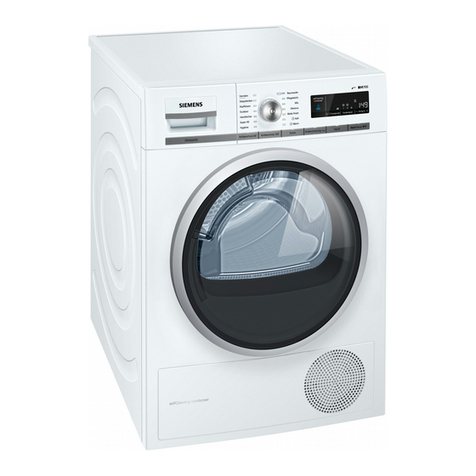
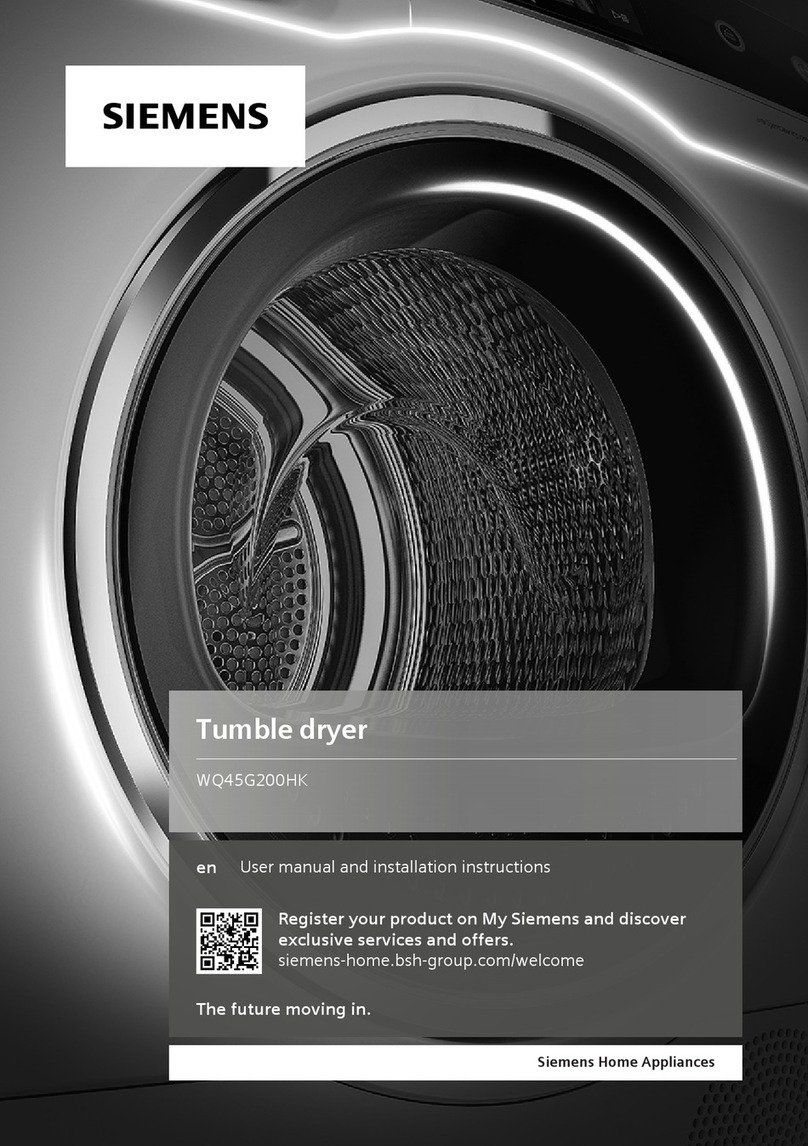
  9. Siemens WT46W567GB User manual

Siemens WT46W567GB User manual

1 2 3 4 5 6
Contents Page
ʋPreparation . . . . . . . . . . . . . . . . . . . . . . 2
ʋSetting the programmes . . . . . . . . . . . . . 2
ʋDrying . . . . . . . . . . . . . . . . . . . . . . . . 3/4
ʋNotes on laundry . . . . . . . . . . . . . . . . . . 5
ʋImportant Information . . . . . . . . . . . . . . .6
ʋOverview of programmes . . . . . . . . . . . . 7
ʋInstallation . . . . . . . . . . . . . . . . . . . . . . . 8
ʋFrost protection / Transport . . . . . . . . . . .8
ʋCleaning and care . . . . . . . . . . . . . . . . . . 9
ʋTechnical data . . . . . . . . . . . . . . . . . . . 10
ʋOptional accessories . . . . . . . . . . . . . . .10
ʋNormal noises . . . . . . . . . . . . . . . . . . . . 11
ʋWhat to do if... / After-sales service . . . .12
ʋSafety instructions . . . . . . . . . . . . . . . . 13
... and adapt to individual requirements
Never operate the dryer if it is damaged.
Inform your after-sales service. Inspecting the
dryer
Sorting and loading laundry
Remove all objects from pockets.
Pay particular attention to cigarette lig hters.
The drum must be empty before filling.
See programme overview on pa ge 7.
See also separate instructions for basket for woollens
(depending on the model)
Your new dryer Intended use Preparing for installation, s ee Page 8
Selecting and adjusting the programme
Select the drying progra mme ...
Press the Start/Stop bu tton
Only if your hands are d ry.
Only hold the plug by the plug
casing.
Connecting the
mains plug
All buttons are sensitive and only need to
be touched lightly.
ʋonly for domestic use.
ʋonly to be used for drying fabrics that have been
washed with water.
.
Do not leave children unsupervised near the dryer.
Keep pets away from the d ryer.
3
2
1
Drying
Drying
Condensation container with filte r
Control panel
Air inlet
Two-part
fluff filter
Drum
Only use the dryer with the fluff filter
inserted!
Congratulations! - You have chos en a modern, high-quality domestic
appliance from Siemens.
The condensation dryer with he at exchanger and automatic cleaning
function is outstanding in terms of efficient energy consumption and
low maintenance requirements. aPa ge 6.
Every dryer which leaves our factory is carefully checked to ensure
that it functions correctly and is in perfect con dition.
Should you have any questions, our after-sales service will be pleased
to help.
Environmentally responsible disposal
Dispose of packaging in an environmentally-respo nsible manner.
This appliance is designated according to Eur opean directive
2002/96/EC which governs waste electrical an d electronic
equipment (WEEE).
The directive provides an EU -wide framework for the return and
recycling of used appliances.
For further information about our products , accessories, spare parts
and services, please visit: www .siemens-home.com
Do not pull out/empty
the condensation container when drying is in progre ss
Drum interior
light
Important Information
Your dryer is designed to be particularly energy-saving and its technical features include a
refrigeration circuit that uses en ergy efficiently, in a similar way to a refrigerato r.
The dryer's heat exch anger is cleaned automatically dur ing drying.
The fluff filters and filter in th e condensation tank must be c leaned regularly.
Never operate the dryer without the fluff filter a nd condensation tank!
ʑFluff filter
During drying, fluff and hairs from the laundry are trapped in the fluff filter. A blocked flu ff filter
may impair the heat exchange proces s.
The fluff filter should therefore be cleane d after every drying cycle.
Rinse the filter regularly under running water aPage 4.
ʑFilter in the condensatio n tank
The filter in the condensation tank cleans the condensation. This condensation is required
for the automatic cleaning process. The filter m ustbe c leaned regularly under running water.
Empty the condensation tank before cleaning the filter aPage 9.
ʑFabrics
Do not dry any fabrics that have come into c ontact with solvents, oil, wax, grease or paint:
e.g. hair styling products, nail varnish rem over, stain remover, cleaning solvent. etc.
Empty all pockets.
Do not dry airtight fabrics.
Avoid drying fabrics that produce a lot of fl uff.
Woollens should be refreshed only using the woollens programme.
Additional functions
Programme selector Display panel
Display for max. load capacity
for selected programme
The programme has ended when
\
lights up in the displa y panel.
Interrupt programme removing or adding laundry.
The drying cycle can be interrupted for a brief period so th at laundry may be added or removed.
The selected programme must then be c ontinued until it is finished.
Never switch the dryer off before the drying process has ended.
1. Open the door. The drying cycle is interrupted .
2. Remove or add laundry and close the door.
3. If required, se lect a new programme and additional func tions.
4. Press the Start/Stop button. The re maining time is updated after a few minutes
Information on laundry ...
Labelling of fabric s
Follow the manufacturer's care information.
(Drying at normal temperatur e.
'cDrying at low temperature aalso select °CüALow Heat.
)cDo not machine dry.
Always observe the safety instructions on page 1 3!
Do not tumble-dry the following fab rics for example:
 Airtight fabrics ( e.g. rubber-coated fabrics).
 Delicate materials (silk , curtains made from syntheti c material) athey may crease.
 Oil-stained laundry.
Drying tips
 To ensure a consiste nt result, sort the laundry by fabric type and drying programme.
 Always dry very small fabrics (e.g. baby socks) together with
large items of laundry (e.g. hand towe ls).
 Close zips, hooks and e yes, and do up any buttons.
Tie belts, apron strings etc. together.
 Do not overdry easy-c are laundry arisk of creasing
Allow laundry to finish drying in the a ir.
 Do not dry woollens in th e dryer. They may, however, be refreshed apage 7 Woollens
Finish programme (depending on the m odel).
 Do not iron l aundry immediately after drying, fold items up and leave for a while athe
remaining moisture will then b e distributed evenly.
 Knitted fabrics (e.g. T-shirts, jers eys) often shrink slightly the first time they are tumble-dried.
aDo not select the Extra Dry programme.
 Starched l aundry is not always suitable for dryers astar ch leaves behind a coating that
adversely affects the drying op eration.
 When washing laundry that is to be tum ble-dried afterwards, use the correct amo unt of
fabric softener according to the manufacturer's instructions.
 Use the Z eitprogramm (Timed programme) for small loads athis imp roves the drying
result.
Environmental protecti on/energy-saving tips
 Before drying, spin the laundry thoroughly in the washing mac hine athe higher the spin
speed, the shorter the drying time will be, thus consuming less energy. Also spin easy-care
laundry.
 Use the maximum re commended capacity, but do not exceed it
aProgramme overview, Page 7.
 Ensure the room is we ll ventilated during drying.
 Do not cover or s eal the air inlet.
Emptying condensation
Empty the container after each d rying cycle, not during drying!
1. Remove the condensation container and hold it level.
2. Pour out the condensation.
3. Always push the container fully back in until it locks in place.
If the .Container indicator lamp is fla shing apage 9.
Cleaning the fluff filter
The fluff filter consists of t wo parts.
Clean the inner fluff fi lter after every drying cycle:
1. Open the door. Remove any fluff from the doo r/around the door.
2. Pull out the inner fluff filter and fold it op en.
3. Remove any fluff (rub your hand over th e fluff filter).
If the fluff filter is very dirty or clogged, rinse it under runn ing
water and dry thoroughly.
Clean the outer fluff filter after every 5th drying cycle:
4. Remove the outer fluff filter.
5. Open it and remove any fluff.
Rinse under running water and dry thor oughly.
6. Fold the fluff filters closed, put them back toge ther and reinsert into
the appliance.
Switching off the dryer
Turn the programme selector to Off.
Do not leave laundry in the dryer.
Removing the laundry
Your dryer has an automatic Knitterschutz (Anti-Crease) function. The drum is moved at set intervals for
30 minutes after the programme has ended. Laundry remains loose an d fluffy (for60 minutes, if additional
Less Ironing function is s elected).
ˎ°CüALow Heat Reduced temperature for delicate fabrics ', for a longer drying
time; e.g. acrylic, polyamide, elastane or aceta te silk.
ˎLess Ironing Reduce s creasing and prolongs the anti-creasing phase after the
programme has finished; can be s elected in one of two levels.
Status indicators
Icc+cc\Programme sequence displays:
drying, iron dry, cupboard dry, slackening/ready.
Service indicators
4Fluff filter
.Container
Rinse the fluff filter under running water aPa ge 4.
Empty the condensation container.
If necessary, clean the filter in the condensation tank aPage 9.
For selecting the settings. ˎMenu
To change all settings in the display pan el. ˎC hange
1 -24 hrs End of the programme after ... (dependi ng on the programme selected, e.g. 1:54h a2h,
you can always select up to the next full hour).
Electronic start
timer 0, 1, 2, 3, 4 Signal volume selectable in four stages: 0 (o ff), 1 (quiet), 2 (normal), 3 (loud), 4 (very loud). Signal 3On-Off Provides protection against unintention al changes to the functions set
(press and hold the Men u button for 5 seconds).
Appliance lock #0, 1, 2, 3 The drying result (e.g. cupboard dry ) can be increased in three stages (1 - 3) for the pr ogrammes
Cottons/Coloureds,Easy-Care,Mixed Fabrics and Rapid 40 apresetting = 0.
After one of these programmes has be en finely adjusted, the setting is retained for the oth ers.
Fine adjustment
Drying result 9600-1800 ²The spin speed that was u sed in the washing machine,
for more precise indication of the projected drying duration only.
Spin speed 
7
Programme overview see also page 5
After drying: laundry i s to be ...
T-shirt
Shirts
Trousers
Skirts/dresses
Sportswear
Work clothing
Anoraks
Towelling
dressing gowns
Underwear
Socks
Bed linen
Table linen
Terry towels
Tea towels/
towels
c
ironed

lightly ironed dry
@c
not ironed
c
passed through a mangle
Cottons/Coloureds max . 7 kg For whites and coloureds/cotton or linen.
Iron Dry ø@ è**è*è*è*è*è*è*è*
Cupboard Dry @***è*è*è**è*è*
Cupboard Dry Plus @è*è*è**è*è*
Extra Dry @è*è*è**
Easy-Care max. 3.5 kg For non-iron laundry made of synthetic fibres and blended fabric, cotton.
Iron Dry cø@c *è*è*è*è*è*è**
Cupboard Dry @*è*è*****
Extra Dry @è*è*è*
MIxed Fabrics m ax. 3 kg For mixed items of laundry made of cotton and easy-care fabri cs.
Cupboard Dry/Iron Dry
Shirts/Blouses max . 3 kg For cotton or linen fabrics tha t are still damp and easy-care fabrics. Cr easing in fabrics is reduced. Fabrics are not d ried
completely. Hang up fabrics!
Outdoor max. 1.5 kg For fabrics with membrane coating, water-repellent fabrics, functiona lclo thing, fleece fabrics (dry jackets/trousers with
removable internal lining separately).
Woollens Finish max. 3 kg For woo llen fabrics suitable for machin e-washing. Fabrics become fluffier but not dry.
Remove fabrics once the programme has ended and allow to dry.
Rapid 40 max.2 kg
For laundry made of synthetic fibres, cotton or blended fabrics (for examp le)th at needs to be dried quickly. The values may
differ from the those specified depending on the typ e of fabric, mixture of laundry to be dried, residual moist ure in the fabric
and loading capacity.
Programme time wa rm max. 3 kg For pre-dried, multi-layered, sen sitivef abrics made of acrylic fibres, or separate small items of laundry.Also for subsequent
drying.
Programme time co ld max. 3 kg For all types of fabrics. For fr eshening up or airing of items of laundry that have been worn for a sh ortpe riod of time.
0111 / 9000615800
*615800* Siemens Electrogeräte GmbH
Carl-Wery-Str. 34
81739 München/Germany
WT46W567GB
8
Installation
 Scope of delivery: dryer, installa tion and instruction manual, basket for woollens
(depending on the model).
 Check dryer for transport d amage.
 The dryer is very heavy. Do not lift without assistance.
 Be careful to avoid shar p edges.
 Do not install in a room which is susceptible to frost. Water may cause damage once it
starts to freeze.
 If in doubt, have t he appliance connected by a specialist.
 Do not lift the dryer by any of the protruding part s (e.g. the door) as they may break o ff.
Setting up the d ryer
 The appliance plug must always be accessible.
 Ensure that the appliance is installed on a clean,
level and firm surface.
 Do not obstruct the air inlet on the front of the
dryer.
 Keep the area around t he dryer clean.
 Level the dryer usin g the threaded feet.
Use a spirit level.
 Do not remove the threaded feet under any
circumstances.
Mains conn ection see safety information
a
Page 13.
 Connect to an AC earthed socket. If in doubt, have th e socket checked by a specialist.
 The mains voltage and the volta ge shown on the rating plate (
a
Page 10) must be the
same.
 The connected load a nd necessary fuse protection are specifie d on the rating plate.
Frost protection
Preparation
1. Empty the condensation containe r
a
page 4.
2. Select any programme using the programme s elector.
3. Press the Start/Stop button
a
condensation is pumped i nto the container.
4. Wait 5 minutes and then em pty the condensation container again.
5. Turn the programme selector to Off.
Transport
 Preparation of dryer
a
see Frost protection.
 Transport the dryer in a vertical upright position.
 Following transportation, leave th e dryer to stand for two hours.
There may be residual water in the dryer.
This can leak out if the dryer is at an ang le.
1.
Remove all accessories
from the drum.
The drum must be empty.
Make sure that the air inlet
remains unobstructed
Clean and level
Do not install the dryer behi nd a door or sliding
door, which could prevent or restrict opening of the
dryer door. This will prevent c hildren from locking
themselves in and putting their live s in danger.
2.
Do not operate the dryer if
there is a danger of frost.
9
Only when the appliance is
switched off.
Care and cleaning
Heat exchanger
The heat exchanger of the dryer i s cleaned automatically when drying is in progress , Cln
appears in the display panel. Do n ot pull the condensation container out during the cle aning
process.
Dryer housing, co ntrol panel, air intake
Wipe with a soft, damp cloth.
Do not use harsh cleaning age nts or solvents.
Remove detergent and cleaning agent resid ue immediately.
Some water may collect between the window and the seal dur ing drying. This does not affect
the proper operation of your dryer in a ny way.
Filter in the condensati on tank
The filter is cleaned automatically when the conde nsation container is emptied.
However, the filter should still be cleaned regul arly under running water. This prevents stubborn
deposits/dirt from building u p.
Cleaning is only required if t he symbol āflashes again in the disp lay panel after the
condensation container has been emptied.
1. Pull out the condensation container.
2. Pull the filter out of its snap- in lock.
3. Clean the filter under runni ng water or in the dishwasher.
4. Refit the filter.
5. Insert the condensation tank so that it lo cks into place.
Only operate the dryer with the filter inserted.
Moisture sensor
The dryer is equipped with stainl ess-steel moisture sensors. These me asure how damp the
laundry is. After long pe riods of use, a fine layer of limesc ale can form on the moistu re
sensors.
1. Open the door.
2. Clean the moisture sensors us ing a damp sponge with a rough surface.
Do not use steel wool or other ab rasive materials.
10
Technical data
ʠDimensions (DxWxH) 60 x 60 x 85 cm (adjustable height)
Weight approximately 53 kg
Max. capacity 7 kg
Condensation container 4.0 l
Connection voltage 220-240 V
Connected load max. 1000 W
Fuse protection 10 A
Ambient temperature 5 - 35 ° C
Product number
Production number Inside of door
The rating plate can be found on th e back of the dryer.
ʠConsumption rates These are guide values determined under standard conditions.
Spin speed in rpm
(residual moisture)
Drying time
in min.**
Energy consumption
in kWh**
Cottons/Coloureds 7 kg
Cupboard Dry* 1400 (approx. 50 %) 112 1.35
1000 (approx. 60 %) 131 1.60
800 (ap prox. 70 %) 150 1.8 6
Iron Dry* 1400 (approx. 50 %) 80 0.96
1000 (approx. 60 %) 99 1.22
800 (ap prox. 70 %) 118 1.4 7
Easy-care 3.5 kg
Cupboard Dry* 800 (ap prox. 40 %) 51 0.56
600 (ap prox. 50 %) 63 0.70
*Test programme to DIN EN 61121
**The values may differ from those given, depending on overvoltage and undervoltag e, thetyp e of fabric, composition
of the laundry to be dried, the residua l moisture in the fabric and the size of the loa d.
ʠDrum interior light ( bulb E14, 25 W)
The drum is illuminated after the doo r is opened or closed, and after the programme has started. The light goes out
automatically. To change the bulb
a
page 12.
Optional accessories (order from the after-sales service using the order number )
Platform
For better loading and unloading. The basket contained in the drawer can be used to carry
the laundry.
Washer-dryer stack connec tion set
The dryer can be stacked on top of a suitable washing machine of the same depth and width,
to save space. The dryer must be s ecured to the washing machine with this connection set.
Same as WZ 20310, but with pull-out wor ktop.
Installation undernea th the worktop
Instead of the appliance covering plate, you must have a metal cover fitted by a special ist.
WZ
20460
WZ
20310
WZ
20300
WZ
20290
11
Normal noises
During drying, the compressor and the pump generate some noise which is entirely normal.
The compressor in the dryer may
occasionally generate a droning noise.
The compressor in the dr yer is ventilated
from time to time, which cr eates a whirring
sound.
The automatic cleaning proc ess causes a
clicking noise.
The process of pumping the condensati on
into the condensation co ntainer generates
pumping noises.
12
What to do if ...
If you cannot r ectify a fault yourself, please co ntact our after-sales service. We w ill always find
an appropriate so lution and will avoid unnecess ary visits by engineers. Trust t he expertise of
the manufacturer and rest assur ed that the repair will be carried out by trained service
technicians using or iginal spare parts. The contact details of your l ocal after-sales service can
be found in the enclosed after-sa les service directory, or by calling one of these nu mbers:
GB 0844 8928999 (Calls from a BT landline will be charged at up to 3 pence per minute.
A call set-up fee of up to 6 pence ma y apply.)
IE 01450 2655
When contacting the aft er-sales service, please quote the appl iance's product number (E no.)
and production num ber (FD) (see the inside of the d oor).
Set the programme se lector to Off and remove t he appliance plug from the so cket.
ʠThe Start/Stop indicator lamp
does not light up.
Mains plug plugged in?
Programme selected?
ʠThe āsymbol and Start/Stop
indicator lamp flash.
Empty container for condensa tion
a
see page 4.
Clean the condensation container filter if necessa ry
a
Page 6.
Each time the dryer is t ransported, you must wait two hours
before operating it.
ʠThe 4symbol and Star t/Stop
indicator lamp flash.
Rinse the fluff filter under run ning water
a
Page 4.
ʠDryer does not start. Start/Stop button sele cted?
Door closed?
Programme set?
Ambient temperature greater tha n 5 °C?
ʠWater is leaking out. Make sure the dryer is level.
ʠThe door opens by itself. Push the door closed u ntil you hear it click into place.
ʠDrying result was not achieved
(laundry too damp).
Hot laundry feels damper than it actually is.
The selected programme does no t suit the load. Use
another drying programme or, i n addition, select the time
programme apage7.
Use fine adjustment for the drying result apage1/2 .
Fine layer of limescale on the humidity se nsors aClean
the humidity sensors apage 9.
Programme cancellation, e.g . tank full, mains power supply
failure, door open or maximum dryin g time reached.
ʠDrying time too long. Clean the fluff filter under running water apage 4.
Insufficient supply of air aensure that air can c irculate.
Air inlet possibly blocked aClear inlet apage 8.
Ambient temperature highe r than 35 °C aVentilate the
room.
ʠThe humidity in the room
increases significantly.
Make sure the room is suffic iently ventilated.
ʠCln appears in the display panel. Not an error! Automatic cle aning of the heat exchang er.
Do not empty the condensation c ontainer.
ʠPower cut. R emove the laundry from the dryer immediately and sprea d
it out. Heat may escape.
ʠThe interior light is n ot working. U nplug the appliance plug, fold back the cover c ap on the
inside above the doo r (using a Torx 20 screwdriver) and
replace the bulb. Close the cover cap.
Never operate the dryer without a cover cap.
ʠOther intermittent noises and
vibrations.
Not an error!
Normal noises
a
Page 11.
ʠLoud humming noise for sev eral
seconds.
Has the condensation container been prope rly reinserted?
a
Push the condensation tank all the way in.
Not an error! No rmal noises
a
Page 11.
13
Safety instructions
Emergency
 Pull the appliance plug out of the socket immediately or disconnec t the fuse.
ONLY use the
dryer...
 In rooms inside the house.
 To dry fabrics.
The dryer must
NEVER...
 Be used for purpos es other than those described above.
 Be modified in term s of its technology or properties.
Hazards
 The dryer must not be used by children or p ersons who have not been
instructed in its use.
 Do not leave children unsupervised near the dryer.
 Keep pets away fro m the dryer.
 Remove all objects from the pockets of garm ents.
Pay particular attention to cigarette lighters
a
Risk of explosion
 Do not l ean or sit on the door
a
Risk of tipping.
Installation
 Secure loose cables
a
Tripping hazard.
 Do not operate the dryer wh ere there is a risk of frost.
Mains
connection
 Connect the dryer according to specifications to an AC e arthed socket,
otherwise it cannot be guaranteed that the appl iance is completely safe.
 The cable cross-section must be sufficient.
 Only use earth-leakage circuit breakers with the following symbol:
 The appliance plug and so cket must be compatible.
 Do not us e multiple plugs/connectors and/o r extension cables.
 Do not to uch or hold the appliance plug with wet han ds
a
Risk of electric shock.
 Never pull the appliance plu g out of the socket by its cable.
 Do not da mage the mains lead
a
Risk of electric shock.
Operation
 Only laundry must be loaded into the d rum.
Before switching on the drye r - check the contents.
 Do not use the dryer if the laundry has been in contact with solvents, oil, wax,
grease or paint (e.g. hair setting spray , nail polish remover, stain remover,
cleaning solvent, etc.)
a
Fire/explosion hazard.
 Hazard caused by d ust (e.g. coal dust, flour): do not use the dryer
a
Risk of explosion!
 Do not put l aundry containing foamed material/rubber in the dryer
a
elastic
material may be destroyed and the d ryer may be damaged due to possible
deformation of the foamed material.
 Switch off the dryer once the programme has ended.
 The water from condensation is not drinki ng water and may be contaminated
with fluff.
Defect
 Do not use the dryer if it is defective or if you suspect that it is.
Repairs must only be carried out b y the after-sales service.
 Do not use a dryer with a faulty mains lead. To p revent risks, a faulty mains
lead must only be replaced by the after- sales service.
 Before changing the bulb of the interior light make absolutely sure you have
pulled the appliance plug from the s ocket
a
Risk of electric shock!
Spare parts
 Only use genuine spare parts an d accessories for safety reasons.
Disposal
 Dryer: unplug th e appliance plug, then cut the mains lead from the appliance.
Dispose of the dryer at an approved pu blic disposal facility.
 The heat exchan gerc ontains fluorinated greenhouse gas R-407C covered by
the Kyoto Protocol adispose of in a proper man ner. Capacity: 0.43 kg.
 Packaging: keep all pac kaging out of reach of ba bies and children.
a
Danger of suffocation!
 All materials are e nvironmentally safe and recyclable. Dispo se of in an
environmentally-responsible manner.
Operating
and installation instructions
en
Observe the safety
instructions on
page 13.
Read these instructions before s witching
on the dryer.
Tumble dryer
1 2
Contents Page
ʋPreparation . . . . . . . . . . . . . . . . . . . . . . 2
ʋSetting the programmes . . . . . . . . . . . . . 2
ʋDrying . . . . . . . . . . . . . . . . . . . . . . . . 3/4
ʋNotes on laundry . . . . . . . . . . . . . . . . . . 5
ʋImportant Information . . . . . . . . . . . . . . . 6
ʋOverview of programmes . . . . . . . . . . . . 7
ʋInstallation . . . . . . . . . . . . . . . . . . . . . . . 8
ʋFrost protection / Transport . . . . . . . . . . . 8
ʋCleaning and care . . . . . . . . . . . . . . . . . . 9
ʋTechnical data . . . . . . . . . . . . . . . . . . . 10
ʋOptional accessories . . . . . . . . . . . . . . . 10
ʋNormal noises . . . . . . . . . . . . . . . . . . . . 11
ʋWhat to do if... / After-sales service . . . . 12
ʋSafety instructions . . . . . . . . . . . . . . . . 13
... and adapt to individu
Never operate the dryer if it is damaged.
Inform your after-sales service. Inspe
Sorting and load
Remove all objects from pockets.
Pay particular attention to cigarette lighters.
The drum must be empty before filling.
See programme overview on page 7.
See also separate instructions for basket for wo
(depending on the model)
Your new dryer Intended use Preparing for installation, see Page 8
Selecting and adjusting the
Select the dry
Press the
Only if your hands are dry.
Only hold the plug by the plug
casing.
Conne
m
All buttons are sensit
be touched lightly.
ʋonly for domestic use.
ʋonly to be used for drying fabrics that have been
washed with water.
.
Do not leave children unsupervised near the dryer.
Keep pets away from the dryer.
Only use the dryer w
inserted!
Congratulations! - You have chosen a modern, high-quality domestic
appliance from Siemens.
The condensation dryer with heat exchanger and automatic cleaning
function is outstanding in terms of efficient energy consumption and
low maintenance requirements. aPage 6.
Every dryer which leaves our factory is carefully checked to ensure
that it functions correctly and is in perfect condition.
Should you have any questions, our after-sales service will be pleased
to help.
Environmentally responsible disposal
Dispose of packaging in an environmentally-responsible manner.
This appliance is designated according to European directive
2002/96/EC which governs waste electrical and electronic
equipment (WEEE).
The directive provides an EU-wide framework for the return and
recycling of used appliances.
For further information about our products, accessories, spare parts
and services, please visit: www.siemens-home.com
ʑaʑaʑ
Additional functions
Programme selector Display panel
Display for max. load capacity
for selected programme
\
('caüA)caaaaaaaaa.a
ˎ°CüALow Heat Reduced temperature for delicate fabrics 'time; e.g. acrylic, polyamide, elastane or a
ˎLess Ironing Reduces creasing and prolongs the anti-cre
programme has finished; can be selected
Status indicators
Icc+cc\Programme sequence displays:
drying, iron dry, cupboard dry, slackening/
Service indicators
4Fluff filter
.Container
Rinse the fluff filter under running water a
Empty the condensation container.
If necessary, clean the filter in the condens aFor selecting the settings. ˎMenu
To change all settings in the display panel. ˎChange
1 -24 hrs End of the programme after ... (depending on the programme selected, e.g. 1:54h a2h,
you can always select up to the next full hour).
Electronic start
timer 0, 1, 2, 3, 4 Signal volume selectable in four stages: 0 (off), 1 (quiet), 2 (normal), 3 (loud), 4 (very loud). Signal 3On-Off Provides protection against unintentional changes to the functions set
(press and hold the Menu button for 5 seconds).
Appliance lock #0, 1, 2, 3 The drying result (e.g. cupboard dry) can be increased in three stages (1 - 3) for the programmes
Cottons/Coloureds,Easy-Care,Mixed Fabrics and Rapid 40 apresetting = 0.
After one of these programmes has been finely adjusted, the setting is retained for the others.
Fine adjustment
Drying result 9600-1800 ²The spin speed that was used in the washing machine,
for more precise indication of the projected drying duration only.
Spin speed 
c@c c
ø@ è**è*è*è*è*è*è*è*@***è*è*è**è*è*@è*è*è**è*è*@è*è*è**cø@c *è*è*è*è*è*è**@*è*è*****@è*è*è*
3 4
ʋʋʋʋʋʋʋʋʋʋʋʋʋʋindividual requirements
Inspecting the
dryer
and loading laundry
for woollens
ing the programme
the drying programme ...
ess the Start/Stop button
Connecting the
mains plug
sensitive and only need to
tly.
ʋʋ
3
2
1
Drying
Drying
Condensation container with filter
Control panel
Air inlet
Two-part
fluff filter
Drum
ryer with the fluff filter
aDo not pull out/empty
the condensation container when drying is in progress
Drum interior
light ʑaʑaʑ
The programme has ended when
\
lights up in the display panel.
Interrupt programme removing or adding laundry.
The drying cycle can be interrupted for a brief period so that laundry may be added or removed.
The selected programme must then be continued until it is finished.
Never switch the dryer off before the drying process has ended.
1. Open the door. The drying cycle is interrupted.
2. Remove or add laundry and close the door.
3. If required, select a new programme and additional functions.
4. Press the Start/Stop button. The remaining time is updated after a few minutes ('caüA)caaaaaaaaaEmptying condensation
Empty the container after each drying cycle, not during drying!
1. Remove the condensation container and hold it level.
2. Pour out the condensation.
3. Always push the container fully back in until it locks in place.
If the .Container indicator lamp is flashing apage 9.
Cleaning the fluff filter
The fluff filter consists of two parts.
Clean the inner fluff filter after every drying cycle:
1. Open the door. Remove any fluff from the door/around the door.
2. Pull out the inner fluff filter and fold it open.
3. Remove any fluff (rub your hand over the fluff filter).
If the fluff filter is very dirty or clogged, rinse it under running
water and dry thoroughly.
Clean the outer fluff filter after every 5th drying cycle:
4. Remove the outer fluff filter.
5. Open it and remove any fluff.
Rinse under running water and dry thoroughly.
6. Fold the fluff filters closed, put them back together and reinsert into
the appliance.
Switching off the dryer
Turn the programme selector to Off.
Do not leave laundry in the dryer.
Removing the laundry
Your dryer has an automatic Knitterschutz (Anti-Crease) function. The drum is moved at set intervals for
30 minutes after the programme has ended. Laundry remains loose and fluffy (for 60 minutes, if additional
Less Ironing function is selected).
ˎüArics ', for a longer drying
or acetate silk.
ˎnti-creasing phase after the
cted in one of two levels.
Icc+cc\ning/ready.
4.ter aPage 4.
densation tank aPage 9.
ˎˎa3#a9²
c@c c
ø@ è**è*è*è*è*è*è*è*@***è*è*è**è*è*@è*è*è**è*è*@è*è*è**cø@c *è*è*è*è*è*è**@*è*è*****@è*è*è*
56
ʋʋʋʋʋʋʋʋʋʋʋʋʋʋʋʋaImportant Information
Your dryer is designed to be particularly energy-saving and its technical features include a
refrigeration circuit that uses energy efficiently, in a similar way to a refrigerator.
The dryer's heat exchanger is cleaned automatically during drying.
The fluff filters and filter in the condensation tank must be cleaned regularly.
Never operate the dryer without the fluff filter and condensation tank!
ʑFluff filter
During drying, fluff and hairs from the laundry are trapped in the fluff filter. A blocked fluff filter
may impair the heat exchange process.
The fluff filter should therefore be cleaned after every drying cycle.
Rinse the filter regularly under running water aPage 4.
ʑFilter in the condensation tank
The filter in the condensation tank cleans the condensation. This condensation is required
for the automatic cleaning process. The filter must be cleaned regularly under running water.
Empty the condensation tank before cleaning the filter aPage 9.
ʑFabrics
Do not dry any fabrics that have come into contact with solvents, oil, wax, grease or paint:
e.g. hair styling products, nail varnish remover, stain remover, cleaning solvent. etc.
Empty all pockets.
Do not dry airtight fabrics.
Avoid drying fabrics that produce a lot of fluff.
Woollens should be refreshed only using the woollens programme.
\
Information on laundry ...
Labelling of fabrics
Follow the manufacturer's care information.
(Drying at normal temperature.
'cDrying at low temperature aalso select °CüALow Heat.
)cDo not machine dry.
Always observe the safety instructions on page 13!
Do not tumble-dry the following fabrics for example:
 Airtight fabrics (e.g. rubber-coated fabrics).
 Delicate materials (silk, curtains made from synthetic material) athey may crease.
 Oil-stained laundry.
Drying tips
 To ensure a consistent result, sort the laundry by fabric type and drying programme.
 Always dry very small fabrics (e.g. baby socks) together with
large items of laundry (e.g. hand towels).
 Close zips, hooks and eyes, and do up any buttons.
Tie belts, apron strings etc. together.
 Do not overdry easy-care laundry arisk of creasing
Allow laundry to finish drying in the air.
 Do not dry woollens in the dryer. They may, however, be refreshed apage 7 Woollens
Finish programme (depending on the model).
 Do not iron laundry immediately after drying, fold items up and leave for a while athe
remaining moisture will then be distributed evenly.
 Knitted fabrics (e.g. T-shirts, jerseys) often shrink slightly the first time they are tumble-dried.
aDo not select the Extra Dry programme.
 Starched laundry is not always suitable for dryers astarch leaves behind a coating that
adversely affects the drying operation.
 When washing laundry that is to be tumble-dried afterwards, use the correct amount of
fabric softener according to the manufacturer's instructions.
 Use the Zeitprogramm (Timed programme) for small loads athis improves the drying
result.
Environmental protection/energy-saving tips
 Before drying, spin the laundry thoroughly in the washing machine athe higher the spin
speed, the shorter the drying time will be, thus consuming less energy. Also spin easy-care
laundry.
 Use the maximum recommended capacity, but do not exceed it
aProgramme overview, Page 7.
 Ensure the room is well ventilated during drying.
 Do not cover or seal the air inlet.
.a
ˎüA'ˎIcc+cc\4.aaˎˎa3#a9²
c@c c
ø@ è**è*è*è*è*è*è*è*@***è*è*è**è*è*@è*è*è**è*è*@è*è*è**cø@c *è*è*è*è*è*è**@*è*è*****@è*è*è*
ʋʋʋʋʋʋʋʋʋʋʋʋʋʋʋʋaʑaʑaʑ
\
('caüA)caaaaaaaaa.a
ˎüA'ˎIcc+cc\4.aaˎˎa3#a9²
7
Programme overview see also page 5
After drying: laundry is to be ...
T-shirt
Shirts
Trousers
Skirts/dresses
Sportswear
Work clothing
Anoraks
Towelling
dressing gowns
Underwear
Socks
Bed linen
Table linen
Terry towels
Tea towels/
towels
c
ironed

lightly ironed dry
@c
not ironed
c
passed through a mangle
Cottons/Coloureds max. 7 kg For whites and coloureds/cotton or linen.
Iron Dry ø@ è**è*è*è*è*è*è*è*
Cupboard Dry @***è*è*è**è*è*
Cupboard Dry Plus @è*è*è**è*è*
Extra Dry @è*è*è**
Easy-Care max. 3.5 kg For non-iron laundry made of synthetic fibres and blended fabric, cotton.
Iron Dry cø@c *è*è*è*è*è*è**
Cupboard Dry @*è*è*****
Extra Dry @è*è*è*
MIxed Fabrics max. 3 kg For mixed items of laundry made of cotton and easy-care fabrics.
Cupboard Dry/Iron Dry
Shirts/Blouses max. 3 kg For cotton or linen fabrics that are still damp and easy-care fabrics. Creasing in fabrics is reduced. Fabrics are not dried
completely. Hang up fabrics!
Outdoor max. 1.5 kg For fabrics with membrane coating, water-repellent fabrics, functional clothing, fleece fabrics (dry jackets/trousers with
removable internal lining separately).
Woollens Finish max. 3 kg For woollen fabrics suitable for machine-washing. Fabrics become fluffier but not dry.
Remove fabrics once the programme has ended and allow to dry.
Rapid 40 max. 2 kg
For laundry made of synthetic fibres, cotton or blended fabrics (for example) that needs to be dried quickly. The values may
differ from the those specified depending on the type of fabric, mixture of laundry to be dried, residual moisture in the fabric
and loading capacity.
Programme time warm max. 3 kg For pre-dried, multi-layered, sensitive fabrics made of acrylic fibres, or separate small items of laundry.Also for subsequent
drying.
Programme time cold max. 3 kg For all types of fabrics. For freshening up or airing of items of laundry that have been worn for a short period of time.
0111 / 9000615800
*615800* Siemens Electrogeräte GmbH
Carl-Wery-Str. 34
81739 München/Germany
WT46W567GB
8
Installation
 Scope of delivery: dryer, installation and instruction manual, basket for woollens
(depending on the model).
 Check dryer for transport damage.
 The dryer is very heavy. Do not lift without assistance.
 Be careful to avoid sharp edges.
 Do not install in a room which is susceptible to frost. Water may cause damage once it
starts to freeze.
 If in doubt, have the appliance connected by a specialist.
 Do not lift the dryer by any of the protruding parts (e.g. the door) as they may break off.
Setting up the dryer
 The appliance plug must always be accessible.
 Ensure that the appliance is installed on a clean,
level and firm surface.
 Do not obstruct the air inlet on the front of the
dryer.
 Keep the area around the dryer clean.
 Level the dryer using the threaded feet.
Use a spirit level.
 Do not remove the threaded feet under any
circumstances.
Mains connection see safety information
a
Page 13.
 Connect to an AC earthed socket. If in doubt, have the socket checked by a specialist.
 The mains voltage and the voltage shown on the rating plate (
a
Page 10) must be the
same.
 The connected load and necessary fuse protection are specified on the rating plate.
Frost protection
Preparation
1. Empty the condensation container
a
page 4.
2. Select any programme using the programme selector.
3. Press the Start/Stop button
a
condensation is pumped into the container.
4. Wait 5 minutes and then empty the condensation container again.
5. Turn the programme selector to Off.
Transport
 Preparation of dryer
a
see Frost protection.
 Transport the dryer in a vertical upright position.
 Following transportation, leave the dryer to stand for two hours.
There may be residual water in the dryer.
This can leak out if the dryer is at an angle.
1.
Remove all accessories
from the drum.
The drum must be empty.
Make sure that the air inlet
remains unobstructed
Clean and level
Do not install the dryer behind a door or sliding
door, which could prevent or restrict opening of the
dryer door. This will prevent children from locking
themselves in and putting their lives in danger.
2.
Do not operate the dryer if
there is a danger of frost.
9
Only when the appliance is
switched off.
Care and cleaning
Heat exchanger
The heat exchanger of the dryer is cleaned automatically when drying is in progress, Cln
appears in the display panel. Do not pull the condensation container out during the cleaning
process.
Dryer housing, control panel, air intake
Wipe with a soft, damp cloth.
Do not use harsh cleaning agents or solvents.
Remove detergent and cleaning agent residue immediately.
Some water may collect between the window and the seal during drying. This does not affect
the proper operation of your dryer in any way.
Filter in the condensation tank
The filter is cleaned automatically when the condensation container is emptied.
However, the filter should still be cleaned regularly under running water. This prevents stubborn
deposits/dirt from building up.
Cleaning is only required if the symbol āflashes again in the display panel after the
condensation container has been emptied.
1. Pull out the condensation container.
2. Pull the filter out of its snap-in lock.
3. Clean the filter under running water or in the dishwasher.
4. Refit the filter.
5. Insert the condensation tank so that it locks into place.
Only operate the dryer with the filter inserted.
Moisture sensor
The dryer is equipped with stainless-steel moisture sensors. These measure how damp the
laundry is. After long periods of use, a fine layer of limescale can form on the moisture
sensors.
1. Open the door.
2. Clean the moisture sensors using a damp sponge with a rough surface.
Do not use steel wool or other abrasive materials.
ʠʠʠ
a
ʠʠā
aa
ʠ4
a
ʠʠʠʠaaaaʠaaaaaʠʠʠʠʠ
a
ʠ
aaaaaaaaaaa
a
a
aaaaa
ā
10
Technical data
ʠDimensions (DxWxH) 60 x 60 x 85 cm (adjustable height)
Weight approximately 53 kg
Max. capacity 7 kg
Condensation container 4.0 l
Connection voltage 220-240 V
Connected load max. 1000 W
Fuse protection 10 A
Ambient temperature 5 - 35 °C
Product number
Production number Inside of door
The rating plate can be found on the back of the dryer.
ʠConsumption rates These are guide values determined under standard conditions.
Spin speed in rpm
(residual moisture)
Drying time
in min.**
Energy consumption
in kWh**
Cottons/Coloureds 7 kg
Cupboard Dry* 1400 (approx. 50 %) 112 1.35
1000 (approx. 60 %) 131 1.60
800 (approx. 70 %) 150 1.86
Iron Dry* 1400 (approx. 50 %) 80 0.96
1000 (approx. 60 %) 99 1.22
800 (approx. 70 %) 118 1.47
Easy-care 3.5 kg
Cupboard Dry* 800 (approx. 40 %) 51 0.56
600 (approx. 50 %) 63 0.70
*Test programme to DIN EN 61121
**The values may differ from those given, depending on overvoltage and undervoltage, the type of fabric, composition
of the laundry to be dried, the residual moisture in the fabric and the size of the load.
ʠDrum interior light (bulb E14, 25 W)
The drum is illuminated after the door is opened or closed, and after the programme has started. The light goes out
automatically. To change the bulb
a
page 12.
Optional accessories (order from the after-sales service using the order number)
Platform
For better loading and unloading. The basket contained in the drawer can be used to carry
the laundry.
Washer-dryer stack connection set
The dryer can be stacked on top of a suitable washing machine of the same depth and width,
to save space. The dryer must be secured to the washing machine with this connection set.
Same as WZ 20310, but with pull-out worktop.
Installation underneath the worktop
Instead of the appliance covering plate, you must have a metal cover fitted by a specialist.
WZ
20460
WZ
20310
WZ
20300
WZ
20290
11
Normal noises
During drying, the compressor and the pump generate some noise which is entirely normal.
The compressor in the dryer may
occasionally generate a droning noise.
The compressor in the dryer is ventilated
from time to time, which creates a whirring
sound.
The automatic cleaning process causes a
clicking noise.
The process of pumping the condensation
into the condensation container generates
pumping noises.
ʠʠā
aa
ʠ4
a
ʠʠʠʠaaaaʠaaaaaʠʠʠʠʠ
a
ʠ
aa
aaaaaaaaa
a
a
aaaaa
āʠʠʠ
a
12
What to do if ...
If you cannot rectify a fault yourself, please contact our after-sales service. We will always find
an appropriate solution and will avoid unnecessary visits by engineers. Trust the expertise of
the manufacturer and rest assured that the repair will be carried out by trained service
technicians using original spare parts. The contact details of your local after-sales service can
be found in the enclosed after-sales service directory, or by calling one of these numbers:
GB 0844 8928999 (Calls from a BT landline will be charged at up to 3 pence per minute.
A call set-up fee of up to 6 pence may apply.)
IE 01450 2655
When contacting the after-sales service, please quote the appliance's product number (E no.)
and production number (FD) (see the inside of the door).
Set the programme selector to Off and remove the appliance plug from the socket.
ʠThe Start/Stop indicator lamp
does not light up.
Mains plug plugged in?
Programme selected?
ʠThe āsymbol and Start/Stop
indicator lamp flash.
Empty container for condensation
a
see page 4.
Clean the condensation container filter if necessary
a
Page 6.
Each time the dryer is transported, you must wait two hours
before operating it.
ʠThe 4symbol and Start/Stop
indicator lamp flash.
Rinse the fluff filter under running water
a
Page 4.
ʠDryer does not start. Start/Stop button selected?
Door closed?
Programme set?
Ambient temperature greater than 5 °C?
ʠWater is leaking out. Make sure the dryer is level.
ʠThe door opens by itself. Push the door closed until you hear it click into place.
ʠDrying result was not achieved
(laundry too damp).
Hot laundry feels damper than it actually is.
The selected programme does not suit the load. Use
another drying programme or, in addition, select the time
programme apage7.
Use fine adjustment for the drying result apage1/2.
Fine layer of limescale on the humidity sensors aClean
the humidity sensors apage 9.
Programme cancellation, e.g. tank full, mains power supply
failure, door open or maximum drying time reached.
ʠDrying time too long. Clean the fluff filter under running water apage 4.
Insufficient supply of air aensure that air can circulate.
Air inlet possibly blocked aClear inlet apage 8.
Ambient temperature higher than 35 °C aVentilate the
room.
ʠThe humidity in the room
increases significantly.
Make sure the room is sufficiently ventilated.
ʠCln appears in the display panel. Not an error! Automatic cleaning of the heat exchanger.
Do not empty the condensation container.
ʠPower cut. Remove the laundry from the dryer immediately and spread
it out. Heat may escape.
ʠThe interior light is not working. Unplug the appliance plug, fold back the cover cap on the
inside above the door (using a Torx 20 screwdriver) and
replace the bulb. Close the cover cap.
Never operate the dryer without a cover cap.
ʠOther intermittent noises and
vibrations.
Not an error!
Normal noises
a
Page 11.
ʠLoud humming noise for several
seconds.
Has the condensation container been properly reinserted?
a
Push the condensation tank all the way in.
Not an error! Normal noises
a
Page 11.
13
Safety instructions
Emergency
 Pull the appliance plug out of the socket immediately or disconnect the fuse.
ONLY use the
dryer...
 In rooms inside the house.
 To dry fabrics.
The dryer must
NEVER...
 Be used for purposes other than those described above.
 Be modified in terms of its technology or properties.
Hazards
 The dryer must not be used by children or persons who have not been
instructed in its use.
 Do not leave children unsupervised near the dryer.
 Keep pets away from the dryer.
 Remove all objects from the pockets of garments.
Pay particular attention to cigarette lighters
a
Risk of explosion
 Do not lean or sit on the door
a
Risk of tipping.
Installation
 Secure loose cables
a
Tripping hazard.
 Do not operate the dryer where there is a risk of frost.
Mains
connection
 Connect the dryer according to specifications to an AC earthed socket,
otherwise it cannot be guaranteed that the appliance is completely safe.
 The cable cross-section must be sufficient.
 Only use earth-leakage circuit breakers with the following symbol:
 The appliance plug and socket must be compatible.
 Do not use multiple plugs/connectors and/or extension cables.
 Do not touch or hold the appliance plug with wet hands
a
Risk of electric shock.
 Never pull the appliance plug out of the socket by its cable.
 Do not damage the mains lead
a
Risk of electric shock.
Operation
 Only laundry must be loaded into the drum.
Before switching on the dryer - check the contents.
 Do not use the dryer if the laundry has been in contact with solvents, oil, wax,
grease or paint (e.g. hair setting spray, nail polish remover, stain remover,
cleaning solvent, etc.)
a
Fire/explosion hazard.
 Hazard caused by dust (e.g. coal dust, flour): do not use the dryer
a
Risk of explosion!
 Do not put laundry containing foamed material/rubber in the dryer
a
elastic
material may be destroyed and the dryer may be damaged due to possible
deformation of the foamed material.
 Switch off the dryer once the programme has ended.
 The water from condensation is not drinking water and may be contaminated
with fluff.
Defect
 Do not use the dryer if it is defective or if you suspect that it is.
Repairs must only be carried out by the after-sales service.
 Do not use a dryer with a faulty mains lead. To prevent risks, a faulty mains
lead must only be replaced by the after-sales service.
 Before changing the bulb of the interior light make absolutely sure you have
pulled the appliance plug from the socket
a
Risk of electric shock!
Spare parts
 Only use genuine spare parts and accessories for safety reasons.
Disposal
 Dryer: unplug the appliance plug, then cut the mains lead from the appliance.
Dispose of the dryer at an approved public disposal facility.
 The heat exchanger contains fluorinated greenhouse gas R-407C covered by
the Kyoto Protocol adispose of in a proper manner. Capacity: 0.43 kg.
 Packaging: keep all packaging out of reach of babies and children.
a
Danger of suffocation!
 All materials are environmentally safe and recyclable. Dispose of in an
environmentally-responsible manner.
aaaaa
āʠʠʠ
a
ʠʠā
aa
ʠ4
a
ʠʠʠʠaaaaʠaaaaaʠʠʠʠʠ
a
ʠ
aaaaaaaaaaa
a
a
Operating
and installation instructions
en
Observe the safety
instructions on
page 13.
Read these instructions before switching
on the dryer.
Tumble dryer

Other Siemens Dryer manuals

Siemens WT45N201GB User manual

Siemens

Siemens WT45N201GB User manual

Siemens WT47W569DN User manual

Siemens

Siemens WT47W569DN User manual

Siemens WT47W580AU User manual

Siemens

Siemens WT47W580AU User manual

Siemens WT7XH940GB User manual

Siemens

Siemens WT7XH940GB User manual

Siemens WT45M2C8DN User manual

Siemens

Siemens WT45M2C8DN User manual

Siemens WT46S597GB User manual

Siemens

Siemens WT46S597GB User manual

Siemens WTXL1100 User manual

Siemens

Siemens WTXL1100 User manual

Siemens WT7YH709ES User manual

Siemens

Siemens WT7YH709ES User manual

Siemens Dryer User manual

Siemens

Siemens Dryer User manual

Siemens WT45H2L7DN User manual

Siemens

Siemens WT45H2L7DN User manual

Siemens WQ56A6A00W User manual

Siemens

Siemens WQ56A6A00W User manual

Siemens WT47W461EU User manual

Siemens

Siemens WT47W461EU User manual

Siemens WTW875M8SN User manual

Siemens

Siemens WTW875M8SN User manual

Siemens WT47W448DN User manual

Siemens

Siemens WT47W448DN User manual

Siemens WT47XMH0EU User manual

Siemens

Siemens WT47XMH0EU User manual

Siemens WT46G401HK Owner's manual

Siemens

Siemens WT46G401HK Owner's manual

Siemens WT46G409GR User manual

Siemens

Siemens WT46G409GR User manual

Siemens WT45HVG2 User manual

Siemens

Siemens WT45HVG2 User manual

Siemens WQ45G200ES User manual

Siemens

Siemens WQ45G200ES User manual

Siemens WQ45G2D9GB User manual

Siemens

Siemens WQ45G2D9GB User manual

Siemens WQ33G2CCDN User manual

Siemens

Siemens WQ33G2CCDN User manual

Siemens WT45RTC8DN User manual

Siemens

Siemens WT45RTC8DN User manual

Siemens WT47W541BY User manual

Siemens

Siemens WT47W541BY User manual

Siemens WT47W5681W User manual

Siemens

Siemens WT47W5681W User manual

Popular Dryer manuals by other brands

Frigidaire GLEH1642DS0 operating instructions

Frigidaire

Frigidaire GLEH1642DS0 operating instructions

Haier HLP141E user manual

Haier

Haier HLP141E user manual

Haier HD70-79 user manual

Haier

Haier HD70-79 user manual

Whirlpool LDR3822HQ0 Use & care guide

Whirlpool

Whirlpool LDR3822HQ0 Use & care guide

Cissell L28FD30 Installation & operation

Cissell

Cissell L28FD30 Installation & operation

Kenmore Elite Oasis 110.6703 Series quick start guide

Kenmore

Kenmore Elite Oasis 110.6703 Series quick start guide

Kleenmaid KED597-4350 Use and care guide

Kleenmaid

Kleenmaid KED597-4350 Use and care guide

Whirlpool WGD5590VQ1 installation instructions

Whirlpool

Whirlpool WGD5590VQ1 installation instructions

Hotpoint TVAL 73 instruction manual

Hotpoint

Hotpoint TVAL 73 instruction manual

Samsung DV435ETGJRA/A1 technical information

Samsung

Samsung DV435ETGJRA/A1 technical information

Whirlpool HFCX80410 Health & Safety, Use & Care, Installation Guide and Online Warranty Registration Information

Whirlpool

Whirlpool HFCX80410 Health & Safety, Use & Care, Installation Guide and Online Warranty Registration Information

Samsung DV7 TA2 Series user manual

Samsung

Samsung DV7 TA2 Series user manual

Whirlpool LE681OXP Use & care guide

Whirlpool

Whirlpool LE681OXP Use & care guide

LG DLG1320W User's guide & installation instructions

LG

LG DLG1320W User's guide & installation instructions

Beko DCU 8230 BX user manual

Beko

Beko DCU 8230 BX user manual

GE GFD14 Owner's Manual & Installation Instructions

GE

GE GFD14 Owner's Manual & Installation Instructions

Electrolux EEFDG317TIW installation instructions

Electrolux

Electrolux EEFDG317TIW installation instructions

Hyco JETS10W Jetstream Slimline Product instruction manual

Hyco

Hyco JETS10W Jetstream Slimline Product instruction manual

manuals.online logo
manuals.online logoBrands
  • About & Mission
  • Contact us
  • Privacy Policy
  • Terms and Conditions

Copyright 2025 Manuals.Online. All Rights Reserved.