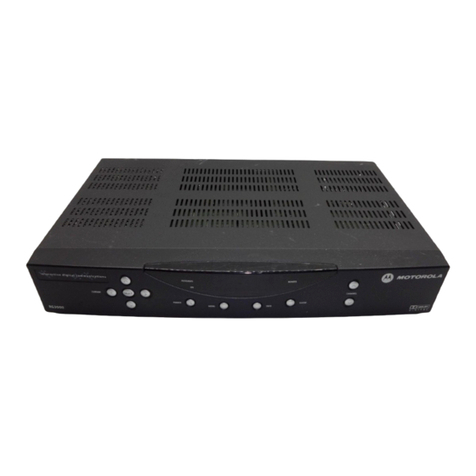
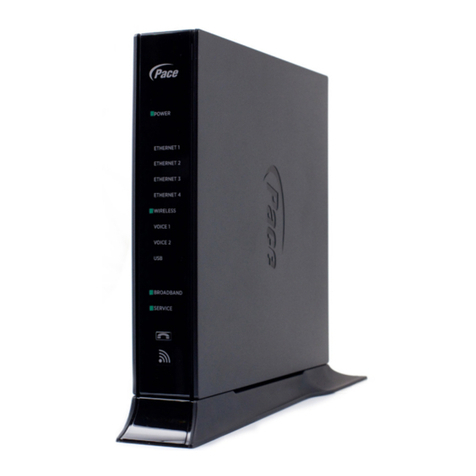
Silversphere HEGA User manual

Installation Manual— HEGA Ethernet Gateway
HEGA Installation Page 1
HEGA Ethernet Gateway —
Installation Guide
Table of Contents
Introduction 3
Prerequisites 3
Materials 4
Activation 4
Installation — HSCA & HEGA 5
Installation — RF Transmitters 9
Testing Auditrak Connectivity 10
Testing Workbench Connectivity 10
Restore Setting to factory default 11
Setting HEGA IP with HDAB 12
Troubleshooting 17

HEGA Installation Page 2

Installation Manual— HEGA Ethernet Gateway
HEGA Installation Page 3
INSTALLATION MANUAL
HEGA Ethernet Gateway
Introduction
The HEGA Ethernet Gateway is the
head-end device used to pass information
between the Companion One system and
Ethernet connected devices. It serves two
main purposes:
lWorkbench functionality over
Ethernet, which includes
programmingchangesandash-
over-busrmwareupdating.
l Real-time Auditrak data.
SPECIAL NOTE: When unplugging
the HEGA, you must wait until power
goes out entirely — roughly 2 minutes —
before plugging power back in.
Ifacongurationchangeismadeto
the HEGA network settings, or a time/
date change is made to the system, the
HEGA web server will not be available
for up to 3 minutes.
Prerequisites
To have a functional HEGA Ethernet
Gateway, certain prerequisites must be met:
lCustomer-provided Ethernet
network connection within 6 feet
of where the HEGA is to be
installed; the installer should
provide a (temporary) network
hub/switch in order to branch and
share the connection between the
HEGA and their computer.
lCustomer-provided Cat 5 cable
to be connected from the customer’s
Ethernet to the HEGA Ethernet port.
lThe HEGA will need an IP address,
subnet mask, and default gateway
provided by the customer. The
settings may be static or DHCP.
lThe HEGA requires outbound port
80 access on the public Internet.
lThe HEGA requires inbound and
outbound port 80 or port 56788
access on the public Internet for
remote Workbench programming
and support.
lA Companion One system

HEGA Installation Page 4
Materials
To take advantage of all the HEGA has
to offer, a HEGA installation requires the
following equipment:
lHEGA 3.10 or greater
lHSCA 3.11 or greater
lHPGA 3.8 or greater
lHDAA 3.7 or greater or HDAB 4.3
lHCKA 4.1 or greater
lHWNA 3.8 or greater (for
installation tests.)
lWAPA 5.3 or greater (for
installation tests.)
lA 1’ standard DB-9 Male-to-Female
serial cable, black with black
connectors (provided)
lA 7’ Cat 5 standard cable, black
with black connectors (provided)
lA 1’ Cat 5 standard cable, black
with black connectors (provided)
lCat 5 standard cable to connect
the installer’s laptop to the
customer’s network (not provided)
lCompanion One Workbench 2.1.29
or greater
Optional included equipment:
lA 7’ Cat 5 crossover cable, gray
with green connectors (provided)
Activation
Before connecting the HEGA, enable it as
a Companion One device by activating it
in Workbench doing the following:
1) Open your most current Workbench
leorreadfromtheHSCAonpre-
existing installations.
2) Check the Ethernet Gateway check
box under Installed Hardware.
3) IMPORTANT: HIPA (the dialup
Auditrak data product) and HEGA
cannot coexist on the same system.
Uncheck the HIPA box if it is checked.
4) Click Edit immediately to the right
of Ethernet Gateway.
5) The Ethernet Gateway settings
window has the following options:
lProperty ID Hash — This is
provided by Silversphere
technical support.
[Call (386) 523–1079]
lHEGA Uses DHCP — Check this
box for DHCP.
lStatic Info — Consult your
network administrator for
the IP Address, Netmask,
Gateway, Primary and
Secondary DNS settings.
6) Onceyouarenishedupdating
these settings, click Close.
7) SaveyourWB2leandthenwrite
to the system.
8) Whenledistributioncompletes,
youwillreceiveanofinemessage
for the HEGA on your desk console.
At this time, also unplug the HIPA
from the system if it exists.
For more information about Workbench,
see the Workbench guide.

Installation Manual— HEGA Ethernet Gateway
HEGA Installation Page 5
ETHERNET GATEWAY
HEGA
NORMAL
POWER
DATA
TROUBLE
FLASHING - DATA
STEADY - LOCAL
SERIAL
ETHERNET USB
Companion OneTM
Installation — HSCA & HEGA
Please make special note
of the following before
installing the HEGA!
Do not connect the HEGA to the HSCA until
after primary power to the system via the
MICT power supplies has been stabilized.
Do not connect the primary “DATA”
connection from the HSCA to the
“ETHERNET” connection on the HEGA.
This could damage your HEGA.
Do not plug and unplug the HEGA
repeatedly. If you must interrupt power
to the HEGA, wait until the green power
LED turns off. This will take as long as
2 minutes. After it has shut off, wait 3
minutes before plugging back in.
Do not install any RF transmitting
devices near the HEGA. See page 7.
1) Mount the HEGA in the
bottom-most position in
the rack.

HEGA Installation Page 6
SYSTEM BUS
HSCA
CONTROLLER
POWER SUPERVISION
NORMAL
POWER
POWER IN
24 VDC +
24 VDC -
24 VDC +
24 VDC -
1
2
3
4
FORM A CONTACTS
AUX 1
AUX 1
AUX 2
AUX 2
1
2
3
4
DATA
TROUBLE
FLASHING - DATA
STEADY - LOCAL
1 2 3 4
PROGRAM
ETHERNET GATEWAY
HEGA
NORMAL
POWER
DATA
TROUBLE
FLASHING - DATA
STEADY - LOCAL
SERIAL
ETHERNET USB
Companion OneTM
Companion OneTM
2) Mount the HSCA
immediately above
the HEGA.
SYSTEM BUS
HSCA
CONTROLLER
POWER SUPERVISION
NORMAL
POWER
POWER IN
24 VDC +
24 VDC -
24 VDC +
24 VDC -
1
2
3
4
FORM A CONTACTS
AUX 1
AUX 1
AUX 2
AUX 2
1
2
3
4
DATA
TROUBLE
FLASHING - DATA
STEADY - LOCAL
1 2 3 4
PROGRAM
ETHERNET GATEWAY
HEGA
NORMAL
POWER
DATA
TROUBLE
FLASHING - DATA
STEADY - LOCAL
SERIAL
ETHERNET USB
Co
mpanion OneTM
Co
mpanion OneTM
SYSTEM BUS
HSCA
CONTROLLER
POWER SUPERVISION
NORMAL
POWER
POWER IN
24 VDC +
24 VDC -
24 VDC +
24 VDC -
1
2
3
4
FORM A CONTACTS
AUX 1
AUX 1
AUX 2
AUX 2
1
2
3
4
DATA
TROUBLE
FLASHING - DATA
STEADY - LOCAL
1 2 3 4
PROGRAM
ETHERNET GATEWAY
HEGA
NORMAL
POWER
DATA
TROUBLE
FLASHING - DATA
STEADY - LOCAL
SERIAL
ETHERNET USB
Companion OneTM
Companion OneTM
3) Connect the
provided 1’
standard DB-9
Male-to-Female
serial cable to
the appropriate
ports on the HEGA
and the HSCA.
SYSTEM BUS
HSCA
CONTROLLER
POWER SUPERVISION
NORMAL
POWER
POWER IN
24 VDC +
24 VDC -
24 VDC +
24 VDC -
1
2
3
4
FORM A CONTACTS
AUX 1
AUX 1
AUX 2
AUX 2
1
2
3
4
DATA
TROUBLE
FLASHING - DATA
STEADY - LOCAL
T R O N
T E L TM
1 2 3 4
PROGRAM
ETHERNET GATEWAY
HEGA
NORMAL
POWER
DATA
TROUBLE
FLASHING - DATA
STEADY - LOCAL
T R O N
T E L TM
SERIAL
ETHERNET USB

Installation Manual— HEGA Ethernet Gateway
HEGA Installation Page 7
SYSTEM BUS
HSCA
CONTROLLER
POWER SUPERVISION
NORMAL
POWER
POWER IN
24 VDC +
24 VDC -
24 VDC +
24 VDC -
1
2
3
4
FORM A CONTACTS
AUX 1
AUX 1
AUX 2
AUX 2
1
2
3
4
DATA
TROUBLE
FLASHING - DATA
STEADY - LOCAL
1 2 3 4
PROGRAM
ETHERNET GATEWAY
HEGA
NORMAL
POWER
DATA
TROUBLE
FLASHING - DATA
STEADY - LOCAL
SERIAL
ETHERNET USB
Companion OneTM
Companion OneTM
SYSTEM BUS
HSCA
CONTROLLER
POWER SUPERVISION
NORMAL
POWER
POWER IN
24 VDC +
24 VDC -
24 VDC +
24 VDC -
1
2
3
4
FORM A CONTACTS
AUX 1
AUX 1
AUX 2
AUX 2
1
2
3
4
DATA
TROUBLE
FLASHING - DATA
STEADY - LOCAL
T R O N
T E L T M
1 2 3 4
PROGRAM
ETHERNET GATEWAY
HEGA
NORMAL
POWER
DATA
TROUBLE
FLASHING - DATA
STEADY - LOCAL
T R O N
T E L T M
SERIAL
ETHERNET USB
4) Connect the
ETHERNET
connection
to the customer’s
Ethernet network.

HEGA Installation Page 8
7) Waitforlestonishdistributing.
After distribution, your HEGA may
beofinefor180secondswhileit
reboots, after which, your HEGA
should be online.
Onceproperlyinstalled,andwithles
distributed to it by the Companion One
system, the HEGA will immediately begin
transmitting zone and system events to
Auditrak. In addition, the HEGA will
also be available via Workbench for
programmingorrmwareupdating.
SYSTEM BUS
HSCA
CONTROLLER
POWER SUPERVISION
NORMAL
POWER
POWER IN
24 VDC +
24 VDC -
24 VDC +
24 VDC -
1
2
3
4
FORM A CONTACTS
AUX 1
AUX 1
AUX 2
AUX 2
1
2
3
4
DATA
TROUBLE
FLASHING - DATA
STEADY - LOCAL
1 2 3 4
PROGRAM
ETHERNET GATEWAY
HEGA
NORMAL
POWER
DATA
TROUBLE
FLASHING - DATA
STEADY - LOCAL
SERIAL
ETHERNET USB
Companion OneTM
Companion OneTM
5) Connect one side of the
provided 1’ Cat 5 cable to
either of the two primary DATA
ports on the HEGA.
Do not connect any other devices
to the other available primary
data port on the HEGA. Leave
the port empty.
6) Connect the other side of that
cable to any available primary
DATA connection on the HSCA.
The HEGA must connect directly
to the HSCA.
SYSTEM BUS
HSCA
CONTROLLER
POWER SUPERVISION
NORMAL
POWER
POWER IN
24 VDC +
24 VDC -
24 VDC +
24 VDC -
1
2
3
4
FORM A CONTACTS
AUX 1
AUX 1
AUX 2
AUX 2
1
2
3
4
DATA
TROUBLE
FLASHING - DATA
STEADY - LOCAL
1 2 3 4
PROGRAM
ETHERNET GATEWAY
HEGA
NORMAL
POWER
DATA
TROUBLE
FLASHING - DATA
STEADY - LOCAL
SERIAL
ETHERNET USB
Companion OneTM
Companion OneTM
SYSTEM BUS
HSCA
CONTROLLER
POWER SUPERVISION
NORMAL
POWER
POWER IN
24 VDC +
24 VDC -
24 VDC +
24 VDC -
1
2
3
4
FORM A CONTACTS
AUX 1
AUX 1
AUX 2
AUX 2
1
2
3
4
DATA
TROUBLE
FLASHING - DATA
STEADY - LOCAL
T R O N
T E L TM
1 2 3 4
PROGRAM
ETHERNET GATEWAY
HEGA
NORMAL
POWER
DATA
TROUBLE
FLASHING - DATA
STEADY - LOCAL
T R O N
T E L TM
SERIAL
ETHERNET USB

Installation Manual— HEGA Ethernet Gateway
HEGA Installation Page 9
SYSTEMBUS
HSCA
CONTROLLER
POWERSUPERVISION
NORMAL
POWER
POWERIN
24VDC +
24VDC -
24VDC +
24VDC -
1
2
3
4
FORMA CONTACTS
AUX1
AUX1
AUX2
AUX2
1
2
3
4
DATA
TROUBLE
FLASHING- DATA
STEADY- LOCAL
TR O N
TE L TM
1 2 3 4
PROGRAM
ETHERNETGATEWAY
HEGA
NORMAL
POWER
DATA
TROUBLE
FLASHING- DATA
STEADY- LOCAL
TR O N
TE L TM
SERIAL
ETHERNET USB
= Any RF transmitter
& antenna. (paging
bases, radio bases, etc.)
Recommended
installation above the
rack. Do not allow
antenna to point down
toward the HEGA.
If transmitter cannot
be installed above the
rack, install within this
recommended area.
Installation — RF Transmitters
Devices that regularly transmit RF will
interfere with the HEGA. To avoid problems,
use the following diagram.
Note: The following recommendation
is for 5-watt transmitters or less. If
installing a stronger transmitter, please
consult Silversphere for installation
recommendations.

HEGA Installation Page 10
Testing Auditrak connectivity
Before a HEGA can begin reporting to
Auditrak,theWorkbenchlemustbe
pre-loaded by Silversphere technical
support. (See page 4 — Activation.) Once
installation is complete, please send the
Workbenchleto
1) Create an e-call event, observe it on
the console, reset it, and observe that
it clears from the console.
2) Log into Auditrak, run a zone-event
report and see the event on the report.
Alternatively, you can log in to Auditrak
and view events as they occur in real time
via the System Status tab.
Testing Workbench connectivity
1) Start Workbench.
2) Click “Read From System.”
3) Select the “Ethernet” radio button.
4) Enter the IP address of the HEGA.
5) Enter the system username and
password (factory default
username — companion — and
password provided by
technical support).
6) Click “Read From System.”
Workbenchwillreadprogrammingles
from the system just as it does when directly
connected to the HSCA serial port.

Installation Manual— HEGA Ethernet Gateway
HEGA Installation Page 11
Restore settings to
factory default
Ifforanyreasoncongurationchangesof
the HEGA render it unavailable, there is a
mechanism available in the HDAB console
to restore settings to factory default.
Restore Network Settings:
1) Press the Settings button on your
HDAB console
2) Press Network Settings in the
upper left right.
3) Enter the password provided by
Silversphere technical support.
4) Press Restore IP Defaults.
5) Press Conrm Entry.
6) Wait 180 seconds for the web server
to restart.
Factory Default Network Settings:
IP Address: 156.96.0.1
Subnet Mask: 255.255.255.0
Gateway: 156.96.0.1
Primary DNS: 208.67.222.222
Secondary DNS: 208.67.220.220
Image 1: LED Codes
LED Label Color State Status
Normal Power Green Off No power
Blink Firmware version flash (on power-up)
Flicker Normal heartbeat
Steady No communication with HSCA
Trou ble Yellow Off Normal
Blink No communication with HSCA
Steady Internal product trouble
Ethernet Green Off No active network connected
Steady/
Blink
Active network connected

HEGA Installation Page 12
Setting HEGA IP with HDAB
It is possible to set the IP information for
the HEGA using an HDAB. To change your
settings, you will need the daily password
(provided by Silversphere technical
support), a functional HDAB, and the
following network information.
l Static IP Address
l Subnet Mask
l Default Gateway
l Primary DNS
l Secondary DNS
Once you have this information, follow the
steps below on your HDAB Desk Console.
P O W E R
TROUBLE
Settings
Network
Settings
Advanced
Operations
Set Time
and Date
1) Press the setup button located in
the center-bottom of the screen.
P O W E R
TROUBLE
Silversphere
Companion One
SETTINGS
Select Function
To cancel settings
at any time, press
the Exit button.
Network
Settings
Advanced
Operations
Set Time
and Date
2) Select Network Settings.

Installation Manual— HEGA Ethernet Gateway
HEGA Installation Page 13
P O W E R
TROUBLE
Silversphere
Companion One
NETWORK SETTINGS
Enter Password.
= = = = = =
Press OK When Done
1
2
A B C
3
D E F
4
G H I
5
J K L
6
M N O
7
P Q R
----> OK
8
T U V
9
W X Y
0
Space
3) Key in the daily password using
the number keys along the left and
right. You can get the daily
password from Silversphere
technical support.
P O W E R
TROUBLE
Silversphere
Companion One
NETWORK SETTINGS
Enter Password.
Select desired
operation from
choices shown.
Restore IP
Defaults
Network
Summary
Save All
Changes
IP Address
Subnet
Mask
BACK
Default
Gateway
Primary
DNS
Secondary
DNS
4) Select which IP setting you’d like
to change from the list along the
right. Note: You may update all
settings before being forced to save.

HEGA Installation Page 14
P O W E R
TROUBLE
Silversphere
Companion One
NETWORK SETTINGS
Network IP Address
The current
value is
192. 168. 020. 011
Do you wish to
Change it?
YESNO
5) In this example, we’ve selected
to update the IP Address. The
steps to update the IP Address,
Default Gateway, Subnet Mask,
and the Primary and Secondary
DNS are the same.
P O W E R
TROUBLE
Silversphere
Companion One
NETWORK SETTINGS
Network IP Address
Enter new
value.
192. 168. 020. 222
Press OK When Done
1
2
A B C
3
D E F
4
G H I
5
J K L
6
M N O
7
P Q R
----> OK
8
T U V
9
W X Y
0
Space
6) Using the numbers along the left
and right, key in the new address,
then press OK when done.

Installation Manual— HEGA Ethernet Gateway
HEGA Installation Page 15
P O W E R
TROUBLE
Silversphere
Companion One
NETWORK SETTINGS
Network IP Address
1
2
A B C
3
D E F
4
G H I
5
J K L
6
M N O
7
P Q R
OK
8
T U V
9
W X Y
0
Space
Change Pending
until saved.
. . . Press OK
P O W E R
TROUBLE
Silversphere
Companion One
NETWORK SETTINGS
Enter Password.
Select desired
operation from
choices shown.
Restore IP
Defaults
Network
Summary
Save All
Changes
IP Address
Subnet
Mask
BACK
Default
Gateway
Primary
DNS
Secondary
DNS
7) After pressing OK, you will
see a message box informing you
that the changes have not yet
been applied to the system.
Press OK again.
At this point, you may go back to
step 4 and continue to repeat steps
4 through 7 until you have updated
all of the network settings you wish
to update.
If you are done making network
changes, continue to step 8.
8) To save your changes, press Save
All Changes.

HEGA Installation Page 16
P O W E R
TROUBLE
Silversphere
Companion One
NETWORK SETTINGS
Save All Changes
HDA 192.168.020.222
SM 255.255.255.000
GW 192.168.020.001
PD 008.008.008.008
SD 004.255.255.255
Save these values?
YESNO
P O W E R
TROUBLE
Silversphere
Companion One
NETWORK SETTINGS
Save All Changes
OK
Changes will take
eect in a few
minutes.
. . . Press OK
9) You will see a summary of what
will be saved to the HEGA. If you
wish to save them, press Yes.
If one of the settings is incorrect,
you may press No, and then return
to step 4 and select the address you
wish to update.
10) You will be prompted with a new
messages, Press OK again. You
should expect your changes to take
effect in roughly 5 minutes.
P O W E R
TROUBLE
Silversphere
Companion One
NETWORK SETTINGS
Enter Password.
Select desired
operation from
choices shown.
Restore IP
Defaults
Network
Summary
Save All
Changes
IP Address
Subnet
Mask
BACK
Default
Gateway
Primary
DNS
Secondary
DNS
11) Remember to press Exit when
done to return to the main screen.

Installation Manual— HEGA Ethernet Gateway
HEGA Installation Page 17
Troubleshooting
Unable to web browse to the HEGA
lHas HEGA power been cycled or
HEGA network settings changed?
If so, wait 10 minutes after power
cycle or 3 minutes after a network
change before trying again.
lHave you recently changed the
system date or time?
If so, wait 10 minutes after power
cycle or 3 minutes after a network
change before trying again.
lIs the Ethernet connection properly
connected to the correct network?
Use a crossover Cat 5 cable when
connecting the HEGA directly to
your computer; otherwise, use a
standard Cat 5 cable when
connecting via customer network.
lIs the computer you are using to
browse to the HEGA properly
connected to the correct network?
Use a crossover Cat 5 cable when
connecting the HEGA directly to
your computer; otherwise, use a
standard Cat 5 cable when
connecting via customer network.
lIs the green LED for the Ethernet
port on the HEGA not illuminated
(eithersteadyorickering)?
This would indicate not being
plugged into a live network.
During a Workbench operation you
receive an error message
lFollow the instructions of the error
message and retry the operation.
If the error message remains after a
retry, double check:
nCorrect address.
nUsername and password entered
in Workbench (if reading via
Ethernet only)
nBoth HEGA and computer are
properly connected to the network.
nHEGA is properly connected to
the HSCA with the serial DB-9
cable provided.
nThe Workbench PC has port 80 or
port 56788 access to the HEGA.
Events are not appearing in Auditrak
lConrmAuditraksettingsare
correct in Workbench.
lConrmHSCAisversion3.11
or greater.
lTest the Internet connection using
another computer on the network.
lConrmthatthepropertyisnotin
an error state in Auditrak.
lConrmHEGAhasoutboundport
80 access on the public Internet.
lConrmnetworksettingsinthe
HEGA are correct, including IP
address and name server.

HEGA Installation Page 18
Unable to update network settings via
an Internet browser
Are you seeing the following error?
Error requesting HSCA
file write status. Please check
equipment and setup and try
again in troubleshooting.
l ConrmthattheDB-9serialport
oftheHEGAisconnectedrmly
to the DB-9 serial port of the
HSCA using the provided DB-9
serial cable.
l Conrmnooneiswriting
or reading with Workbench. You
cannot make changes via the
browser interface while reading
or writing with Workbench.
lRefresh the page.
IPT Error on the console
IPT (Internal Port Trouble) means that the
HEGA internal web server was unable to
communicate with the Companion Bus.
If the IPT does not self-correct, please
contact Silversphere technical support at
(386) 523–1079.
“No Internet Conn. ” message on
the console
This indicates that the HEGA is unable
to connect to the Internet. Check your
internet connection (page 7) and contact
your network administrator.
Once Internet connectivity has been
restored, the message will clear from
the console automatically. The message
will not clear until the problem with the
Internet connection has been resolved.
“Extrn SerCbl Discn”,”SerCblDisc” on
the console
This indicates that the serial connection
between the HSCA and the HEGA is
disconnected. (See page 6.) Reconnect the
serial cable.
Once serial connectivity has been
restored, the message will clear from
the console automatically. The message
will not clear until the problem has been
resolved.

Installation Manual— HEGA Ethernet Gateway
HEGA Installation Page 19
Alternative Programming Options
You may also configure the HEGA
Ethernet settings by connecting your
laptop’s Ethernet port to the HEGA
Ethernet port using the provided
crossover cable.
The following instructions
are for advanced users and
requires a password from
Silversphere Techncial
Support.
1) Start by restoring the HEGA back
to the factory default network
settings (page 11).
2) Navigate to the area of your
laptop’s operating system where
network IP settings can be viewed
and changed.
3) Note the current network IP settings.
4) Change the IP address of the laptop
to use static address 156.96.0.2, subnet
mask 255.255.255.0. Do not specify a
Gateway or DNS.
5) Connect you laptop directly to the
Ethernet port on the HEGA using a
crossover cable.
6) Open a web browser and enter
the following in the address bar:
http://156.96.0.1/
7) When prompted, log in with the
username — companion — and
the password provided by
Silversphere technical support.
8) Click the System Settings, then
Network Settings and
change the Ethernet settings to
meet the appropriate network
criteria provided.
9) After entering the new settings,
click save changes.
10) A pending changes prompt will
appear. Click Apply/Undo
Changes.
11) Click apply changes and apply
them by pressing OK. Allow 10
minutesforlestoloadandthe
HEGA to restart.
12) Unplug the crossover cable from
the HEGA Ethernet port and, using
the provided Cat 5 standard cable,
connect the HEGA Ethernet port to
the network.
13) Change the IP network settings on
your laptop back to those noted in
step 3.
14) Using a Cat 5 standard cable (not
supplied), connect your laptop to
the customer’s network in order to
further communicate with the HEGA.
15) Using Workbench, read from the
system by selecting Ethernet and
typing in the new IP address as
conguredinstep8.Loginusing
the information provided in step 7.
Savethisleandbeginusingitas
themasterWorkbenchle.
Table of contents
Popular Gateway manuals by other brands

Volansys
Volansys Modular IoT Gateway user manual
4IPNET
4IPNET HSG320 Quick installation guide
Bivocom
Bivocom TG453 Series user guide
Carrier
Carrier XCT 7 40VCBL17FQEE Installation and owner's manual
Iget
Iget Home GW1 user manual
Freescale Semiconductor
Freescale Semiconductor QorIQ LS1021A-IOT Getting started
