SIMOLIO SM-DAC01 User manual

User Manual
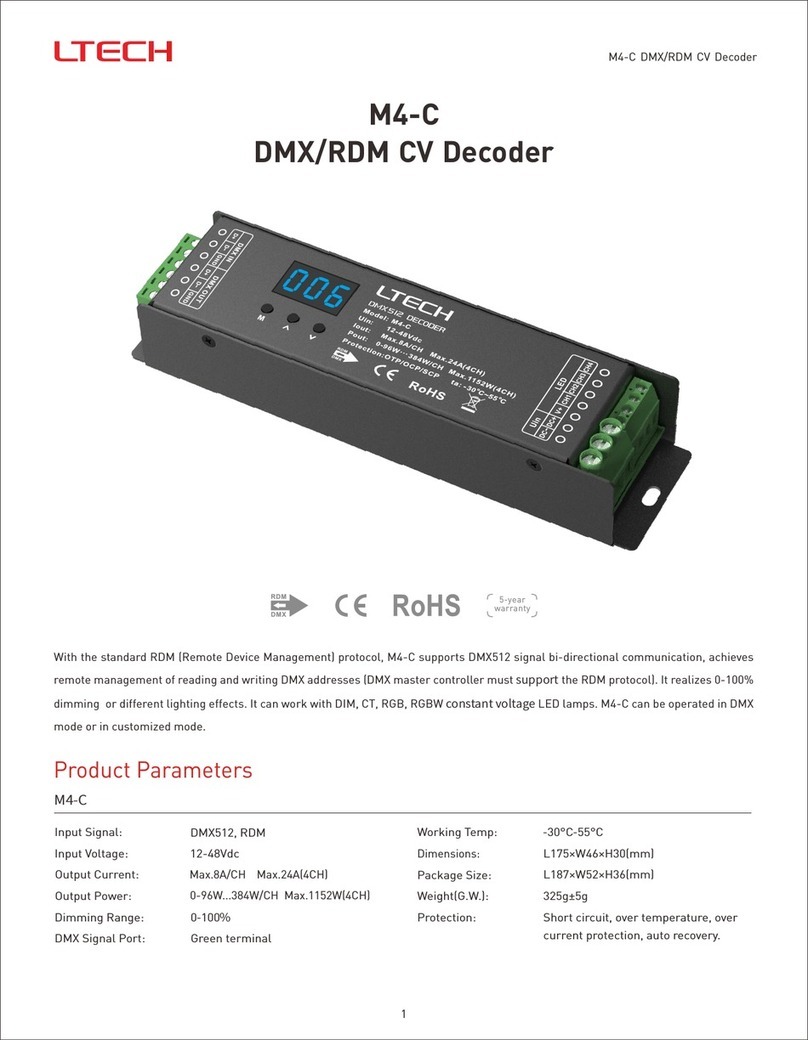
Digital to Analog Audio Converter
SM-DAC01
Support Email: support@simolio.com (for NA/AU)
Digital to Analog Audio Converter
DAC
192KHz
SM-DAC01 Manual
7. Limited Warranty
For any new product sold by SIMOLIO or SIMOLIO's authorized resellers,
there is a 12-month limited warranty. The warranty covers manufacturing
defects and product failure for a period of 12 months from the original date
of purchase, and warranty period is not extended if we repair or replace a
warranted product.
This warranty is provided at the discretion of Simolio Ltd. And does not cover
appearance damage or damage due to acts of nature, accident, misuse,
abuse, negligence, commercial use, or modification of or to any part of the
product. Accessories such as power adapter and audio cable are not covered
by this warranty.
Please contact SIMOLIO customer support team and provide your order
number to register the warranty.
support@simolio.com (for NA/AU)
www.simolio.com
www.amazon.com/simolio
09

Contents
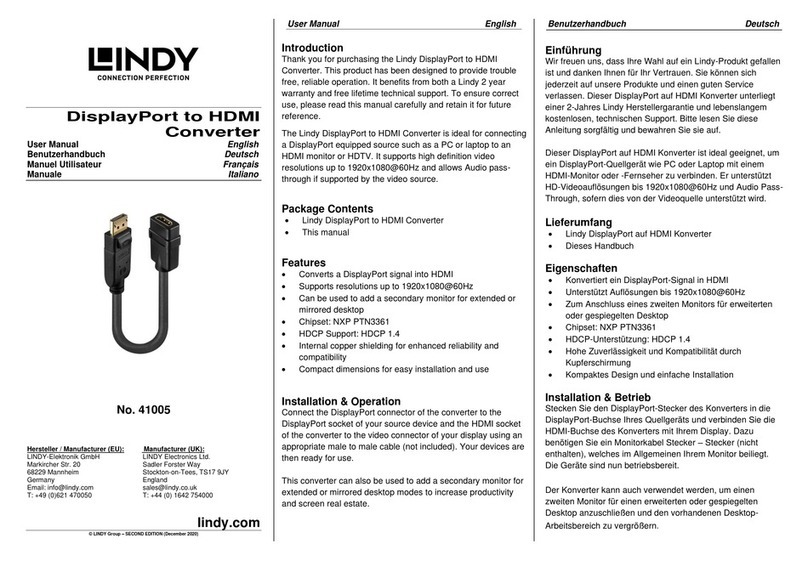
Thank you for choosing the SIMOLIO SM-DAC01 digital to analog audio
converter. Please read this guide carefully and keep it in a safe place for
future reference. If you need any further assistance, please contact our
customer support team at:
support@simolio.com (for NA/AU)
Response Time: 2-24h, excl. holidays
www.amazon.com/simolio
www.simolio.com
SM-DAC01 Manual SM-DAC01 Manual
1.
2. Specifications ............................................................................ 02
3. Product Diagram ......................................................................... 03
4. Package Contents ....................................................................... 03
5. Connection and Operation .......................................................... 04
5.1 Power on and Cable Connection ............................................ 04
5.2 TV Settings ............................................................................ 06
6. Troubleshooting ......................................................................... 08
7. Limited Warranty ........................................................................ 09
Important Safety Instructions ...................................................... 01

2. Specifications
1. Important Safety Instructions
01 02
SM-DAC01 Manual SM-DAC01 Manual
1. Please plug and unplug the signal cables slowly and do not plug, unplug or
shake them frequently.
2. Do not expose them to extreme temperatures.
3. The device should not be placed under the sun, rain and damp or
unventilated environment.
4. Keep device away from liquid.
5. Please put the device far away from heat sources such as fire, power, or
other amplifiers that generate heat.
6. Please do not insert metal or other objects to the device ports except
signal cables.
7. Please do not attempt to disassemble the device! Only qualified person
can provide services!
Signal Inputs/Outputs
Connector
Sample Rate
Mechanical
Environmental
Power Supply
Input Audio Coaxial or Optical digital audio
Output Audio R/L + 3.5mm audio
Input Audio connector Optical , Coaxial
Output Audio connector RCA(R/L) , 3.5mm Aux jack
Operating Temperature 0℃ ~ 70℃+
Operating Humidity 10% ~ 85% RH(no condensation)
Storage Temperature -10℃ ~ 80℃+
Storage Humidity 5% ~ 90% RH(no condensation)
Output: DC 5V 1A Input: 100~240V
Power Consumption 0.5 watts (Max)
Size(L*W*H) 73X60.5X22.5mm
Weight 105g
32KHz, 44.1KHz, 48KHz, 96KHz and 192KHz

03
SM-DAC01 Manual SM-DAC01 Manual
04
3. Product Diagram
RON/OFF
VOL
-
+
OUTPUT
L
DC 5V
Input Sel ec t
Optical C oa xial
OPT COA
INPUT
Power IN
DC 5V Optical IN
Coaxial IN
Input Selector
Power Indicator RCA Out AUX Out
Volume Control
& ON/OFF
Power Adapter User Manual
DAC Converter
4. Package Contents
Dig ital to An alog Aud io Conv erter
DAC
192 KH z
User Ma nua l
Dig ital to An alog Au dio Con verte r
SM- DAC 01
Supp ort Ema il: sup port@ simol io.co m (for NA /AU)
Digital to Analog Audio Converter
DAC
192KHz
5. Connection and Operation
5.1 Power On and Cable Connection
1. Power and turn on the DAC with red indicator on. (Ref. Fig1)5.1.
DC 5V
Input S ele ct
Optic al Co ax ial
OPT COA
INPUT
Option 1: Optical cable (included)
Option 2: Coaxial Cable
(purchase separately)
Power Adapter (included)
Fig 1 TV
TV Box
DVD COA OU T
OPT OUT
5.1.2. Connect the DAC to the OUTPUT of your audio source using the
optical fiber cable or coaxial cable. Slide the input select to match the type
you are using (Optical or Coaxial). (Ref. Fig2)
Fig 2
DAC INPUT
DAC POWER ON
Optical Fiber Cable

0605
SM-DAC01 Manual SM-DAC01 Manual
2. Please use the original power adapter.
3. Please make sure all devices you wish to connect have been turned off
before installation.
4. Supports RCA and 3.5mm AUX output simultaneously. For example, you
can use amplifier and headphone at the same time.
5. Remove the protective plastic caps from both ends of the optical digital
audio cable.
5.1.3. Connect the INPUT of your mplifier, or
speaker or headphone to the L/R RCA or 3. 5mm headphone jack on the
Converter. (Ref. Fig3)
audio wireless transmitter or a
RON/OF F
VOL
-
+
OUTPU T
L
Option A: L/R RCA Cable (purchase separately)
Option B: 3.5mm AUX Cable (purchase separately)
Fig 3 Audio Wireless Transmitter
Amplifier
Speaker
Headphone
AUX IN
DAC OUTPUT
Notes:
1. Please rotate the VOL knob counterclockwise to minimize the volume to
avoid damage to your hearing before turning on audio sources.
5.2 TV Settings
5.2.1. Ensure your TV Audio Format is set to “PCM”
or “Dolby/DTS” is OFF. (Use TV remote control).
(Ref. Fig 4)
PS: For Samsung TV, use TV remote to go to:
Settings > Sound > Expert Settings >
Audio Format or Digital Output Audio Format,
then select PCM.Fig 4
Settings
Audio Format
Dolby Digital
DTS
DTS Neo 2:5
PCM

07 08
6. Troubleshooting
SM-DAC01 Manual SM-DAC01 Manual
Phenomena
The audio output format of your
TV or TV related AV devices is
not set to PCM.
Set it to PCM. For example: Settings >
Sound > Digital Audio Out Format>
PCM. Menu depends on TVs.
Doesn't work
or no sound
AV audio output is disabled or
not activated.
The input signal selection is not
consistent with input signal type.
The DAC converter is not
turned on.
The volume is set too low.
Make sure the volume on your audio
device, DAC and amplifiers, speakers,
headphones etc. has all been set to a
sufficient volume.
Causes Solutions
Change the TV’s AUDIO OUT setting to
"External Speakers". For example:
Settings >Menu >Option > Sound >
Speakers > External Speakers. Menu
depends on TVs.
Ensure the input signal selection is the
same as input signal type.
Turn the on/off knob to the right until
you hear a click.
For Panasonic TV, go to sound setting menu and set TV audio output to
SPDIF output.
5.2.2. If there is no sound after TV is set to “PCM/
LPCM” audio format, please use TV remote and
set TV speaker to “External Speaker” or other
proper settings. Setting menu varies from different
TV brands and models. (Ref. Fig 5)
Speakers
Internal speakers
External speakers
Headset
Fig 5
Table of contents

