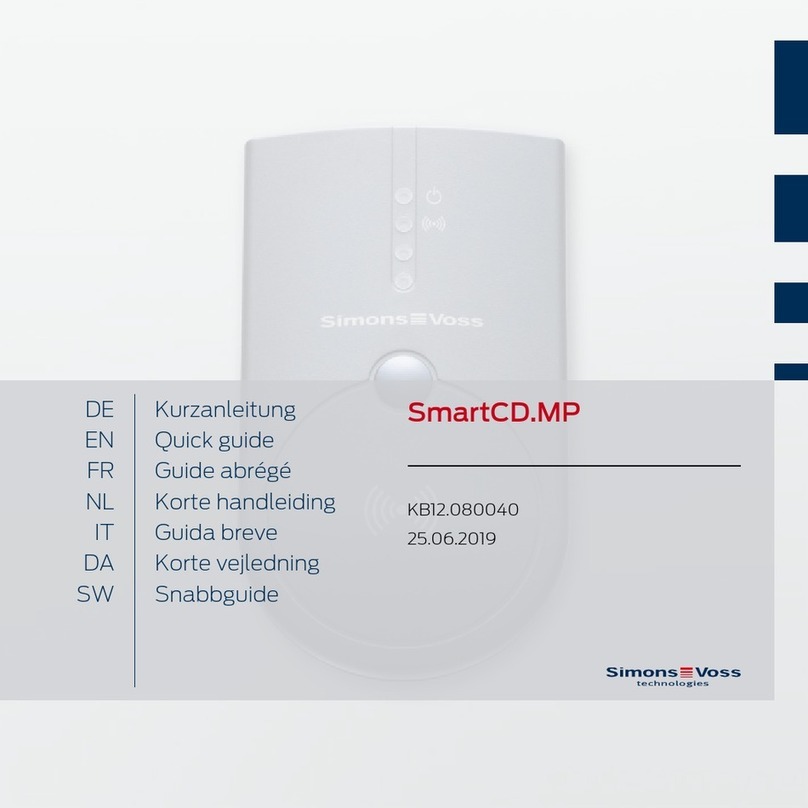
Simons Voss Technologies Smart CD.MP User manual

1
KURZANLEITUNG
SMART CD.MP
Manual SmartCD.MP · Manuel SmartCD.MP ·
Documentación SmartCD.MP · Documentatie
SmartCD.MP · Manuale SmartCD.MP · Håndbøg
SmartCD.MP · Handbok SmartCD.MP
V-2013-03

2

3
INHALT
1.0 Allgemeines 6
2.0 Warnhinweise 6
3.0 Lieferumfang 7
4.0 Anschluss an PC, Laptop oder Touchbook 7
5.0 Inbetriebnahme des SmartCD.MP 8
6.0 Programmieren mit dem SmartCD 8
7.0 Bedeutung der LEDs 10
1.0 General information 11
2.0 Warning 11
3.0 Included in delivery 12
4.0 Connection to PC, laptop or Touch Book 12
5.0 Initial operation of Smart CD. MP 13
6.0 Programming with Smart CD 13
7.0 Meaning of LED signals 15
1.0 Généralités 16
2.0 Mise en garde 16
3.0 Contenu de la livraison 17
4.0 Connexion à un ordinateur, ordinateur portable
ou touchbook 17
5.0 Mise en service du SmartCD.MP 18
6.0 Programmer avec le SmartCD 19
7.0 Signication des diodes LED 20

4
1.0 Indicazioni generali 21
2.0 Avvertenze 21
3.0 Dotazione 22
4.0 Collegamento a PC, laptop o touchbook 22
5.0 Messa in funzione di SmartCD.MP 23
6.0 Programmazione con SmartCD 23
7.0 Signicato dei LED 25
1.0 Algemeen 26
2.0 Waarschuwingen 26
3.0 In de levering inbegrepen: 27
4.0 Aansluiting aan pc, laptop of touchbook 27
5.0 Inbedrijfstelling van de SmartCD.MP 28
6.0 Programmeren met de SmartCD 28
7.0 Betekenis van de LED‘s 30
1.0 Generalidades 31
2.0 Indicaciones de advertencia 31
3.0 El suministro incluye 32
4.0 Conexión a PC, ordenador portátil o touchbook 32
5.0 Puesta en funcionamiento del SmartCD.MP 33
6.0 Programación con el SmartCD 34
7.0 Signicado de los LED 35

5
1.0 Generelt 36
2.0 Advarsler 36
3.0 Leveringen omfatter: 37
4.0 Tilslutning til PC, laptop eller touchbook 37
5.0 Ibrugtagning af SmartCD.MP 38
6.0 Programmere med SmartCD 38
7.0 Betydning af LEDs 40
1.0 Allmänt 41
2.0 Säkerhetsanvisningar 41
3.0 Ingår i leveransen 42
4.0 Anslutning till PC, bärbar dator eller Touchbook 42
5.0 Ta SmartCD.MP i drift 43
6.0 Programmering med SmartCD 43
7.0 Lysdiodernas innebörd 45

6
1.0 ALLGEMEINES
Mit dem SmartCD.MP können die SimonsVoss Mifare® Pure SmartCard-
Produkte programmiert werden. Hierzu gehören die folgenden Varianten:
· SmartCards bzw. SmartTags
· Zylinder-SC (.MP)
· SmartHandle-SC (.MP)
· SmartRelais-SC (.MP)
2.0 WARNHINWEISE
· Direkte Sonneneinstrahlung vermeiden.
· Von elektrischen und magnetischen Störquellen fernhalten.
· Das Programmiergerät nicht mit Feuchtigkeit in Verbindung bringen.
· Das Programmiergerät nicht mit Öl, Farbe, Säuren o.ä. aggressive
Substanzen in Verbindung bringen.
· Für die Nutzung des Programmiergerätes ist die LSM 3.2 oder neuer
notwendig.
· Mit dem SmartCD.MP können keine SimonsVoss Hybrid-Produkte pro-
grammiert werden (z.B. Zylinder Z4.MH).
· Das Programmiergerät wird über die USB-Schnittstelle mit Strom ver-
sorgt. Eine andere Art der Stromversorgung ist nicht zulässig.
· Änderungen am Produkt durch den Nutzer dürfen nicht durchgeführt
werden.
· Änderungen bzw. technische Weiterentwicklungen von SimonsVoss Tech-
nologies AG können nicht ausgeschlossen werden.
· Durch fehlerhaft programmierte SmartCards bzw. Schließungen kann

7
der Zugang durch eine Tür versperrt werden. Für die Folgen fehlerhafter
Programmierungen, wie nicht möglicher Zugang zu verletzten Personen,
Sachschäden oder anderer Schäden, haftet die SimonsVoss Technologies
AG nicht.
· Die Dokumentation wurde nach bestem Wissen erstellt, evtl. Fehler
können aber nicht ausgeschlossen werden. Hierfür kann keine Haftung
übernommen werden.
· Sicherheitshalber sollten sich Implantatträger bei ihrem Arzt über die mög-
liche Gefährdung durch Funk-Baugruppen (13,56 MHz) erkundigen.
· Sollten Abweichungen von Inhalten in Fremdsprachenversionen der Doku-
mentation bestehen, gilt im Zweifelsfalle das deutsche Original.
3.0 LIEFERUMFANG
1. SmartCD.MP
2. USB-Kabel zum Anschluss an eine USB-Schnittstelle
3. CD-ROM mit USB Treibern
4. Beipackzettel
4.0 ANSCHLUSS AN PC, LAPTOP ODER TOUCHBOOK
Das SmartCD.MP kann mit dem mitgelieferten Kabel über eine freie USB-
Schnittstelle (USB 1.1, USB 2.0 oder USB 3.0) direkt an einen PC, Laptop
bzw. bei mobiler Programmierung an ein Netbook/Touchbook angeschlos-
sen werden. Bei Anschluss über einen USB-Hub muss dieser Hub über eine
eigene Spannungsversorgung verfügen.

8
Mit dem SmartCD.MP können direkt am PC/Laptop alle digitalen Kompo-
nenten SC (.MP) des SimonsVoss Systems 3060 programmiert werden.
SmartCards bzw. SmartTags können nur programmiert werden, wenn das
SmartCD.MP direkt an einen PC/Laptop angeschlossen ist.
Bei mobiler Programmierung kann auch die LSM Mobile in Verbindung mit
einem Netbook/Touchbook (Betriebssystem Windows Vista, 7 oder 8) ver-
wendet werden. In diesem Falle muss das Programmiergerät per USB Kabel
an das Netbook/Touchbook angeschlossen werden.
5.0 INBETRIEBNAHME DES SMARTCD.MP
Nachdem Sie das SmartCD.MP mittels USB Kabel mit dem PC/Laptop erst-
mals angeschlossen haben, wird eine neue USB Hardware vom Windows
Betriebsystem entdeckt. Folgen Sie den Anweisungen des Installationsme-
nüs, und installieren Sie den auf der beiliegenden CD enthaltenen Treiber auf
Ihrem Rechner.
6.0 PROGRAMMIEREN MIT DEM SMARTCD
6.1 PROGRAMMIEREN MIT SMARTCD.MP UND PC/LAPTOP
Erstprogrammierungen sind immer mit der Desktop-Software durchzuführen.
Bitte folgende Punkte beachten:
· Auf dem PC/Laptop muss die aktuelle Version der LSM 3.2 oder neuer
installiert sein.

9
· Vor einem Update unbedingt ein aktuelles Backup durchführen.
· Achtung: Für die Installation der LSM-Software unter Windows Vista/7/8
benötigen Sie Administrator-Rechte!
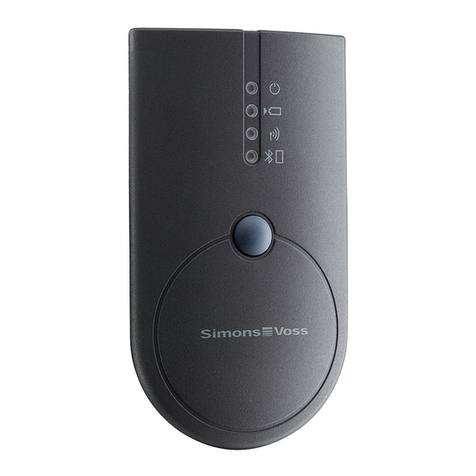
SmartCards: Die SmartCards bzw. SmartTags auf den Kreis des Program-
miergeräts legen und die Programmierung in der LSM starten.
Zylinder: Die Stirnseite der Verpackung (die Seite auf der das Etikett ange-
bracht ist) auf das Programmiergerät stellen und die Programmierung in der
Software starten. Ein Auspacken der Produkte ist für die Programmierung
unter normalen Umständen nicht notwendig. Sollte es bei einer Programmie-
rung öfter zum Abbruch kommen, kann durch Entnahme des Zylinders aus
der Verpackung Abhilfe geschaffen werden.
6.2 PROGRAMMIEREN MIT DEM SMARTCD.MP UND
NETBOOK/TOUCHBOOK
Auf dem PC/Laptop muss die aktuelle Version der LSM 3.2 oder neuer
installiert sein. Zusätzlich muss die LSM.Mobile 3.2 oder neuer auf dem
Netbook/Touchbook installiert und eingerichtet werden.
Achtung:
Es muss immer die passende Version der LSM.MOBILE zur LSM verwendet
werden.
Sie können jetzt einen auf dem PC/Laptop erstellten Schließplan durch
Export auf einen USB-Stick übertragen. Nach vollständigem Export den
USB-Stick aus dem PC/Laptop entfernen und in das Netbook/Touchbook
einstecken. Dann die LSM.MOBILE öffnen und aus dieser den Schließplan
10
auf dem USB-Stick aufrufen und einwählen. Für nähere Informationen zur
LSM.MOBILE schauen Sie bitte in das Handbuch.
7.0 BEDEUTUNG DER LEDS
1 LED (grün) leuchtend -->Gerät betriebsbereit
2 LED nicht belegt
3 LED (grün) leuchtend --> Gerät kommuniziert mit der SV Schließung
4 LED nicht belegt

11
1.0 GENERAL INFORMATION
Smart CD.MP can be used to programme SimonsVoss Mifare® Pure Smart
Card products. These include the following items:
· Smart Cards or Smart Tags
· Cylinder SC (.MP)
· Smart Handle SC (.MP)
· Smart Relay SC (.MP)
2.0 WARNING
· Avoid placing in direct sunlight.
· Keep away from sources of electrical and magnetic interference.
· Do not allow the programming device to come into contact with damp.
· Do not allow the programming device to come into contact with oil, paint,
acids or similar aggressive substances.
· LSM 3.2 or higher is required to use the programming device.
· Smart CD .MP cannot be used to programme any SimonsVoss hybrid
products, such as Cylinder Z4.MH.
· The programming device is powered via a USB port. It is not permitted to
supply power in any other way.
· The user must not modify the product in any way.
· The product is subject to modications or further technical developments
by SimonsVoss Technologies AG.
· Access through a door may be blocked due to defective or incorrectly
programmed Smart Cards or locks. SimonsVoss AG is not liable for con-
sequences of incorrect programming, such as blocked access to injured

12
persons, physical damage or any other losses.
· This documentation has been compiled in accordance with the best
knowledge available to us. However, errors cannot be ruled out. No liabili-
ty is accepted in such cases.
· As a precaution, people who have implants should consult their doctor
regarding any possible hazards caused by radio component assemblies
(13.56 MHz).
· Should there be differences in the content of other language versions of
this documentation, the German version applies in cases of doubt.
3.0 INCLUDED IN DELIVERY
1. Smart CD.MP
2. USB cable for connection to a USB port.
3. CD ROM with USB drivers
4. Instruction leaet
4.0 CONNECTION TO PC, LAPTOP OR TOUCH BOOK
Smart CD .MP can be directly connected to a free USB port (USB 1.1, USB
2.0 or USB 3.0) on a PC or laptop, or on a netbook or Touch Book in the
case of mobile programming, using the supplied cable. If Smart CD .MP is
connected to a USB hub, the hub must have its own power supply.
Smart CD .MP can be used to programme all SC (.MP) digital components
in the SimonsVoss System 3060 directly on a PC or laptop.

13
Smart cards or smart tags can only be programmed if the Smart CD .MP is
connected directly to a PC or laptop.
In the case of mobile programming, you may also use LSM Mobile in con-
junction with a netbook or Touch Book (operating system Windows Vista,
7 or 8). In such a case, the programming device must be connected to the
netbook or Touch Book using the USB cable.
5.0 INITIAL OPERATION OF SMART CD. MP
After you have connected Smart CD .MP to a PC or laptop using the USB
cable, the new USB hardware is detected by the Windows operating sys-
tem. Follow the instructions on the installation menu, and install the driver
contained on the supplied CD on your computer.
6.0 PROGRAMMING WITH SMART CD
6.1 PROGRAMMING WITH SMART CD .MP AND PC OR LAPTOP
You should always carry out initial programming with desktop software.
Please note the following points:
· The current version of LSM 3.2 or higher must be installed on the PC or
laptop.
· You must create a backup before updating the software.
· Note: you must hold administrator access rights to install the LSM soft-
ware in Windows Vista/7/8!

14
Smart cards: place a smart card or smart tag on the circle on the program-
ming device and start programming in LSM.
Cylinders: place the front of the packaging (the side where the label is
afxed) on the programming device and start programming in the software.
You do not need to unpack products for programming under normal circum-
stances. Should programming be interrupted several times, you can make it
easier by removing the cylinder from the packaging.
6.2 PROGRAMMING WITH SMART CD .MP AND A NETBOOK
OR TOUCH BOOK
The current version of LSM 3.2 or higher must be installed on the PC or
laptop. LSM.Mobile 3.2 or higher must also be installed and set up on the
netbook or Touch Book.
Warning: you must always use the right version of LSM.MOBILE for LSM.
You can now export a locking plan created on the PC or laptop to a USB
ash memory. Once the export is complete, remove the USB ash memory
from the PC or laptop and insert into the netbook or Touch Book. Then
launch LSM.MOBILE and launch the locking plan from the USB ash memo-
ry in LSM.MOBILE and log on. Consult the manual for more information on
LSM.MOBILE.

15
7.0 MEANING OF LED SIGNALS
1 LED (green) lit --> device ready for operation
2 LED not used
3 LED (green) lit --> Device is communicating with the SV lock
4 LED not used

16
1.0 GÉNÉRALITÉS
Le SmartCD.MP permet de programmer les produits Mifare® Pure de
SimonsVoss. Les variantes suivantes en relèvent également :
· SmartCards et respectivement SmartTags
· Cylindre-SC (.MP)
· SmartHandle-SC (.MP)
· SmartRelais-SC (.MP)
2.0 MISE EN GARDE
· Éviter toute exposition directe au soleil.
· Tenir éloigner de toute interférence électrique et magnétique.
· L’appareil de programmation ne doit pas entrer en contact avec
l’humidité.
· L’appareil de programmation ne doit pas entrer en contact avec de l’huile,
de la peinture, des acides et autres substances agressives.
· Le LSM 3.2 ou une version plus récente est nécessaire pour l’utilisation de
l’appareil de programmation.
· Le SmartCD.MP ne permet pas de programmer les produits hybrides de
SimonsVoss (par ex. cylindre Z4.MH).
· Le programmateur est alimenté par le port USB. Un autre type
d’alimentation n’est pas autorisé.
· L’utilisateur ne doit procéder à aucune modication du produit.
· Les modications et développements techniques de SimonsVoss Techno-
logies AG ne peuvent pas être exclus.
· La mauvaise programmation d’une SmartCard peut bloquer l’accès à une

17
porte. SimonsVoss Technologies AG décline toute responsabilité pour les
dommages résultant de programmations impropres, comme par exemple
l’accès impossible à des personnes blessées, à des dommages matériels
ou à d’autres dommages.
· La documentation a été préparée en toute bonne foi, des erreurs ne peu-
vent toutefois pas être exclues. Cela n’engage aucune responsabilité.
· Il est recommandé aux porteurs d’implants de s’informer auprès de leur
médecin des risques possibles générés par les modules radio (13,56
MHz).
· Si le contenu de la documentation devait varier en fonction des versions
en langues étrangères, alors la version allemande reste la seule pertinente
en présence de doute.
3.0 CONTENU DE LA LIVRAISON
1. SmartCD.MP
2. Câble USB pour la connexion à l’interface USB
3. CD-ROM avec pilote USB
4. Notice
4.0 CONNEXION À UN ORDINATEUR, ORDINATEUR PORTABLE
OU TOUCHBOOK
Le SmartCD.MP peut grâce au câble fourni, être directement connecté via
un port USB libre (USB 1.1, USB 2.0 ou USB 3.0) à un ordinateur, ordinateur
portable et respectivement à un netbook/touchbook par programmation
mobile. Lorsqu’il est connecté via un concentrateur USB, ce concentrateur

18
doit disposer d’une alimentation propre.
Le SmartCD.MP permet de pouvoir directement programmer tous les com-
posants SC (.MP) du système 3060 SimonsVoss sur l’ordinateur/ordinateur
portable.
Les SmartCards et respectivement les SmartTags peuvent seulement être
programmés si le SmartCD.MP est directement connecté à un ordinateur/
ordinateur portable.
Pour la programmation mobile, il est également possible d’utiliser le LSM
Mobile en connexion à un netbook/touchbook (système d’exploitation
Windows Vista, 7 ou 8). Dans ce cas, l’appareil de programmation doit être
connecté au netbook/touchbook via un câble USB.
5.0 MISE EN SERVICE DU SMARTCD.MP
Une fois que vous avez connecté pour la première fois le SmartCD.MP à
l’ordinateur/ordinateur portable via le câble USB, un nouveau matériel USB
sera détecté par le système d’exploitation Windows. Suivez les instructions
du menu d’installation, et installez les pilotes fournis par le CD sur votre
ordinateur.

19
6.0 PROGRAMMER AVEC LE SMARTCD
6.1 PROGRAMMER AVEC LE SMARTCD ET
L’ORDINATEUR/ORDINATEUR PORTABLE
Les premières programmations doivent toujours être réalisées avec le logiciel
du bureau. Veuillez s’il vous plaît respecter les points suivants :
· La dernière version du LSM 3.2 ou une version ultérieure doit être installée
sur votre ordinateur/ordinateur portable.
· Toujours effectuer une sauvegarde avant toute mise à jour.
· Attention : vous devez disposer des droits d’administrateur pour
l’installation du logiciel LSM sous Windows Vista/7/8 !
SmartCards : positionner les SmartCards et respectivement les SmartTags
sur le cercle de l’appareil de programmation et commencer à programmer
dans le LSM.
Cylindre : positionner la face avant de l’emballage (côté sur lequel l’étiquette
est collée) sur l’appareil de programmation et commencer la programmation
dans le logiciel de démarrage. Le déballage des produits n’est parfois pas
nécessaire pour la programmation. Si des interruptions surviennent lors de la
programmation, il peut alors être utile de retirer le cylindre de l’emballage.
6.2 PROGRAMMER AVEC LE SMARTCD.MP ET UN
NETBOOK/TOUCHBOOK
La dernière version du LSM 3.2 ou une version ultérieure doit être installée
sur votre ordinateur/ordinateur portable. En outre, le LSM.Mobile 3.2 ou une
version ultérieure doit être installé sur le netbook/touchbook.

20
Attention : il faut toujours utiliser la version du LSM.MOBILE compatible avec
le LSM.
Vous pouvez maintenant transférer un plan de fermeture crée sur
l’ordinateur/ordinateur portable en effectuant une exportation vers une clé
USB. À l’issue de l’exportation, retirer la clé USB de l’ordinateur/ordinateur
portable et la connecter sur le netbook/touchbook. Ouvrir ensuite le LSM.
MOBILE et sélectionner le plan de fermeture enregistré sur la clé USB.
Pour plus d’informations concernant le LSM.MOBILE, veuillez s’il vous plaît
consulter le Manuel.
7.0 SIGNIFICATION DES DIODES LED
1 La diode LED clignote
(vert) --> Appareil prêt à
être utilisé
2 La diode LED n’est pas
utilisée
3 La diode LED clignote
(vert) --> Appareil com-
munique avec
la fermeture SV
4 La diode LED n’est pas
utilisée
Table of contents
Languages:
Other Simons Voss Technologies Motherboard manuals

Simons Voss Technologies
Simons Voss Technologies SmartCD.HF User manual

Simons Voss Technologies
Simons Voss Technologies SmartCD.MP User manual

Simons Voss Technologies
Simons Voss Technologies PalmCD2 User manual

Simons Voss Technologies
Simons Voss Technologies SmartCD.MP User manual

Simons Voss Technologies
Simons Voss Technologies CD.STARTER.G2 User manual

Simons Voss Technologies
Simons Voss Technologies CD.STARTER.G2 User manual