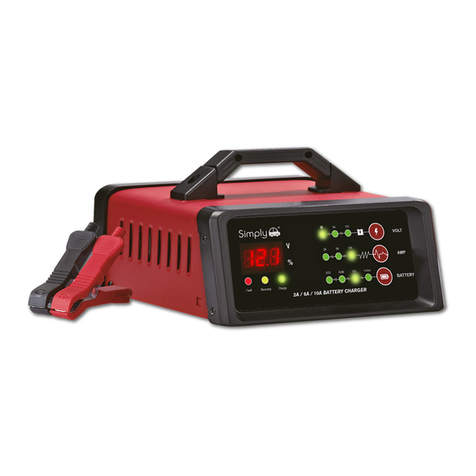
Simply BTC-4004 User manual

0.5A/1A 12V AUTOMATIC BATTERY
CHARGER INSTRUCTION MANUAL
BTC-4004
Please read before use
Save this manual for future
reference

SAFETY GUIDELINES /DEFINITIONS
• DANGER: Indicates an imminently hazardous situation which, if not avoided, will result
in death or serious injury.
• WARNING: Indicates a potentially hazardous situation which, if not avoided, could
result in death or serious injury.
• CAUTION: Indicates a potentially hazardous situation which, if not avoided, may result
in minor or moderate injury.
• CAUTION: Used without the safety alert symbol indicates potentially hazardous
situation which, if not avoided, may result in property damage.
• RISK OF UNSAFE OPERATION. When using tools or equipment, basic safety
precautions should always be followed to reduce the risk of personal injury. Improper
operation, maintenance or modification of tools or equipment could result in serious injury
and property damage. There are certain applications for which tools and equipment are
designed. Simply Auto strongly recommends that this products NOT be modified and/or
used for any application other than for which it was designed. Read and understand all
warning and operating instructions before using any tool or equipment.
IMPORTANT SAFETY INSTRUCTION
WARNING - RISK OF EXPLOSIVE GASES
WORKING IN THE VICINTY OF A LEAD-ACID BATTERY IS DANGEROUS.
BATTERIES GENERATE EXPLOSIVE GASES DURING NORMAL OPERATION.
FOR THIS REASON, IT IS IMPORTANT THAT YOU FOLLOW THESE INSTRUCTIONS
EACH TIME YOU USE THE CHARGER.
To reduce the risk of a battery explosion, follow these instructions and those published
by the manufacturers of the battery and any equipment you intend to use in the vicinity of
the battery. Review the cautionary markings on these productions and on the engine.
WARNING: This product contains chemicals known to cause cancer and birth defects
or other reproductive harm. Wash hands after handling. Use the battery charger on 12V
AGM/STD batteries ,as used in automobiles, trucks tractors, airplanes, vans, RVs, trolling
motors ,etc. This charger is not intended to supply power to low-voltage electrical systems,
other than in a motor-starting application.
WARNING: Do not use battery charger with dry cell batteries that are commonly used
with home appliances. These batteries may burst and cause injury or damage to property.
• Use only attachments recommended or sold by the battery charger’s manufacturer.
Use of non-recommended attachments may result in a fire, electric shock, or injury.
• Locate the battery charger’s power cord so it cannot be stepped on, tripped over, or
subjected to damage or stress.
• Do not operate the charger if it has received a sharp blow, been dropped, or otherwise
damaged in any way. Take it to a qualified professional for inspection or repair.
• Do not disassemble the charger. Take it to a qualified professional when service or
repair is required.
• To reduce the risk of electric shock, unplug the charger from the outlet before attempting
any maintenance or cleaning.
• Always charge the battery in a well-ventilated area.

• Do not set the charger on flammable materials, such as carpeting, upholstery, paper,
cardboard, etc.
• Never smoke or allow sparks or flames in the vicinity of the battery or engine.
WARNING: RISK OF EXPLOSIVE GAS.
• Operate the charger as far away from the battery as DC charger cables permit.
• Do not expose the charger to rain or snow.
• NEVER charge a frozen battery.
• NEVER set a battery on top of the charger.
• NEVER place the charger directly above a battery being charged. Gases from the
battery will corrode and damage the charger.
• NEVER touch the battery clips together when the charger is energized.
• When disconnecting the battery charger, pull by the plug, not by the cord. Pulling
on the cord may cause damage to the cord or plug.
• Do not operate the charger with damaged cord or plug.
• NEVER allow battery acid to drop onto the charger.
PERSONAL SAFETY PRECAUTIOUS
• Wear complete eye and clothing protection when working near lead-acid batteries.
Always have someone nearby for help.
• Have plenty of fresh water, soap and baking soda nearby for use, in case battery acid
contacts your eyes, skins, or clothing. Wash immediately with soda and water and seek
medical attention.
• If battery acid comes in contact with eyes, flush eyes immediately for a minimum of 10
minutes and get medical attention.
• Neutralize any acid spills thoroughly with baking soda before attempting to clean up.
• Remove all personal metal items from your body, such as rings, bracelets, necklaces
and watches. A battery can produce a short circuit current high enough to weld a ring to
metal, causing a severe burn.
• Do not drop a metal tool onto the battery.
• If it is necessary to remove the battery from the vehicle to charge it, always remove the
grounded terminal first.
ASSEMBLY INSTRUCTIONS
Remove all cord wraps and uncoil the cables prior to using the battery charger.
This battery charger is for use on a nominal 230 volt circuit.
USING AN EXTENSION CORD
Make sure your extension cord is in good condition. When using an extension cord, be
sure to use one heavy enough to carry the current your product will draw. An undersized
cord will cause a drop in line voltage resulting in loss of power and overheating.

Preparing to Charge
1. Determine voltage of battery to be maintained by referring to the vehicle manual.
2. If it is necessary to remove battery from vehicle to charge, or to clean terminal, always
remove grounded terminal from battery first. Make sure all accessories in the vehicle
are off, so as not to cause an arc.
3. Clean battery terminals. Do not allow corrosion to come in contact with eyes.
4. Add distilled water in each cell until battery acid reaches level specified by battery
manufacturer. This helps purge excessive gas from cells. Do not overfill. For a battery
without cell caps (maintenance free), carefully follow manufacturer’s charging
instructions.
5. Study all battery manufacturer’s specific precautions, such as removing or not
removing cell caps while charging, and recommended rates of charge.
6. Remove battery completely from boat/airplane or any confined area before charging.
Area around battery should be well ventilated while battery is being charged. Do not
operate while an enclosed area.
CAUTION: This battery charger does not detect, diagnose or analyze the condition of
the battery. Attempting to charge/maintain a battery with an abnormal condition can
further damage the battery. If in doubt, have the battery checked by a qualified
professional prior to using this unit.
IMPORTANT: Do not start the vehicle with the charger connected to the AC outlet, or
it could result in damage to the charger.
Charger Location
1. Locate battery charger as far away from battery as cables permit.
2. Charge above freezing temperature and below40 degree Celsius(C) (104 degree
Fahrenheit).
3. NEVER place battery charger directly above battery being charged; gases from
battery will corrode and damage charger.
4. NEVER allow battery acid to drip on battery charger when reading gravity or filling
battery.
5. NEVER operate battery charger in a closed-in area or restrict ventilation in anyway.
6. Marine batteries must be removed and charged on shore. To charge it on board
requires equipment specially designed for marine use. This unit is NOT designed for
such use.
7. Do not set a battery on top of battery charger.
WARNING: A SPARK NEAR THE BATTERY MAY CAUSE AN EXPLOSION. TO
REDUCE RISK OF A SPARK NEAR THE BATTERY: CONNECT AND DISCONNECT
DC OUTPUT CLAMPS AND RING TERMINALS ONLY AFTER REMOVINGAC CORD
FROM ELECTRIC OUTPUT.
Connection Precautious
1. Disconnect AC cord from electric outlet before connecting or disconnecting DC clamps.
Follow these steps when the battery is installed in a vehicle:
1. Position AC and clamp cords away from hood, door, or moving engine parts.
2. Stay clear of fan blades, belts, pulleys, and other parts that can cause injury to persons.
3. Check polarity of battery posts. POSITIVE (POS, P, +) battery post usually has
larger diameter than NEGATIVE (NEG, N,-) post.

4. Determine which post of battery is grounded (connected) to the chassis. If NEGATIVE
post is grounded to chassis (as in most vehicles), see 5. If POSITIVE post is grounded
to the chassis, see 6.
5. For negative-grounded vehicle, connect POSITIVE (RED) clamp from battery charger
to POSITIVE (POS, P, +) engine block away from battery. Connect NEGATIVE
(BLACK) clamp to vehicle chassis or engine block away from battery. Do not connect
clip to carburetor, fuel lines, or sheet-metal body parts. Connect to a heavy gauge
metal part of the frame or engine block.
6. For positive-grounded vehicle, connect NEGATIVE (BLACK) clamp from battery charger
to NEGATIVE (NEG, N, -) ungrounded post of battery. Connect POSITIVE (RED) clamp
to vehicle chassis or engine block away from battery. Do not connect clip to carburetor,
fuel lines, or sheet-metal body parts. Connect to a heavy gauge metal part of the frame
or engine block.
7. When disconnecting charger, disconnect AC cord, remove clamp from vehicle chassis,
and then remove clamp from battery terminal.
8. Do not charge the battery while the engine is operating.
Follow these steps when the battery has been removed from a vehicle:
1. Check polarity of battery posts. Positive (marked POS, P, +) usually has a larger
diameter than the Negative battery post (marked NEG, N, -).
2. Connect the POSITIVE (RED) battery clamp to the POSITIVE battery post (marked
POS, P, + or red).
3. Stand as far back from the battery as possible, and do not face battery when marking
final connection.
4. Carefully connect the NEGATIVE (BLACK) charger clamp to the free end of the battery
cable connected to the NEGATIVE terminal.
5. When disconnecting charger, always do so in reverse sequence of connecting
procedure and break first connection while as far away from battery as practical.
• Check unit periodically for wear and tear. Take to a qualified technician for replacement
of worn or defective parts immediately.
• Read and Understand This Instruction Manual Before Using This Unit.
SAVE THESE INSTRUCTIONS
FEATURES:
●Battery Select Button: This button allows you to change the charging mode for different
types of batteries(AGM battery or STD battery). The peak voltage for charging AGM battery
is at 14.4V, while for STD battery, it is at 14.8V. Attention: Battery Select Button won’t work
during the process of charging.
●Current Select Button: Current Select Button enables you to change the charging current
between 0.5A and 1A.
●Battery Indicator: During a battery charging process, 25% will be displayed when the
charging voltage is below 12.1V; it shows 50% when the voltage is at 12.8V; 75% means
the voltage is at 13.4V, and when the battery is fully charged, the voltage is at 14.4V.
●Maintains battery charger in stored vehicles.
●Fully automatic; When the voltage of the battery is above 8V, battery charger will
automatically power on to charge the battery, and it will automatically power off when
battery isfully-charged.

●Built-in circuit protection guards against overcharging or short circuit.
●Automatically check the polarity(requires a minimum of 2.5 volts battery voltage).
●Convenient, color-coded clamps for easy, correct installation.
●Charges with high frequency, pure DC current.
Battery Charger and Components
OPERATING INSTRUCTIONS
Battery select
button
Connecting
clamps
Charging
indicator
AC wall charger
Current select
button

IMPORTANT: ALWAYS disconnect the AC power cord from AC power outlet before
connecting (or disconnecting) the charger to (or from) the battery.
Connecting the Charger and Charging the Battery with Battery Clamps
The charger’s output leads have color-coded battery clamps (RED-POSITIVE and
BLACK-NEGATIVE).
1. Unplug the battery charger AC cord from the AC outlet.
2. Disconnect the battery clamps from the unit at output and cord connector
3. Plug the AC cord into the AC outlet (230V~ 50/60 Hz)
4. Press the battery selection and current selection to proper setting
5. Connect the RED POSITIVRE clamp to the POSITIVE post of the battery.
6. Connect the BLACK NEGATIVE clamp to the NEGATIVE post of the battery.( Note: if
reversely connect or short circuit, the 4 LED lights will flash as error message signal.)
7. Then the charger will charging the battery automatically.
8. Leave the unit on.
9. Monitor the battery from time to time.
TROUBLESHOOTING
WARNING: During troubleshooting, if there is a need to connect/disconnect the unit from
battery, follow the steps outlined in “Important Safety Instructions” at the front of this
manual and the warning “ To reduce risk of a spark near the battery”.
Common problem Possible solutions
Unit not charging ●Check that the charger is properly connected to a live AC
Outlet.
●Check that the correct battery selection setting has been
selected for the battery being charged.
●Check that the correct current selection setting has been
selected for the battery being charged.
●If the current under charging state has fallen below 0.3A, the
charger will not charge the unit automatically.
●Make sure output connections are secured.
●Check correct polarity connections.
BATTERY CONNECTION
If the charger does not connected properly, charging will not start, Make sure the
charger is connected to the battery and the connection points are clean and making a
good connection or make sure no reverse connections at the battery.
CHARGING COMPLETOIN
Charge completion is indicated by the charging status indicator turning on ( LED
indicator shows fully charged state) . This means that the charger has stopped charging.
NOTE: If the battery is not removed, the charger can detect the voltage. When battery
voltage is lower than 13.5V, the charger will charge for battery automatically.
MAINTAINGING A BATTERY
The unit maintains 12V batteries, keeping them at fully charged. It can charge small
batteries and maintain both small and large batteries. If you are maintaining a fully
charged large battery, you are properly utilizing the battery charger. However, if you use
this battery charger to charge a large battery, such as a marine deep-cycle battery, that
was not fully charged, you may lose some of the battery’s capacity. Therefore, we do not

recommend charging a large battery with this unit.
NOTE: The maintain mode technology utilized in this charger allows you to safely charge
and maintain a healthy battery for exhausted periods of time. However, problems with the
battery, electrical problems in the vehicle, improper connections or other unanticipated
conditions could cause excessive current draws. As such, occasionally monitoring your
battery and the charging process is recommended.
MAINTENANCE AND CARE
A minimal amount of care can keep your battery charger working properly for years.
●Clean the clamps each time you are finished charging. Wipe off any battery fluid that
may have come in contact with the clamps, to prevent corrosion.
●Occasionally cleaning the case of the charger with a soft cloth will keep the finish shiny
and help prevent corrosion.
●Coil the input and output cords neatly when storing the charger. This will help prevent
accidental damage to the cords and charger.
●Store the charger unplugged from AC power outlet, in an upright position.
●Store inside, in a cool, dry place. Do not store the clamps clipped together, on or around
metal, or clipped to the cables.
WARNING
1. It only can be used for 12V rechargeable AGM/STD batteries.
2. The product should not be used under the water.
3. Ensure enough power supplying for the battery charger.
4. Never charging damaged battery in case of destroying battery charger.
5. To prevent potential danger, the battery charger should be away from heat object and
explosive gas during operation.
6. Do not change charger line or plug in order to avoid electric shock.
7. To prevent the battery charger from damage, the product should be away from children
and animals.
8. The battery charged needs to be checked to verify the input current beyond standard
output of charger.
9. Never charging on the condition that contains flammable and explosive gases.
10. Do not come close to the battery during charging.
11. The battery should be placed in ventilated well area.
12. The product should not be operated by children, those who have psychiatric disorders
and lack of experience, except that is supervised and instructed by supervisor.
13. Do not dismantle or repair privately if the charger damaged, bring it to certified service
center to repair.
SPECIALNOTICE:
If the battery’s low voltage result in battery charging failure cause of instant complete
release, the battery need put aside for 1 hour until the battery voltage recover at proper range
SPECIFICATIONS PARAMETERS
Input power supply: AC 230V 50/60Hz
Maximum input power: 20W
Output
Output
voltage: DC 12 V
current: 0.5/1A
Adaptable charging battery: 6-100AH
Part of Simply Brands
simply-brands.com
Table of contents
Other Simply Batteries Charger manuals
Popular Batteries Charger manuals by other brands
VOLTCRAFT
VOLTCRAFT 23 57 04 operating instructions
Sonic Equipment
Sonic Equipment 12V-2A manual
Philips
Philips SCB1280NB/12 user manual
Antares
Antares 91136 Instructions for installation and use

BEIYANG ELECTRIC APPARATUS
BEIYANG ELECTRIC APPARATUS KCG3 user manual

Schumacher Electric
Schumacher Electric SI-82-6 owner's manual

