Simulab PacerMan User manual
www.simulab.com
USER GUIDE v1.0
System Set Up
Software Installation
Troubleshooting
PacerMan
TM

Table of Contents
Overview .........................................3
System Components .................................4
Quick Start Guide ...................................7
System Set Up ......................................8
IInstall Software .........................................8
Bluetooth ............................................10
Unpack and Inspect .....................................12
Install Tissue ..........................................12
Prepare Fluid System ....................................14
Connect to Power.......................................15
Connect Body Form to USB ................................16
Connect PacerMan to your Pacing Generator ...................16
System Set Up Checklist ..................................17
Software Guide.................................... 18
Launching Software .....................................18
Home Page...........................................19
Instructor Mode Scenario Setup .............................20
Calibration ...........................................21
Monitor Page ......................................... 22
Patient Vitals .......................................... 23
New Scenario ......................................... 24
Additional Functionality Bar ...............................25
Debrillator Interface Options .............................. 26
Pacing Procedural Options ................................ 27
System Maintenance and Storage ......................28
Battery Charging .......................................28
Relling the Pulse Bulb ...................................28
Draining the System .....................................29
Power Down the System ..................................30
Cleaning the System.....................................31
Packing and Storing.....................................31
Troubleshooting ...................................33
Warranty and Maintenance Agreement..................39
Replacement Parts Catalog ........................... 41

Overview |3PacerMan System
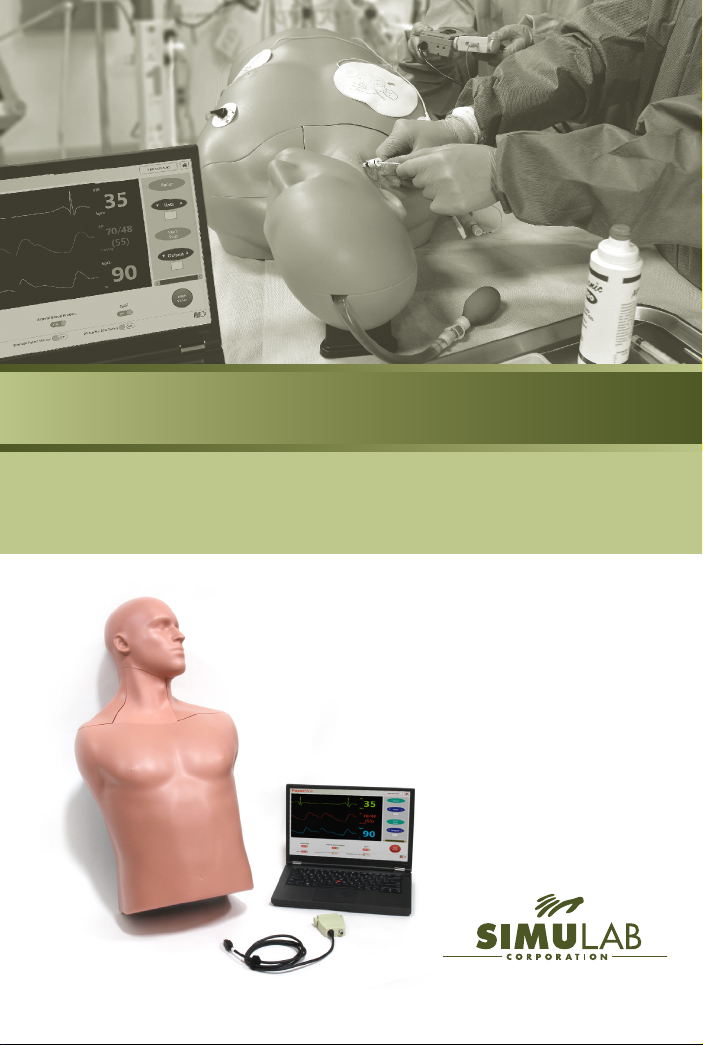
System Overview
PacerMan™ is the only high-delity
simulator for immersive transvenous
pacing—from needle insertion to capture
using all the clinical equipment. The system
offers a one of a kind opportunity to
practice the entire procedure—including
identifying intrinsic bradycardias, assessing
intracardiac waveforms and manipulating
output and rate with a pacing generator.
SKILL DEVELOPMENT
Learn to manipulate the pacing generator and interact with your
procedural kit.
» Gain and lose capture
» Rene output and rate in real-time
Improve procedural performance through instructor led competencies and
self directed repetition.
Practice decision making based on outcome options.
Train using blind and ECG guided techniques.
Increase team engagement with scenario based learning.
COMPONENTS AND ACCESSORIES
Body Form
Replaceable Tissue
Head Cover
Torso Cover
Fluid Reservoir Cap
Vessel Channel Cover
Simulated Extension System
Body Form to USB Cable
Wall Power Supply
Battery Charger
Battery Pack
PacerMan requires your own pacing generator and kit.
OEM Extension Cable
Universal Extension Cable
Drain Tube with Stop Clip
Venous Fluid Mixing Bottle
SimuSensor Venous Blood Concentrate
Simulated Arterial Blood
Fill Port with Funnel
Arterial Hand Pump
Fill Line
Carrying Case
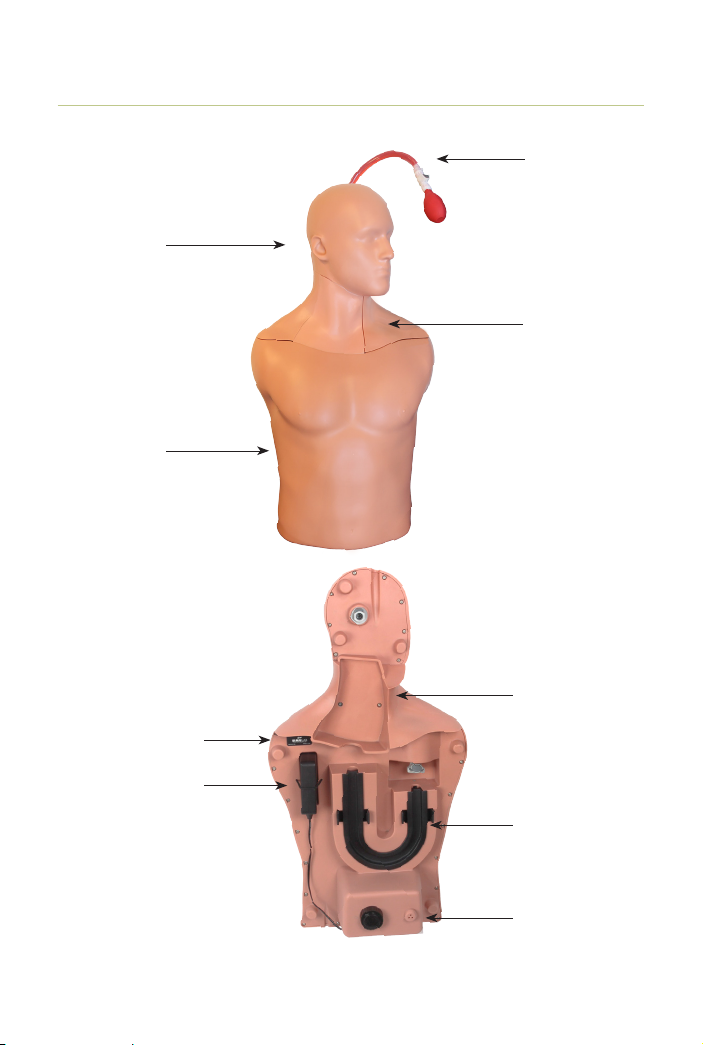
System Components
BODY FORM
Simulab Corporation4 |System Components
Replaceable Tissue
Vessel Channel
Cover
Tissue Cradle
Serial Number Label
Battery Well
Torso Cover
Fluid Reservoir
and Cap
Head Cover
Arterial Line

System Components |5PacerMan System
Replaceable Tissue
System Components (continued)
Accessory Port:
Body Form to
USB Port:
Power Switch
Power Cord
Connection:
In Use Valve
Drain Connection
POWER & DRAIN INTERFACE PANEL
COMMUNICATION PANEL
Battery PackOr
Or
OEM Extension
Cable
Universal Extension
Cable
Body Form to
USB Cable
Wall Power Supply
Simulated
Extension System
Simulab Corporation6 |System Components
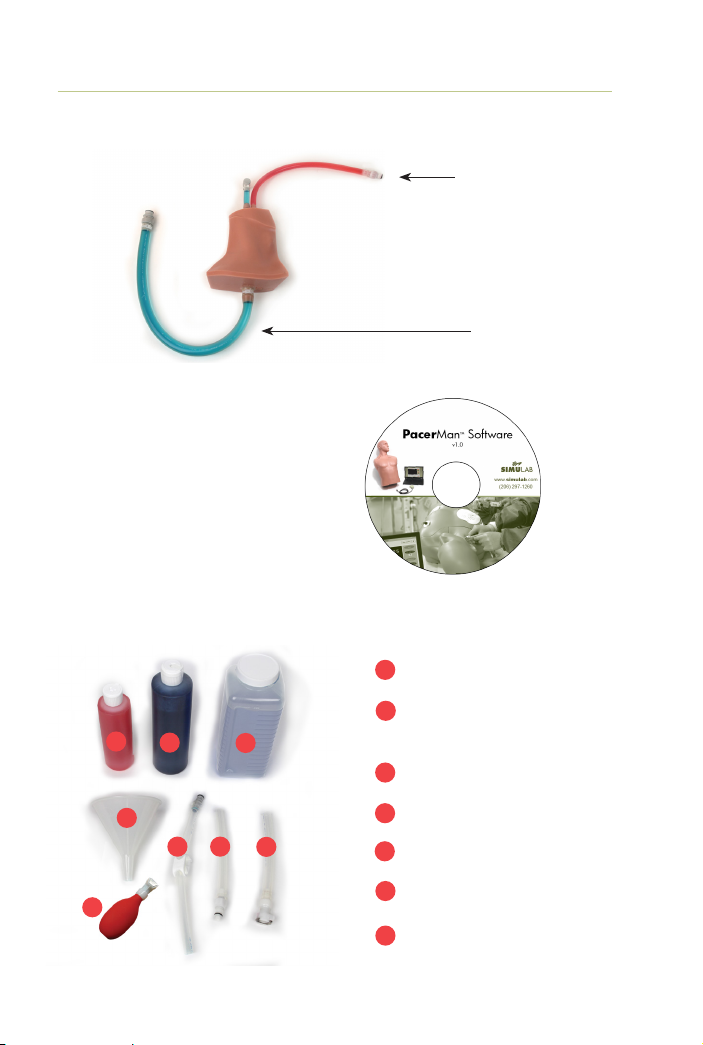
FLUID ACCESSORIES
System Components (continued)
Simulated Arterial Blood
SimuSensor Venous Blood
Concentrate
Venous Fluid Mixing Bottle
Fill Port with Funnel
Drain Tube with Stop Clip
Arterial Hand Pump
Fill line
1
1
4
4
4
3
3
6
7
7
6
2
2
5
5
PACERMAN SOFTWARE
Arterial
Line
Venous
Line
REPLACEABLE TISSUE

Quick Start Guide |7PacerMan System
Quick Start Guide
Load the PacerMan software onto your PC or laptop.
Insert the replaceable tissue and ll up the uid reservoir.
Connect body form to computer and power source.
Connect the body form to the pacing generator using the Simulated
Extension System.
Turn on power switch, and then turn the valve to the IN USE position.
Launch PacerMan software.
Choose Instructor or Student Mode.
If using Instructor Mode, set scenario parameters and then click begin.
You’ll hear the system self-calibrate and the status window will close,
opening the monitor page.
Turn on the vitals you want to present by toggling to the “ON” position
Your PacerMan System is ready to go.
1
5
2
6
3
7
8
9
10
4
NOTE: If any status items display “NO” check your connection
or see System Callibration on page: 21.
Simulab Corporation8 |System Set Up
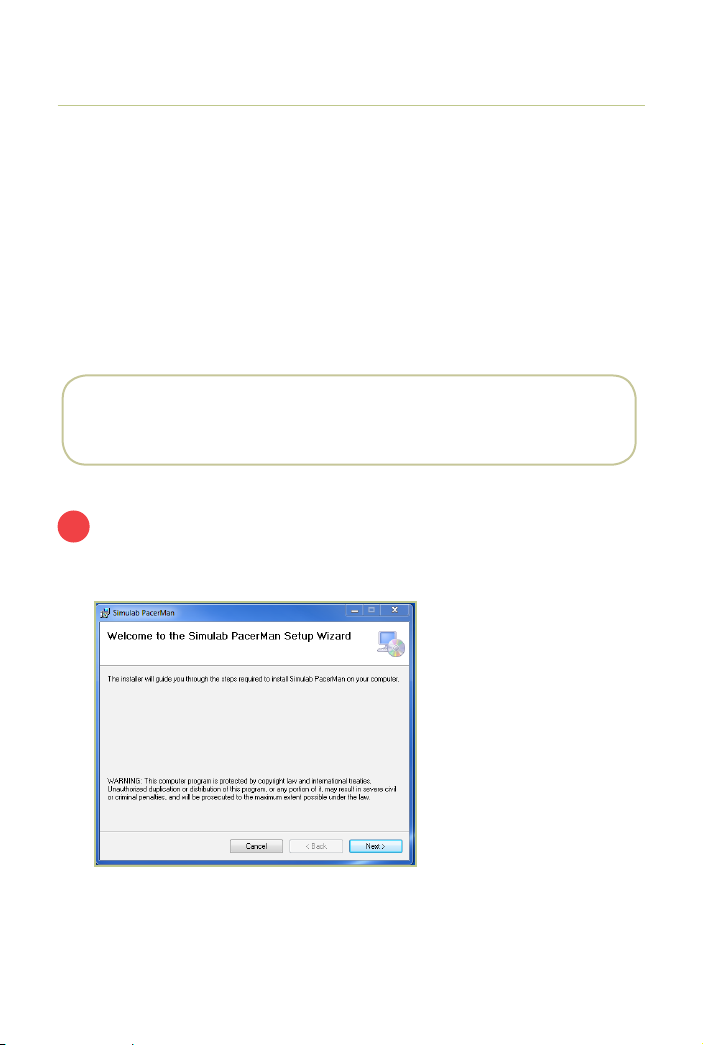
System Set Up
The “Welcome” screen will automatically display when you insert the
PacerMan set up CD.
1
Make sure your computer has an Internet connection. The software requires USB
and Bluetooth drivers to be installed when you use the PacerMan System for the
rst time.
Window 7 or higher
512 MB RAM
Disk Space required if .net 4.5 is not already installed. If it is already
installed, then it requires less than 2MB of disk space
IMPORTANT NOTE: Install the PacerMan Software on your PC before
connecting the PacerMan System Body Form to your computer.
INSTALL SOFTWARE
REQUIREMENTS FOR SOFTWARE INSTALLATION
System Set Up |9PacerMan System
Install Software (continued)
Select the destination folder for installation. Choose the default location or
navigate to the desired location. Then click “Next”.
Click “Next” and proceed with the software installation.
Software installation will begin. Note: if you click “Cancel” on this screen it
will end the installation.
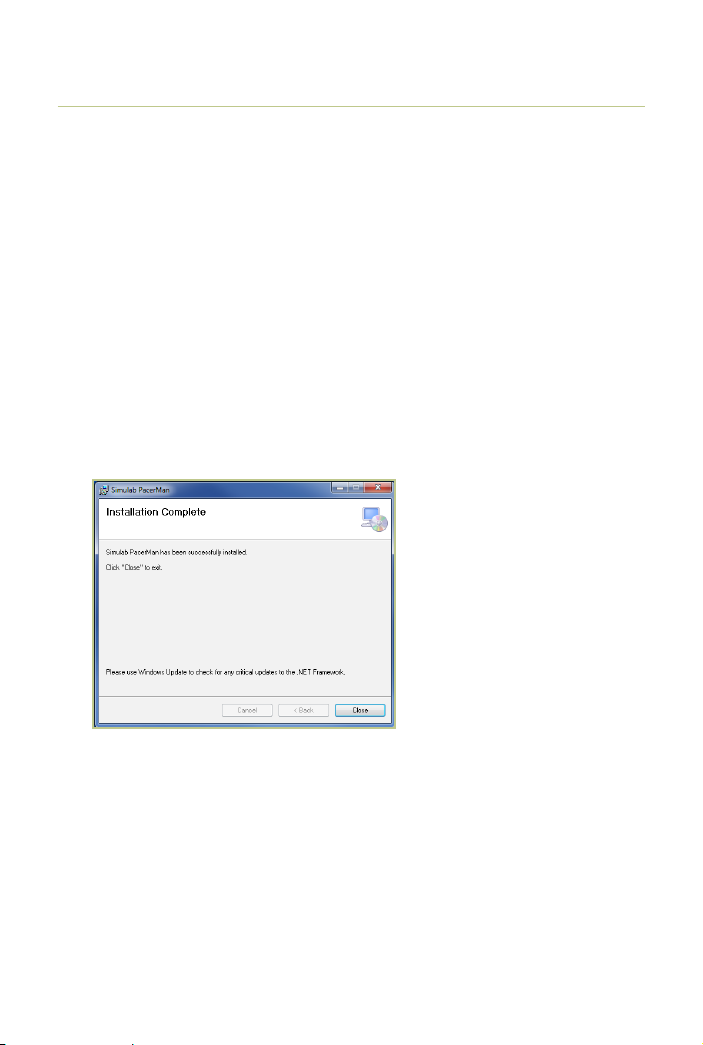
Once your software is successfully installed, the “Installation Complete” screen
will appear. Click “Close” and now the PacerMan set-up CD can be removed
from the disk drive. Please restart your computer before proceeding.
Simulab Corporation10 |System Set Up
Set up Bluetooth Connection
Ensure your PC is connected to the Internet the rst time you connect to
Bluetooth so the Bluetooth device driver can be properly installed. This will
happen automatically in the background when the system is rst paired.
To make PacerMan Bluetooth discoverable:
Connect to wall or battery power
Turn Power Switch ON
Disconnect USB to Body Form Cable
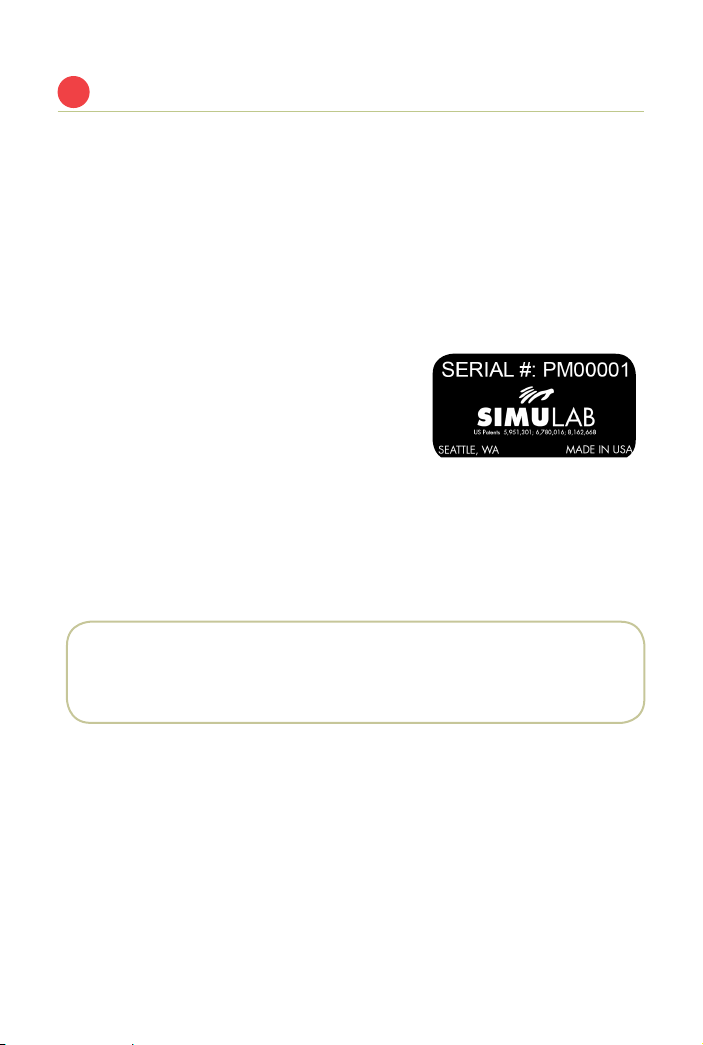
Each PacerMan has a serial number that is a
unique identier and will be displayed in the
discoverable device name. The Serial number
can be found on a label under the PacerMan
body form cover.
The PacerMan and PC will usually automatically connect anytime the two
devices are in range of each other when the Body Form is turned on, and the
USB cord is not connected to the body form.
Connection may take up to 30 seconds after PacerMan has been turned on and
discoverable.
NOTE: If using multiple PacerMan Systems in the same room, make sure
to properly pair each individual PC with the intended PacerMan body form
serial number.
2

System Set Up |11PacerMan System
In Windows 7
1. Turn on your PacerMan System
2. Select the Windows Start button > Devices and Printers.
3. Select Add a device > select the PacerMan > Next.
4. Follow any other instructions that might appear.
In Windows 8.1
1. Turn on your PacerMan System
2. Select the Start button > type Bluetooth > select Bluetooth settings from the
list.
3. Turn on Bluetooth > select the PacerMan > Pair.
4. Follow any instructions that might appear.
Bluetooth Connection (continued)

Simulab Corporation12 |System Set Up
Check to make sure all of the parts
listed in the System Components
section are in the case. Contact
Simulab for assistance if anything is
missing or damaged.
Remove the torso and head covers
from the body form. Then take off the
black vessel channel cover by using
the nger clips to gently lift off.
Place the replacement tissue in the
cradle, and lay the venous line into
the channel.
INSTALL TISSUE
UNPACK AND INSPECT
3
4

System Set Up |13PacerMan System
Connect the tissue in the two places
shown. Make sure it’s snapped
securely into both ends.
Replace the vessel channel cover,
ensuring it snaps into place.
Lay the arterial line into the channel
in the head area and replace the
head cover.
Install Tissue (continued)
1
2

Simulab Corporation14 |System Set Up
To create an arterial pulse, attach the
pulse bulb to the artery (red line). It
is pre-lled with red simulated blood.
If air gets into the pulse bulb, you’ll
need to rell it. Please see “Relling
the Pulse Bulb” on page 28.
NOTE: When removing the pulse
bulb, do so over a paper towel, as
there will be a small release of uid.
Mix SimuSensor Venous Concentrate
(blue) with water in the Fluid Mixing
Container by following these steps:
MIXING RECIPE:
1. Fill water up to the 30 oz
line
2. Add 2 oz of the Blue
SimuSensor Venous
Concentrate up to top line.
3. Shake to mix.
Fill up the uid reservoir using the
funnel and be sure to keep an eye
on the uid level. Then replace the
reservoir cap.
NOTE: The uid reservoir
holds approximately 24 oz
when it’s empty.
Install Tissue (continued)
PREPARE FLUID SYSTEM
5
Concentrate (2 oz)
Water (30 oz)

System Set Up |15PacerMan System
Concentrate (2 oz)
Prepare Fluid System (continued)
Replace the head and torso cover.
PacerMan is powered by battery or
wall power. To connect the battery,
place it in the battery well that’s
located under the torso cover.
Put the torso cover back on and the
cord will t through the mouse hole
as shown. Plug the battery cord into
the port labeled DC IN on the panel.
For wall power, plug the Wall Power
Supply into the DC IN port and plug
the other end into the wall.
Then turn the power switch on and
turn the Valve to the IN USE position.
CONNECT TO POWER
6
Mouse hole
Dial
DC IN
Power Switch
NOTE:
The System requires the valve to be
in the “In Use” position while using
the System.
Simulab Corporation16 |System Set Up
Connect PacerMan with your
computer using the Body Form to
USB cable. Simply plug one end into
the port labeled “USB” and the other
end into your laptop or PC. Or use
Bluetooth connection.
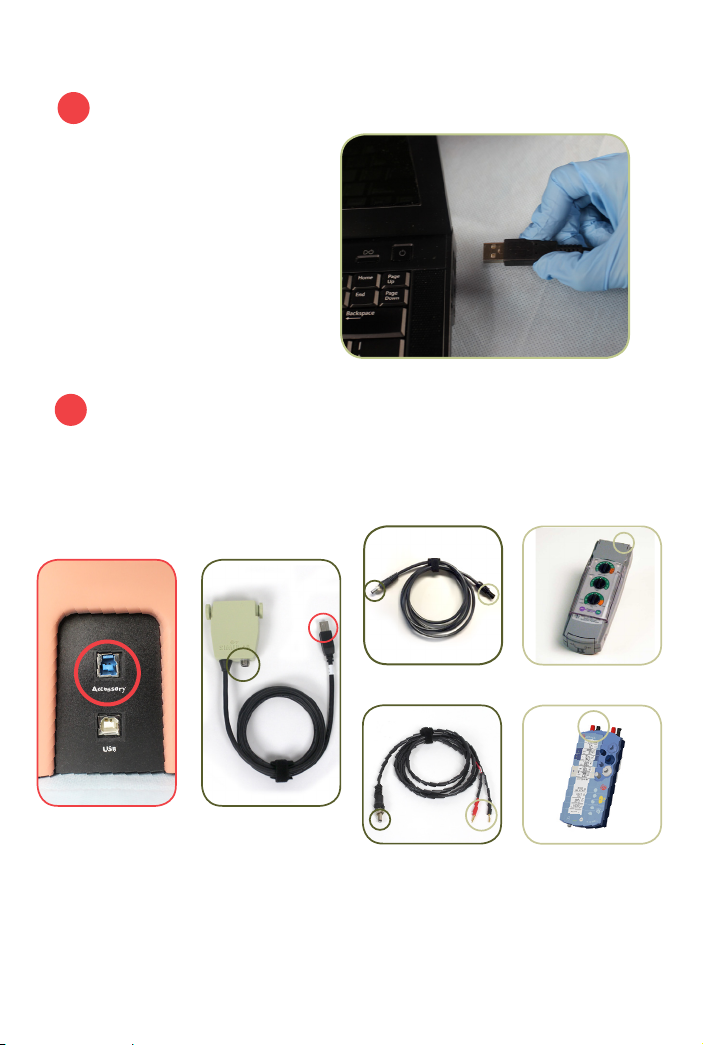
CONNECT PACERMAN TO YOUR PACING GENERATOR
BODY FORM TO PC
7
8
OEM Extension Cable Your Pacing Generator
(Medtronic plug-in)
Universal Extension Cable
Simulated Extension SystemCommunication Panel
Your Pacing Generator
(Distal and proximal plug-in)
The Simulated Extension System connects your pacing generator with the
PacerMan Body Form. It has one cable to t most Medtronic pacing generators
and another universal cable for those with only distal and proximal plug-ins.
++
+
+

System Set Up |17PacerMan System
System Set-up Checklist
Tissue: Ensure tissue is connected properly. See “Install Tissue” on
page: 12.
Fluid: Ensure tank is lled. See “Prepare Fluid System” page: 14.
Extension System: Ensure the Extension System is connected. See
“Connect PacerMan to your Pacing Generator” on page: 16.
Simulab Corporation18 |Software Guide
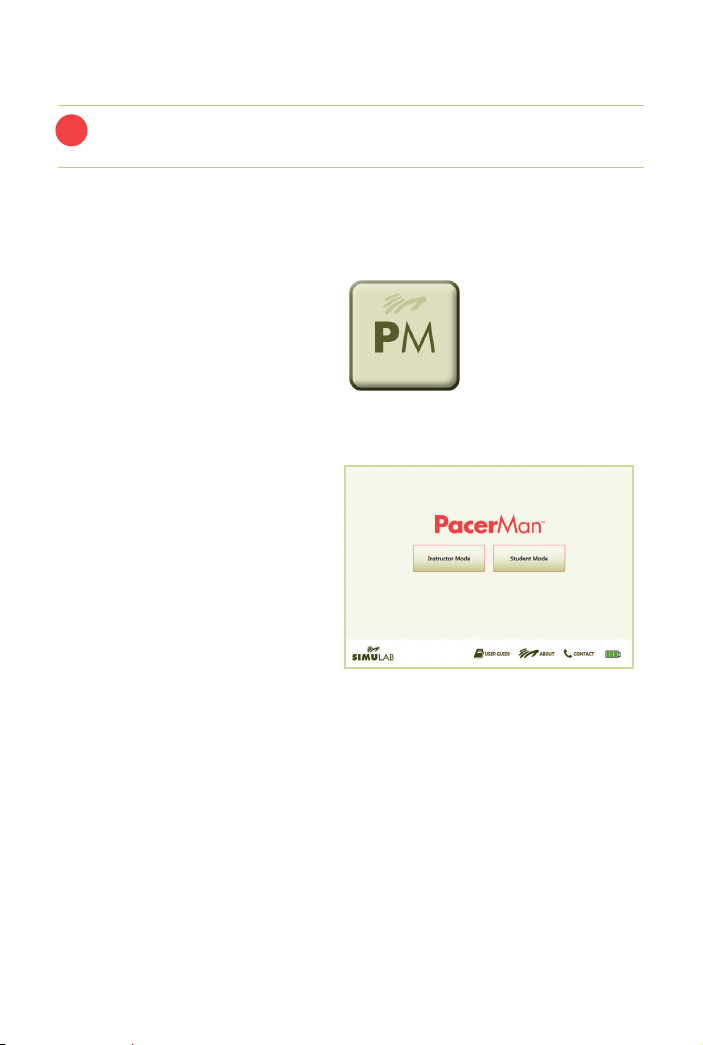
PacerMan Software Guide
Launch the PacerMan software by
double-clicking on your desktop icon
through the Start Menu, or in the
directory where your software was
installed.
The PacerMan System Home Page
will open and you will be ready to
begin.
LAUNCHING PACERMAN SOFTWARE
The rst time you connect the PacerMan body form to the PC a driver will
install. This requires a connection to the Internet and will happen in the
background.
1

Software Guide |19PacerMan System
PacerMan System Home Page
From the home page, choose to operate PacerMan in the Instructor Mode
or Student Mode.
Student Mode: Automatically initiates a unique scenario to allow
for independent learning.
1
3
2
4
1
2
3
4
2
Instructor Mode: Allows you to select a scenario set up by
choosing multiple outcomes for transvenous or transcutaneous
pacing (see page 20).
User Support: The User Support Section contains links providing
help with troubleshooting, how to contact the Simulab Customer
Care team and specics about your PacerMan Software version.
System Power Indicator: This indicator will alert you to the
system power status.

Simulab Corporation20 |Software Guide
Instructor Mode Scenario Setup
3
Intrinsic Cardiac Rhythm: Choose an option from the dropdown
menu.
Transcutaneous Settings: (Optional) Choose successful capture
threshold and outcome settings. Note: keeping the default settings will
not have an impact on the scenario.
Transvenous Pacing Settings:
Capture Threshold:Decide what a successful mA output will
be to gain capture.
Outcome: What outcome will the rst pass of the catheter
present?
Click Begin. The system will calibrate and the monitor screen will
open.
1
1
3
3
2
2
4
4
Next, the system will prompt you to set up your scenario parameters.
Table of contents
Other Simulab Medical Equipment manuals


