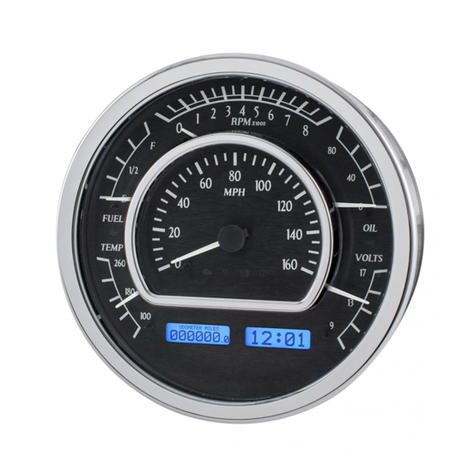
SIMUTEC SDU V2.0 User manual

v2.0
Updated 17/12/2022
Installation and User Guide:
SDU V2.0
A. Assembly
A1. What’s in the box
A2. Assembly Instructions
A3. Tools Required
B.Automatic Installation Guide (recommended)
B1. Run the Simutec SDU Installer
B2. Select the Required Install Options
B3. Select the Required Additional Tasks
B4. Import Dashboard
B5. Add SDU-2 Default Device
C. Configuring Within SimHub
C1. Select your Dash Display
C2. Select your LED Profile
D.Troubleshooting
D1. Restart
D2. Blank Dash Display
D3. Screen Flickering
D4. LEDs not Illuminating
D5. Device not Connected
D6. Additional Support

v2.0
Updated 17/12/2022
A. ASSEMBLY
A1.What’s in the box
Before you proceed to setting up your SDU device, please check the
contents of the box matches the components identified below:
•Simutec SDU Device
•Simutec universal rear mounting bracket
•2 x M6 countersunk bolt
•2 x M8 caphead bolt
•High Speed USB cable
A2. Tools Required
Tools required for mounting your device to your RIG:
•3mm Allen key
•4mm Allen key / 6mm Allen key
A3. Assembly Instructions
Carefully remove the universal rear mounting bracket from the back of
the SDU device using a 3mm Allen key.
Depending on the mounting option, take the required bolts and align to
the associated holes –now tightly fasten the bracket to the FFB / RIG.
Once attached, you can now set the height and reattach the SDU to the
bracket with the small bolts removed initially.
(The SDU can be installed to the rig whilst still attached to the bracket)
A. M8 caphead mounting bolts for Simucube / OSW and other
compatible FFB installations
B. M6 countersunk mounting bolts for Fanatec installation
C. Adjustable mounting bolt to set height position of SDU-2.

v2.0
Updated 17/12/2022
B. AUTOMATIC INSTALLATION GUIDE
RECOMMENDED INSTALLATION PROCESS
We have created an easy install executable application to make installing
and setting up your Simutec device as simple and as straight forward as
possible.
The latest version can be found here: https://www.simutec.co.uk/sdu-
downloads
B1.Run the Simutec SDU Installer
Double click the exe application.
B2. Select the Required Install Options
SimHub is a third party software which we have designed our products to
operate on. Other softwares are available.
Both the Dash Design and LED Profile can be imported automatically at
this stage or manually (detailed further in this User Guide).
Select the Required Install Options

v2.0
Updated 17/12/2022
B3. Select the Required Additional Tasks
It is not mandatory to use our dash design layout, however our dash
design is recommended by many sim racers. For the best functionality,
please select “Install fonts”.
B4. Import Dashboard
The installer will now prompt you to import the dash into the SimHub
library (example shown below).
B5. Add SDU-2 Default Device
Open SimHub, navigate to [Devices] on the left menu and select “Add
Device”. Select the Simutec SDU-2 from the Device list.

v2.0
Updated 17/12/2022
C. CONFIGURING WITHIN SIMHUB
The SDU-2 is designed to integrate into SimHub with
the latest Gen3 Firmware being plug and play and
supported by SimHub.
C1. Select your Dash Display
Choose a default Simutec SDU dash display /
generic SimHub display / create your own
In this menu you can choose which display you wish to have on your dash,
including which Idle screen you wish to display.
C2. Select your LED Profile
Choose a default Simutec LED Profile / customise /
create your own
Inside the “Edit Profile”options you can customise the LED functions. It is
recommended that RPM shift lights “Use values relative to configured
redline”is left unchecked, unless you have defined your vehicle.

v2.0
Updated 17/12/2022
D. TROUBLESHOOTING
D1. Restart
Restart Software and Connect your Simutec SDU
Fully close down SimHub software, disconnect Simutec SDU device,
relaunch SimHub software, connect Simutec SDU device.
D2. Blank Dash Display
Dashboard Selection
If the installation has been a success, your SDU device will be
“Connected”. If your device is “Partially Connected”without an active
display. You may need to re-install the USBD480 Display Drivers (available
to download here)
D3. Screen Flickering
Configure Optimum Frame Rate Limit
Our SDU device is designed to run at 10-60FPS depending on PC
capabilities. Limiting factors can be due to CPU processing power,
number of USB devices connected and USB prioritisation.
Evidence of screen flicker indicates that your device needs to receive data
with a lower frame rate limit.
Easily adjust the frame rate limit by changing the [Display refresh rate
limit (FPS)] –we recommend 20FPS.
D4. LEDs not Illuminating
LED Profile Selection
Ensure that the RGB LED profile is selected. From the LED profile tab on
the Device.
To ensure that any conflicting Port is not interfering with the device,
disable all Arduino. From the LEFT MENU select [Arduino] > From the TOP
MENU select [My Hardware] –Disable Arduino.
D5. Device not Connected
COMM Port Selection / USB 2.0 / USB 3.0 / Powered
Hub
•Ensure your COMM ports are not overloaded with outdated devices.
•If you are connected via USB 3.0 try unplugging (PC side) and
reconnecting, this can sometimes refresh the COMM port.
•If you are using a non powered / non active USB 2.0 cable longer than
2m in length it is required to use a Powered Hub.
Table of contents

