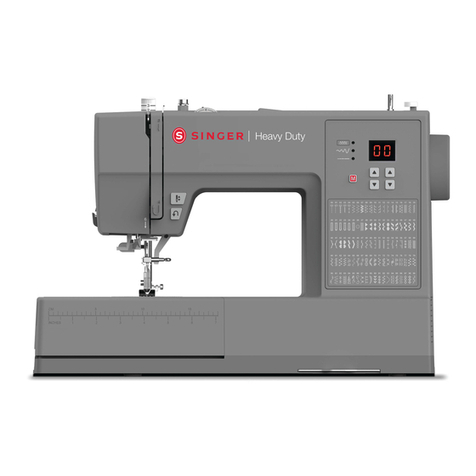
Singer Stylist 7258 User manual

INSTRUCTION MANUAL


1

2
When using an electrical appliance, basic safety precautions should always be followed, including the following.”“Read all instructions
before using this sewing machine.
DANGER
-
-To reduce the risk of electric shock:
IMPORTANT SAFETY INSTRUCTIONS
1. This sewing machine should never be left unattended when plugged in. Always unplug this sewing machine from the electric outlet
immediately after using and before cleaning.
WARNING
-
To reduce the risk of burns, re, electric shock, or injury to persons:
1. Do not allow to be used as a toy. Close attention is necessary when this sewing machine is used by or near children.
2. This appliance is not intended for use by persons (including children) with reduced physical, sensory or mental capabilities, or lack
of experience and knowledge, unless they have been given supervision or instruction concerning use of the appliance by a person
responsible for their safety. Children should be supervised to ensure that they do not play with the appliance.
3. Use this sewing machine only for its intended use as described in this manual. Use only attachments recommended by the
manufacturer as contained in this manual.
4. Never operate this sewing machine if it has a damaged cord or plug, if it is not working properly, if it has been dropped or damaged,
or dropped into water. Return the sewing machine to the nearest authorized dealer or service center for examination, repair, electrical
or mechanical adjustment.
5. If the supply cord is damaged, it must be replaced by the manufacturer, its service agent or similarly qualied persons in order to
avoid a hazard.
6. Never operate the sewing machine with any air openings blocked. Keep ventilation openings of the sewing machine and foot control
free from the accumulation of lint, dust, and loose cloth.
7. Never drop or insert any object into any opening.
8. Indoors use only.
9. Do not operate where aerosol (spray) products are being used or where oxygen is being administered.
10. To disconnect, turn switch to the off (“0”) position, then remove plug from outlet.
11. Switch off or unplug the appliance when leaving it unattended, unplug the appliance before carrying out maintenance or replacing
lamps.
12. Do not unplug by pulling on cord. To unplug, grasp the plug, not the cord.
13. Keep ngers away from all moving parts. Special care is required around the sewing machine needle.
14. Never sew with a damaged needle plate as this can cause needle to break.
15. Do not use bent needles.
16. Do not pull or push fabric while stitching. It may deect the needle causing it to break.
17. Switch the sewing machine off (“0”) when making any adjustments in the needle area, such as threading needle, changing needle,
threading bobbin, or changing presser foot, etc.
18. Always unplug sewing machine from the electrical outlet when removing covers, lubricating, or when making any other user
servicing adjustments mentioned in the instruction manual.
19. To avoid electrical shock never put the machine nor the mains cable or mains plug into water or other liquids.
20. The LED lamp maximum power is 0.3w, maximum voltage is DC 5v, if the LED lamp is damaged, you should not use the product
and send it to the manufacture or service agent to repair or replace at once.
21. Attention the following to avoid injury:
- Unplug the foot controller of the appliance when leaving it unattended:
- Unplug the foot controller of the appliance before carrying out any maintenance.
SAVE THESE INSTRUCTIONS
This product is for household use, or equivalent.
CAUTION
-
-Moving parts-To reduce risk of injury, switch off before servicing. Close cover before operating machine.
FOOT CONTROL (USA & Canada only)
Use Model YC-485 EC or Model JF-1000 with this sewing machine.
POLARIZED PLUGS CAUTION (USA & Canada only)
This appliance has a polarized plug (one blade wider than the other). To reduce the risk of electric shock, this plug is intended to t in a polarized
outlet only one way. If the plug does not t fully in the outlet, reverse the plug. If it still does not t, contact a qualied electrician to install the
proper outlet. Do not modify the plug in any way.
This appliance complies with EEC Directive 2004/108/EC covering the electromagnetic compatibility.
Please note that on disposal, this product must be safely recycled in accordance with relevant National legislation relating to electrical/
electronic products. If in doubt please contact your retailer for guidance.
SINGER is a registered trademark of The Singer Company Limited or its afliates.
©2010 The Singer Company Limited or its afliates.
All rights reserved.
3

4

5
1. Bobbin winding tension disk
2. Thread take-up
3. Thread tension control
4. Face cover
5. Thread cutter
6. Removable extension table/
Accessory box
7. Bobbin winder shaft
8. Bobbin winder stop
9. Sewing speed control
10. Pattern number reference guide
11. Operation buttons
12. Horizontal spool pin
13. Handle
14. Hand wheel
15. Power/light switch
16. Cord socket
17. Identication plate
18. Presser foot lifter
19. Buttonhole lever
20. Thread guide
21. Automatic needle threader
22. Thread guide
23. Thread guide
24. Presser foot screw
25. Needle
26. Bobbin cover plate
27. Needle bar
28. Thread cutter
29. Foot release lever
30. Needle clamp screw
31. Presser foot
32. Feed dogs
33. Needle plate
34. Bobbin cover release button
35. Large extension table (Optional)
36. Power line cord
37. Foot control
38. Instruction manual
1.了解你的机器KNOWING YOUR SEWING MACHINE
机器零件名称
1.绕线张力器
2.挑线杆
3.上线张力调节器
4.面板
5.割线器
6.辅助缝台/附件盒
7.绕线器轴
8.绕线止动块
9.速度控制钮
10.操作面板
11.控制按钮
12.水平线柱
13.手柄
14.手轮
15.电源/灯源开关
16.电源插座
17.标牌
18.压脚提升杆
19.锁纽孔控制杆
20.导线器
21.自动穿线杆
22.导线钩
23.导线钩
24.压脚柄螺钉
25.机针
26.梭芯盖板
27.针杆
28.割线器
29.压脚释放钮
30.针夹螺钉
31.压脚
32.送布齿
33.针板
34.梭芯盖板释放钮
35.大扩展台
(选购件)
36.电源连接线
37.脚踏控制器
38.使用说明书
MACHINE IDENTIFICATION

6
1. Needles
2. Bobbins (4 total - 1 in machine)
3. Auxiliary spool pin
4. Spool pin felt discs (2)
5. Spool pin cap (mini)
6. Spool pin cap (small)
7. Spool pin cap (large)
8. Buttonhole opener/Seam Ripper and Brush
9. Screwdriver for needle plate
10. Darning plate
11. Zipper foot
12. Satin stitch foot
13. Blind stitch foot
14. Buttonhole foot
15. Straight stitch foot
16. Overcasting foot
17. Darning & embroidery foot
18. Gathering foot
19. Rolled hem foot
1.针包
2.梭芯(共4个,其中机器上安装1个)
3.备用线柱
4.毡垫(2)
5.小线塞
6.中线塞
7.大线塞
8.拆线刀及毛刷
9.针板螺钉起子
10.绣花板
11.拉链压脚
12.密针缝压脚
13.暗缝压脚
14.锁纽孔压脚
15.直缝压脚
16.布边缝压脚
17.刺绣压脚
18.缩褶压脚
19.卷边压脚
机器附件 ACCESSORIES
装在机器上的压脚称为万能压脚,在大多数缝纫情
况下使用。
The Foot that comes on your Sewing machine is called the
General Purpose Foot and will be used for the majority of your
sewing.
密针缝压脚(12)是另一个非常有用的压脚,用于
大多数装饰线迹,特别是密集的缎纹线迹。
The Satin Foot (12) is another very useful foot and should be
used for most decorative sewing.
当需要另外选购梭芯时,注意梭芯类型是15J。 When purchasing additional bobbins, be sure they are Class I5 J.

7

8
电源 / 灯源开关
POWER/LIGHT SWITCH
只有电源 / 灯源开关打开时,机器才能正常运转。电源
和车灯由同一个开关控制。
当维修机器或更换机针等时,必须关闭电源开关。
Your machine will not operate until the power/light switch is
turned on. The same switch controls both the power and the light.
When servicing the machine, or changing needles, etc., machine
must be disconnected from the power supply.
当使用电源线和脚踏控制器时
WHEN USING POWER LINE CORD AND FOOT
CONTROL
将电源插头①插入机器的电源插座内,接通电源②。把
脚踏控制器插头③插入机器的控制器插座内(B 图)。
Connect the plug of the power line cord into the cord socket (1)
and your wall outlet (2) as illustrated (B).
Connect the foot control plug into the machine socket (3).
缝纫前的准备
SETTING UP YOUR MACHINE
在第一次使用机器前,请先清除针板上的多余机油。
Be sure to wipe off any excess oil from needle plate area before
using your machine the rst time.
当仅使用电源线时
WHEN USING POWER LINE CORD ONLY
将电源插头①插入机器的电源插座内,接通电源②
(A 图)。
Connect the plug of the power line cord into the cord socket (1)
and your wall outlet (2) as illustrated (A).
电源 / 灯源开关关闭 (OFF)
Set power/light switch at “OFF”
电源 / 灯源开关关闭 (OFF)
Set power/light switch at “OFF”
电源线
Power line cord
脚踏控制器
Foot control
电源 / 灯源开关关闭
Power/light switch “OFF”
电源 / 灯源开关打开
Power/light switch “ON”
电源插座
Machine socket
控制器插头
Pin plug
电源线
Power line cord
Always disconnect the machine from power supply by
removing the plug from the wall-outlet.
提示:本机可以使用脚踏控制器,也可以不使用脚
踏控制器。
NOTE: This machine can be used either with or without foot
control.

9
线柱
SPOOL PINS
水平线柱
HORIZONTAL SPOOL PIN
将线团放入线柱,套上线塞并确保出线顺畅。如果线团
上有留线槽,则把留线槽的一端放在线柱的右侧。
Place thread spool on the pin and secure with a spool cap to ensure
smooth ow of thread. If the thread spool has a thread retaining
slit, it should be placed to the right.
Select the correct spool pin cap according to the type and diameter
of spool being used. The diameter of the spool pin cap should
always be larger than that of the spool itself.
垂直线柱
VERTICAL SPOOL PIN
先装上备用线柱,并在上面放置一个毛毡垫,再放上线
团。
Attach the spool pin and place a felt disc over it. Place a spool of
thread on the spool pin.
压脚提升杆
PRESSER FOOT LIFTER
压脚有三个位置。
1. 放下压脚,开始缝纫。
2. 提升压脚至中间位置,放入或移动布料,以及更换压脚。
3. 提升压脚至最高位置,适合较厚的布料。
There are three positions for your presser foot.
1. Lower the presser foot to sew.
2. Raise the lifter to the middle position to insert or remove fabric,
and to change presser foot.
3. Lift it to its highest position to accommodate thicker fabrics.
绣花板
DARNING PLATE
当你需要手动控制送料,如钉纽扣、自由绣花、自由压
线时,要使用绣花板。
转动手轮提起机针,提起压脚杆。将绣花板放在针板上,
绣花板的两个突起对准针板上的两个小孔。
Use the darning plate when you need to control fabric feeding for
button sewing, free motion work and free motion darning.
Raise needle and presser foot, and position darning plate onto the
needle plate with the two pins on the back inserted to the holes of
needle plate.
线团
Spool
毛毡垫
Spool pin felt discs
备用线柱
Vertical spool pin
线团留线槽
Thread retaining slot
线塞
Spool pin cap 线团
Spool
水平线柱
Spool pin

10
卸辅助缝台
CONVERTING TO FREE-ARM SEWING
本机可以用于平板或筒式两种缝台。
装上辅助缝台,可以得到比较大的平板缝台。
卸辅助缝台,用双手将辅助缝台向左平移,直至全部移
出。若将它放回原位,将辅助缝台向右平移,直到咔嚓
滑入原位。
大扩展台(选购件)
LARGE EXTENSION TABLE (OPTIONAL)
先将辅助缝台向左移出。
打开大扩展台的撑脚,把大扩展台沿着缝台向右平移,
如图箭头所示将 A、B、C、D 四个插销分别对应卡入
机器的插口。
To place onto the machine, lift the supporting leg of the extension
table, and slide the table into place while tting the guide pins A, B,
C and D into machine as illustrated.
Your machine can be used either as a flat- bed or as a free-arm
model.
With the extension table in position, it provides a large working
surface.
To remove the extension table, hold it rmly with both hands and
pull it off to the left as shown. To replace, slide the extension table
back into place until it clicks.
With the extension table removed the machine converts into a free-
arm model for sewing children’s clothes, cuffs, trouser legs, and
other hard-to-reach places.
扩展台
Extension table
撑脚
Supporting leg

11
绕梭芯
WINDING THE BOBBIN
1. 将线团放在线柱上,拉出线头,按图示把线绕进导线
板。
Place a spool of thread on the spool pin, and secure it with the
spool pin cap. Pull the thread out from the spool and place it
through thread guides as shown in illustration.
Be sure to pull thread securely into the bobbin winding tension
disk.
2. 线头从梭芯端小孔穿出 ;把梭芯放在绕线轴上。
Put end of thread through the hole in bobbin as shown.Push
bobbin winder shaft to far left position, if it is not already there.
4. 启动机器,在梭芯开始绕线几圈后,停车,剪去线尾。
重新启动机器,继续绕线直至梭芯绕满,停车。将绕
线轴推回左端,剪断连线,取下梭芯。
Start machine and the bobbin starts to wind. Bobbin will
automatically stop turning when completely lled. Push shaft to
the left to remove bobbin and cut thread.
3. 右推梭芯使绕线轴靠至绕线止动块。
Place bobbin onto shaft with end of thread coming from top
of bobbin. Push bobbin winder shaft to the right until it clicks.
Hold the end of thread.
确认使用的是15J型梭芯
Be sure to use Class 15 J bobbins.

12
装梭芯
THREADING THE BOBBIN THREAD
1. 逆时针转动手轮将机针提到最高位置。
Raise the needle to its highest position by rotating the hand
wheel toward you (counter-clockwise).
2. 把梭芯盖板释放钮向右拨,梭芯盖打开,移走梭芯盖
板。
Remove the bobbin cover plate by pushing the release button to
the right. Bobbin cover will pop up sufciently to allow you to
remove the cover.
4. 将线绕过槽(A ),并拉向左边。
Pull thread through the slot (A) and then to the left.
6. 盖上梭芯盖板。
Replace the bobbin cover plate onto the needle plate.
3. 放入梭芯。确保拉线时,梭芯是逆时针方向旋转。
Insert the bobbin making sure the bobbin rotates counter-
clockwise when you pull the thread.
5. 用一手指轻轻地按在梭芯上部,拉动线头绕进槽(B)。
然后继续拉动线头向后方拉出约 15 厘米。
With a nger held gently on top of the bobbin, pull the thread
until it stops in slot (B). Then pull about 6” (15 cm) of thread
and lead it towards back of the machine under the presser foot.
注意:这一步骤非常重要,否则可能导致梭芯不能被
绕上线,当梭芯顺时针方向旋转时会引起缝纫问题。
NOTE: This is a very important step as the bobbin can become
unthreaded and cause sewing problems if it rotates clockwise.
提示:缝纫能操作的底线长度。
NOTE: This is also a very important step to assure the bobbin
thread does not slip out of position.

13
穿上线
THREADING THE TOP THREAD
A . 提起压脚提升杆。(如果压脚未被提起,则无法得到
正确的线张力。)
Raise the presser foot lifter. Always be sure to raise the presser
foot lifter before threading the top thread. (If the presser foot
lifter is not raised, correct thread tension cannot be obtained.)
C. 右手拉着线、左手拉住线头,如图按照以下步骤穿线。
Thread the machine with your left hand while rmly gripping
the thread with your right hand in the following order as
illustrated.
* 将线绕入导线板①和②。
Guide the thread through thread guide (1), and then pull it
into the pre-tension guide (2).
* 线卡入导线板②的卡片中。
Pull the thread into the tension discs (which are located inside
the machine) by rst passing the thread to the left of plate (2).
Then guide the thread to the bottom of the groove.
* 线沿着线槽③往下拉。
Do a U-turn around the inside of the tab (3).
* 然后从右向左绕入挑线杆④。
Pass the thread through the thread take-up (4) from right to
left.
* 拉着线使它滑入挑线杆眼。
Pull the thread into the inside of the take-up lever until it
reaches the eye of the lever.
* 再把线绕入导线钩⑤。
Guide the thread into the thread guide (5).
* 由前向后将线穿进针孔⑥(见下一页“自动穿线
器”)。
Pass the thread through the eye of the needle (6) from front to
back. (See following page for instructions on operation of the
Automatic Needle Threader.)
B. 逆时针转动手轮,把机针提到最高位。
Turn the hand wheel toward you until the needle is in its highest
position.

14
Raise the needle to its highest position by rotating the hand wheel
towards you (counter-clockwise).
1. Hook thread into thread guide as illustrated.
2. Pull down lever while holding the end of thread.
3. Rotate the lever to the rear of the machine.
4. Guide thread into hooked end and pull the thread upward.
5. Return the lever and needle will be threaded automatically.
6. Release the lever and pull thread away from you.
自动穿线器
USING AUTOMATIC NEEDLE THREADER
逆时针转动手轮,把机针提到最高位。
1. 把线勾在自动穿线杆的导线钩上。
2. 按下自动穿线杆到最低位置。
3. 左手如图示转动穿线杆,至穿线钩进入针孔时停住。
4. 右手将线头贴着机针由下往上轻提,让线被穿线钩勾
住。
5. 轻轻释放穿线杆,见线被勾入针孔中形成线环。
6. 放回自动穿线杆 ;拉出针孔后的线头。
重要提示 :
按以下方法可以确认上线是否被夹入夹线器中。
1) 提起压脚,向机器后方拉动上线,几乎感觉不到线阻
力并且机针无偏斜。
2) 放下压脚,再次向机器后方拉动上线,此次会感到明
显的线阻力,机针略有后弯倾向。这表示上线已经被
夹入夹线器中,否则穿线有误,需要重新穿线。
Important:
To verify that the machine is threaded properly in the tension discs,
do this simple check:
1)
With the presser foot raised and the needle unthreaded, pull the
thread. You should detect only a slight resistance and little or
no deection of the needle.
2)
Now lower the presser foot and again pull the thread towards
the the back of the machine. This time you should detect a
considerable amount of resistance and much more deection of
the needle. If you do not detect the resistance, this means you
have not threaded the machine correctly and need to rethread it.
提示:为了穿线顺畅,建议操作者在使用自动穿线器
时,选择直线线迹(针在中间位置)。
NOTE: For smooth threading it is recommended you set the
machine for straight stitch when using the needle threader.

15
引下线
PICKING UP BOBBIN THREAD
1. 提起压脚提升杆
Raise the presser foot lifter.
2. 左手轻拉上线线头,右手逆时针转动手轮,使针下降
至针板内,继续转动手轮直到针回到最高位置。
Holding needle thread loosely with your left hand, turn hand
wheel toward you (counter-clockwise) with your right hand,
rst lowering the needle and continuing until the needle comes
to its highest position.
3. 慢慢地拉扯上线,使下线穿过针板孔拉出。
Lightly pull up the top thread, and pick up bobbin thread, which
will appear through the needle plate slot.
4. 将上线和下线一起从压脚缺口下方往后拉出约 15 厘米。
Pull both top and bobbin threads together toward the back of the
machine under the presser foot, leaving about 6” (15 cm) clear.
提示:有一个快速引下线的方法。选择直线缝线迹,
按一下倒缝按钮。机针将向下、再向上,转一周回到
上位。
NOTE: A quick way to pick up the bobbin thread is, with
straight stitch selected, touch and release the reverse switch.
Your machine will perform one down-up cycle and stop with
the needle up. Always stopping with the needle “fully up” is
one of the features of your computer sewing machine.

16
布料类型 FABRICS 线 THREAD 机针 NEEDLES
轻、薄料
Light-Weight
薄棉布 Batiste
纺绸 Chiffon
绉纱 Crepe
中料
Medium-Weight
灯芯绒 Corduroy
法兰绒 Flannel
华达呢 Gabardine
斜纹布 Gingham
亚麻、薄棉 Linen\Muslin
羊毛、绉纱 Wool\Crepe
中厚料
Medium-Heavy
针织布 Bonded Wovens
帆布 Canvas
外衣布 Coating
粗斜纹棉布 Denim
牛仔布 Jean
编织料
Knits
编织 Bonded Knits
混纺 Double Knit
运动衫 Jersey
经编针织 Tricot
涤棉 Cotton-wrapped
涤纶 Polyester
100% 涤纶 100% Polyester
*40 支丝光棉 * Mercerized Size 40
*粗线 * "Heavy Duty"
涤棉 Cotton-wrapped
涤纶 Polyester
100% 涤纶 100% Polyester
*60 支丝光棉 * Mercerized Size 60
涤棉 Cotton-wrapped
涤纶 Polyester
100% 绦纶 100% Polyester
*50 支丝光棉 * Mercerized Size 50
尼龙 Nylon
涤棉 Cotton-wrapped
涤纶 Polyester
涤纶 Polyester
尼龙 Nylon
2020 红柄
red shank
2020 红柄
red shank
2020 红柄
red shank
2045 黄柄
yellow shank
11/80 橙圈
orange band
11/80 橙圈
orange band
14/90 蓝圈
blue band
16/100 紫圈
purple band
14/90 蓝圈
blue band
16/100 紫圈
purple band
18/110 黄圈
yellow band
* 不要用于弹力布料。Do not use on stretch fabrics.
* 为了达到最好的缝纫效果,请使用胜家牌机针。For best sewing results, always use a SINGER branded needle.
机针、线和布料之间的关系图
NEEDLE, THREAD AND FABRIC CHART
根据不同的布料选择机针和线。下表是关于针和线的选择,非常实用。每次新的缝纫前都要进行针和线的选择,
确保在梭芯内使用与上线是相同类型和规格的线。
Your fabric will determine the choice of a needle and thread. The following table is a practical guide to needle and thread selection.
Always refer to it before a new sewing project. In most cases, you will use the same size and type of thread in the bobbin as in the top
thread supply.
下列布料可由任何成分制成:棉布、亚麻、丝绸、羊毛、合成纤维、人造丝、
混纺。下面举例说明他们的厚度和种类。
The fabrics below can be of any ber: cotton, linen, silk, wool, synthetic, rayon, blends. They are
listed as examples of weight. 类型
TYPE
规格
SIZE

17
更换机针
CHANGING THE NEEDLE
1. 逆时针转动手轮,提升针杆到最高位置。
2. 放松针夹螺钉。
3. 取下旧针。
4. 将新的针插入针夹中,针柄平面向后。
5. 沿槽向上推到顶。
6. 用螺钉起子拧紧针夹螺钉。
1. Raise the needle bar to its highest position by turning the hand
wheel toward you.
2. Loosen the needle clamp screw by turning it toward you.
3. Remove the needle by pulling it downward.
4. Insert the new needle into the needle clamp with the at side
toward the back.
5. Push the needle up as far as it can go.
6. Tighten the needle clamp screw rmly with the screw driver.
Always disconnect the machine from power supply by
removing the plug from the wall-outlet.
针柄平面
Flat side
限位销
Stop pin
针柄平面向后
Flat side toward the back
机针
Needle
注意:适当拧紧螺钉,但不要拧得过紧。
NOTE: Tighten snugly, but do not over tighten.
友情提示:在压脚下放一块碎布或一张纸,这样在换
机针时可避免机针掉入针板槽内。
Helpful Hint: Placing a scrap of fabric under the presser foot
and lowering the presser foot makes it easier to change the
needle and will preclude dropping the needle into the needle
plate slot.

18
调整上线张力
ADJUSTING TOP THREAD TENSION
把机器的上线张力调节器设置在“AUTO(自动)”档,
可以完成 90% 的缝纫操作。
90% of your sewing will be done with the tension control dial (on
top of the machine) set at “AUTO” .
友情提示:调节数值大小,可改善缝纫效果。
Helpful Hint: A slight adjustment to a higher number or a
lower number may improve sewing appearance.
直线线迹
STRAIGHT STITCHING
美观的线迹在很大程度上取决于上线和下线的平稳线张
力。当缝纫布料时,上线和下线能稳定地固定在布料的
中间层,那么就能保持平稳的线张力。
如果发现缝纫线迹不规则,那么需要调整线张力。
进行任何调整时需要放下压脚。通常只有在缝纫直线线
迹时才需要平稳的线张力(确认上线和下线的线迹)。
The correct appearance of your stitching is largely determined by
the balanced tension of both top and bobbin threads. The tension is
well balanced when these two threads ‘lock’ in the middle of layers
of the fabric you are sewing.
If, when you start to sew, you nd that the stitching is irregular,
you will need to adjust the tension control.
Make any adjustments with presser foot ‘down’.
A balanced tension (identical stitches both top and bottom) is
usually only desirable for straight stitch sewing.
曲折缝和装饰线迹
ZIG ZAG and DECORATIVE SEWING
进行曲折缝和装饰缝时,上线张力一般小于直线缝纫时。
当上线出现在布料的底部时,总是可以得到美观的线迹,
几乎没有褶皱。
For zigzag sewing and decorative stitch functions, thread ten-sion
should be less than for straight stitch sewing.
You will always obtain a nicer stitch and less puckering when the
upper thread appears on the bottom side of your fabric.
梭芯张力
BOBBIN TENSION
梭芯张力在机器出厂时就已经校准,一般情况下操作者
不需要再作调整。
The bobbin tension has been correctly set at the factory, so you do
not need to adjust it.
平稳的线迹
Well balanced
反面
Under side
正面
Top side
上线太松
Top stitch too loose
增加线张力
Increase tension
上线太紧
Top stitch too tight
减小线张力
Decrease tension
Other manuals for Stylist 7258
4
Table of contents
Other Singer Sewing Machine manuals

Singer
Singer 4843116 User manual

Singer
Singer 81-3 User manual

Singer
Singer 324 User manual

Singer
Singer 211G146 User manual

Singer
Singer 114-32 User manual

Singer
Singer Feather Weight II User manual

Singer
Singer 14SH754 - User manual

Singer
Singer XL-1000 User manual

Singer
Singer 3300 Series User manual

Singer
Singer 300W class User manual

Singer
Singer 5825 User manual

Singer
Singer 115-1 User manual

Singer
Singer 1300-1 User manual

Singer
Singer 212U443A Setup guide

Singer
Singer 136W105 Quick start guide

Singer
Singer 96-85 User manual

Singer
Singer 6202 User manual

Singer
Singer 8280 User manual

Singer
Singer Style-O-Matic 328 Building instructions

Singer
Singer 6268 User manual