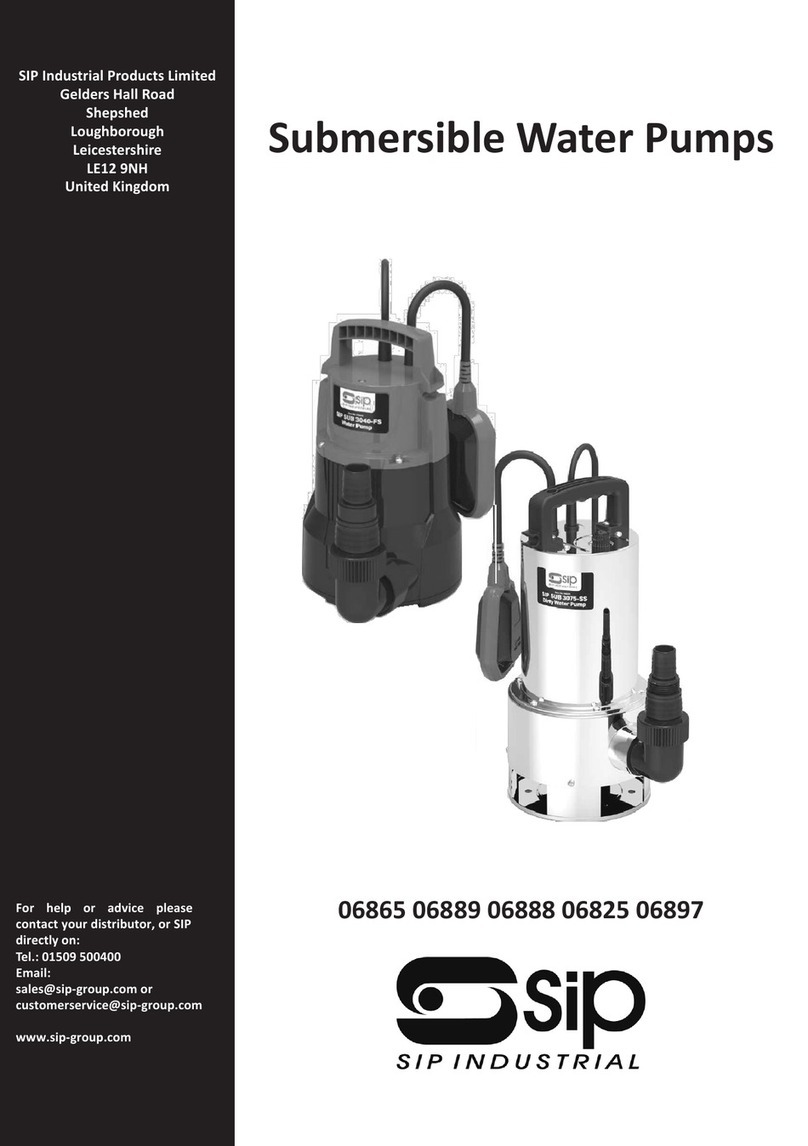
SIP SUB1025SS User manual

24
FOR HELP OR ADVISE ON THIS PRODUCT PLEASE CONTACT YOUR DISTRIBUTOR,
OR SIP DIRECTLY ON:
TEL: 01509500400
EMAIL: sales@sip-group.com or technical@sip-group.com
www.sip-group.com
Ref: 251013
Please dispose of packaging for the product in a responsible
manner. It is suitable for recycling. Help to protect the
environment, take the packaging to the local amenity tip and
place into the appropriate recycling bin.
Never dispose of electrical equipment or batteries in with your
domestic waste. If your supplier offers a disposal facility please
use it or alternatively use a recognised re-cycling agent. This will
allow the recycling of raw materials and help protect the envi-
ronment.
1
SUB1010FS, 1015FS & 1025SS
Water Pumps
Please read and fully understand the instructions in this manual
before operation. Keep this manual safe for future reference.
06879, 06881 & 06885

2
23
Declaration of Conformity
We
SIP (Industrial Products) Ltd
Gelders Hall Road
Shepshed
Loughborough
Leicestershire
LE12 9NH
England
As the manufacturer's authorised representative within the EC
declare that the
Sub 1010FS Water pump - SIP Part No. 06879
Sub 1015FS Water pump - SIP Part No. 06881
Sub 1025SS Water pump - SIP Part No. 06885
Conforms to the requirements of the following directive(s), as indicated.
2006/95/EC Low Voltage Directive
2004/108/EC EMC Directive
2002/95/EC RoHS Directive
And the relevant harmonised standard/s, including:
EN 55014-1+A2:2011
EN 55014-2:+A2:2008
EN 61000-3-2+A2:2009
EN 61000-3-3:2008
Signed: …………………………………...
Mr P. Ippaso - Managing Director - SIP (Industrial Products) Ltd
Date: 26/03/2013.
DECLARATION OF CONFORMITY

22
NOTES
3
CONTENTS
Page No. Description
4. Safety Symbols Used Throughout This Manual
4. Safety Instructions
7. Specified Conditions of Use
8. Electrical Connection
9. Guarantee
10. Technical Specifications
10. Contents & Accessories
11. Getting to Know Your Water pump
12. Operating Instructions
14. Maintenance Instructions
15. Troubleshooting
16. Exploded Drawing - 06879 Sub 1010FS
17. Parts List - 06879 Sub 1010FS
18. Exploded Drawing - 06881 Sub 1015FS
19. Parts List - 06881 Sub 1015FS
20. Exploded Drawing - 06885 Sub 1025SS
21. Parts List - 06885 Sub 1025SS
23. Declaration of Conformity

4
SAFETY SYMBOLS USED THROUGHOUT THIS MANUAL
Danger / Caution: Indicates risk of personal injury and/or the possibility of
damage.
Warning: Risk of electrical injury or damage!
Note: Supplementary information.
When using the water pump, basic safety precautions should always be followed to
reduce the risk of fire, electric shock and personal injury.
Read all these instructions before operating the water pump and save this user manu-
al for future reference.
The water pump should not be modified or used for any application other than that
for which it was designed.
It was designed for pumping rain water, domestic waste water and to remove water
from flooded rooms in emergency conditions.
It was not designed for permanent installation in a domestic or commercial pond.
If you are unsure of its relative applications do not hesitate to contact us and we will
be more than happy to advise you.
KNOW YOUR WATER PUMP: Read and understand the owner's manual and labels af-
fixed to the water pump. Learn its applications and limitations, as well as the potential
hazards specific to it.
KEEP CHILDREN AND UNTRAINED PERSONNEL AWAY FROM THE WORK AREA: All visitors
should be kept at a safe distance from the work area.
STORE THE WATER PUMP SAFELY WHEN NOT IN USE: The water pump should be stored in
SAFETY INSTRUCTIONS
IMPORTANT: Please read the following instructions carefully, failure to do
so could lead to serious personal injury and / or damage to the water
pump.
21
Ref No. Description SIP Code Ref No. Description SIP Code
1. Float switch PW11-00086 25. Motor lining PW11-00115
2. Mains lead PW11-00085 26. Motor front cover PW11-00116
3. Screw 4.2x13 PW11-00102 27. Oil Seal 24x11x4.5 PW11-00066
4. Screw 4.2x18 PW11-00077 28. Mechanical seal PW11-00117
5. Handle PW11-00103 29. Adjusting washer PW11-00118
6. Cap nut M5 PW11-00104 30. Impeller PW11-00119
7. Top cover PW11-00105 31. Nut M8 PW11-00071
8. Seal 18.8x3 PW11-00106 32. Main seal 89.5x5.2 PW11-00068
9. Motor holder PW11-00107 33. End ring PW11-00120
10. Cable protection PW11-00053 34. Screw 4.2x32 PW11-00074
11. Cable gland PW11-00054 35. Motor support PW11-00121
12. Capacitor PW11-00108 36. O-ring PW11-00122
13. Capacitor gland PW11-00056 37. Base PW11-00123
14. Screw 3.9x30 PW11-00057 38. Bottom Cover PW11-00124
15. Metal cover PW11-00109 39. Screw 4.2x18 PW11-00077
16. Wave washer PW11-00060 40. Elbow PW11-00078
17. Bearing 6201 PW11-00061 41. Elbow o-ring PW11-00079
18. Rotor PW11-00110 42. Hose adaptor PW11-00080
19. Bearing 6201 PW11-00061 43. Screw M4x8 PW11-00125
20. Exhaust nut PW11-00111 44. Spring washer M4 PW11-00082
21. Steel ball PW11-00073 45. Earth wire PW11-00083
22. O-ring PW11-00112 46. Lock washer M4 PW11-00084
23. Exhaust screw PW11-00113 47. Insulation plate PW11-00058
24. Stator PW11-00114
PARTS LIST
06885 SUB1025SS

20
EXPLODED DRAWING
06885 SUB1025SS
5
SAFETY INSTRUCTIONS….cont
a dry location and disconnected from the mains supply, and out of the reach of chil-
dren.
WEAR THE CORRECT CLOTHING: Do not wear loose clothing, neckties, rings, bracelets,
or other jewellery, which may get caught in moving parts.
PROTECT YOURSELF FROM ELECTRIC SHOCK: When working with the water pump, avoid
contact with any earthed items (e.g. pipes, radiators, hobs and refrigerators, etc.). It is
advisable wherever possible to use an RCD (residual current device) at the mains
socket.
STAY ALERT: Always watch what you are doing and use common sense. Do not oper-
ate the water pump when you are tired or under the influence of alcohol or drugs.
DISCONNECT THE WATER PUMP FROM THE MAINS SUPPLY: When not in use, before ser-
vicing and when changing hoses, etc.
AVOID UNINTENTIONAL STARTING: Make sure the float switch is in the down position be-
fore connecting the water pump to the mains supply.
DO NOT ABUSE THE MAINS LEAD: Never attempt to move the water pump by the mains
lead or pull it to remove the plug from the mains socket. Keep the mains lead away
from heat, oil and sharp edges. If the mains lead is damaged, it must be replaced by
the manufacturer or its service agent or a similarly qualified person in order to avoid
unwanted hazards.
CHECK FOR DAMAGED PARTS: Before every use of the water pump, check for any
damage and determine that it will operate correctly and perform its intended func-
tion. Check for alignment of moving parts, free running of moving parts, breakage of
parts, and any other conditions that may affect its operation. Any parts that are dam-
aged should be correctly repaired or replaced by an authorised service centre unless
otherwise indicated in this instruction manual. Have defective items replaced by an
authorised service agent. Do not use the water pump if the mains lead is split or the
casing is damaged.
MAINTAIN THE WATER PUMP WITH CARE: Keep the impeller clean for the best and safest
performance. The mains lead must be checked at regular intervals and replaced if
damaged.
USE ONLY RECOMMENDED ACCESSORIES: Consult this user manual, your distributor or
SIP directly for recommended accessories. Follow the instructions that accompany the
accessories. The use of improper accessories may cause hazards and will invalidate
any warranty you may have.
DO NOT OVERREACH: Keep proper footing and balance at all times.
USE THE RIGHT TOOL: Do not use the water pump to do a job for which it was not de-
signed.
HAVE YOUR WATER PUMP REPAIRED BY A QUALIFIED PERSON: The pump is in accord-
ance with the relevant safety requirements. Repairs should only be carried out by
qualified persons using original spare parts, otherwise this may result in considerable
danger to the user.
DO NOT dismantle, tamper with or use the water pump without all parts fitted and all
pipes secure as this may be dangerous and will invalidate the warranty.

6
SAFETY INSTRUCTIONS….cont
CAUTION: The warnings and cautions mentioned in this user manual can not cover all possible
conditions and situations that may occur. It must be understood by the operator that common
sense and caution are factors which cannot be built into this product, but must be applied.
When installing, please ensure your SIP submersible pump is disconnected from
the electrical supply to prevent possible injury to people and / or damage due
to un-wanted start up.
Avoid inserting hands or other objects into the inlet / outlet of the pump whilst it is
connected to the mains supply.
Use the handle provided to transport or lift the pump.
Always check the pump regularly, and take it out of service if the water is likely
to freeze.
When not in use, always ensure that the pump is fully drained of any water and
stored in a warm environment to protect it from frost damage.
Never allow the pump to run without water flowing through it.
The pump should not be used where aquatic life is present such as in a domes-
tic, or commercial pond, or similar.
Always rinse the pump with clean water and fully drain after each use.
Never carry the water pump by the mains lead or pull it to remove the plug
from the mains socket, or the pump from the water.
Keep the mains lead away from heat, oil and sharp edges.
If the mains lead is damaged, it must be replaced by the manufacturer or its
service agent or a similarly qualified person in order to avoid unwanted hazards.
Never use flammable or corrosive liquids to clean the water pump.
Never use the water pump to pump anything other than water, it should not be
used to pump flammable, corrosive or other potentially damaging or danger-
ous liquids.
The ambient temperature should be no less than 0°C.
We recommend that the pump should be switched on every 3 months for a
few minutes.
If the water pump is used in a place of work all rules and laws etc. relating to the use
of portable electrical appliances should be followed.
19
PARTS LIST
Ref No. Description SIP Code Ref No. Description SIP Code
1. Mains lead PW11-00085 21. Adjusting washer PW11-00095
2. Float switch PW11-00086 22. Impeller PW11-00096
3. Top cover PW11-00087 23. Nut M8 PW11-00071
4. Cable protection PW11-00053 24. Casing PW11-00097
5. Cable gland PW11-00054 25. Steel ball PW11-00073
6. Capacitor PW11-00088 26. Gasket PW11-00098
7. Capacitor gland PW11-00056 27. Screw 2.9x8 PW11-00099
8. Screw 3.9x30 PW11-00057 28. Screw 4.2x32 PW11-00074
9. Insulation plate PW11-00058 29. O-ring PW11-00126
10. Metal cover PW11-00089 30. Base PW11-00100
11. Wave washer PW11-00060 31. Screw 4.2x18 PW11-00077
12. Bearing 6201 PW11-00061 32. Bottom cover PW11-00101
13. Rotor PW11-00090 33. Screw 4.2x18 PW11-00077
14. Bearing 6201 PW11-00061 34. Elbow PW11-00078
15. Stator PW11-00091 35. Elbow o-ring PW11-00079
16. Motor lining PW11-00092 36. Hose adaptor PW11-00080
17. Motor front cover PW11-00093 37. Screw M4x6 PW11-00081
18. Oil Seal 24x11x4.5 PW11-00066 38. Spring washer M4 PW11-00082
19. Mechanical seal PW11-00094 39. Earth wire PW11-00083
20. Main seal 89.5x5.2 PW11-00068 40. Lock washer M4 PW11-00084
06881 SUB1015FS

18
EXPLODED DRAWING
06881 SUB1015FS
7
SPECIFIED CONDITIONS OF USE
This range of submersible water pumps can be used to drain rain water, do-
mestic waste water and to remove water from flooded rooms in emergency
conditions. The pump can be used to transfer clean or moderately dirty fluids
(depending on the model).
These submersible pumps are designed to be used in the following applica-
tions:
Draining of cisterns, rainwater reservoirs, wells, ponds, swimming pools, storm
drains, flooded cellars, boats and yachts.
They are only for use with water and not chemicals or other substances that
could damage the internal seals etc.
The pump cannot be used for sea water or flammable, corrosive, explosive or
dangerous liquids.
They should not be used where aquatic life is present such as in domestic, or
commercial ponds, or similar.
The duty cycle for these pumps is 60 minutes on followed by at least 10 minutes
of rest.
Caution: Use, other than that specified is not permitted.

8
ELECTRICAL CONNECTION
WARNING! It is the responsibility of the owner and the operator to read, understand
and comply with the following:
You must check all electrical products, before use, to ensure that they are safe.
You must inspect power cables, plugs, sockets and any other connectors for wear or
damage.
You must ensure that the risk of electric shock is minimised by the installation of appro-
priate safety devices; A residual current circuit Breaker (RCCB) should be incorporated
in the main distribution board. We also recommend that a residual current device
(RCD) is used. It is particularly important to use an RCD with portable products that are
plugged into a supply which is not protected by an RCCB. If in any doubt consult a
qualified electrician.
Connecting to the power supply:
This SIP water pump is fitted with a standard 230v ~ 13 amp type plug. Before using
the water pump, inspect the mains lead and plug to ensure that neither are dam-
aged. If any damage is visible have the water pump inspected / repaired by a suita-
bly qualified person. If it is necessary to replace the plug a heavy duty impact resistant
plug would be preferable.
The wires for the plug are coloured in the following way:
Yellow / green Earth
Blue Neutral
Brown Live
As the colours of the wires may not correspond with the markings in your plug, pro-
ceed as follows: The wire which is coloured blue, must be connected to the terminal
marked with N or coloured black. The wire which is coloured brown, must be connect-
ed to the terminal, which is marked L or coloured red. The wire which is coloured yel-
low / green should be connected to the terminal which is coloured the same or
marked
Always secure the wires in the plug terminal carefully and tightly. Secure the cable in
the cord grip carefully.
17
Ref No. Description SIP Code Ref No. Description SIP Code
1. Mains lead PW11-00050 19. Mechanical seals PW11-00067
2. Float switch PW11-00051 20. Main seal 89.5x5.2 PW11-00068
3. Top cover PW11-00052 21. Adjusting washer PW11-00069
4. Cable protection PW11-00053 22. Impeller PW11-00070
5. Cable gland PW11-00054 23. Nut M8 PW11-00071
6. Capacitor PW11-00055 24. Casing PW11-00072
7. Capacitor gland PW11-00056 25. Steel ball PW11-00073
8. Screw 3.9x30 PW11-00057 26. Screw 4.2x32 PW11-00074
9. Insulation plate PW11-00058 27. O-ring PW11-00075
10. Metal cover PW11-00059 28. Base PW11-00076
11. Wave washer PW11-00060 29. Screw 4.2x18 PW11-00077
12. Bearing 6201 PW11-00061 30. Elbow PW11-00078
13. Rotor PW11-00062 31. Elbow o-ring PW11-00079
14. Bearing 6201 PW11-00061 32. Hose adaptor PW11-00080
15. Stator PW11-00063 33. Screw M4x6 PW11-00081
16. Motor lining PW11-00064 34. Spring washer M4 PW11-00082
17. Motor front cover PW11-00065 35. Earth wire PW11-00083
18. Oil Seal 24x11x4.5 PW11-00066 36. Lock washer M4 PW11-00084
PARTS LIST
06879 SUB1010FS

16
EXPLODED DRAWING
06879 SUB1010FS
9
This SIP water pump is covered by a 12 month parts and labour warranty covering fail-
ure due to manufacturers defects. This does not cover failure due to misuse or operat-
ing the water pump outside the scope of this manual - any claims deemed to be out-
side the scope of the warranty may be subject to charges Including, but not limited to
parts, labour and carriage costs.
This guarantee does not cover consumables such as hose adaptors & impeller etc.
In the unlikely event of warranty claims, contact your distributor as soon as possible.
Note: Proof of purchase will be required before any warranty can be hon-
oured.
GUARANTEE
ELECTRICAL CONNECTION….cont
Warning: Never connect live or neutral wires to the earth terminal of the plug.
Only fit an approved plug with the correct rated fuse. If in doubt consult a
qualified electrician.
Note: If an extension lead is necessary in order to reach the mains supply; The
cross section should be checked so that it is of sufficient size so as to reduce the
chances of voltage drops. Always fully unwind the lead during use.
Note: Always make sure the mains supply is of the correct voltage and the
correct fuse protection is used. In the event of replacing the fuse always
replace the fuse with the same value as the original.

10
TECHNICAL SPECIFICATIONS
Name Sub 1010FS Sub 1015FS Sub 1025SS
SIP Part No.06879 06881 06885
Power 400w 850w 1100w
Flow Rate 167 l/min 250 l/min 333 l/min
Outlet Diameter 25 - 32mm 25 - 32mm 25 - 32mm
Max. Pumping Head 7.5 m 9 m 10.5 m
Max. Operating Depth 7 m 8 m 8 m
Max. Particle 5mm 25mm 35mm
Body type Plastic Plastic Stainless steel
Pump Type Clean water Dirty Water Dirty Water
Cable Length 10 m 10 m 10 m
Net Weight 3.8kgs 5.7kgs 6.7kgs
Ref. Description Ref. Description
A. Water pump C. Elbow
B. Instruction Manual D. Hose adaptor
CONTENTS & ACCESSORIES
Note: If any of the above are missing or damaged, contact your distributor
immediately.
C
B
D
A
06879 06881 06885
15
TROUBLESHOOTING
Fault Possible cause Solution
Pump will not run.
1.Blown fuse.
2.Residual current circuit
breaker tripped
3.Power supply problem.
4.Float switch problem.
5.Impeller jammed.
1.Check and replace with
correct rated fuse.
2.Check and reset.
3.Check with a qualified elec-
trician.
4.Manual lift the float switch in
an upright position, if it still
doesn't work contact distribu-
tor for repair.
5.Check and remove block-
age.
Pump runs but no water
being pumped.
1.Impeller blocked.
2.Hose blocked or flat.
3.Air trapped in the pump.
1.Check and clean.
2.Check hose and clear any
obstruction.
3.Place the pump on its side
in the water (with the hose still
connected), wait until all the
air bubbles have stopped,
return to an upright position.
Lack of water being
pumped.
1.Incorrect hose diameter.
2.Hose flat or kinked.
3.Possibly an obstruction in
the pump/hose.
1.Try a bigger diameter hose.
2.Check hose.
3.Check pump impeller and
hose, clean and remove ob-
struction if necessary.
Note: If non of the above solutions work, contact your distributor for repair.

14
MAINTENANCE INSTRUCTIONS
The pump is mainly maintenance free, you may need, from time to time to clear
the impeller of any unwanted waste / debris. Always ensure that the mains lead is
removed from the power supply before all maintenance operations.
Remove the base retaining screws (see below diagrams).
Remove the base.
Rinse with clean water to remove debris.
Re-fit the base and o-ring and secure with the retaining screws.
1
2 3
1
2 3
06879 06881 06885
Screws
Clean and store the pump in a dry and frost-free place after each use, the am-
bient temperature should be no less than 0°c.
Never use flammable or corrosive liquids to clean the water pump.
11
Ref. No. Description Ref. No. Description
1. Carry handle 5. Elbow
2. Mains lead 6. Hose adaptor
3. Float switch 7. Float switch slot
4. Base
GETTING TO KNOW YOUR WATER PUMP
1
2
3
4 5
6
7
06879
1
2
3
4
5
6
7
06881
1
2
3
4
5
6
7
06885

12
OPERATING INSTRUCTIONS
A B C
1
2
13, 15 & 19mm 25mm 32mm
Choose the correct hose adaptor size to match your hose (diagram below).
13, 15 & 19mm HOSE
Remove the topmost nipple from the hose adaptor (1).
Screw a 1” bsp female tap adaptor onto the hose adaptor.
Fit an equivalent hose connector to the hose.
Connect the hose connector to the tap adaptor.
25mm HOSE
Push a hose of 25mm onto the hose adaptor without cutting anything.
Tighten the hose with a pipe clip or similar, where necessary.
32mm HOSE
Remove the top two nipples from the hose adaptor (2).
Push a hose of 32mm onto the hose adaptor.
Tighten the hose with a pipe clip or similar, where necessary.
ATTACHING THE HOSE
Note: Pipe clips, hose connectors & tap adaptors are not supplied.
13
OPERATING INSTRUCTIONS….cont
Screw the hose adaptor onto the elbow, then screw it into the side of the water
pump.
Push your hose onto the hose adaptor (see page 12).
Secure using a relevant pipe clip or similar (pipe clip not supplied).
Lower the pump into the water, use rope or similar around the handle to lower it
into position where required.
Note: Do not use the mains lead or float switch to lower beyond reach.
Warning: The water pump should be fitted with an RCD (residual current
device), or similar, to ensure the power is cut should any problems occur.
When installing, please ensure your SIP submersible pump is disconnected from the
electrical supply to prevent possible injury to people and / or damage due to un-
wanted start up.
You may need to shorten the length of the float switch
in order to control the depth of which it cuts power to
the pump (see right diagram).
Once the water pump is in position, connect to a pow-
er supply and switch on. After a few moments, the
pump should start to pump the water; if the water is
too low it will not pump until the water has risen high
enough to engage the float switch.
INSTALLING THE PUMP
This manual suits for next models
1
Table of contents
Other SIP Water Pump manuals
Popular Water Pump manuals by other brands

All-Flo
All-Flo IOM C038 Installation operation & maintenance

CorSolutions
CorSolutions PeriMicro Operator's manual

Conel
Conel FLOW TP30 Installation and operation instruction

Ingersoll-Rand
Ingersoll-Rand 6737X-XXX Operator's manual

Electrolux
Electrolux 5304522469 Use & care manual

MIXER
MIXER OPTIMIX 20 manual

PSG Dover
PSG Dover All-Flo A050 Users installation operation & maintenance

Pfeiffer Vacuum
Pfeiffer Vacuum HIPACE 1200 I operating instructions

Espa
Espa VE121N instruction manual

Evolution Aqua
Evolution Aqua ceTus Installation and instruction manual

GP
GP MKS40A Repair manual

IWAKI PUMPS
IWAKI PUMPS MDF-L250 instruction manual