SIRCHIE CGD8800X Manual

Technical Information TI0387R9
100 HUNTER PLACE, YOUNGSVILLE, NC 27596 USA
Ph: (919) 554-2244, (800) 356-7311 • Fax: (919) 554-2266, (800) 899-8181
• Web: www.sirchie.com • Email: [email protected]
CGD8800X –CGD8800X220
Combustible Gas Detector
Background and Purpose
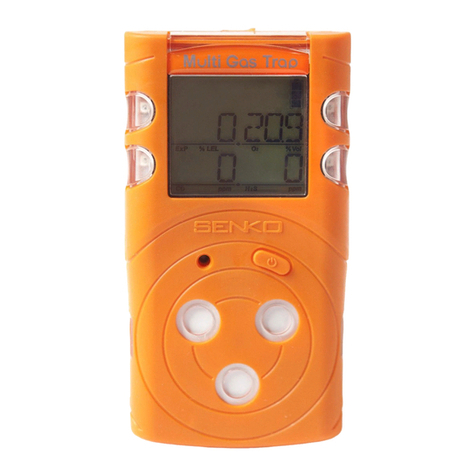
The CGD8800X Combustible Gas Detector offers significantly improved hydrocarbon detection
while featuring visual concentration indicators and battery operation in a reliable safe
enclosure. The Combustible Gas Detector indicates the strength of the vapor source on a six
LED bar graph display along with an audible “ticking”signal (similar to a Geiger counter), whose
frequency increases as the concentration of the combustible gas increases. The CGD8800X’s
sensitivity is adjustable and thus is an excellent instrument for pinpointing minute
concentrations of combustible hydrocarbons and the presence of hazardous vapors to levels as
low as one PPM (parts per million).

Technical Information TI0387R9
100 HUNTER PLACE, YOUNGSVILLE, NC 27596 USA
Ph: (919) 554-2244, (800) 356-7311 • Fax: (919) 554-2266, (800) 899-8181
• Web: www.sirchie.com • Email: [email protected]
Unpacking / Set-up
Before using the CGD8800X, it is necessary to install the NiMH battery pack.
1. Remove the rubber boot from around the instrument, carefully pulling it loose with your
fingers. Do not pry with any metallic object, as this could damage the case and boot.
2. On the top side of the instrument, loosen the slotted retaining screw holding the battery
cover in place. Figure 1
3. Pivot the cover up and pull out toward the retaining screw to remove from the case.
4. Connect the battery pack harness plug into the instrument’s battery connector. Push the
plug fully into the connector, latching it into place. Figure2
5. Position the battery pack in the case, with the temperature sensor “bump” facing downward
into the recessed area of the case. Figures 3 & 4
6. Reinstall the battery cover and fasten the retaining screw.
7. Reinstall the rubber boot around the instrument.
Figure 1: Loosen screw & remove battery cover Figure 2: Plug-in the battery connector
Figure 3: Insert battery pack into case Figure 4: Battery pack correctly installed
Charge the battery pack in order for the unit to function correctly.
1. Place the power switch in the OFF / CHARGE position.
2. Plug the AC adapter (included with the CGD8800X) into an appropriate wall outlet, and
connect the charger jack to the charge input on the instrument.

Technical Information TI0387R9
100 HUNTER PLACE, YOUNGSVILLE, NC 27596 USA
Ph: (919) 554-2244, (800) 356-7311 • Fax: (919) 554-2266, (800) 899-8181
• Web: www.sirchie.com • Email: [email protected]
3. During the charge cycle, the yellow LED (charge) is illuminated. Once charging is complete,
the green LED (READY) will also illuminate.
•Leaving the AC adapter connected after charging will not damage the instrument. However,
be aware that the instrument will not operate until the AC adapter has been disconnected.
•The battery pack is shipped pre-charged but its condition upon arrival to the user is unknown
due to parasitic drainage that occurs during storage and shipment. An initial charge cycle is
recommended to achieve full performance of the instrument. This initial charge will take 2-6
hours depending on the actual condition of the battery pack. Subsequent charges (applied
after the red low-battery LED illuminates) will take approximately 15 hours.
•New battery packs need to be conditioned before they’re capable of optimum performance.
To condition a new battery pack, charge it fully then operate the instrument as normal until
the low battery LED illuminates. Repeat this procedure a minimum of 3 to 5 times.
Safety Precautions
CAUTION: To prevent personal injury:
Always insure that the rubber boot is installed on the instrument. Failure to do so may impair
the intrinsic safety of the instrument —without the rubber boot in place, there is a possibility
of static charge leading to explosion.
CAUTION: To prevent equipment damage:
•Charge the NiMH battery pack only in temperatures between 32°F and 104°F (0°C and 40°C).
Charging outside this temperature range may cause permanent damage to the battery pack.
•Use only the AC adapter included with the CGD8800X to charge the NiMH battery pack.
Controls / Operation
Once the battery pack is fully charged, the CGD8800X is ready to use.
1. Move the instrument to a known, non-contaminated atmosphere.
2. Turn the sensitivity control fully counter-clockwise.
3. Turn the power switch ON. The power LED should be illuminated and no sound should be
heard. Once the instrument has warmed up for about 30 seconds, a ticking sound will be
heard.
4. Rotate the sensitivity control to the highest setting that does not cause the instrument to
alarm.
5. Search the general area of the suspected leak. When a detectable compound enters the
sensor, the tick rate increases and the leak intensity LEDs illuminate from left to right. The
larger the concentration, the more LEDs will light up.

Technical Information TI0387R9
100 HUNTER PLACE, YOUNGSVILLE, NC 27596 USA
Ph: (919) 554-2244, (800) 356-7311 • Fax: (919) 554-2266, (800) 899-8181
• Web: www.sirchie.com • Email: [email protected]
6. In most cases, it is not necessary to adjust the sensitivity of the instrument. However, if the
alarm sounds before a leak source can be found, it is likely the air is contaminated with
heavy concentrations of gas. You may desensitize the instrument by turning the sensitivity
knob counter-clockwise to a lower setting in order to pinpoint the leak location.
NOTE: Joint compounds used on newly installed piping may contain combustible solvents and
could cause a false alarm.
Status and Leak Intensity Indicators
Five (5) small LED status indicators are located on the right front of the instrument, in a vertical
column arrangement. Six (6) Leak Intensity indicators are arranged in a horizontal row, below
the status indicators and Sensitivity control knob.
From top to bottom, the Status LED display functions are:
Power (red): Illuminates when the instrument is ON.
Low Battery (red): Illuminates when a battery charge is
needed. The battery pack must be fully recharged before
the instrument is used again.
Charge (yellow): Illuminates during the recharge process.
Ready (green): Illuminates when the charge cycle is
complete. A fully charged battery pack provides up to three
(3) hours of continuous operation.
Fault (red): Illuminates only if there is a problem with
charging the battery pack.
Leak Intensity Indicators (red): Illuminate from left to right,
indicating stronger leak intensity as more LEDs are lit.
Cleaning and Maintenance
Do not allow dirt or grease to obstruct the charger input jack on the side of the instrument.
Use only a soft cloth dampened with mild soap to clean the body of the instrument.
Do not subject the instrument to extreme mechanical shock, exposure to strong magnetic
fields or extreme temperatures.
Do not drop the battery pack or subject it to mechanical shock or extreme temperatures.
Never immerse the instrument or the probe into a liquid.
Figure 5: Status and Leak Intensity Indicators

Technical Information TI0387R9
100 HUNTER PLACE, YOUNGSVILLE, NC 27596 USA
Ph: (919) 554-2244, (800) 356-7311 • Fax: (919) 554-2266, (800) 899-8181
• Web: www.sirchie.com • Email: [email protected]
Instrument Service
If the instrument does not sound an alarm in the presence of a known leak, it will require
service. Discontinue using the instrument, remove the battery pack and return the battery pack
with the instrument to SIRCHIE for Calibration Service.
Technical Specifications
Power Supply: 4.8V NiMH rechargeable battery pack (four AA-size cell pack)
Continuous Operation: Up to 3 hours (fully charged battery pack)
Battery Pack Lifetime: Approximately 200 charge cycles
Warm-up Period: Approximately 30 seconds
Duty Cycle: Continuous; no limitation
Response Time: Instantaneous
Sensitivity: Variable; as low as 1 ppm (gasoline vapor)
Operating Environment: 32°F to 125°F (0°C to 52°C)
Dimensions: 8 in. x 3 in. x 1.8 in. (20.3 cm x 7.6 cm x 4.6 cm)
Weight: Approximately 16 ounces (454 grams)
Probe Length: 15 in. (38 cm)
Calibration
In order to guarantee proper operation and to maintain NIST traceability, the sensor must be
replaced every two years. Frequently check the “calibration due date” sticker located on the
back panel and return to SIRCHIE for Calibration Service before the date has expired. Contact
Parts and Accessories
CGD8809 Replacement Rechargeable NiMH Battery Pack
CGDCALX Calibration Service (includes sensor replacement)
CGDREF Reference Standard Pads, 10pk

Technical Information TI0387R9
100 HUNTER PLACE, YOUNGSVILLE, NC 27596 USA
Ph: (919) 554-2244, (800) 356-7311 • Fax: (919) 554-2266, (800) 899-8181
• Web: www.sirchie.com • Email: [email protected]
Trouble Shooting Guidelines
Before returning the instrument for repair, carefully review these Trouble Shooting steps to
determine if the problem can be solved. If the instrument still fails to work correctly, contact
SIRCHIE at (800) 356-7311 to arrange its return for service.
Symptom
Possible Causes
Actions
Power indicator LED does not
light; instrument is non-
responsive.
1) Battery pack not
charged.
2) AC adapter connected
to instrument.
1) Connect AC adapter to instrument and charge
battery pack. Refer to Unpacking/Setup for
instructions.
2) Remove AC adapter.
Fault LED lights during charging.
1) Problem with battery
pack.
2) Internal failure.
1) Disconnect AC adapter from instrument and
wait one hour for battery pack to cool. Do not
use instrument or attempt to charge battery
pack during this time. After one hour, reconnect
AC adapter to instrument. If red LED (fault)
illuminates again, replace battery pack.
2) If battery pack is not the problem,
discontinue using instrument and return it to
Sirchie for service.
Instrument does not seem
operable; does not alarm in the
presence of leaks.
1) Sensor failure.
2) Instrument failure.
Attempt to verify unit operation on known
combustible gas leak source. If no response,
return the instrument to Sirchie for service.
Battery life is less than3 hours of
operation.
1) Battery pack needs to
be conditioned.
1) To condition battery pack: charge it fully, then
operate instrument as normal until the low
battery LED illuminates. Repeat this procedure a
minimum of 3 to 5 times.
Instrument does not operate
and battery pack charge cycle
will not complete (24+ hour
charge applied and green light
does not illuminate).
1) Battery pack not
connected.
2) Bad battery pack.
1) Follow instructions in the Unpacking/Setup
section to check that the battery pack
connection is secure.
2) Replace battery pack.
CAUTION: This instrument should be serviced only by SIRCHIE. Failure to do so may impair the
intrinsic safety of the device. Do not open the case of the instrument. There are no user-
serviceable parts inside.
Only the battery compartment section of the case may be opened to insert or remove the
battery pack.
This manual suits for next models
1
Table of contents
Popular Gas Detector manuals by other brands

yellow jacket
yellow jacket 69373 Series Instruction and operation manual
FORENSICS DETECTORS
FORENSICS DETECTORS FD-60 user manual

HSS Hire
HSS Hire Safe and Sure 34074 Operating & safety guide
GMI
GMI Gasurveyor 3-500 User handbook
Taichuan
Taichuan HM-710 manual
Autronica
Autronica AutoPath HC800 instructions
