Siro SI1605 User manual
Unidirectional 5-Channel Radio-Handheld Transmitter
with integrated timer
SI1605
Compatible with unidirectional SIRO drives:
ERB15-LE
EYA25-LE
06-2020

1
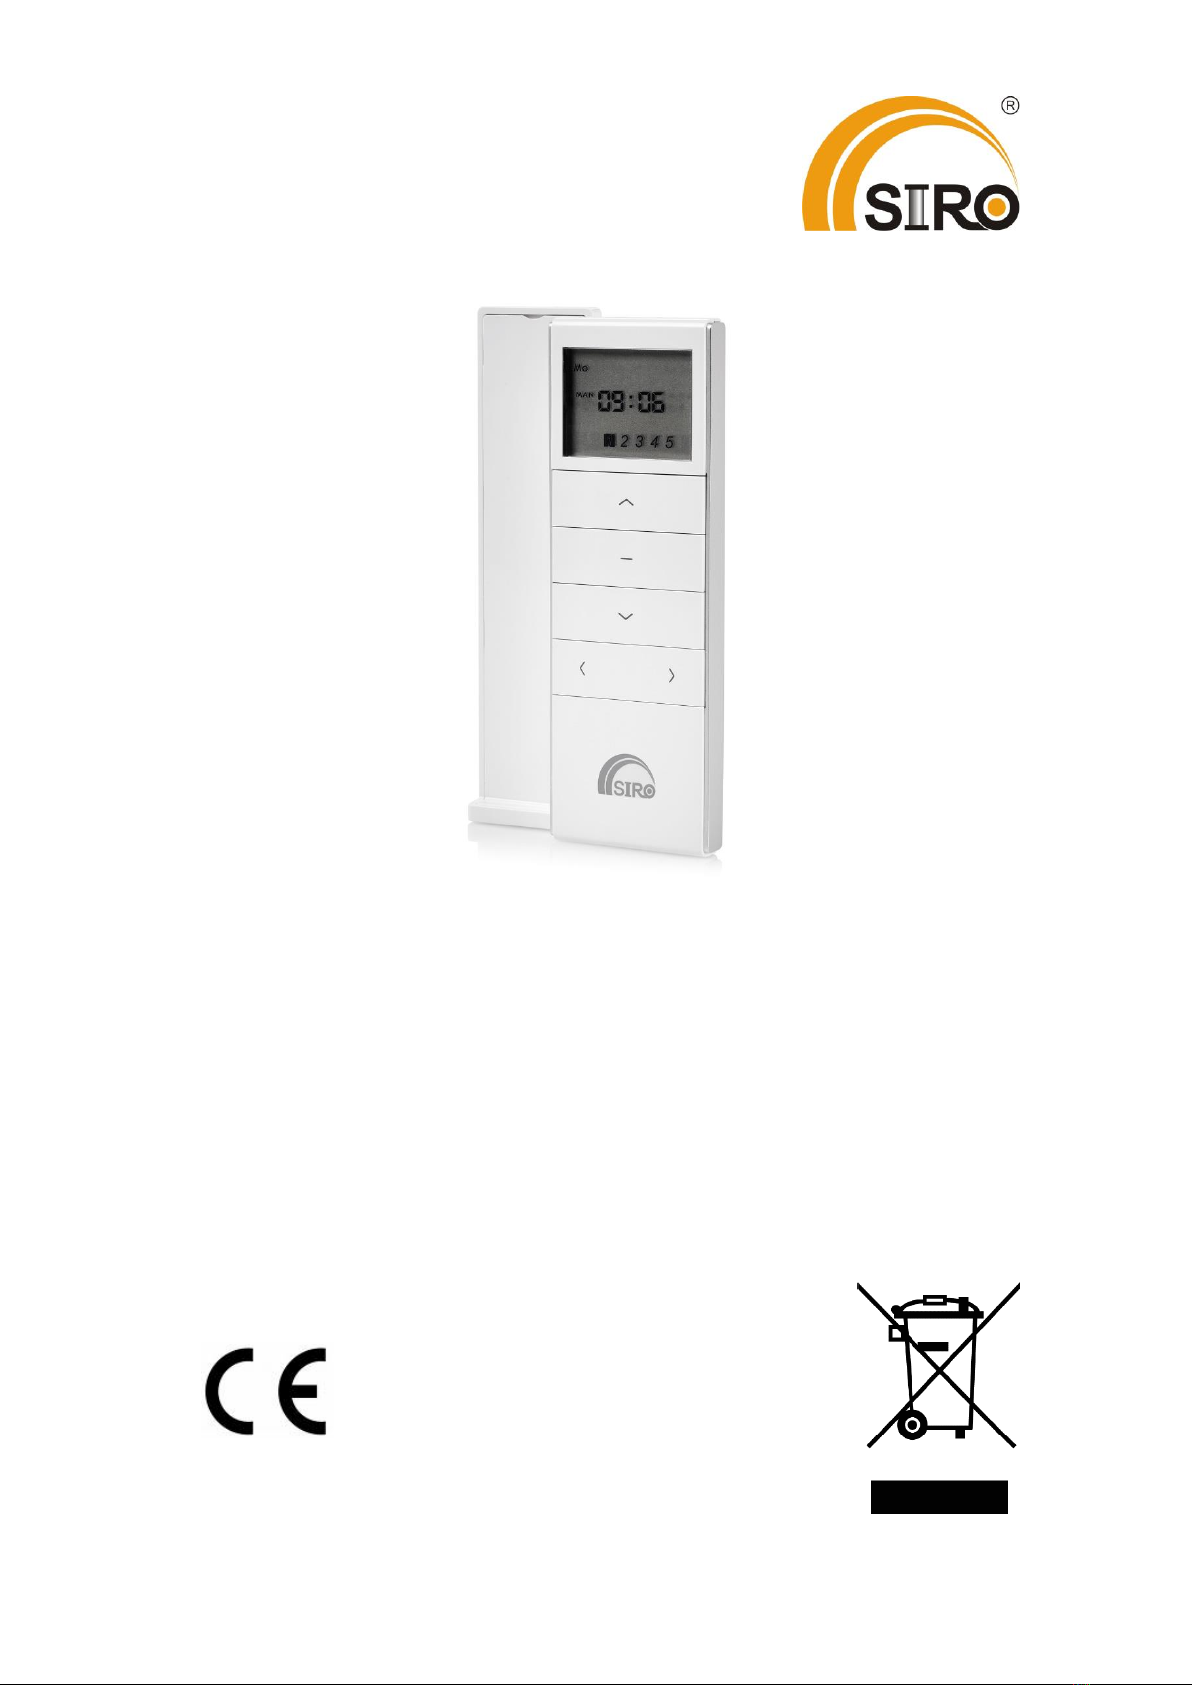
1. Functional overview
The remote control SI1605 is a radio transmitter with integrated timer. You can use the transmitter to
remotely control drives and radio receivers of the unidirectional LE-series from SIRO either manually or
automatically with a program.
The SI1605 remote controller has 5 radio channels with which the motors or radio receivers
can be controlled individually or combined into several groups.
Furthermore, the handheld transmitter SI1605 has three different modes:
Manual Mode ( ): Normal remote controller without the time switch function
Automatic Mode ( ): Remote controller with timer function (main mode)
Random Mode ( ): In this mode, your settings are executed 15 minutes before or after
the specified time. Example: You have set the driveway to 10.00 hours. This way your shading
system will randomly drive up at 9.45 or 10.15.
Use the mode button (see figure) to select the respective mode.

2
2. Installation
The remote controller SIS1605 requires a battery cell type CR2450 –3V as power source. To
ensure that the device can execute all commands, it is recommended to replace empty batteries
in time.
1. Open the battery compartment of the remote controller on the back by sliding the cover down.
2. Insert the battery into the battery compartment with the plus pole facing upwards.
3. Close the battery compartment.
3. Setting the weekday and time (only in manual mode)
During the setting mode, you always have 60 seconds time between each action. If no activity
is performed during this period, the unit automatically returns to the operation mode.
However, you can exit the setting mode at any time without saving any settings.
The weekdays are displayed in English:
Mo: Monday Tu: Tuesday We: Wednesday
Th: Thursday Fr: Friday Sa: Saturday
Su: Sunday
v
1. To change into MAN-
Mode, press and hold
the mode button.
2. Press and hold the time
button for 3 seconds. The hour
display will now flash.
3. Press the up or down
button to set the current
hour. Example here: 11
4. Press the P1 + button to
confirm. The minute display will
now flash.
5. Press the up or down button to
set the current number of minutes.
Example here: 11:01
6. Press the P1 + button
again to confirm. The weekday
display will now flash.
7. Enter the current day by
pressing the up or down
button. Example here:
Monday
8. Press and hold the time button for 3
seconds to save the setting. For final
confirmation press the time button again
briefly.

3
4. Herstellung der Verbindung zwischen Antrieb und Sender
Before the SI1605 remote controller can control one or more drives, the connection
between the devices must be established. First select a channel on the SI1605 remote
controller that is to be used to control one or a group of drives. Make sure that the
remote controller is in manual mode.
Please refer to the operation instructions of the LE-series drive you have received for the procedure of
teaching-in and end position setting.
5. Setting the roll up and down times
If the set time shows "--:--", it means that on this day of the week and in this channel no
timer function is set.
1. Switch to the
AUTO mode
using the mode
button.
2. Press and hold the time
button for 3 seconds to
display the time status. By
pressing the up and down
button, the set time of each
day is displayed.
4. Press the up or
down button to set
the hours (roll up).
5. Press the P1 +
Taste to set the
minutes (roll up).
The minute display
flashes.
6. Press the up or
down button to set
the minutes (roll up).
8. You can now set the
hours of the roll-down
time by pressing the
up or down button.
3. Press the time
button. The hour
display flashes. You
can now set the roll-
up time.
7. Press the mode
button to confirm the
setting. You will now be
taken to the setting of the
roll-down time.

4
6. Bug fixing
Problem
Possible cause
Solution
The device does not
work
The battery is incorrectly
inserted or empty.
Check that the battery is inserted
correctly. Replace the battery if
necessary.
The drive cannot be
moved up / down
manually.
Automatic mode is active.
Press the time button to switch to
manual mode. Manual appears in the
display.
The drive does not move
up / down at the set
time.
Manual mode is active.
Press the time button to switch to
automatic mode. Auto appears in the
display.
7. Technical data
Technical data
Power supply:
3 Volt
Battery type:
CR2450
Working current:
≤12mA
Protection class:
IP 20
Operating temperature:
-5°C to +40°C
Radio coding:
Rolling Code
Radio frequency:
433.92 MHz
Transmitter power:
5mW
Channels:
5
Compatibility:
SIRO LE Series
Check that you have received the correct device before commissioning. Also compare the frequency
information on the motor or controller nameplate.
9. Press the P1
+ Taste to set
the minutes (roll
down).
11. Press the time button to confirm the roll-down
time. The display changes and now shows Monday (Mo)
with the roll-up symbol. The hours flash. After you have
carried out the up and down times for the whole week in
sequence, press the time button for 3 seconds. The
hours and minutes display flashes. Your setting has now
been saved. You will automatically leave the setting
mode.
10. Press the up
or down button
to set the minutes
(roll down).

5
8. Warranty conditions
SIRO Antriebs- und Steuerungstechnik offers a 2-year warranty on new drives that have been
professionally installed and properly operated in accordance with the installation instructions. The
warranty covers all design faults, material defects and manufacturing faults.
Any defects occurring within the warranty period will be remedied by SIRO free of charge by supplying
an equivalent or new product. Replacement delivery for warranty reasons does not result in general
extensions of the original warranty period.
Any claims for compensation beyond this are excluded.
SIRO Antriebs- und
Steuerungstechnik GmbH
Eurode - Park 1-27
D-52134 Herzogenrath
Germany
Table of contents
Other Siro Transmitter manuals


Popular Transmitter manuals by other brands


Sentera Controls
Sentera Controls HPS-X -2 Mounting and operating instructions

Rear view safety
Rear view safety RVS-554W instruction manual

Crystal Vision
Crystal Vision FTX202 user manual

sebaKMT
sebaKMT Sebalog GT-3 user manual

Linear
Linear ET-2 Code setting guide

PR electronic
PR electronic 4104 product manual