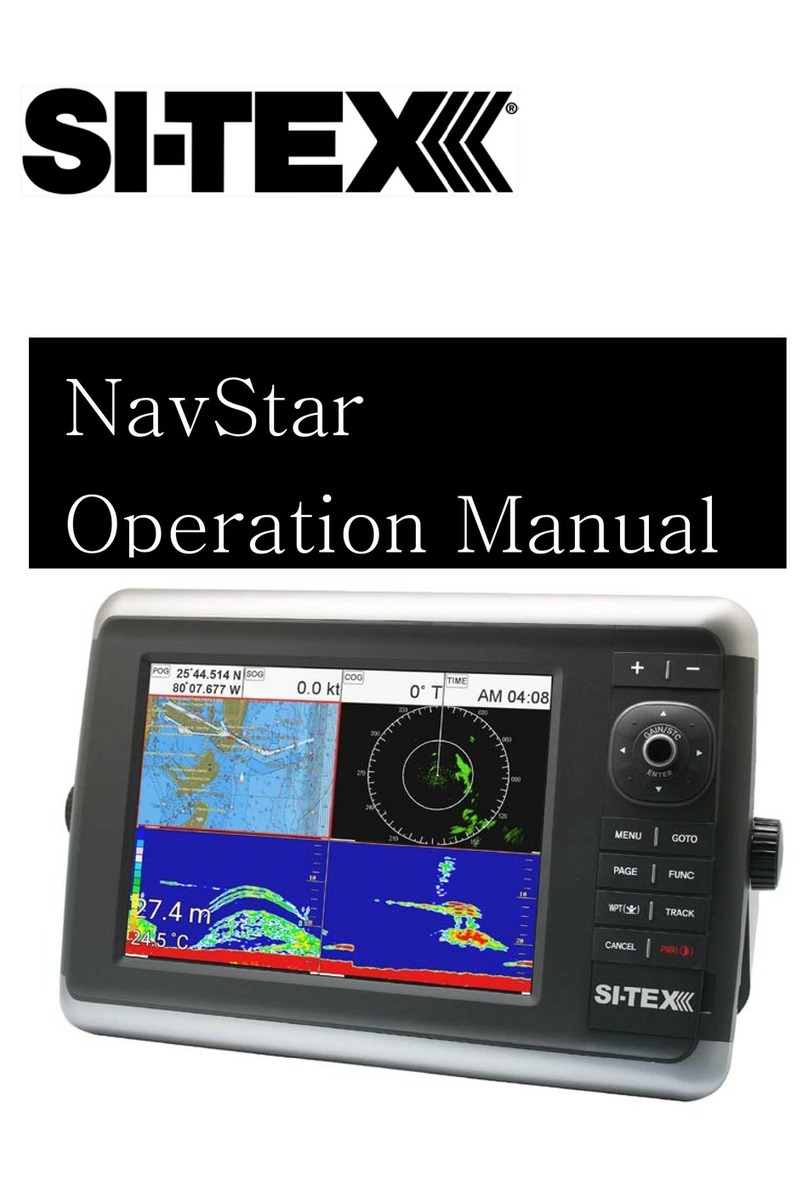
Sitex Explorer Nav Pro User manual

Chart Plotter
USER MANUAL
Explorer Nav Pro


1. Disclaimer and warnings 5
2. Introduction 6
2.1 Keyboard 6
2.2 Connections scheme 7
3. Getting started 10
3.1 Switching ON 10
3.2 Switching OFF 10
3.3 First Setup page 10
3.4 Selecting the system language 10
3.5 Selecting the chart language 11
3.6 Setting units, time zone and time
format 11
4. Controlling the display 13
4.1 Status bar 13
4.2 The Map 14
4.3 Fish Finder page 15
4.4 GPS Status page 16
4.5 Engine Monitor Display 17
4.6 Split page 18
4.7 Data window customization 19
5. Using C-Map Data (4D / Max) 20
5.1 Moving around the Chart and
Changing Chart Scale 20
5.2 Finding Your Boat Position 20
5.3 Map full info and quick info 20
6. GO TO function 22
6.1 Navigation to a single destination [GO
TO] 22
6.2 Creating a route 23
6.3 Route following 24
6.3.1 Route following optimization 25
6.3.2 Route following options 26
6.4 Easy routing 27
7. User Data 29
7.1 Marks 29
7.1.2 Editing Mark’s color, symbol,
name and description 31
7.1.3 Editing Mark’s latitude and
longitude position 31
7.2 Routes 32
7.2.3 Editing a Route’s color, name
and description 33
7.2.4 Checking a route 33
7.3 Waypoints 34
7.3.1 Editing waypoint’s position 34
7.3.2 Changing the order of waypoints
in a route 35
7.4 Tracks 35
7.4.1 Setting up a track generation
interval 36
7.4.2 Displaying Track 37
7.4.3 Converting Track to Route 37
7.4.4 Editing Track’s color, name and
description 37
7.5 Locate user data on map 37
7.6 Changing user data default color,
symbol or prex 38
7.7 Exporting / importing user data 39
8. A-B function 40
9. Search function 41
10. Tide info 43
11. MOB 45
12. Alarms 46
13. Simulation mode 49
14. General settings 50
14.1 Export/Import User Settings 50
14.2 Function Keys Settings 51
14.3 Navigation Settings 51
14.4 Keyboard Settings 52
14.5 Ship Prole Settings 53
15. Map settings 54
15.1 Course Predictor 54
15.2 Heading Line 54
15.3 Map Orientation 55
16. Ports settings 56
16.1 NMEA0183 serial ports 56
16.2 Serial ports Output 56
16.3 View port incoming data 57
16.4 NMEA2000 port 57
17. AIS 58
17.1 AIS Filters 58
18. Fish Finder 61
18.1 Switching on the Fish Finder 61
18.2 Fish Finder full page 61
18.4 Frequency 64
18.5 Sensitivity setup 65

18.6 Transducer setup 66
19. System messages 68
20. Updates 69
21. Acronyms and denitions 70
22. Technical specications 76
23. Contextual menu diagram 77
24. Analytic index 79

5
Chart Plotter - User Manual
1. Disclaimer and warnings
This user manual is intended to describe core functionality of the chart plotter. The
information in this document is subject to change without notice. The manufacturer makes
no representations or warranties with respect to the contents hereof and specically
disclaims any implied warranties of merchantability or tness for any particular purpose. The
manufacturer reserves the right to revise this publication and to make changes from time to
time in the content hereof without obligation of the manufacturer to notify any person of such
revision or changes.
Electronic charts displayed by the device are believed to be accurate and reliable, but they
are not intended to replace ocial charts which should remain your main reference for all the
matters related to the execution of safe navigation. For this reason we would like to remind
you that you are required to carry on board and use the ocially published and approved
nautical charts.
Please be aware that the serial ports are not opto-isolated and therefore the peripherals are
electrically connected to the device. This allows the connection of high speed peripherals, like
Fish Finder. If you are connecting a NMEA0183 peripheral and you would like to isolate it from
the device, you have to add the opto-isolator externally.
If water leaks into the equipment, immediately turn o the power at the switchboard. Fire or
electrical shock can result.
If the equipment is giving o smoke or re, immediately turn o the power at the switchboard.
Fire or electrical shock can result.
Do not open the equipment. The equipment uses high voltage that can cause electrical shock.
Keep the SD card slot’s door closed to avoid water intrusion into the device
Extensive exposure to heat may result in damage to the device.
Please read through the device manual before the rst operation. If you have any questions,
please contact the Company’s customer service or your local dealer.
C-MAP media is available from C-MAP Authorized Resellers.

6
Chart Plotter - User Manual
2. Introduction
The chart plotter is a computerized electronic chart system, designed as a navigation aid.
The cartplotter integrates GPS data with an electronic navigational chart and can display
additional information from AIS, sh nder and other sensors. The chart plotter is compatible
with both C-Map MAX and C-Map 4D map format on micro SD Card. The C-Map charts
can be purchased by C-Map authorized resellers. Navigating through chart plotter pages is
possible using either keyboard or remote controller.
2.1 Keyboard
1. Function keys [F1 - F4] are special keys. Each key can perform two functions. A short
press performs the function labeled on the unit face. A long press executes a second
function which can be customized by user. This gives you a wider scope of functions that
can be executed by pressing function keys. Read Par. 14.2 to learn how to customize the
function keys.
2. [MOB] is a special key dedicated to man-over-board situation. Pressing MOB places a
MOB mark on the current boat position and starts navigation to that place.
3. [MENU] opens the main menu if pressed on one of the main pages (map, Fish Finder,
GPS status, Engine monitor). It selects the top bar control buttons if pressed on full menu
1
32
4
56
7
8
9

7
Chart Plotter - User Manual
pages such as Marks, Routes, Tracks and others.
4. [JOYSTICK] can move the cursor around the map or through menu items. Press Up,
Down, Left or Right.
5. [ZOOM IN] changes scale of the map.
6. [ZOOM OUT] changes scale of the map.
7. [ENTER] is used to conrm an action or a selection. When on map page, pressing Enter
opens the contextual menu of a map object.
8. [CLEAR] exits from the current menu or, if you are on map page and the cursor is away
from the boat position, centers the map on the boat position (home mode).
9. [POWER] turns the device on/o when pressed and held in. Short press allows switching
Day/Night modes of the screen.
2.2 Connections scheme

8
Chart Plotter - User Manual
2.3 Remote Controller
You can operate on the chart plotter using the optional remote controller. The remote controller
connects to chart plotter via radio signal and requires one AAA battery.
To connect the remote controller with the device:
1. On the Keyboard, press [ENTER] to open the Main Menu
2. Select “General Settings” and press [ENTER]
3. Enable connectivity with Remote Controller selecting “Remote Control” and pressing
[ENTER]
4. Select PIN and press [ENTER]
5. Input the correct PIN, which you can nd on the backside of your remote controller
6. Press the remote controller joystick to activate it. On the status bar (left top) of the
page you will see the remote control icon. Now you can operate on chart plotter with
the remote controller from distance.
The battery status can be seen either on the Remote control page when remote controller is
connected, or in status bar (see par.4.1) when battery is low.
Menu
Back
Cycle
Mark/MOB
Zoom
(Tilt, Rotate)
Switch
wheel function
Compass
Remote controller buttons:
●[MENU]: same as chart plotter MENU.
●[BACK]: same as chart plotter CLEAR.
●[MARK]: short press puts Mark on map. Long press puts MOB on the current vessel’s

9
Chart Plotter - User Manual
position.
●[CYCLE]: cycles through pages.
●[SWITCH WHEEL FUNCTION]: changes the function of remote controller’s wheel. It
has three functions on map: zoom in/out, rotate, tilt. The wheel selector can also be
used to navigate through menu items as with joystick.
●[COMPASS]: point with remote controller towards any direction around you and press
this button. You will see red dashed line on the map of chart plotter, showing the
pointed direction.
Compass Calibration
The remote controller’s inner compass needs to be calibrated.
1. Simultaneously press BACK and COMPASS on the remote controller until you here
three beeps.
2. Release the buttons after you hear three beeps.
3. Start moving the remote controller slowly in a gure eight shape. The rotation must be
around three axes. It might take 1 minute for calibration to complete.
4. Stop rotation after you hear three beeps. Now the compass sensor is calibrated. If
you hear two beeps start compass calibration from the beginning.
3
1 2
3beeps

10
Chart Plotter - User Manual
3. Getting started
3.1 Switching ON
Before powering the chart plotter on, check for the correct voltage (10-35 volt) and the correct
connections with other instruments. Press and hold [POWER] to turn on the device.
It might take few minutes for chart plotter to start.
3.2 Switching OFF
Press and hold [POWER] to switch the chart plotter o. A countdown timer appears on the
screen. If you release [POWER] before the countdown timer reaches zero, the chart plotter
will remain on.
3.3 First Setup page
When turning the device on for the rst time, you will see the First Setup pages. You will see
them each time after restoring to factory default settings (can be done in “General Settings” –
“Log&Backup”). This set of pages allows selecting software language, chart language, units,
time zone and time format. This information can be changed at any time in the “General
Settings” menu.
1. Switch chart plotter ON and wait for the rst Setup Page to appear on the screen.
2. Select the desired option on the corresponding page by moving joystick up/down, or
keep the default value.
3. Press [ENTER] to conrm the selection.
4. Move joystick [RIGHT] to go to the next page or [LEFT] to go to the previous page.
5. On the Warning page move joystick [DOWN] to scroll the “Limitations of Use” text.
6. Press [ENTER] when you reach the end of text.
NOTE By pressing [ENTER] “OK“ you accept the “Limitations of Use”. You must accept all the
limitation specied in the Warning page in order to use the chart plotter.
3.4 Selecting the system language
To set the main language of software - menus, data pages, warning/alarm messages:
1. Open the Main Menu by pressing [MENU]
2. Select “General Settings”
3. Select “Software Language”
4. Select language by moving joystick [UP]/ [DOWN] and pressing [ENTER].

11
Chart Plotter - User Manual
3.5 Selecting the chart language
To change the language of the chart information, which includes names of geographical
objects on map, their description on Full Info page and list of objects found by search function:
1. Open the Main Menu by pressing [MENU]
2. Select “General Settings”
3. Select “Chart Language”
4. Select your desired chart language in the list
The selected chart language has three modes:
●Off: the selected language is applied only to the geographical names of the
geographical area, to which this language relates. English language is used for the
other than the selected language’s map area. For example, if you choose Italian
language and the mode is O, the geographical names of Italy will be in Italian
language, while other national territories will be in English. At the same time all
objects’ info pages will be in Italian.
●International: all map names are displayed in English regardless the map area,
meanwhile the selected language is applied to full info descriptions of map objects.
●Local: the local languages are used for the map objects, but their full info
descriptions are present in the selected language. If no local language is available,
English is used instead.
3.6 Setting units, time zone and time format
To change units:
1. Open the Main Menu by pressing [MENU]
2. Select “General Settings”
3. Select “Units”
4. Choose among US, UK or European standard or manual to set each unit of measure
manually and press [ENTER]
If you choose manual:
5. Select each option and press [ENTER] to conrm
To change time zone:
1. Open the Main Menu by pressing [MENU]

12
Chart Plotter - User Manual
2. Select “General Settings”
3. Select “Time zone”
4. Choose among UTC or Manual and press [ENTER]
If you choose manual:
5. Select Time Zone and press [ENTER]
6. Select the desired zone and press [ENTER] to conrm
7. Select “Daylight Saving” and press [ENTER] to enable it (it must be enabled / disabled
manually)
To change time format:
1. Open the Main Menu by pressing [MENU]
2. Select “General Settings”
3. Select “Time format”
4. Choose the date format and time format (12 / 24 h) and press [ENTER]

13
Chart Plotter - User Manual
4. Controlling the display
The chart plotter displays 5 main Pages:
●Map (Par. 4.2)
●Fish Finder (Par 4.3)
●GPS status (Par. 4.4)
●Engine Monitor (Par 4.5)
●Split Map / Fish Finder page (Par. 5.5)
To change displayed page:
1. Press [MENU]
2. Select “Page”
3. Press [ENTER]
4. In the widget popup select the desired page by moving joystick cursor and press [ENTER].
4. Pages widget pop-up
A quicker way to switch between pages is to set one of the function keys (see 14.2) to “Page”.
4.1 Status bar
The Status bar appears in the upper part of the screen on every page. It displays:
●GPS status depending on the quality of satellite data

14
Chart Plotter - User Manual
●Remote controller connection status
●Fish Finder connection status.
4.2 The Map
The Map page includes:
●Map
●Compass bar
●Position box
●Data window.
Fig 4.2.1 – Map Page
During navigation you will see your Course Over Ground and bearing on the compass bar,
marked with blue and red arrows respectively. The compass bar can be switched o in the
General Settings, Databox Settings page. The position box appears on the left bottom of the
map and shows the lat/lon and minimal depth in home mode, additionally it shows DST and
BRG when in cursor mode. The data window can be customized (see Par. 4.7). Read Par. 5
on How to use C-Map data.
Press [ENTER] to open the contextual menu, and [CLEAR] to close it.
Press [MENU] to open Main Menu of the Map page.

15
Chart Plotter - User Manual
Fig 4.2.2 – Map Page Menu
4.3 Fish Finder page
The Fish Finder page is available only if a Black Box Fish Finder accessory is connected to
the Chart Plotter.
Fig 4.3.1 – Fish Finder page (simulation mode)

16
Chart Plotter - User Manual
For more details about Fish Finder see Par. 18.
Press [MENU] to open Main Menu of the Fish Finder page.
Fig 4.3.2 – Fish Finder Menu
4.4 GPS Status page
Fig 4.4 – Example of GPS Status page

17
Chart Plotter - User Manual
4.5 Engine Monitor Display
Fig.4.5 – Example of Engine Monitor Display page
The device can be connected through CAN bus to a compatible NMEA 2000 engine, to display engine
state and performance.
Each parameter presented with a scale divided into three zones: green (acceptable value), yellow
(warning), red (critical). If the value of any of those parameters exceeds the permissible range, the
corresponding top icon is highlighted with red color.
NOTE The fuel tank capacity value must be set in the Ship Prole (see Par. 14.5); please make sure
you have set the correct value in the Ship Prole page.

18
Chart Plotter - User Manual
4.6 Split page
Fig.4.6 – Example of split page
The Split page is a screen split between map and Fish Finder. Each half of the split view has its own
Main Menu. When you open the split page, the active view is always the map. In order to operate on
the Fish Finder view, press [MENU] twice.
To Change the active view with remote controller:
1. Press [MENU] twice
OR
2. Long press [SWITCH WHEEL FUNCTION]
You will see a green transparent icon for a few seconds over the active view.
To open the contextual menu on the map view, press [ENTER] while the map view is active. To open
the contextual menu on the Fish Finder view, press [ENTER] on the echogram of the Fish Finder view.

19
Chart Plotter - User Manual
4.7 Data window customization
The Data window is a set of customizable data boxes. It is present on the map page and on the Fish
Finder page. The boxes may be set up to display various sensor data. By default it consists of 10 data
boxes, but you can reduce the number of displayed data boxes in General Settings, where you can
turn o data window display, customize data boxes content or remove some of them.
You can choose to show either 2 columns (10 data boxes) or 1 column (5 data boxes):
1. Press [MENU]
2. Select “General Settings”
3. Press [ENTER] on “Databox Settings” (or simply move joystick [LEFT])
4. Place cursor over “1 column” (or “2 columns”) and press [ENTER].
To customize data box content:
1. Move joystick [DOWN] and stop on the data box you want to customize
2. Press [ENTER]
3. Browse the list to select the desired option
4. Press [ENTER] to conrm selection or [CLEAR] to exit data box editing.

20
Chart Plotter - User Manual
5. Using C-Map Data (4D / Max)
The chart plotter has a built-in background world map, but to use the chart plotter as a
navigation aid, C-Map detailed chart is required. The chart plotter is compatible with both
C-Map MAX and C-Map 4D map format on micro SD Card. The C-Map chart can be
purchased from C-Map authorized resellers. To use C-Map detailed chart (4D or MAX), insert
the micro SD card with data to the micro SDslot of your chart plotter. The slot is located at the
bottom of the device.
NOTE After inserting the C-Map chart, the chart plotter could ask to restart the device.
5.1 Moving around the Chart and Changing Chart Scale
Use the joystick keys to pan the chart. Also use [ZOOM IN] and [ZOOM OUT] to change the
chart scale so that a smaller or larger area is shown on the chart.
5.2 Finding Your Boat Position
The most common use of the chart plotter is to show your boat's current location.
You can home the cursor to the boat using [CLEAR]. This would center the map view on the
boat position and update the display as the boat moves.
The “Screen amplier” function helps to keep the majority of the area in front of the vessel's
position, so if you turn on this function, the chart plotter will take into account your course to
locate the boat at the most comfortable position in the map relatively to the actual course.
To turn Screen amplier on/o:
1. Press [MENU]
2. Select “General Settings”
3. Select “Navigation”
4. Place cursor on “Screen amplier” and press [ENTER]
Use the joystick to move the cursor away from the boat's current position and exit the Home Mode.
5.3 Map full info and quick info
The detailed chart has a database of information about map objects, which may be helpful
for navigation. To read map full info, press [ENTER] over the desired point on map and select
“Full info” in contextual menu.
Table of contents
Other Sitex GPS manuals
