manuals.online logo
Brands
  1. Home
  2. •
  3. Brands
  4. •
  5. Skandika
  6. •
  7. Tent
  8. •
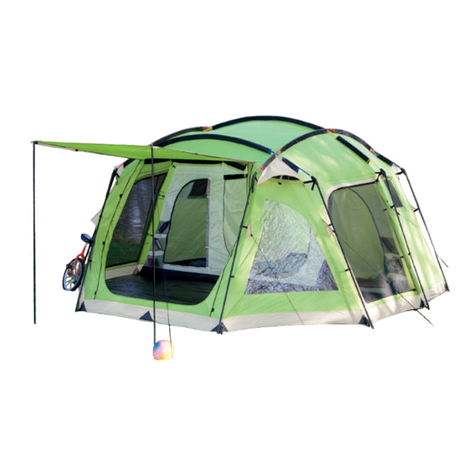
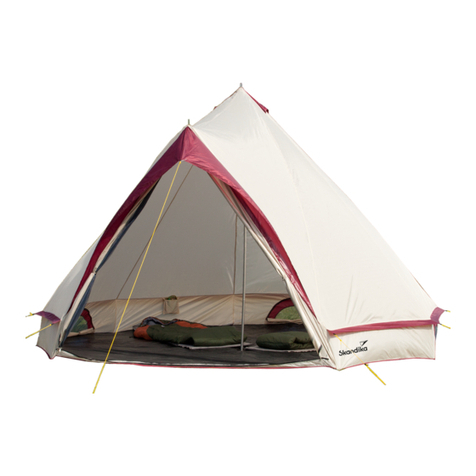
  9. Skandika DAYTONA 6 XXL PROTECT User manual

Skandika DAYTONA 6 XXL PROTECT User manual

DAYTONA 6 XXL PROTECT
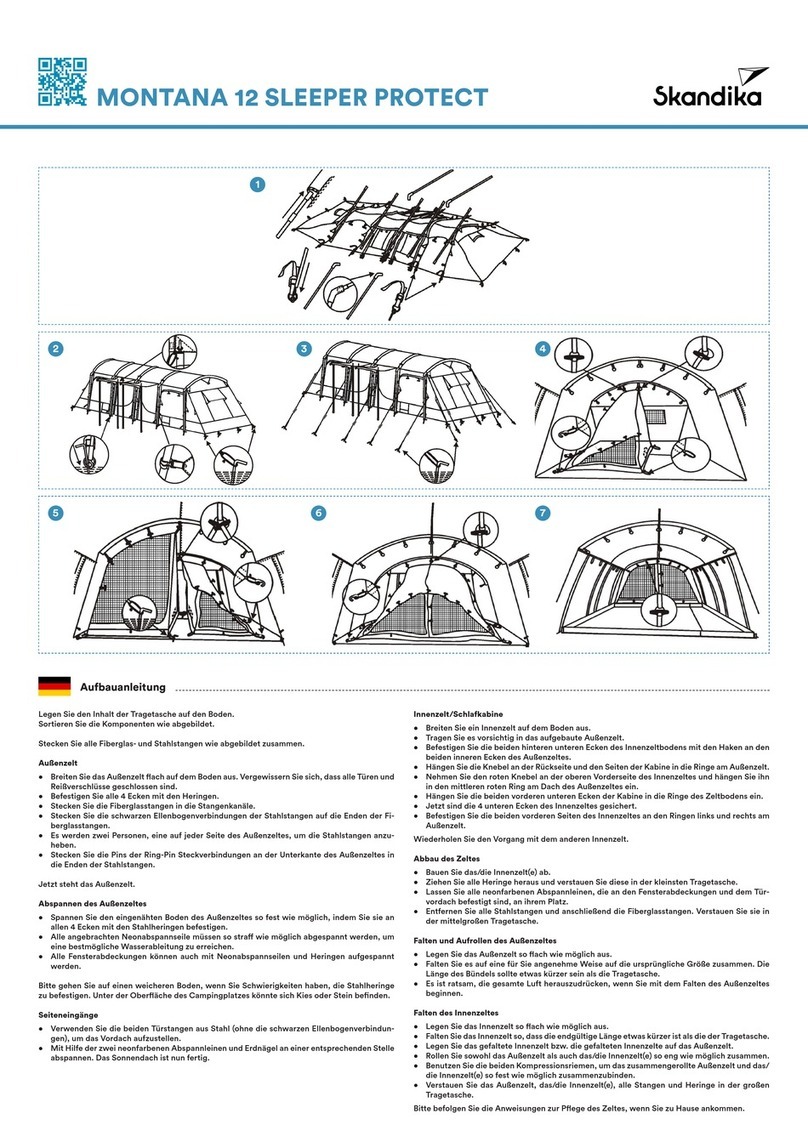
Legen Sie den Inhalt der Tragetasche auf den Boden.
Sortieren Sie die Komponenten wie abgebildet.
Stecken Sie alle Fiberglasstangen wie abgebildet zusammen.
Außenzelt
• Breiten Sie das Außenzelt ach auf dem Boden aus. Vergewissern Sie sich, dass alle Türen und
Reißverschlüsse geschlossen sind.
• Stecken Sie zuerst zwei Hauptstangen und dann drei farbcodierte Stangen (gelb) in die ent-
sprechenden farbcodierten Stangenkanäle des Außenzeltes.
• Befestigen und sichern Sie die obere Abdeckung auf dem Dach mit den angebrachten Haken.
• Stecken Sie die Metallstifte an den Ring-Pin Ösen, die sich unter der eingenähten Bodenplane
des Außenzeltes benden, in beide Enden der Zeltstangen.
• Das Außenzelt steht nun von selbst und kann mit Stahlheringen an den PP-Gurtbändern am
Boden des Außenzeltes befestigt werden.
Abspannen des Außenzeltes
• Alle Stangen durch die Ringe der Ring-Pin Ösen mit Heringen abstecken.
• Spannen Sie den eingenähten Zeltboden an den Außenkanten so stra wie möglich ab.
• Alle angebrachten Neonabspannseile müssen so stra wie möglich abgespannt werden, um
eine bestmögliche Wasserableitung zu erreichen.
• Die Spannung des Außenzeltes kann über die Abspannseile und Schnallen an den PP-Gurten,
die beide Seiten des Außenzeltes verbinden, eingestellt werden.
Bitte gehen Sie auf einen weicheren Boden, wenn Sie Schwierigkeiten haben, die Stahlheringe
zu befestigen. Unter der Oberäche des Campingplatzes könnte sich Kies oder Stein benden.
Eingang
• Um das Vordach aufzustellen, verwenden Sie die beiden Aufstellstangen aus Stahl und ste-
cken die einzelnen Stangensegmente zusammen.
• Mit Hilfe der zwei neonfarbenen Abspannleinen und Erdnägel an einer entsprechenden Stelle
abspannen. Das Sonnendach ist nun fertig.
Innenzelt/Schlafkabine
• Bringen Sie die Innenzelte an den entsprechenden Ort im montierten Außenzelt und breiten
Sie sie auf dem Boden aus.
• Beginnen Sie an der Rückseite des Innenzeltes und befestigen Sie die Ecken entlang der Un-
terkante des Außenzeltes.
• Hängen Sie das Innenzelt an der Unterseite des Außenzeltes ein und arbeiten Sie sich mit
Hilfe der Knebel an der Außenwand des Innenzeltes und der Schlaufen an der Unterseite des
Außenzeltes nach oben vor.
Wiederholen Sie die obigen Schritte für die anderen beiden Innenzelte - Sie können eines der
Innenzelte weglassen, um die Wohn- oder Lagerkapazität zu erhöhen und das Reisegewicht des
gesamten Zeltes zu verringern.
Aufbauanleitung
Abbau des Zeltes
• Bauen Sie die Innenzelte ab.
• Ziehen Sie alle Stahlheringe heraus und verstauen Sie sie in der kleinsten Tragetasche.
• Behalten Sie alle Neonabspannleinen, die am Zelt befestigt sind, an ihrem Platz.
• Entfernen Sie die beiden Stahlaufstellstangen und alle Fiberglasstangen. Verstauen Sie sie in
der mittelgroßen Tragetasche.
Falten und Aufrollen des Außenzeltes
• Legen Sie das Außenzelt so ach wie möglich aus.
• Falten Sie es so, wie es Ihnen am besten passt, auf die ursprüngliche Größe. Die Länge des
Bündels sollte etwas kürzer sein als die Tragetasche.
• Es ist ratsam, die gesamte Luft herauszudrücken, wenn Sie mit dem Falten des Außenzeltes
beginnen.
Falten der Innenzelte
• Legen Sie die Innenzelte so ach wie möglich aus.
• Falten Sie die Innenzelte so, dass die endgültige Länge etwas kürzer ist als die der Trageta-
sche.
• Legen Sie die gefalteten Innenzelte auf das Außenzelt.
• Rollen Sie das Außenzelt und die Innenzelte so eng wie möglich zusammen.
• Benutzen Sie die beiden Kompressionsriemen, um die zusammengerollten Sachen so fest wie
möglich zu verschnüren.
• Verstauen Sie das Außenzelt, die Innenzelte, alle Stangen und Heringe in der großen Trage-
tasche.
Bitte befolgen Sie die Anweisungen zur Wartung des Zeltes, wenn Sie zu Hause ankommen.
PIN
1
3
4
5
6
2
7
DAYTONA 6 XXL PROTECT
Lay down the contents from the carry bag on the ground. Sort the components as shown.
Assemble all the berglass poles as shown.
Flysheet
• Spread the ysheet at on the ground. Make sure all the doors are closed and zipped up.
• Insert two main poles rst and then three colour-coded poles (yellow) into the matching co-
lour-coded sleeves on the ysheet.
• Attach and secure the top cover on the roof using the attached hooks.
• Insert the pin-ring components located at the sewn-in groundsheet of the ysheet into both
ends of the poles.
• The ysheet is now standing up by itself, which can be secured by anchoring down with steel
pegs at the PP webbings, located at the edges of the ysheet.
Stretching the ysheet
• Peg down all the poles through the rings of the pin-ring components.
• Stretch and peg down the sewn-in groundsheet of the ysheet edges with the steel pegs as
tight as possible.
• All the attached neon guy ropes must be pegged down as tightly as possible to achieve the
best possible water shedding.
• The tension of the tent can be adjusted by the guy ropes and buckles on the PP webbings
joining both sides of the ysheet.
Please move to softer ground whenever you nd it dicult to peg down the steel pegs. There
might be gravel or rock beneath the surface of the campsite.
Entrance
• Use the two steel door poles to pitch the canopy.
• With the help of two neon guy ropes and steel anchors, peg down at appropriate spots. The
sun canopy is now completed.
Inner tent/sleeping cabin
• Take the inner tents inside the assembled ysheet to their appropriate location and spread it
out on the ground.
• Starting from the rear of the inner tent, stake down the corners along the bottom edge of the
ysheet.
• Hook the inner tent to the underside of the ysheet starting from the bottom rear and work
your way forward to the top using the toggles on the outer wall of the inner tent and loops
running along the underside of the ysheet. Repeat the same procedure with the other inner
tents.
Repeat the steps above for the next two inner tents - you can leave one of the inner tents out to
increase the living or storage capacity and to reduce the travel weight of the whole tent.
Dismantling the tent
• Dismantle the inner tents.
• Pull out all the steel pegs and store them in the smallest carry bag.
• Keep all the neon guy ropes that are attached on the tent in place.
• Remove the steel upright poles and all berglass poles. Store them in the mid-size carry bay
bag.
Folding and rolling the ysheet
• Lay down the ysheet as at as possible.
• Fold it in any way that you are comfortable with to the original size. The length of the bundle
should be slightly shorter than the carry bag.
• It is advisable to press all the air out as you start folding of the ysheet.
Folding the inner tents
• Lay down the inner tents as at as possible.
• Fold the inner tents so the nal length is slightly shorter than the carry bag.
• Lay the folded inner tents on top of the ysheet.
• Roll the ysheet and the inner tents as tight as possible.
• Use the two compression straps to tie the rolled things as tight as possible.
• Stu the ysheet, inner tents, all poles, and stakes/pegs into the large carry bag.
Please follow the maintenance procedure of the tent when you arrive home.
Tent set up instructions Instructions de montage
Déposez le contenu du sac de transport sur le sol. Classez les éléments comme indiqué.
Assemblez tous les arceaux en bre de verre comme illustré.
Tente extérieure
• Étendez la tente extérieure à plat sur le sol. Assurez-vous que toutes les portes et fermetures
éclair sont fermées.
• Insérez d‘abord les deux arceaux principaux, puis les trois arceaux à code couleur (jaune) dans
les fourreaux à armature au code couleur correspondants sur la tente extérieure.
• Fixez et sécurisez la protection supérieure sur le toit à l‘aide des crochets prévus à cet eet.
• Introduisez les goupilles dans les œillets Ring-Pin, qui se trouvent sous le tapis de sol cousu
de la tente extérieure, dans les extrémités des arceaux de la tente.
• La tente extérieure tient maintenant debout toute seule et peut être xée avec des piquets/
sardines en acier aux sangles en PP sur les bords de la tente extérieure.
Tendre la tente extérieure
• Fixer tous les arceaux avec des piquets à travers les anneaux des œillets Ring-Pin.
• Tendez le plus possible le tapis de sol cousu sur les bords extérieurs de la tente.
• Tous les haubans en néon installés doivent être tendus le plus possible an d‘obtenir la meil-
leure évacuation possible de l‘eau.
• La tension de la tente extérieure peut être réglée à l‘aide des cordes d’haubanage et des bou-
cles sur les sangles en PP qui relient les deux côtés de la tente extérieure.
Essayez de vous installer sur un sol plus friable si vous rencontrez des dicultés à xer les pi-
quets en acier. Il pourrait y avoir du gravier ou de la roche sous la surface du camping.
Entrée
• Pour monter l‘auvent, utilisez les deux barres en acier et assemblez les diérents segments
de la barre.
• Tendre à un endroit approprié à l‘aide des deux cordes d’haubanage de couleur uo et des
piquets de terre. L‘auvent est maintenant érigé.
Tente intérieure/cabine de couchage
• Placez les tentes intérieures à l‘endroit correspondant dans la tente extérieure montée et éta-
lez-les sur le sol.
• Commencez par l‘arrière de la tente intérieure et xez les coins le long du bord inférieur de la
tente extérieure.
• Accrochez la tente intérieure au bas de la tente extérieure et montez vers le haut à l‘aide des
attaches due sur les boucles de la paroi extérieure.
Répétez les étapes ci-dessus pour les deux autres tentes intérieures - vous pouvez omettre l‘une
des tentes intérieures pour augmenter la capacité de vie ou de stockage et réduire le poids de
transport de l‘ensemble de la tente.
Démontage de la tente
• Démontez les tentes intérieures.
• Retirez tous les piquets/sardines en acier et rangez-les dans le plus petit sac de transport.
• Gardez toutes les cordes d’haubanage en néon xées à la tente à leur place.
• Retirez les deux barres d’acier et tous les arceaux en bre de verre. Rangez-les dans le sac de
transport de taille moyenne.
Pliage et enroulement de la tente extérieure
• Étalez la tente extérieure aussi à plat que possible.
• Pliez-la de la manière qui vous convient le mieux, à sa taille initiale. La longueur du paquet
doit être légèrement plus courte que celle du sac de transport.
• Il est conseillé d‘expulser tout l‘air lorsque vous commencez à plier la tente extérieure.
Pliage des tentes intérieures
• Posez les tentes intérieures aussi à plat que possible.
• Pliez les tentes intérieures de manière que la longueur nale soit légèrement plus courte que
celle du sac de transport.
• Posez les tentes intérieures pliées sur la tente extérieure.
• Enroulez aussi bien la tente extérieure que les tentes intérieures le plus étroitement possible.
• Utilisez les deux sangles de compression pour attacher le plus fermement possible les aaires
enroulées.
• Rangez la tente extérieure, les tentes intérieures, tous les arceaux et les sardines dans le grand
sac de transport.
Veuillez suivre les instructions d‘entretien de la tente lorsque vous rentrerez chez vous.
Other Skandika Tent manuals

Skandika Esbjerg Travel 2 Manual

Skandika

Skandika Esbjerg Travel 2 Manual

Skandika PITEA SUV Manual

Skandika

Skandika PITEA SUV Manual

Skandika Freeland User manual

Skandika

Skandika Freeland User manual

Skandika Hurricane 12 Manual

Skandika

Skandika Hurricane 12 Manual

Skandika Hurricane 8 Manual

Skandika

Skandika Hurricane 8 Manual

Skandika Milano 6 Manual

Skandika

Skandika Milano 6 Manual

Skandika Drammen 5 Manual

Skandika

Skandika Drammen 5 Manual

Skandika Drammen 4 Manual

Skandika

Skandika Drammen 4 Manual

Skandika Nimbus 12 Manual

Skandika

Skandika Nimbus 12 Manual

Skandika Pitea Van Manual

Skandika

Skandika Pitea Van Manual

Skandika Toronto 8 Manual

Skandika

Skandika Toronto 8 Manual

Skandika Narvik 80060 User manual

Skandika

Skandika Narvik 80060 User manual

Skandika Saturn 4 Manual

Skandika

Skandika Saturn 4 Manual

Skandika Casablanca User manual

Skandika

Skandika Casablanca User manual

Skandika Gotland 4 Manual

Skandika

Skandika Gotland 4 Manual

Skandika Hurricane 12 Protect Manual

Skandika

Skandika Hurricane 12 Protect Manual

Skandika SIMO 5 User manual

Skandika

Skandika SIMO 5 User manual

Skandika Copenhagen 6 Manual

Skandika

Skandika Copenhagen 6 Manual

Skandika Daytona 6 Manual

Skandika

Skandika Daytona 6 Manual

Skandika Toronto 6 Manual

Skandika

Skandika Toronto 6 Manual

Skandika Folldal 4 Air-Rise User manual

Skandika

Skandika Folldal 4 Air-Rise User manual

Skandika Nordland 6 Manual

Skandika

Skandika Nordland 6 Manual

Skandika Hammerfest 6 Protect Manual

Skandika

Skandika Hammerfest 6 Protect Manual

Skandika Montana 8 Protect Manual

Skandika

Skandika Montana 8 Protect Manual

Popular Tent manuals by other brands

Nigor 8717729777251 Setup Instruction

Nigor

Nigor 8717729777251 Setup Instruction

UNHCR 00008154 General information

UNHCR

UNHCR 00008154 General information

Harbor Freight Tools CoverPro 62860 owner's manual

Harbor Freight Tools

Harbor Freight Tools CoverPro 62860 owner's manual

Reimo Victoria User instruction

Reimo

Reimo Victoria User instruction

Haushalt International 62042 Directions for use and safety instructions

Haushalt International

Haushalt International 62042 Directions for use and safety instructions

SunnCamp HOLIDAY 550 S quick start guide

SunnCamp

SunnCamp HOLIDAY 550 S quick start guide

VONDOM VELA 54137 Assembly instructions

VONDOM

VONDOM VELA 54137 Assembly instructions

Snow Peak Living Lodge M manual

Snow Peak

Snow Peak Living Lodge M manual

DARCHE kozi Series instruction manual

DARCHE

DARCHE kozi Series instruction manual

Coleman Phad X2 2000000456 installation instructions

Coleman

Coleman Phad X2 2000000456 installation instructions

Western Shelter Systems WS-D FIELD SHOWER Assembly instructions

Western Shelter Systems

Western Shelter Systems WS-D FIELD SHOWER Assembly instructions

Tarptent MoTrail Setup

Tarptent

Tarptent MoTrail Setup

Clam 8398 manual

Clam

Clam 8398 manual

Kiwi Camping Kingfisher 6 Recreational Tent Pitching instructions

Kiwi Camping

Kiwi Camping Kingfisher 6 Recreational Tent Pitching instructions

ABSCO SHEDS CPSW33 manual

ABSCO SHEDS

ABSCO SHEDS CPSW33 manual

ALDI Adventuridge CC-80045-8 instruction manual

ALDI

ALDI Adventuridge CC-80045-8 instruction manual

SunnCamp ULTIMA ASPIRE 260 Erection Instructions

SunnCamp

SunnCamp ULTIMA ASPIRE 260 Erection Instructions

Bergans Lavvo manual

Bergans

Bergans Lavvo manual

manuals.online logo
manuals.online logoBrands
  • About & Mission
  • Contact us
  • Privacy Policy
  • Terms and Conditions

Copyright 2025 Manuals.Online. All Rights Reserved.