SKY DEVICES Platinum 5.0M User manual

-1-
Content
1 General Information................................................................................2
1.1 Profile......................................................................................................2
1.2 Safety warning and Attentions................................................................2
2 Your phone................................................................................................ 4
2.1 Phone overview.......................................................................................4
2.2 Functions of Keys................................................................................... 4
2.3 Functions of icons................................................................................... 4
3 Getting started..........................................................................................5
3.1 Installing the SIM Card and the Battery.................................................5
3.2 Charging the Battery...............................................................................5
3.3 Linking to the Networks and devices..................................................... 6
3.4 Using the touch screen............................................................................7
3.5 Using the onscreen keypad..................................................................... 8
3.6 Dialing Calls........................................................................................... 8
4 Using the Menus.......................................................................................9
4.1 Chrome Browser..................................................................................... 9
4.2 Camera.................................................................................................... 9
4.3 Contacts...................................................................................................9
4.4 Email..................................................................................................... 10
4.5 FM Radio.............................................................................................. 10
4.6 Photos....................................................................................................10
4.7 Play Store.............................................................................................. 10
5 Appendix..................................................................................................11

-2-
11General Information
1.1 Profile
Please read this pamphlet carefully in order to make your phone in
perfect condition.
Our company may change this mobile phone without prior written
notice and reserves the final right to interpret the performance of this
mobile phone.
Due to different software and network operators, display on your
phone may be different, refer to your phone for details.
1.2 Safety warning and Attentions
Safety warning
ROAD SAFETY COMES FIRST
Do not use a hand-held phone while driving. Use hands-free fittings
when calls are unavoidable while driving. In some countries, dialing or
receiving calls while driving is illegal!
SWITCH OFF IN AIRCRAFT
Wireless devices can cause interference in aircraft. Using a mobile
phone in flight is illegal and risky.
Please make sure that your mobile phone is powered off in flight.
SWITCH OFF BEFORE ENTERING RISKY AREAS
Strictly observe the relevant laws, codes, and regulations on the use
of mobile phones in risky areas. Turn off your mobile phone before
entering a place susceptible to explosion, such as an oil station, oil tank,
chemical plant or a place where a blasting process is under way.
OBSERVE ALL SPECIAL REGULATIONS
Follow any special regulations in force in any area such as hospitals
and always switch off your phone whenever it is forbidden to use it or,
when it may cause interference or danger. Properly use your mobile phone
near medical apparatuses, such as pacemakers, hearing aids and some
other electronic medical devices, as it may cause interference to such
apparatuses.
INTERFERENCE
The conversation quality of any mobile phone may be affected by
radio interference. An antenna is built inside the mobile phone and located
below the microphone. Do not touch the antenna area during a
conversation, lest that the conversation quality deteriorate.
QUALIFIED SERVICE
Only qualified personnel may install or repair phone equipment.
Installing or repairing the mobile phone on your own may bring great
danger and violates the warranty rules.

-3-
ACCESSORIES AND BATTERIES
Use only approved accessories and batteries.
USE SENSIBLY
Use only in a normal and proper manner.
EMERGENCY CALLS
Ensure the phone is switched on and in service, enter the emergency
number, e.g. 112, then press the Dial key. Give your location and state
your situation briefly. Do not end the call until told to do so.
Note: Just like all other mobile phones, this mobile phone does not
necessarily support all the features described in this manual due to
network or radio transmission problems. Some networks even do not
support the emergency call service. Therefore, do not rely solely on the
mobile phone for critical communications such as first aid. Please consult
the local network operator.
Precautions
This mobile phone is well designed with fine art. Please exercise
special care when using it. The following suggestions will help your
mobile phone survive the warranty period and extend its service life:
Keep the mobile phone and all its fittings beyond children's reach.
Keep the mobile phone dry. Keep away from rain, moisture, liquid or
other substances that may corrode electronic circuits.
Do not use or store the mobile phone in dusty places, lest that active
parts of the mobile phone be damaged.
Do not store the mobile phone in a high-temperature place. High
temperature will shorten the life of electronic circuits and damage the
battery and some plastic parts.
Do not store the mobile phone in a chilly place. Otherwise, moistures
will be formed inside the mobile phone to damage electronic circuits when
the mobile phone is moved to a constant temperature place.
Do not throw, knock or shock the mobile phone, as that will destroy the
internal circuits and high-precision components of the mobile phone.
-4-
22Your phone
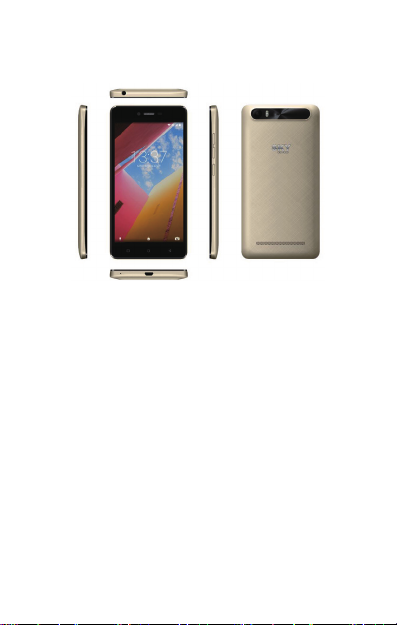
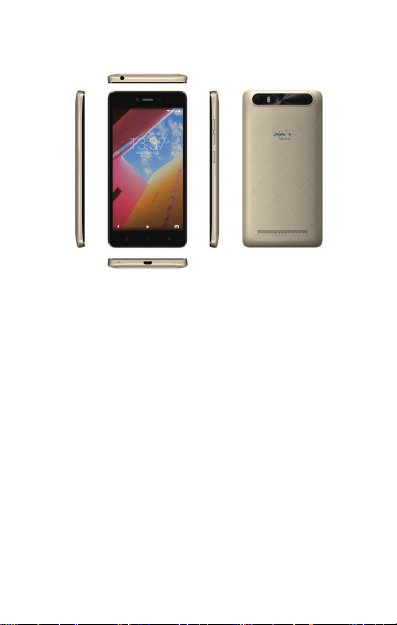
2.1 Phone overview
2.2 Functions of Keys
The mobile phone provides the following keys:
Power key
Power key situates at the right side of the phone. While using the phone,
you can press this key to lock screen; if you press and hold this key, a
phone-options dialog would pop out. Here, you can select to adjust the
profile mode, power off, reboot or turn on/off airplane mode.
Volum e k ey
Volume key situates at the right side of the phone. You can press it to
adjust ringer volume.
2.3 Functions of icons
Menu icon
Touch this icon to access options of a selected function;
Home icon
Touch it to open home screen. If you’re viewing the left or right extended
Home screen, touch it can enter the home screen.
Back icon
Touch this icon to return to the previous screen;

-5-
33Getting started
3.1 Installing the SIM Card and the Battery
A SIM card carries useful information, including your mobile phone
number, PIN (Personal Identification Number), PIN2, PUK (PIN
Unlocking Key), PUK2 (PIN2 Unlocking Key), IMSI (International
Mobile Subscriber Identity), network information, contacts data, and short
messages data.
Note:
After powering off your mobile phone, wait for a few seconds before
removing or inserting a SIM card.
Exercise caution when operating a SIM card, as friction or bending
will damage the SIM card.
Properly keep the mobile phone and its fittings such as the SIM cards
beyond children's reach.
Installation
Hold the power key for a while and select power off to power off the
mobile phone.
Take the back cover away.
Insert the SIM Card into the SIM Card slot lightly with the corner
cutting of the card aligning to the notch of the slot, the gold plate of the
small card facing download and the gold plate of the normal card facing
up, till the SIM Card cannot be further pushed in.
With the metallic contacts of the battery facing the metallic contacts in
the battery slot, install the battery.
Note:
The SD card is a miniature object. Keep it out of the reach of children
for fear that children swallow it!
3.2 Charging the Battery
Your mobile phone can monitor and display the battery state.
Normally the remaining energy of the battery is indicated by the
battery level icon at the upper right corner of the display screen.
When the battery energy is insufficient, the mobile phone prompts
"Battery low".
Using a travel adapter:
Install the battery into the mobile phone before charging the battery.
Connect the adapter of the travel charger with the charging slot in the
mobile phone. Ensure that the adapter is fully inserted.
Insert the plug of the travel charger to an appropriate power outlet.
During the charging, the battery level grids in the battery icon keep
flickering till the battery is fully charged.
The battery icon does no longer flicker when the charging process

-6-
ends.
Note:
Ensure that the plug of the charger, the plug of the earphone, and the
plug of the USB cable are inserted in the right direction. Inserting them in
a wrong direction may cause charging failure or other problems.
Before the charging, ensure that the standard voltage and frequency of the
local mains supply match the rated voltage and power of the travel
charger.
Optimizing battery life
You can extend your battery’s life between charges by turning off
features that you don’t need. You can also monitor how applications and
system resources consume battery power.
To guarantee the optimal performance of your battery, please stick to
the following rules:
Turn off radios that you aren’t using. If you aren’t using Wi-Fi®,
Bluetooth®, or GPRS, use the Setting application to turn them off.
Turn down screen brightness and set a shorter screen timeout.
If you don’t need them, turn off automatic syncing for Gmail,
Calendar, Contacts, and other applications.
Note: On the Home screen, press Menu icon and touch Settings >
More>Battery. The Battery Use screen lists the applications that have been
using the battery, from greatest to least battery use. The top of the screen
displays the time since you were last connected to a charger or, if you’re
currently connected to one, how long you were running on battery power
before you connected to a charger. Then each application or service that
used battery power during that time is displayed, in order of the amount of
power they used. Touch an application in the Battery Use screen to learn
details about its power consumption. Different applications offer different
kinds of information.
3.3 Linking to the Networks and devices
Your phone can connect to a variety of networks and devices,
including mobile networks for voice and data transmission, Wi-Fi®data
networks, and Bluetooth®wireless connection devices, such as headsets.
You can also connect your phone to a computer, to transfer files from your
phone’s SD card and share your phone’s mobile data connection via USB.
Connecting to mobile networks
When you assemble your phone with a SIM card, your phone is
configured to use your provider’s mobile networks for voice calls and for
transmitting data.
Connecting to Wi-Fi®networks
Wi-Fi®is a wireless networking technology that can provide Internet
access at distances of up to 100 meters, depending on the Wi-Fi®router

-7-
and your surroundings.
Touch Settings>Network > Wi-Fi®. Check Wi-Fi®to turn it on. The
phone scans for available Wi-Fi®networks and displays the names of
those it finds. Secured networks are indicated with a Lock icon.
Note: If the phone finds a network that you connected to previously, it
connects to it.
Touch a network to connect to it. If the network is open, you are
prompted to confirm that you want to connect to that network by touching
Connect. If the network is secured, you’re prompted to enter a password or
other credentials.
Connecting to Bluetooth®devices
Bluetooth®is a short-range wireless communications technology that
devices can use to exchange information over a distance of about 8 meters.
The most common Bluetooth®devices are headphones for making calls or
listening to music, hands-free kits for cars, and other portable devices,
including laptops and cell phones.
Touch Settings> Network > Bluetooth®. Check Bluetooth®to turn it
on.
You must pair your phone with a device before you can connect to it.
Once you pair your phone with a device, they stay paired unless you
unpair them.
Your phone scans for and displays the IDs of all available Bluetooth®
devices in range. If the device you want to pair with isn’t in the list, make
it discoverable.
Connecting to a computer via USB
You can connect your phone to a computer with a USB cable, to
transfer music, pictures, and other files between your phone’s SD card and
the computer.
3.4 Using the touch screen
Touch-screen tips
Touch
To act on items on the screen, such as application and settings icons,
to type letters and symbols using the onscreen keyboard, or to press
onscreen buttons, you simply touch them with your finger.
Touch & hold
Touch & hold an item on the screen by touching it and not lifting
your finger until an action occurs. For example, to open a menu for
customizing the Home screen, you touch an empty area on the Home
screen until the menu opens.
Drag
Touch & hold an item for a moment and then, without lifting your
finger, move your finger on the screen until you reach the target position.

-8-
Swipe or slide
To swipe or slide, you quickly move your finger across the surface of
the screen, without pausing when you first touch it (so you don’t drag an
item instead). For example, you slide the screen up or down to scroll a list.
Lock screen
When Screen lock in Security setting is enabled, press Power key to
lock the handset. This helps to prevent accidental touching of keys and as
well as power saving. When Sleep function in Display setting is enabled,
after the handset device has been idle for preset period, the screen will be
locked automatically to save power.
Unlock screen
Press Power key to switch on the handset device. The lock screen
appears. Touch and slide right to unlock screen, and the screen being
locked last time will show.
3.5 Using the onscreen keypad
You enter text using the onscreen keyboard. Some applications open
the keyboard automatically. In others, you touch a text field where you
want to enter text to open the keyboard. You can also enter text by
speaking instead of by typing.
To enter text
Touch a text field, and the onscreen keyboard opens. Some
applications open the keyboard automatically. In others, you touch a text
field where you want to enter text to open the keyboard.
Touch the keys on the keyboard to type.
The characters you’ve entered appear in the text field, with
suggestions for the word you are typing below.
Use the Delete icon to erase characters to the left of the cursor.
After finishing typing, touch Back icon to close the keyboard.
3.6 Dialing Calls
Dialing a call to a number in the contacts
Touch the Phone icon or the phone application icon on the Home
screen, then select the Contacts tab. Swipe or slide upward/downward to
pick out the target contact. Then you can touch the dial icon to originate a
call.
Dialing a call to a number in call log
Touch the Phone icon or the phone application icon on the Home
screen, then select the call log tab. Swipe or slide upward/downward to
pick out and touch the target contact. Then you can originate a call.
Answering incoming calls
Touch the Answer icon to answer an incoming call.
TouchtheEndicontoendthecurrentconversation.

-9-
To reject an incoming call, touch the Decline icon.
Managing multiple calls
If you accept a new call when you’re already on a call, you can touch
the Answer icon to answer the current calls.
44Using the Menus
4.1 Chrome Browser
You can use Browser to view web pages and search for information on the
web.
When you open Browser, your home page opens. The web address
(URL) of the current page is displayed at the top of the window.
Call History
You can use this function to manage your calls:
All:All calls will be in the list.
Missed:You can view a list of missed calls.if there are some missed
calls,you can drag the Column notice down to view it.
Outgoing:You can view and manage the dialed calls.
Incoming:You can view and manage the received calls.
4.2 Camera
Touch the Camera icon in the main menu interface or on the home
screen, camera opens in Landscape mode, ready to take a picture. In this
mode, you can touch the camera icon to take a photo, touch photo icon and
slide right to switch between photo, video gif and Panorama mode.
Note:youcanalsotouchmenuicontopopoutanoptionbox.There,
you can switch to camcorder mode.
4.3 Contacts
In the contacts screen, touch menu icon and you can perform the
following operations:
Contacts to display: you can select the contacts on different group to
display.
Import/export: you can import/export the contacts form SIM card or
storage; you can also share the visible contacts.
Blocked numbers:select this option to enter the callfirewall.
Accounts: you can sync with your account.
Settings: you can set the display options in this interface.
Send contacts by Messaging:select this function,then you can
choose some contacts to share by messaging
Batch delete: Select this function, then you can mark the target
contacts. To delete all contacts, you just need to touch all at the top of

-10-
contacts screen. Last, touch OK and confirm to delete contacts.
Groups:you can edit or delete a groups
Advanced options:you can view the SIM capacity and Clear up
contacts
4.4 Email
You use the Email application to read and send email. There are many
email address to choose
Touch email icon to access it. If the Email account has not been set up,
you can set up an Email account in a few steps.
Account setup
Enter an Email address and the account’s password.
Account settings
Set inbox checking frequency.
Set Send email from this account by default.
Set Notify me when email arrives.
Set Synchronize contacts, calendar or Email from this account.
Set Automatically download attachments when connected to Wi-Fi®.
Compose and sending Email
To compose and send an Email:
1. Touch the create icon to compose a new Email.
2. Enter Email address (es) for intended recipient(s).
3. Touch Menu →Attach file to attach a file.
4. Touch Menu →Add Cc/Bcc to add copy or blind copy this
Email to other contacts.
5. After completing the Email, Touch send icon to send the Email.
Touch folder icon to check the account status. For each Email account
there are five default folders, i.e., Inbox, Drafts, Outbox, Send and Trash
folders. To view sent Emails, open Sent folder and tap refresh icon.
4.5 FM Radio
Please plug in the compatible earphone to the device and then turn on
the radio. The earphone cable can be used as FM Antenna. Please adjust
appropriate volume when listening to the radio. Continue to use higher
volume is harmful for your ear.
4.6 Photos
Both pictures and videos taken by camera or stored in SD card can be
scanned through this function.
You also can log in the google to view the photos in your account.
4.7 Play Store
You can download and manage media files through this application.

-11-
55Appendix
Appendix 1::Troubleshooting
If you find exceptions when operating the mobile phone, restore the
factory settings and then refer to the following table to solve the problem.
If the problem persists, contact the distributor or service provider.
Fault
Cause
Solution
SIM card error
The SIM card is
damaged.
Contact your network
service provider
The SIM card is not in
position.
Check the SIM card
The metal face of the
SIM card is polluted.
Clean the SIM card with
acleancloth
Poor received
signal quality
Signals are obstructed.
For instance, radio
waves cannot be
effectively transmitted
nearby a high building
or in a basement.
Move to a place where
signals can be effectively
transmitted
Line congestions occur
when you use the
mobile phone in
high-traffic hours
Avoid using the mobile
phone in high-traffic
hours
The mobile
phone cannot
be powered on
The battery energy is
exhausted.
Charge the battery
Calls cannot be
dialed
Call barring is activated
Cancel call barring
The mobile
phone cannot
connect the
network
The SIM card is invalid
Contact your network
service provider
The mobile phone is not
in a service area of the
GSM network
Move to the network
operator's service area
The signal is weak
Move to a place where
the signal quality is high

-12-
The battery
cannot be
charged
The charging voltage
does not match the
voltage range indicated
on the charger
Ensure the charging
voltage matches the
voltage range indicated
on the charger
An improper charger is
used
Use the charger specially
designed for the mobile
phone
Poor contact
Ensure the charger plug
is in good contact with
the mobile phone

-13-
Contenu
1 Informations Générales.........................................................................14
1.1 Profil......................................................................................................14
1.2 Avis de sécurité et avertissements.........................................................14
2 El téléphone............................................................................................ 16
2.1 Description du téléphone...................................................................... 16
2.2 Fonctionnalités de Touches...................................................................16
2.3 Fonctionnalités des icônes.................................................................... 16
3 Pour commencer.................................................................................... 17
3.1 Installer la carte SIM et la batterie........................................................17
3.2 Charger de la batterie............................................................................17
3.3 Connecter aux réseaux aux appareils....................................................18
3.4 Utiliser l’écran tactile............................................................................19
3.5 Utiliser le clavier de l’écran..................................................................20
3.6 Passer des appels...................................................................................21
4 Utiliser les Menus...................................................................................21
4.1 Chrome Navigateur...............................................................................21
4.2 Appareil photo.......................................................................................21
4.3 Contacts.................................................................................................21
4.4 Courriel électronique............................................................................ 22
4.5 Radio FM.............................................................................................. 23
4.6 Photos....................................................................................................23
4.7 Play Store.............................................................................................. 23
5 Annexe..................................................................................................... 23

-14-
1 Informations Générales
1.1 Profil
Veuillez lire attentivement ce manuel afin que votre téléphone portable
soit dans des parfaites conditions.
Notre société peut changer ce téléphone portable sans notification
écrite préalable, et se réserve le droit final d'interpréter les performances
de ce téléphone portable.
En raison des différents opérateurs de réseau et de logiciels, l'affichage
sur votre portable peut se différencier, veuillez-vous vous référer à votre
manuel pour plus de détails.
1.2 Avis de sécurité et avertissements
Avis de sécurité
LA SÉCURITÉ ROUTIÈRE AVANT TOUT
N’utilisez pas un téléphone portable en conduisant. Veuillez utiliser
les accessoires de main-libre lorsque les appels sont inévitables pendant la
conduite. Dans certains pays, il est illégal de passer ou de recevoir des
appels en conduisant !
VEUILLEZ ÉTEINDRE LE TÉLÉPHONE DANS LES AVIONS
Les appareils sans fil peuvent conduire à l'interférence en avion. Il est
illégal et risqué d’utiliser un téléphone portable en vol.
Veuillez-vous assurer que votre téléphone portable est éteint pendant le
vol.
VEUILLEZ ÉTEINDRE LE TÉLÉPHONE AVANT D'ENTRER
DANS LES ZONES À RISQUE
Veuillez respecter strictement les lois, les codes et les règlements
pertinents sur l'utilisation des téléphones portables dans les zones à risque.
Éteignez votre téléphone portable avant d'accéder à un lieu susceptible
d’exploser, tels qu’une station-service, réservoir d'huile, usine chimique ou
un endroit où un processus de dynamitage est en cours.
RESPECTEZ TOUS LES RÉGLEMENTS SPÉCIAUX
Suivez toutes les règlements spéciaux en vigueur dans certains endroits
tels que les hôpitaux et éteignez toujours votre téléphone dans les endroits
où il vous est interdit de l'utiliser. Utilisez votre portable de façon correcte
à proximité des appareils médicaux, tels que les stimulateurs cardiaques,
les prothèses auditives ou d'autres appareils électroniques, car ils peuvent
conduire à l'interférence avec de tels appareils.
INTERFÉRENCE
La qualité de conversation de tout téléphone portable peut être
affectée par une interférence radio. Une antenne est construite dans le
téléphone et située sous le micro. Ne touchez pas la zone de l’antenne
pendant une conversation, sinon la qualité de cette conversation se
détériorera.

-15-
SERVICE QUALIFIÉ
Il n'est permis qu'au personnel qualifié d'installer ou réparer l'appareil
téléphonique. Installer ou réparer le téléphone par vous-même pourrait
s’avérer très dangereux et violer les règles de la garantie.
ACCESSOIRES ET BATTERIES
N'utilisez que les accessoires et les batteries approuvées par le fabricant.
SENSIBILITÉ D'UTILISATION
N'utilisez le portable qu'en façon normale et appropriée.
APPELS D'URGENCE
Assurez-vous que le portable est démarré et mis en service, saisissez le
numéro d'urgence, pas exemple le 112, puis appuyez sur la touche Appel.
Informez de votre localisation et indiquez votre situation de façon brève.
Ne mettez pas fin à l'appel avant d'y être autorisé.
Remarque : Comme tous les autres téléphones portables, ce téléphone
portable n’accepte pas nécessairement toutes les caractéristiques décrites
dans ce manuel, en raison des problèmes de réseaux et de transmissions.
En outre, certains réseaux ne prennent pas en charge les services d'appels
d'urgence. Par conséquent, la communication dans des situations
d'urgence, comme les situations où des premiers secours sont nécessaires,
ne devrait pas dépendre entièrement des téléphones mobiles. Veuillez
consulter votre opérateur réseau local.
Précautionne
Ce dispositif est de conception délicate, veuillez prêter attention lors de
son utilisation. Les propositions suivantes vous aideront à prolonger sa durée
de vie au-delà de la période de garantie :
Veuillez garder le téléphone portable et tous ses accessoires hors de la
portée des enfants.
Veuillez garder le téléphone portable au sec. Tenez-le hors de portée de la
pluie, de l’humidité, des liquides ou autres substances qui pourraient causer de
la corrosion sur les circuits électroniques.
N'utilisez pas ou ne placez pas le téléphone portable dans des endroits
poussiéreux, sinon quoi les parties actives du téléphone pourraient être
endommagées.
Ne placez pas votre téléphone portable dans un endroit à très haute
température. Des températures extrêmes peuvent réduire la durée de vie des
circuits électroniques, et endommager la batterie ainsi que les parties en
plastique.
Ne placez pas votre téléphone portable dans un endroit froid. Sinon quoi, de
la moisissure se formera à l’intérieur du téléphone portable et endommagera les
circuits électroniques lorsque le téléphone portable sera déplacé vers un endroit
à température ambiante
Ne jetez pas, ne frappez pas et ne secouez pas le téléphone portable, car cela
détruira les circuits internes et les composants de haute précision du téléphone
portable.
-16-
2 El téléphone
2.1 Description du téléphone
2.2 Fonctionnalités de Touches
Le portable comporte les touches suivantes :
Touche marche
La touche Marche est située sur le côté droit du téléphone. Tout en
utilisant le téléphone, vous pouvez appuyer sur cette touché pour
verrouiller. Si vous maintenez cette touche enfoncée, une boîte de dialogue
sur les options du téléphone apparaîtra. Ici vous pouvez modifier le profil,
démarrer ou éteindre votre téléphone, le téléphone en mode
silencieux/mode avion ou bien éteint.
Touche volume
La touche volume est située sur le côté droit du téléphone, vous
pouvez appuyer dessus pour ajuster le volume de la sonnerie.
2.3 Fonctionnalités des icônes
Icône Menu
Touchez sur cette icône pour accéder aux options des fonctionnalités
sélectionnées ;
Icône Accueil
Appuyez sur la touche Accueil pour ouvrir l'écran d'accueil, si vous
affichez sur la droite ou la gauche de l'écran d'Accueil étendu, touchez
cette icône pour accéder à l'écran d'Accueil.
Icône Retour
Appuyez sur cette icône pour retourner à l'écran précédent.

-17-
3Pourcommencer
3.1 Installer la carte SIM et la batterie
La carte SIM comporte les informations utiles, y compris le numéro de
votre portable, PIN (Numéro d'Identification Personnel), PIN2, PUK (clé
de Déverrouillage du code PIN), PUK2 (PUK (clé de Déverrouillage du
code PIN2), IMSI (Identité d'Abonné de Mobile International),
l’information de réseau, les données des contacts, et les données des
messages.
Remarque :
Après avoir éteint votre téléphone portable, veuillez patienter quelques
secondes avant de retirer ou d'insérer une carte SIM. Veillez à toujours
manipuler la carte SIM avec précaution, tout frottement ou pliage pourrait
endommager votre carte SIM. Maintenir le téléphone portable, ses
accessoires ainsi que la carte SIM hors de portée des enfants.
Installation
Maintenir appuyée la touche Marche quelques secondes et
sélectionner éteindre pour éteindre votre téléphone portable.
Retirez le cache arrière du téléphone.
Insérez doucement la Carte SIM dans la fente pour Carte SIM, avec le
coin coupé de la carte aligné avec l’encoche de la fente, et la plaque dorée
de la carte face vers le bas, jusqu’à ce que la Carte SIM ne puisse pas être
poussée plus loin.
Installez la batterie avec les contacts métalliques de la batterie face
aux contacts métalliques dans le logement de la batterie.
Remarque :
La carte SD est un objet miniature. Gardez-la hors de portée des enfants,
de peur que ceux-ci l’avalent !
3.2 Charger de la batterie
Le téléphone portable peut contrôler et afficher l’état de la batterie.
Généralement, la charge restante de la batterie est indiquée par l'icône
de niveau située dans l'angle supérieur droit de l'écran d’accueil.
Lorsque la charge de la batterie est insuffisante, le téléphone affiche le
message “batterie faible”.
Utilisation du chargeur du voyage :
Installez la batterie dans le téléphone portable avant de recharger la
batterie.
Branchez l'adaptateur du chargeur de voyage avec la fente de
chargement du téléphone portable. Assurez-vous que l'adaptateur soit
entièrement inséré.
Branchez la prise du chargeur de Voyage dans une prise de courant
appropriée.
Pendant le chargement, les barres du niveau de la batterie dans l’icône
vacillent jusqu'à ce que la batterie soit entièrement charge.

-18-
L'icône de la batterie ne vacille plus dès lors que le processus de
chargement est terminé.
Remarque :
Assurez-vous que la prise du chargeur, la prise de l'écouteur et la prise
du câble USB soit insérées dans le bon sens. Les insérer dans le mauvais
sens pourrait causer un échec du chargement ou d'autres problèmes. Avant
de brancher le chargeur, assurez-vous que la tension et la fréquence du
réseau locale correspondent à la tension et voltage du chargeur de
voyage.
Optimiser la vie de la batterie
Vous pouvez améliorer la vie de votre batterie entre les chargements
en éteignant les fonctions dont vous n'avez pas besoin. Vous pouvez aussi
contrôler comment les applications et les ressources du système
consomment votre batterie.
Pour garantir la performance optimale de votre batterie, veuillez-vous
en tenir aux règles suivantes :
Éteignez les radios que vous n'utilisez pas. Si vous n'utilisez pas le
WI-FI®, Bluetooth®, ou GPRS, utilisez l'application Réglages pour les
éteindre.
Diminuez la luminosité de votre écran et définissez un laps de temps
plus court pour l'éteinte de votre écran.
Si vous n'en avez pas besoin, éteignez la synchronisation automatique
pour Gmail, Calendrier, Contacts, et d'autres applications.
Remarque : Sur l'écran d'accueil, appuyez sur l'icône Menu et sur
Réglages >Dispositif >Batterie. L'écran d'utilisation de la batterie fait
défiler les applications qui utilisent de la batterie, de celle qui en utilise le
plus à celle qui en utilise le moins. Le haut de l'écran affiche le temps
depuis votre dernière connexion à un chargeur ou, si vous êtes
actuellement connecté avec un chargeur, le temps pendant lequel vous
avez utilisé la batterie avant de vous connecter à un chargeur. Puis chaque
application ou service qui a utilisé de la batterie pendant cette période est
affichée, dans l'ordre décroissant du montant d'énergie utilisé. Touchez
une application dans l'écran d'Utilisation de la Batterie pour en savoir
plus sur la consommation d'énergie. Différentes applications proposent
différentes sortes d'information.
3.3 Connecter aux réseaux aux appareils
Votre téléphone peut se connecter à une vaste gamme de réseaux et
d'appareils, y compris des réseaux mobiles pour des transmissions vocales
et de donnés, des réseaux de données WI-FI®, et des appareils Bluetooth®
comme les écouteurs. Vous pouvez également connecter votre téléphone à
un ordinateur, pour transférer des fichiers de la carte SD de votre
téléphone et pour partager la connexion des données mobiles de votre
téléphone via USB.

-19-
Se connecter aux réseaux mobiles
Lorsque vous assemblez votre téléphone avec une carte SIM, votre
téléphone est configuré pour utiliser les réseaux mobiles de votre
fournisseur, pour les appels vocaux et les transmissions de données.
Se connecter aux réseaux Wi-Fi®
Le Wi-Fi® est une technologie de réseau sans fils qui peut fournir un
accès Internet à une distance jusqu'à 100 mètres, en fonction du routeur
Wi-Fi® et des environs.
Appuyez sur Réglages > Réseaux > Wi-Fi®. Cochez Wi-Fi® pour
l'activer. Le téléphone recherche les réseaux Wi-Fi® disponibles et affiche
les noms de ceux qu'il trouve. Les réseaux sécurisés sont indiqués avec
une icône de Cadenas.
Remarque : Si le téléphone trouve un réseau sur lequel vous vous êtes
connecté précédemment, il s'y connecte automatiquement.
Touchez un réseau pour vous y connecter. Si le réseau est ouvert, on
vous demande de confirmer que vous voulez bien vous connecter à ce
réseau en touchant Se Connecter. Si le réseau est sécurisé, il vous sera
demandé un mot de passe et d'autres informations.
Se connecter à des appareils Bluetooth®
Le Bluetooth® est une technologie de communications sans fils à
courte distance que les appareils peuvent utiliser pour échanger des
informations à une distance d'environ 8 mètres. Les appareils Bluetooth®
les plus connus sont les écouteurs pour passer des appels ou écouter de la
musique, des kits-main libres pour voitures, et d'autres appareils portables,
comme les ordinateurs portables et les téléphones portables.
Appuyez sur Réglages > Réseaux >Bluetooth®. Cochez Bluetooth®
pour l'activer.
Vous devez jumeler votre téléphone avec un appareil avant de pouvoir
vous y connecter. Une fois que vous avez connecté votre téléphone avec
un appareil, ils restent jumelés jusqu'à ce que vous les désactiviez.
Votre téléphone recherche et affiche les IDs de tous les appareils
Bluetooth® disponibles à portée. Si l'appareil avec lequel vous souhaitez
jumeler n'est pas dans la liste, rendez-le détectable.
Se connecter à un ordinateur vis USB
Vous pouvez connecter votre téléphone à un ordinateur avec un câble
USB, pour transférer de la musique, des images, et d'autres fichiers entre
la carte SD de votre téléphone et votre ordinateur.
3.4 Utiliser l’écran tactile
Astuces pour utiliser l'écran tactile
Toucher
Para agir sur des objets sur l'écran, comme des icônes d'applications,
ou de paramétrages, pour saisir les lettres et les symboles en utilisant le
clavier sur l'écran, ou pour appuyer sur des boutons de l'écran, touchez-le
Table of contents
Languages:
Other SKY DEVICES Cell Phone manuals

SKY DEVICES
SKY DEVICES Elite C5 User manual

SKY DEVICES
SKY DEVICES SKY 4.0LM User manual

SKY DEVICES
SKY DEVICES ELITE 5.5 IRIS User manual

SKY DEVICES
SKY DEVICES SKYMusic User manual

SKY DEVICES
SKY DEVICES ELITE 5.5 OCTA User manual

SKY DEVICES
SKY DEVICES Tank User manual

SKY DEVICES
SKY DEVICES EliteOctaMax User manual

SKY DEVICES
SKY DEVICES SKYF1M User manual

SKY DEVICES
SKY DEVICES PLATINUM 5.0 User manual

SKY DEVICES
SKY DEVICES Fuego 4.0D User manual


