Contents
For your safety.......................5
ABOUT YOUR DEVICE............................6
NETWORK SERVICES.............................6
Shared memory...................................7
1. Getting started .................8
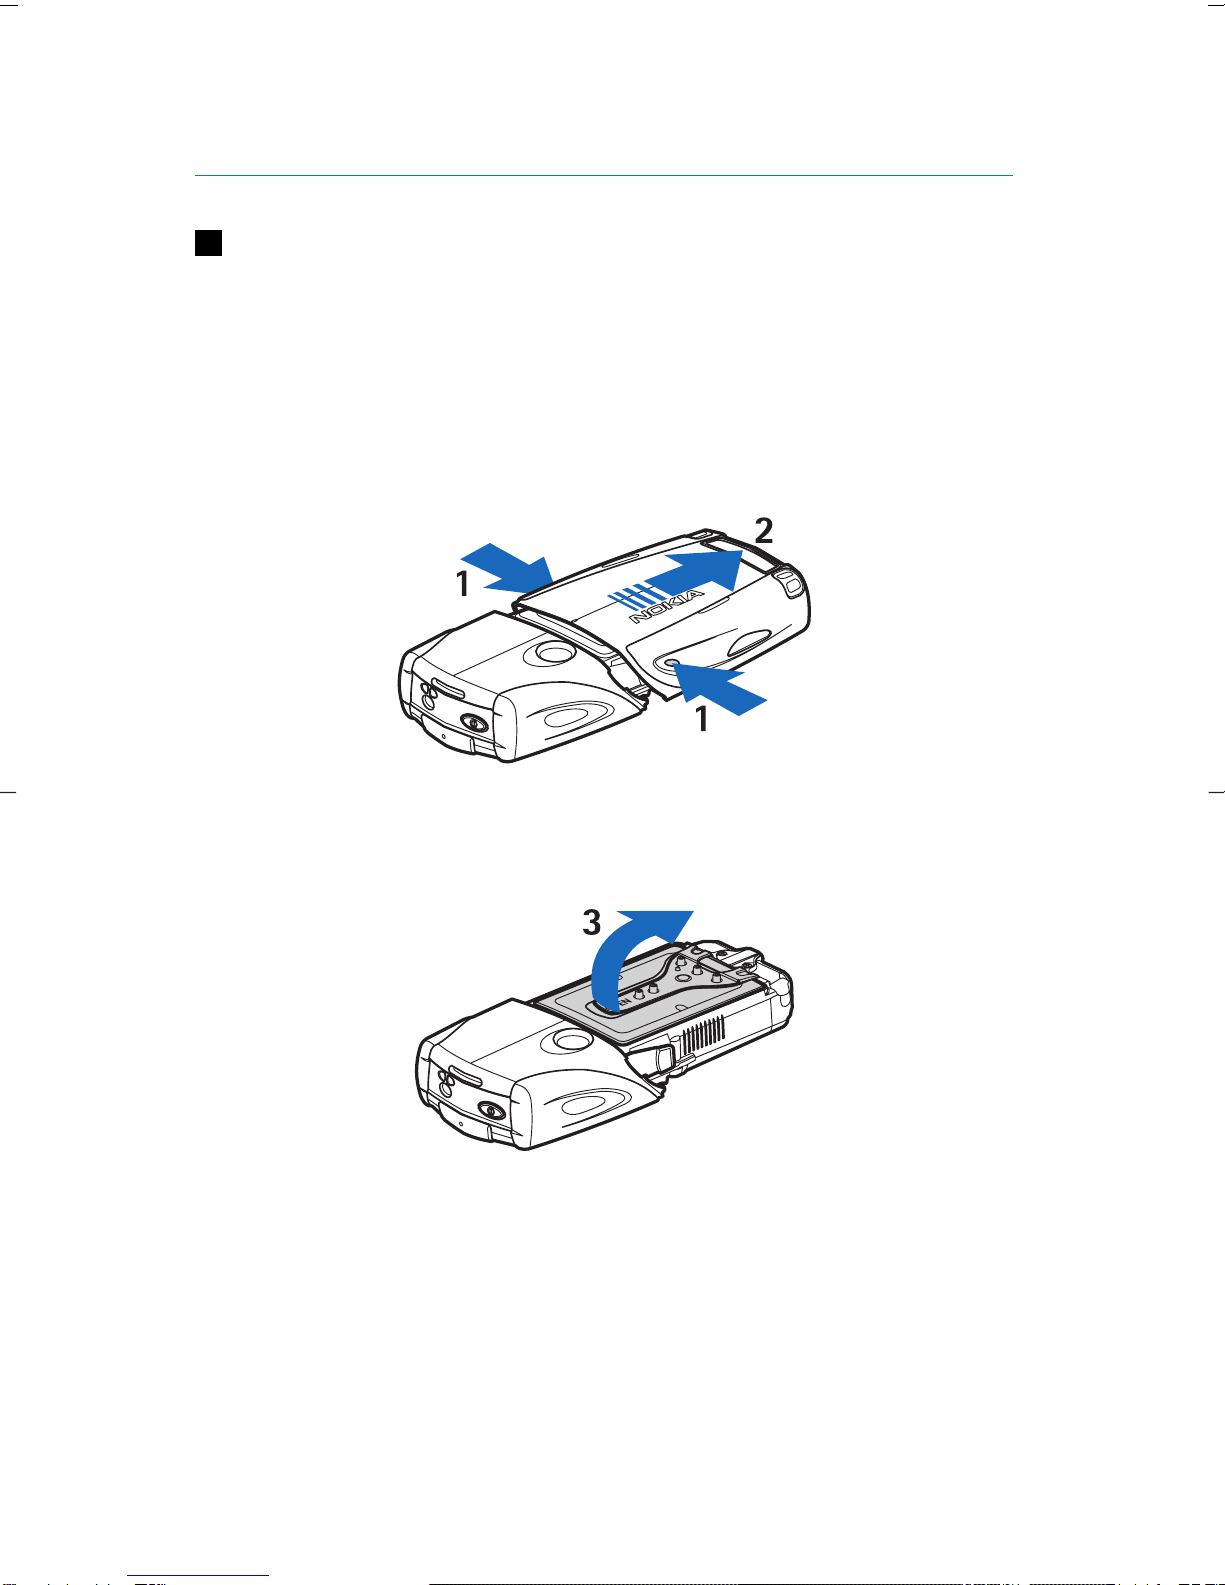
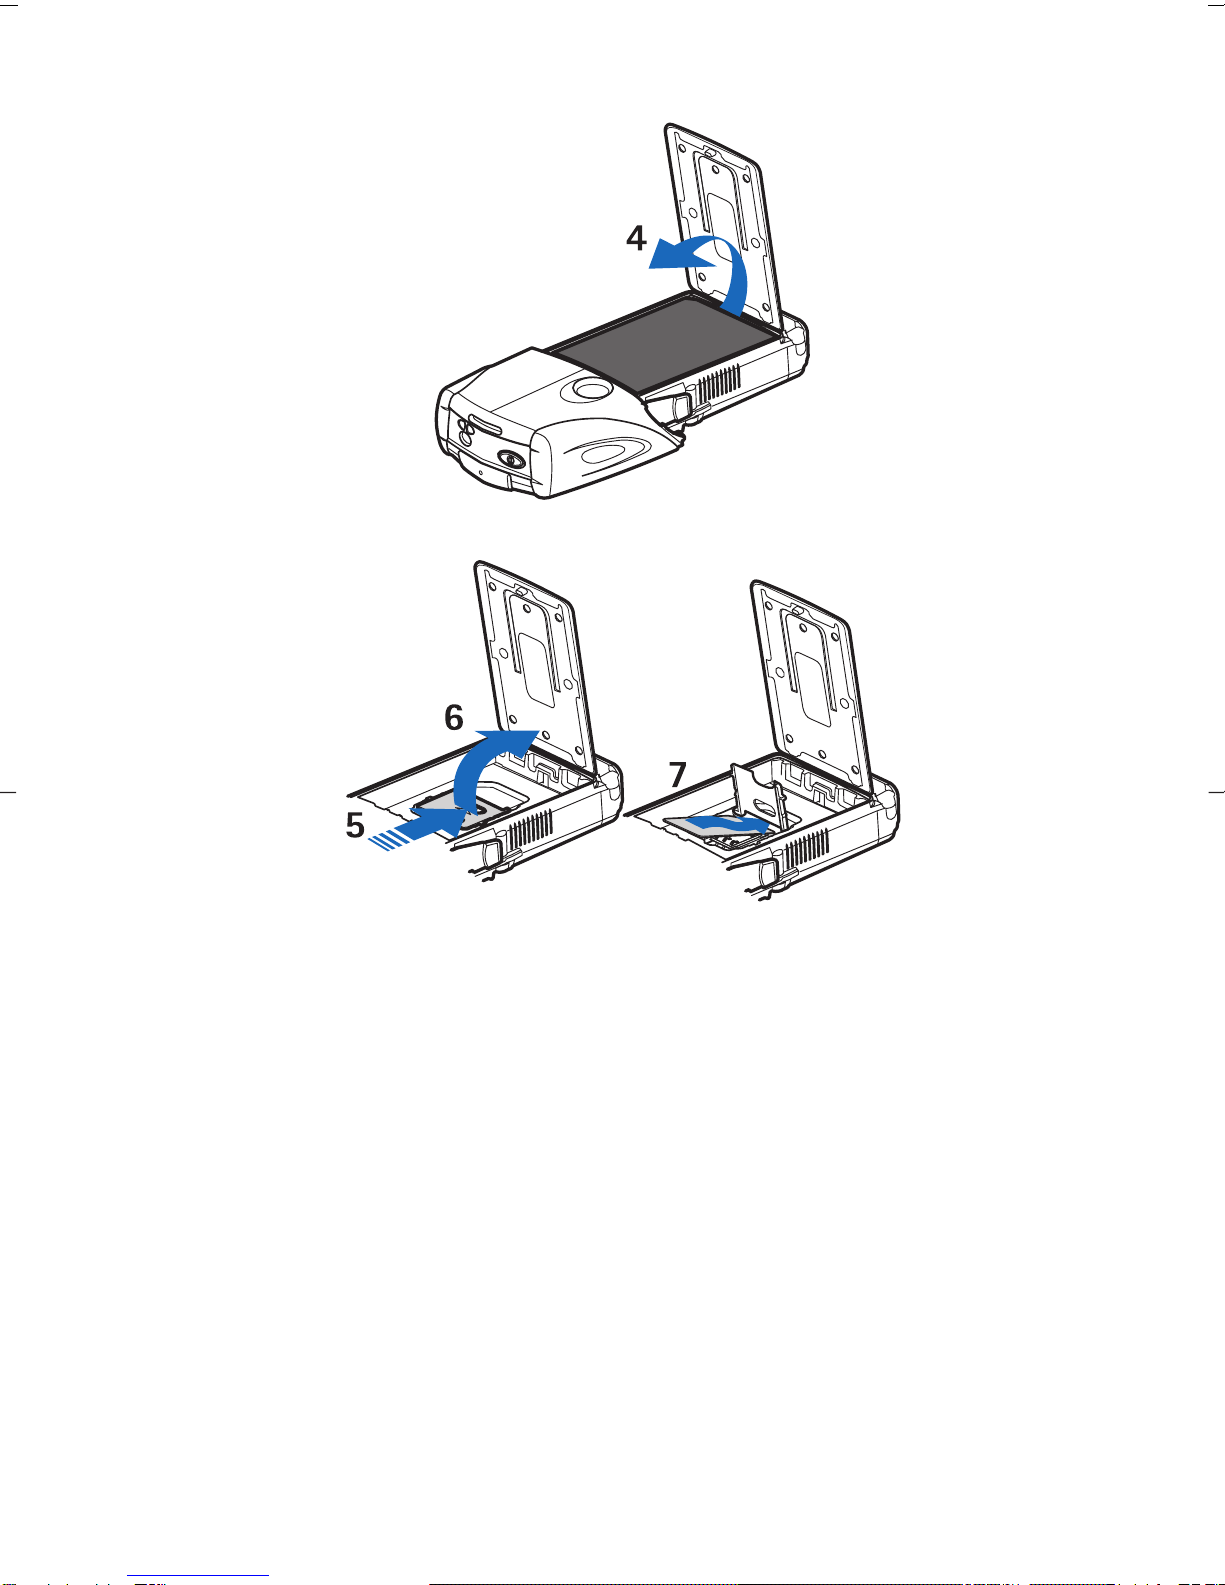
Installing the SIM card and
battery....................................................8
Charging the battery.......................10
Switching the phone on and
off...........................................................11
Keys and connectors........................12
Main indicators in standby
mode.....................................................13
Access codes.......................................15
Changing the shell and key
mat........................................................15
Attaching the carrying strap to
the phone............................................17
2. Your phone......................19
Standby mode....................................19
Some useful shortcuts in
standby mode....................................20
Keypad lock (Keyguard)..................20
Over the air settings service..........21
3. Call functions...................23
Making a call.......................................23
Speed dialling....................................23
Answering or rejecting a
call.........................................................23
Options during a call.......................24
4. Menu functions...............25
Using the menu.................................25
Menu list..............................................26
5. Writing text.....................28
Setting predictive text input on
and off..................................................28
Selecting the writing
language..............................................28
Using predictive text input............28
Using traditional text input..........29
Tips for writing text.........................30
6. Messages..........................31
Text messages...................................31
Multimedia messages.....................34
E-mail messages...............................38
Chat.......................................................40
Voice messages.................................44
Info messages....................................45
Message settings..............................45
Service commands...........................47
7. Contacts............................48
Settings for contacts........................48
Adding contacts................................48
Saving multiple numbers and
text items............................................49
Adding an image..............................50
Searching for a contact...................50
Editing or deleting contact
details...................................................50
Deleting contacts..............................50
My presence........................................51
Subscribed names............................52
Copying contacts...............................53
Sending and receiving a
business card.....................................54
Voice dialing.......................................54
Other functions..................................55
8. Call register......................57
Recent call lists..................................57
Call counters and call timers.........57
Positioning..........................................58
9. Settings.............................59
Profiles.................................................59
Tone settings.....................................59
Cyan
Magenta
Yellow
Black
file:///C:/USERS/MODEServer/jelim/5891816/NPL-5_Debra/en-APAC/issue_1/NPL-5_Debra_en-APAC_1.xml Page 3 Jun 25, 2004 8:17:06 AM