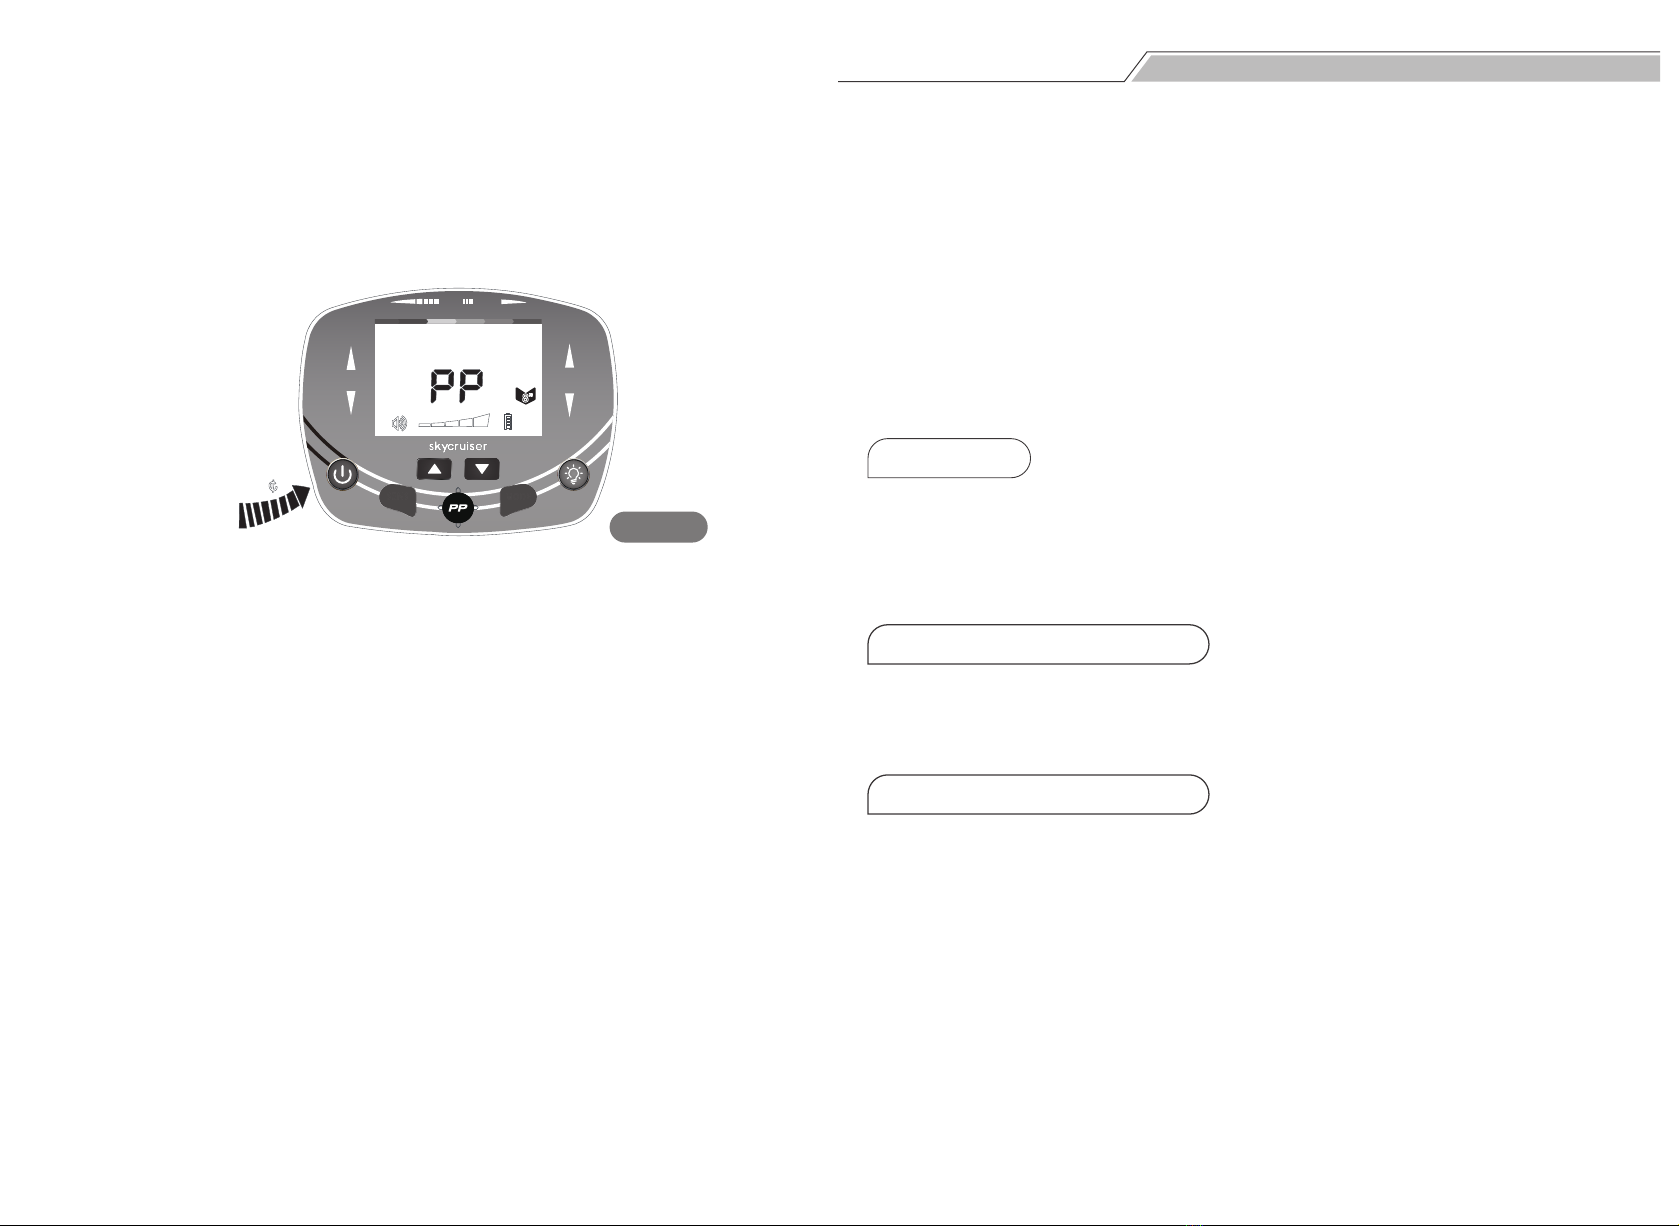
Skycruiser TX-910 User manual

FERROUS
NON - FERROUS
GOLD SILVE R
40 50 60 70 80 90
VOL
SENS
MODE
MODE
COIN
DEPTH

Contents
Specifications
Assembly
Battery Instructions
Safety Precautions
Control Panel
Quick Start
Basic Operation
Q&A
Troubleshooting
Care and Maintenance
Product Disposal
Contact Us
Thank you for choosing our Metal Detector TX-910. Please read this manual
carefully and know the function of TX-910 before use. And please keep it for
future reference.
It is recommended to use the TX-910 outdoors, because there is too much
interference indoors.
In the higher sensitivity range, the detector will be more sensitive to
electromagnetic interference. By reducing the sensitivity, the interference
will be reduced correspondingly.
When detecting metals, move the search coil at a constant speed. Keep the
search coil parallel with the ground and about 1/2 inch above the surface.
Do not swing it like a pendulum.
For coin-sized objects, the depth indicator is accurate. But for large-sized
objects or irregular-shaped objects, the accuracy will reduce slightly.
For most of the valuable metal objects, the detector will send out a consistent
signal. If the signal isn't consistent, it may be a false signal.
The LCD panel will automatically darken every 10 minutes. Hold the Vol
(Backlight)key for 2 seconds to light it up.
If the PINPOINT mode malfunctioned, sending a signal even though there
is no metal, lift the detector and press the P-P key once to solve the prob-
lem.
Tips:
1.
2.
3.
4.
5.
6.
7.
- 1 -
----------------------------------------------------------------------------------------
----------------------------------------------------------------------------------------------
-------------------------------------------------------------------------------------------
-------------------------------------------------------------------------------------
--------------------------------------------------------------------------------------------------
---------------------------------------------------------------------------
-----------------------------------------------------------------------------------
--------------------------------------------------------------------------------------------
-----------------------------------------------------------------------------------
----------------------------------------------------------------------------------------
-------------------------------------------------------------------------------
--------------------------------------------------------------------------------
2
3
5
6
6
9
15
19
21
22
22
23

Specifications Assembly
- 3 -- 2 -
The structure of the TX-910 is shown in Fig. 1 below.
Step 1. Loosen the lock knob on the lower stem, and take down the bolt. Then
install the lower stem on the search coil, and lock it tightly (see Fig. 2).
Operation Mode
Motion Mode
Non-motion Mode
Coins Depth
Sensitivity Control
Signal Strength
Sound Frequency
Volume Indicator
LCD Backlight
Battery Indicator
Turn-off Prompt
Search Coil
Earphone Jack
Power Supply
Target Metals
Discrimination
4+1
ALL-METAL, DISC, MEMORY, JEWELRY
PINPOINT
2′′, 4′′, 6′′, 8′′ and +
5 Grades
5 Grades
3 Kinds of Frequency Indicating Different Metals
3 Grades
White
4 Bars
Sound a Prompt Tone Every Ten Minutes
Waterproof Search Coil
3.5mm Earphone Jack
Two 9V Alkaline Batteries
6 Kinds; 0 to 99 Double Digits
FERROUS
NON - FERROUS
GOLD SILVER
40 50 60 70 80 90
VOL
SENS
MODE
MODE
COIN
DEPTH
Bracket
Upper Stem
Control Panel
Lock Nut
Lower Stem
Lock Knob
Search Coil
Middle Stem
Lower Stem
Screw
Lock Nut
Fig. 1
Fig. 2

- 5 -- 4 -
Battery Instructions
Step 2. Loosen the lock nut on the middle stem, and press the silver button on
the lower stem. Then insert the lower stem into the middle stem (see Fig. 3).
Step 3. Loosen the lock nut on the other end of the middle stem. Press the
silver button on the upper stem, and insert the upper stem into the other end
of the middle stem (see Fig. 4).
Step 4. Adjust the length that the lower stem inserts into the middle stem. Also,
you can adjust the total length of the stem, making you feel comfortable with
your arm straight.
Step 5. Wind the cable of the search coil around the stem with moderate
tightness, rather than make it sway. Plug the cable into the lower left part of
the control panel (see Fig. 5). Please note that do not pull the cable or plug.
Please use two 9V alkaline batteries.
Uncover the battery case and install the batteries according to the polarity sign
in the battery case. If you are not going to use the detector for a long time,
please remove the batteries from the battery case.(see Fig.6)
Plug
Fig. 3
Fig. 4
Fig. 5
Fig. 6
Middle Stem
Lower Stem
Silver Button
Silver Button

- 7 -- 6 -
Safety Precautions
Control Panel
In areas with heavy traffic, do not wear earphones in case of any traffic
accidents.
Always obtain permission before detecting metals at any private sites.
Keep away from the region where there may bury the electrical line, cable
line or pipeline, in particular, the pipes that are full of flammable gases and
liquids.
Do not detect in the military area where there may bury bombs or explosives.
When digging out the target, use the reasonable method, and do not
destroy the vegetation. Leave the land and vegetation as it was, and fill in
the holes after the excavation.
Signal Strength Cursor: Indicates the signal strength when in the
PINPOINT mode.
Mode Icon: Indicates the operation mode; divided into four kinds.
Sens Cursor: Divided into five grades. The sensitivity is of the highest
value when all the indicator lights up.
Vol Cursor: Indicates the volume.
Digital ID Cursor/P-P Cursor: Two digits of 01 to 99 accurately indicate
the metal. It can also display the P-P icon. When it displays the P-P icon, it
means it enters the PINPOINT mode.
Target ID Cursor: Divided into 6 categories; used to indicate the target
metals.
Coin Depth Cursor: Divided into five grades. It indicates the approximate
depth of 25¢ silver coin in the neutral soil.
Battery Power Cursor: Divided into four bars; indicates the battery
power. When the battery power cursor is flashing, it means the battery
should be replaced.
Power Button: Switch the detector on/off.
Fig. 7
COIN
DEPTH
FERROUS
NON - FERROUS
GOLD SI LVER
40 50 60 70 80 90
VOL
SEN S
MO D E
MODE
1.Signal Strength Cursor 8. Digital ID Cursor/P-P Cursor
9. Target ID Cursor
10. Coin Depth Cursor
11. Battery Power Cursor
12. Vol(Backlight) Key
13. P-P Key
2. Mode Icon
3. Sens Cursor
4. Vol Cursor
5.( , ) Key
6. ON/OFF
7. Mode-Sens Key
1. LCD Display
2. Button Definition
POWER Button:
1.

- 9 -- 8 -
Quick Start
Press the MODE button, and you can select four modes in turn.
A-M: All Metal Mode. The detector will make responses to all metals.
DISC: Discrimination Mode. In this mode, you can eliminate certain kinds
of metal and the detector won't make responses to it.
MEMORY: Remember some kinds of metals you choose, and the detector
will only make responses to these kinds of metals.
JEWELRY: Eliminate iron. It won't make responses to iron, but it will
respond to other metals, like silver, gold, etc.
Fig. 8
1. Lay Flat the Detector
2. Turn On the Detector
3. ALL METAL Mode Test
Mode-Sens Key:
( , ) Button (For Two Functions)
P-P Button:
1.
Press the SENS button, and press ( , ) buttons to adjust the sensitivity.
2.
Press SENS Button, the sens cursor will flash, and the ( , ) button is
used to adjust the sensitivity.
1.
In the DISC mode, the ( , ) button is used to set the target metals to be
eliminated.
Press the P-P key, and the detector will shift to the PINPOINT mode to locate
the target accurately. Press the P-P key once again to exit the PINPOINT mode.
Put the detector on a wooden or plastic table, making the search coil stretch
out of the table about 11.81 inches (see Fig. 8). Keep it away from walls,
ceilings and floors, turn off all kinds of electrical appliances that will generate
electromagnetic interference, and remove watches and rings from your
hands.
Press the Power button, the detector will sound two tones, and all LCD
patterns will light up for a moment. And the detector is set by default before
the last shutdown.
Press the MODE button, the A-M icon will be displayed. Sweep the search coil
about 2.75-3.93 inches respectively above six sample metals (iron nail, 5¢
nickel coin, pull-tab, 1¢Zinc coin, 10¢ copper coin and 25¢ silver coin).
2.

- 11 -- 10 -
Fig. 9
Fig. 10
Fig. 11
4. DISC Mode Test
5. MEMORY Mode Test
Press the MODE button again, and the DISC icon lights up.
Press ( , ) button and set the discrimination target to eliminate some
metals that do not need to be detected. For example, to eliminate three
kinds of metals such as iron, nickel and pull-tab. Press the ( , ) button to
eliminate these three target metals.
Sweep the search coil about 2.75-3.93 inches above the six metal samples
in turn.
When sweeping above the iron nail, 5¢ nickel coin and pull-tab, the
detector will not make responses, because they are eliminated.
When sweeping the other three samples, the corresponding target icons
flash, and the double digits show the corresponding number.
Take detecting the 50¢ silver coin as an example (see Fig. 10).
a) The detector sounds three different tones in turn.
b) The depth indicator indicates the second grade.
c) The target metal icon flashes respectively. The double digits display the
corresponding number as shown in the table.
Take detecting the iron nail as an example. (See Fig. 9)
Sample Iron Nail 5¢
Nickel
Coin Pull-tab 1¢
Zinc
Coin
25¢
Copper
Coin
50¢
Silver
Coin
High
Tone
High
Tone
Middle
Tone
Low
Tone Middle
Tone
Low
Tone
10-40 41-50 55-70 72-75 80-83 86-88
Tone
Identification
Indicator
Double Digits
COIN
DEPTH
FERROUS
NON - FERROUS
GOLD SI LVER
MODE
40 50 60 70 80 90
VOL
SENS
MODE
a)
b)
c)
d)
Press the MODE button again, and the MEMORY icon lights up. The target ID
cursor will all light up (see Fig. 11).
a)
If you want to detect 50¢ silver coin and eliminate the other metals, you can
follow the procedure below.
Sweep the search coil about 2.75-3.93 inches above the 50¢silver coin
scan, and the target metal icon of 50¢silver coin consistently flash, while
the other metal icons are removed (See Fig. 12).
b)
e)
COIN
DEPTH
FERROUS
NON - FERROUS
GOLD SI LVE R
40 50 60 70 80 90
VOL
SEN S
MODE
MODE
25
COIN
DEPTH
MODE
FERROUS
NON - FERROUS
GOLD SI LVER
40 50 60 70 80 90
VOL
SENS
MODE

- 13 -- 12 -
6. JEWELRY Mode Test
7. PINPOINT Mode Test
Sweep the search coil about 2.75-3.93 inches above the six samples.
c)
Take detecting the 50¢silver coin as an example. (See Fig.13)
When sweeping the 50¢ silver coin, if the detector responds, it indicates
that the detector has memorized the setting for detecting a 50¢silver coin.
Then the detector will not respond when it sweeps other five samples.
d)
If you want to detect other metals, press the MODE button again. Then the
MEMORY icon will light up, and it displays the same as Fig. 11. Then go on
repeating the above operation.
e)
To exit the MEMORY mode, press the MODE button, making the detector
return to the state of Fig. 11. Then press the MODE button again to exit the
MEMORY mode, and enter the next operation mode.
Press the MODE button again, the JEWELRY icon lights up. The first target
metal on the left is eliminated, showing that the iron is removed. The detector
only responds to other metals.
Take detecting the 1¢ zinc coin as an example (See Fig. 14).
f)
Press the P-P key, and the P-P icon lights up and flashes. The detector com-
pletes the ground balance, and the P-P icon stops flashing. The target ID
cursor and double digits are extinguished, the depth indicator is in the full
grid, and the detector sounds a single-frequency tone (See Fig. 15).
a)
COIN
DEPTH
MODE
FERROUS
NON - FERROUS
GOLD SI LVE R
40 50 60 70 80 90
VOL
SE N S
MO D E
Fig. 12
Fig. 13
Fig. 14
Fig. 15
25
COIN
DEPTH
MODE
FERROUS
NON - FERROUS
GOLD SI LVE R
40 50 60 70 80 90
VOL
SE N S
MO D E
1
COIN
DEPTH
MODE
FERROUS
NON - FERROUS
GOLD SI LVE R
40 50 60 70 80 90
VOL
SE N S
MO D E
COIN
DEPT
FERROUS
NON - FERROUS
GOLD SI LVE R
40
MODE
50 60 70 80 90
VOL
SE N S
MO D E

- 15 -- 14 -
1. Turn On
2. Set the Operation Mode
3. Choose the Sensitivity
Take a 25¢ silver coin and move it closer to the search coil slowly. At the
position of about 7" to 8", the first set of the signal strength cursor begins to
appear, the sound becomes louder and the tone becomes higher. If you
continue to move the 25¢ silver coin, the signal strength cursor changes to
the full grid in a second, and it sounds louder. Meanwhile, the depth indicator
indicates the depth decreases correspondingly to have only one grid left,
showing that the metal is gradually approaching the center of the search
coil (See Fig. 16).
TX-910 is designed for outdoor use. There are too many objects indoors and all
kinds of electrical equipment that will cause interference. It is not suitable to
use the detector indoors.
Field detection will be more complicated. Because there are so many elements
that will affect the detection results, such as the composition of the regional
soil, the component, size, shape and the oxidation degree of the underground
metals. The following content is only the general steps for field detection. You
should operate the detector again and again to accumulate your experience to
achieve good results.
Hold the detector, and keep the search coil away from the ground. By pressing
the Power button, the detector will sound two tones, and all the LCD lights up
for a while. And the detector is restored to the setting of the last shutdown.
In general, the user could choose the ALL METAL mode. In this mode, the
detector will respond to all kinds of metals.
The user tends to set the sensitivity higher. However, in the higher sensitivity
range, the detector will be more sensitive to the electromagnetic interference
that comes from the power lines or cables around, and it will react abnormally
to the mineralized soil or soil with electrical conductivity. If you move the search
coil in the detection area, and the detector sends an unstable false signal,
please decrease the sensitivity.
If you operate the detector with your partner at the same time, please pay attention
to keep more than 393.7 inches away from each other, and decrease the sensitivity
appropriately.
b)
Press the P-P key again to exit the PINPOINT mode and the P-P icon will be
removed.
By following all the steps above, you will have a basic knowledge of the
detector, and you can move on to the next part of the basic operation.
c)
Fig. 16
COIN
DEPTH
MODE
FERROUS
NON - FERROUS
GOLD SI LVER
40 50 60 70 80 90
VOL
SE N S
MOD E
25
Basic Operation

- 17 -- 16 -
4. Move the Search Coil
7. Depth Indicator
5. Make Use of the Sound to Help Discrimination
6. Make Use of Double Digits to Help Discrimination
When detecting, move the search coil at a constant speed, rather than sweep it
unsteadily. Keep the search coil parallel with and about 1/2 inch above the
surface. Do not swing it like a pendulum (See Fig. 17).
The following table is used as a preliminary guide. The approximate ranges of
the US dollar and pound coins are listed in the table.
When detecting, the double digits may be different slightly, depending on the
composition, size, shape, distance from the search coil and the speed of
detecting. The surrounding soil also affects the value. There are differences in
casting coins in different years. There is a wide range for gold, a thin ring is
about 45, and a rough ring and gold coin may reach up to 70-80. The table
below is just for reference.
For coin-sized objects, the depth indicator is accurate. But for large-sized or
irregular-shaped objects, the depth readings will be less accurate. If you sweep
the search coil at the same place several times, and it shows the same depth,
then the detection result is accurate. If the depth indicator varies, try to change
the angle of sweeping. There may be more than one target present.
Most valuable metal objects will send repeatable signals. If the signal isn’t
repeatable, it’s mostly a false signal. When there is a clear sound for buried
targets, you could find out the approximate target type and depth on the LCD
screen. And you could also move the search coil above the target objects fast
to get a more stable signal.
When detecting, you don’t need to stare at the screen all the time. And the
sound identification system will sound three frequency tones to help discriminate
the target metals.
Low Pitch-- 5¢nickel coin and so on;
Medium Pitch-- pull-tab, soda bottle and zinc coin;
High Pitch-- copper, aluminum and silver metal, such as 1¢, 10¢, 25¢and
so on.
Fig. 17 Range of Double
Digits Possible Metal Dollar Coin Pound Coin
5P, 10P, 50P
20P, (10P, 50P)
01--40 Iron 1P
Nickel 5¢41--55
55--65 Pull-tab
65--75 Zinc, Soda Bottle 1¢ 1£
75--85 Copper, Aluminum 10¢,25¢ 2£, 2P
85--99 Silver 50¢, 1$

- 19 -- 18 -
8. PINPOINT
9. Choose Different Modes on Circumstances
When detecting in the motion mode, you should move the search coil
persistently. Although you find the region that may bury some metals, it's not
easy for you to determine the exact location, which may make it difficult to dig
them out. At this time, you should shift to the PINPOINT mode.
In fact, the sensitivity in the non-motion mode is high, so you can also choose
to search metals by using the non-motion mode directly. In some regions, the
ground is too narrow to sweep the search coil, you could choose the PINPOINT
mode. In the region with severe mineralization or salinization, you could try to
use the PINPOINT mode directly for detecting metals.
Q: Is it waterproof?
A: Yes. The search coil is waterproof, so it can be used on the beach. But please
note that the control box is not waterproof.
Q: How many batteries does this machine need? What type of battery?
A: Two 9V alkaline batteries are required.
Q: What does it come with?
A: Two 9V alkaline batteries, a headphone, a shovel, a bag & user manual.
Q: What type of earphone does the metal detector fit
A: 3.5mm earphone jack
Q: How to adjust the appropriate sensitivity?
A: It will depend on your current environment. If the sensitivity is adjusted to
the highest level, noise may be generated due to the influence of the
surrounding environment.
By pressing the P-P key, the P-P icon lights up, the depth indicator will be
in the full grid, the detector will sound a low single-frequency tone, and
the sensitivity is in the highest level.
a)
Hold the search coil to approach the ground, and move it slowly in the
region where you find the target. In the position where the single-frequency
tone becomes louder, and the signal strength cursor begins to appear, you
can continue to move the search coil slowly until the sound turns louder,
the signal strength cursor is in the full grid, and the depth indicator is in the
lowest value. By doing this, you have positioned the target location rough-
ly.
b)
If the area with the strongest signal is larger and the location is not accurate
enough, you can keep the location of the search coil unchangeable and exit
the P-P mode. Then press the P-P key again and repeat the above opera-
tion. After that, you can move the search coil slightly, and the area will be
smaller. By doing this, you have positioned the location of the target metal.
And you can mark the center of the search coil on the ground to facilitate
the digging.
You can choose other operation modes according to your needs and experience.
If there are more scrap metals in the detection area, you can choose the DISC
mode to eliminate the metals that do not need to be detected. Please note that
when detecting in the wild, due to the impact of the ground condition, the
discrimination and depth indicator will be a slight deviation. The composition, size
and oxidation of the metals will all affect the results. You need to consider
these factors before choosing to eliminate a certain metal or determining
whether there are precious metals. Do not eliminate the precious metals.
c)
Q&A

- 21 -- 20 -
The signal is unstable, and the position
of the target ID cursor change.
Using the PINPOINT mode when the
search coil approaches the ground, the
detector will sound a tone.
Sweep the search coil at a different
angle to determine whether you
can get a more stable signal.
1.
If the target is buried deeply, you
could try to increase the sensitivity
or speed up the speed of sweeping
the search coil to get a more stable
signal.
2.
There may be more than one
metal target buried below the
earth. Try to increase the sensitivity
or set different discrimination
range to sweep the search coil.
3.
It may be a severely oxidized
target, or the ground is seriously
magnetic. You can try to decrease
the sensitivity.
4.
The ground is seriously magnetic.
When gets closer to the ground,
choose the PINPOINT mode to
reduce the sensitivity.
There may be a large metal under
the ground.
1.
2.
Problems Solutions
Troubleshooting
Problems Solutions
There is no power and no sound,
and the LCD screen doesn’t light up.
The detector sounds a successive
"DIDI..." tone.
The LCD screen displays normally,
but the detector cannot function.
The LCD screen displays normally,
but the sensitivity is very low.
The detector sounds an irregular
tone, or the target ID cursor flash.
Be sure that the batteries are
installed correctly.
Replace the batteries.
Make sure that no other metal
detectors being operated around.
Don't use the detector indoors,
because there will be some
interference caused by metals
around.
Make sure whether there is any
electromagnetic interference
source, such as power lines,
cables, electronic fences and so
on. Keep the detector away from
these objects, or try to reduce the
sensitivity.
1.
2.
1.
1.
2.
Decrease the sensitivity properly.
The connection of the search coil
may be loose. Plug the cable firmly.
When turning on the detector, there
may be metals near the search coil.
Keep the search coil far away from
the ground, and then turn on the
detector again.
2.

- 22 - - 23 -
Contact Us Care and Maintenance
Product Disposal
The TX-910 metal detector is of superior design and craftsmanship. Please
follow the suggestions below to clean and care for the metal detector to
lengthen its lifespan, so you can use it for years.
Used products with batteries should be taken to a recycling station and not be
disposed of with household waste. Hand it over to the applicable collection
station for the recycling of electrical and electronic equipment. The separate
collection and recycling of the product will help to conserve natural resources
and ensure that it is recycled in a manner that protects human health and the
environment. Disposal must be carried out in accordance with local environmental
regulations for waste disposal. For more details about where you can drop off
the appliance for recycling, please contact your local city office, your household
waste disposal service or the seller from whom you purchased the product.
We provide a one-year warranty for our products. If you have any problems
or need any help when using the product, please don’t hesitate to contact us
and we will help you solve the problems as soon as possible.
Handle the detector gently and carefully. Dropping it may damage
the circuit boards and battery case, which may cause the detector
malfunction.
Use the detector only in environments with normal temperatures.
Or it may shorten the life of electronic devices, and damage the
detector.
Wipe the detector with a damp cloth occasionally to keep it looking
new. Do not use harsh chemicals, cleaning solvents, or strong
detergents to clean the detector.
Keep the detector away from dust and dirt, which may cause
premature wear of parts.
Table of contents
Other Skycruiser Metal Detector manuals