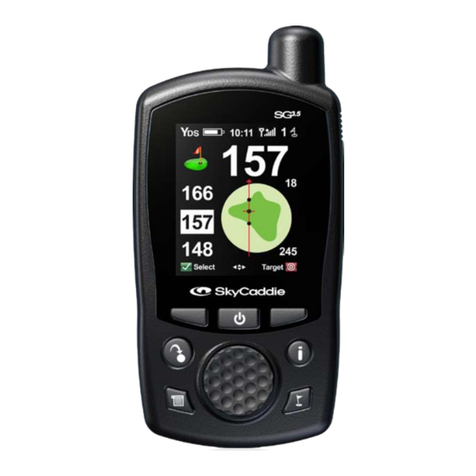
SkyGolf SkyCaddie SG3 User manual

SkyCaddie®1
User Guide
For SkyCaddie SG3 and SG4 Models

2 SkyGolf®
Patent Pending.
© 2001-07 SkyHawke Technologies, LLC. All Rights Reserved.
SkyCaddie®User’s Guide. All content within is copyrighted by SkyHawke Technolo-
gies, LLC and may not be reprinted without permission.
The content of this guide is furnished for informational use only, is subject to change
without notice, and should not be construed as a commitment by SkyHawke Tech-
nologies, LLC. SkyHawke assumes no responsibility or liability for any errors or
inaccuracies that may appear in the informational content contained in this guide.
SkyGolf®, SkyCaddie®, SkyGolf GPS®, SkyCourse®, SkyPlayer®, and IntelliGreen®
are registered trademarks of SkyHawke Technologies, LLC.
SkyHawke Technologies, LLC, Ridgeland Technology Center, 274 Commerce Park
Drive, Suite M, Ridgeland, Mississippi 39157 USA.
Please register your SkyCaddie at www.skygolf.com within 30 days of
purchase to activate your Consumer Limited Warranty.
Visit us on the web at www.skygolf.com.
Version SG3.1.10252006

SkyCaddie®3
Table of Contents
Introduction/Company Pledge
Chapter 1: Getting Started................................................................................ 6
1.1 SkyCaddie Overview .................................................................................. 6
1.1.1 Button Layout .................................................................................... 6
1.1.2 Navigation Keys................................................................................. 7
1.1.3 Button Descriptions ........................................................................... 7
1.1.4 On-screen Indicators ......................................................................... 8
1.2 System Requirements ................................................................................. 9
1.3 Charging...................................................................................................... 9
1.4 Activating Your SkyCaddie .........................................................................11
1.5 BenetsofSkyPlayerClubMembership ................................................... 14
1.6 Downloading Courses to Your SkyCaddie................................................. 16
Chapter 2: Playing Golf With Your SkyCaddie.............................................. 17
2.1 Acquiring Signals....................................................................................... 17
2.2 Selecting a Course to Play ........................................................................ 18
2.3 Viewing Targets During Play...................................................................... 19
2.3.1 IntelliGreens .................................................................................... 19
2.3.2 Target Views .................................................................................... 19
2.3.3 Center Only View............................................................................. 23
Chapter 3: Customizing Your SkyCaddie For Play....................................... 24
3.1 Preferences .............................................................................................. 24
3.2 Determining Shot Distance........................................................................ 26
3.3 Help and Information ................................................................................. 26
3.4 Advanced Menu ........................................................................................ 27
Chapter 4: Recording Your Own Course....................................................... 30
4.1 Naming Personal SkyCaddie Courses ...................................................... 30
4.2 Recording Green Targets .......................................................................... 30
4 SkyGolf®
4.3 Setting Par and Handicap ......................................................................... 31
4.4 Playing Personal SkyCaddie Courses....................................................... 31
4.5 Re-Recording Personal SkyCaddie Courses ............................................ 31
4.6 Renaming or Deleting Personal SkyCaddie Courses................................ 32
4.7 Publishing Personal SkyCaddie Courses.................................................. 32
Chapter 5: SkyCaddie Menu Items................................................................. 33
Helpful Hints .................................................................................................... 38
Appendices ...................................................................................................... 40
Appendix A: Target Icons and Target Descriptors.......................................... 40
AppendixB:SkyPlayerClubMembershipBenetComparison .................... 43
Appendix C: Target Examples ....................................................................... 45

SkyCaddie®5
INTRODUCTION
Company Pledge
Congratulations on your purchase of the SkyCaddie, the world’s simplest, most
powerful rangender created by golfers for golfers. Our goal is to help you play bet-
ter, play faster, and have more fun! The SkyCaddie gives you the same information
that a Tour Caddie gives a pro, right in the palm of your hand. Once you start using
theSkyCaddie,you’llndthatyouwon’twanttoplaygolfwithoutitagain.
We can proudly say that thousands of hours have been spent perfecting the
SkyCaddieforyourgolngpleasure.Itisthemostadvanced,powerfulandeasiest
touserangenderavailabletogolferstomeasuredistancesonagolfcourse.
Welcome to the Next Generation Rangender!
Enjoy your new SkyCaddie and Play Well!

6 SkyGolf®
Backlight ON/OFF
Power ON/OFF
and
Key Lock/Unlock
Joystick
Right Soft Key
Help
Fig. 1
SkyCaddie layout
Left Soft Key
Menu
Mark
CHAPTER 1
Getting Started
1.1 SkyCaddie Overview
1.1.1 Button Layout
Hole
Info

SkyCaddie®7
1.1.2 Navigation Keys
Joystick — Navigate the SkyCaddie menus by moving the joystick UP/DOWN/
LEFT/RIGHT. Press the joystick for select functions (The Joystick Select feature
may be enabled or disabled by accessing the Main Menu / Advanced Menu /
System Settings).
Left and Right Soft Keys — The left and right soft keys correspond to functions
displayed at the bottom left and right of your SkyCaddie display. Press the ap-
propriate soft-key to select the desired function displayed.
1.1.3 Button Descriptions
Power On/Off and Key Lock/Unlock — Press the Power button located at the top-
right of the SkyCaddie to power on/off or to lock/unlock the keypad. Upon pressing
the Power button you are prompted to choose either “Off” (Left Soft Key) to power
off the device or “Lock” (Right Soft Key) to lock the keypad. To unlock the keypad,
select ‘Unlock” by pressing the Right Soft Key, then choose “Yes”.
Backlight — Press the Backlight button located at the top-left of the SkyCaddie to
active the backlight in low-light conditions. Two-levels of brightness are available.
Press once for the lower setting, twice for the brightest setting and three times to
turn off the backlight. The backlight will turn off automatically after 30 seconds if
you are not in Demo Mode.
Info — To quickly view additional information relevant to your SkyCaddie or hole in
play, press the Info button. (Additional information may include SkyCaddie Serial
Number, Software Version, Course Name, Hole Number, Par and Handicap)
Help — Use the Help button to display onscreen instructions or information about
the current screen being displayed. For example, Help provides instructions on
how to use buttons for a particular screen.

8 SkyGolf®
Menu — Press the Menu button to display the SkyCaddie Main Menu.
Hole — Press the Hole button to display information about the next hole. Press
“Select” to advance to the next hole. To advance to a different hole, move the
joystick LEFT/RIGHT or select “List” to view all holes. Scroll to the appropriate
hole and press “Select”.
Mark — The Mark Ball feature is used to determine shot distance. Press the Mark
button, and then select “Mark” before taking your shot. Press the Mark button again
when you get to the location where your ball landed. The shot distance will be
displayed. For more information about the Mark Ball feature, see Section 3.2.
1.1.4 On-screen Indicators
Distance — Displays the selected unit for distance as either “Y”=Yards, “M”=Meters,
“mi”=Miles, or “K”=kilometers.
Battery Level —Quicklyconrmremainingbatterylevelwiththeonscreenbattery
gauge.
Satellite Signal Level — Easily verify satellite signal strength with the onscreen
signal bars. The plus sign above the signal bars indicates that SBAS (Satellite-
Fig. 2
On-screen indicators.
TIP: Pressing the same button again will return you to the
previous screen.

SkyCaddie®9
1.2 System Requirements
BeforeregisteringyourSkyCaddieatwww.skygolf.com,pleaseconrmyour
computer meets the minimum system requirements:
• PC with Microsoft®Windows®2000/XP
• Microsoft®Internet Explorer®6.0 or higher
• 256 MB of RAM
• 4 MB of available hard disk space
• Internet access
• Available PC USB port
• 2X CD-ROM drive (optional)
1.3 Charging
FOR SKYCADDIE SG4 USERS
Prior to using your SkyCaddie SG4 be sure to
fully charge the battery. To charge the battery,
please follow these steps:
1. Insert the supplied rechargeable battery into
the back of the SkyCaddie (Fig. 3).
Fig. 3
Inserting a rechargeable battery into the SG4
based Augmentation System) has been acquired. This is the preferred signal level
for optimal performance.
Hole Number — Displays the current hole number in play.

10 SkyGolf®
2. Attach the supplied PC USB cable to the back of the SkyCaddie. When con-
nected properly, the cable will point down (Fig. 4).
3. Insert the AC adapter connector into the open cable port (located in the middle
Fig. 4
Attaching the PC USB cable.
Fig. 5
AC Adapter and PC Cable (SG4).

SkyCaddie®11
of the cable) and plug the wall adapter into an AC wall outlet (Fig. 5).
If the SkyCaddie is powered on while charging, the backlight will automatically
illuminate and the battery gauge will indicate charging. When fully charged, the
backlight will turn off.
The battery will charge, even with the SkyCaddie turned off. A full battery charge may
take 4 hours. Once fully charged, expect more than 12 hours of continuous play.
NOTE: Always connect the cable to the SkyCaddie rst before connecting to AC
power.
FOR SKYCADDIE SG3 USERS
The SkyCaddie SG3 requires two AA batteries
for power. Prior to using your SkyCaddie SG3,
insert the two supplied AA batteries by remov-
ing the battery cover on the back of the device
(Fig. 6). Once inserted, reattached the cover
and tighten the screw. Expect more than 12
hours of continuous play with new batteries.
1.4 Activating Your SkyCaddie
Within 30 days, please register your
SkyCaddie, create a “My SkyCaddie” online
account and select a SkyPlayer Club Mem-
bership Plan by going to the SkyGolf website
at www.skygolf.com. Click Getting Started
to learn more about the process. Simply fol-
low the website instructions to complete the
Fig. 6
Inserting batteries (SG3).

12 SkyGolf®
process.
During this process you will be asked to create a user name and password for
your online account referred to as “My SkyCaddie”. The “My SkyCaddie” online
account offers a full range of member services, easy access to download courses,
support and more. In addition to creating an account, you will be asked to select a
SkyPlayerClubMembershipPlanthatbesttsyourneeds.(Benets of member-
ship are listed in Section 1.5)
PriortoactivatingyourSkyCaddie,youwillrstneedtoinstallasimplesoftware
program to your Windows-compatible PC. This software program, referred to as
SkyCaddie Desktop, will allow your SkyCaddie to communicate with the SkyGolf
website. This program allows you to DirectConnect with the SkyGolf website, so
you can personalize your SkyCaddie, download courses and periodically update
your SkyCaddie’s software.
IMPORTANT: If your computer is protected by a rewall, it may need
to be set up to allow our SkyCaddie software programs to access the
web. If your rewall software displays any warning messages during the
activation process, simply indicate that you wish to allow access.
STEP 1: Install the Software
Insert the supplied CD into your CD-ROM drive on your computer. Follow the
instructions on your computer screen to complete the installation. If the CD does
not auto-run, double-click your “My Computer” icon on your Desktop then double-
click the CD drive containing the Installation CD.
Once you successfully install the SkyCaddie software program, you are ready
to be connected to your computer.
IMPORTANT: You must complete the SkyCaddie software installation
prior to connecting your SkyCaddie to your PC.
!
!

SkyCaddie®13
STEP 2: Power on the SkyCaddie
If it is not already on, power on your SkyCaddie by pressing the Power button
located at the top right-hand side of the device.
STEP 3: Connect the SkyCaddie to your PC
Connect your SkyCaddie to your PC USB port
using the supplied USB cable as follows:
1. To connect the cable, align the screw on the
cable connector with the screw-hole on the
device and tighten (see Fig. 4 on Page 10 for
an illustration). When connected properly, the
cable will point down.
2. Plug the USB connector into an open USB port
on your PC. When it is properly connected, your
SkyCaddie will display a screen indicating that
it is ready for DirectConnect (Fig. 7).
NOTE: Your PC may give you a “Found New
Hardware” message the rst time you plug in your
SkyCaddie. Simply follow your PC’s instructions
as necessary.
STEP 4: DirectConnect
You may click the DirectConnect button at the SkyGolf website at this time to
register your SkyCaddie and to create an account. Simply follow the instructions
on your PC screen.
Fig. 7
“DirectConnect Ready”
screen

14 SkyGolf®
1.5 Benets of SkyPlayer Club Membership
During registration of your SkyCaddie, you’ll be given the option to select an
annual membership plan designed to t how many courses you play.You can
signicantlyincreasethe valueofyourSkyCaddiewiththese memberbenets
for a small yearly fee:
• Online Course Storage. Your “My SkyCaddie” provides safe storage and easy
access to courses obtained through our website. Your courses are managed and
stored on our servers as Playlists,soyoudonothavetomaintainlesonyour
PC. Additionally, you can use any compatible computer in the world to access
your personal “My SkyCaddie”.
• Easy Website Access. SkyGolf®DirectConnect links your SkyCaddie to our
website so that you can easily log into your “My SkyCaddie” page to add courses
to your SkyCaddie or update your software as new updates are available.
• SkyCourses®.SkyCourses are golf courses that have been recorded for use
with the SkyCaddie and contain unique information on each course layout. Each
membership plan provides different levels of SkyCourse access and storage in
your own personal “My SkyCaddie”. Thousands of published SkyCourses are
available online, and we keep the SkyCourses up-to-date for you. Our SkyCourse
database is growing daily. SkyCourses are either Published or Unpublished:
• Published SkyCourses are golf courses that can be accessed with purchase
of a Membership Plan. The quality of each published SkyCourse is rated on
our website as follows:
– Four Star: recorded by one of our SkyGolf GPS professionals; contains
information on up to 40 targets per hole plus an IntelliGreen.
– Three Star: professionally recorded prior to implementation of the Intel-
liGreen feature; does not include IntelliGreens.

SkyCaddie®15
– Two Star/One Star: recorded by other members of our SkyPlayer com-
munity that have chosen to share their personal courses.
• Unpublished SkyCourses are golf courses created by you using your SkyCad-
die. These are courses that only you can access and play with; they are not
viewable by any other SkyCaddie users unless you choose to submit your
Unpublished SkyCourses to SkyGolf. Our database is growing daily through
the efforts of SkyGolf professionals and SkyPlayers like you.
• Share Courses with Other Users. Members can submit courses they have cre-
ated with the SkyCaddie to us to share with other members. The more members
share, the more courses everyone will have access to.
• IntelliGreens®.IntelliGreen graphics are part of our exclusive, professional 4-Star
SkyCourses. They provide an eagle’s eye view of the green, with an indicator
representing a direct line-of-play from wherever you are on the course.
• Theft Deterrent. Registering the SkyCaddie’s Electronic Serial Number (ESN)
deters theft by protecting your investment from unauthorized use. If your Sky-
Caddieislostorstolen,contactSkyGolfsothatwecanagyourESNas“lost”
or “stolen” to prevent unauthorized use.
• “Owned By” Screen. This screen allows SkyCaddie personalization.
• Online Support, Software Updates, and Upgrades. SkyCaddie software
is automatically checked for upgrades and updated when you do a SkyGolf®
DirectConnect.
NOTE: Membership is not required to obtain GPS signals or to record or play
personal courses on your SkyCaddie. See Appendix B for a comparison of fea-
tures on the SkyCaddie with those additionally available with a SkyPlayer Club
Membership.

16 SkyGolf®
1.6 Downloading Courses to Your SkyCaddie
Asdenedabove,SkyCoursesaregolfcoursesthathavebeenrecordedfor
use with the SkyCaddie and contain unique information on each course layout.
Thousands of published SkyCourses are available online at the SkyGolf website
for you to download to your SkyCaddie. Once you have established an online ac-
count and selected a Membership Plan, you will have access to our rapidly growing
database of professionally mapped courses.
You may search the course database at www.skygolf.com by clicking Course
Library or DirectConnect to access your online account. To display a list of courses
in your area, simply enter your search criteria such as Region, State or Course
Name. Select the desired course(s) and send them to your SkyCaddie. In order
to download courses, your SkyCaddie must be connected to your PC using the
supplied cable.
NOTE: Your SkyCaddie will hold 10 published SkyCourses and 5 unpublished
SkyCourses.

SkyCaddie®17
CHAPTER 2
Playing Golf With Your SkyCaddie
Now is the moment you’ve been waiting for — taking the SkyCaddie to the course.
TheSkyCaddieistheeasiestandmostpowerfulrangendertouseonthousands
on courses worldwide. Once it acquires GPS satellite signals and you choose the
course you want to play it will be the most trusted caddie you have ever had. It will
give you all the important information on every shot on every hole.
2.1 Acquiring Signals
While standing outside prior to play, power on the SkyCaddie. To begin, select
“Start” by pressing the Left Soft Key. Use the left
soft key to navigate the initial start up screens
until the satellite searching screen is displayed as
shown in Figure 8.
You must power up the SkyCaddie 5-10 minutes
prior to play to acquire GPS satellite signals and
reach optimal performance.
While searching for satellite signals, the Sky-
Caddie displays animated graphics indicating when
satellite signals are received. The SkyCaddie will
display “Searching”, “Acquiring” and “Ready” as it
advances through the process of acquiring satellite
signals.OncetheappropriateGPSxisacquired,
the SkyCaddie will automatically advance to the
next screen. (You may manually advance to the
next screen while the GPS continues to search for
signals by selecting “OK” or “Demo”). Fig. 8
“Searching” screen

18 SkyGolf®
NOTE: You must be outdoors with an unobstructed view of the sky for the SkyCad-
die to receive GPS satellite signals.
2.2 Selecting a Course to Play
IfyourSkyCaddiehasobtainedaGPSsatellitesignalx,theSkyCaddiewill
attempt to determine your location and auto-select the closest installed course.
When a course is displayed, press Select to play that course or simply scroll to
another course (courses will be sorted by distance from your current location). If
no courses are installed on your SkyCaddie, the SkyCaddie will open the “Demo
Course”. If only one course is loaded, the SkyCaddie will ask if you want to play
that course.
Once a course has been selected, the SkyCaddie will ask you for the hole to
start on or the Driving Range (D). Make the appropriate selection to begin.
Fig. 9 –“Acquiring” screen Fig. 10 –“Ready” screen

SkyCaddie®19
2.3 Viewing Targets During Play
The SkyCaddie offers several different target view screens giving you options for
displayingthekeytargetinformation.Choosethetargetviewsthatbesttyourstyle
of play. The next few sections detail the the various views and their function:
2.3.1 IntelliGreens
An IntelliGreen is a graphic of the shape of the
green (Fig. 11). In IntelliGreen view, the green
will have an arrow drawn through it representing
a direct line-of-play from where you are on the
course. The view of the IntelliGreen will rotate on
the screen to show the green from the direction of
your approach (i.e. the closest part of the green
will always display at the bottom).
The three numbers along the left side of the
display are distances to the front, a point on the
green (represented by a crosshair), and back of
the green along the line drawn. To switch between
these three points, simply choose Select using the
left soft key. Move the joystick UP/DOWN/LEFT/
RIGHT to reposition the line-of-play (crosshair).
The distances will recalculate automatically based
on the new position of the line.
While in the Intelligreen view, select “Target”
with the Right Soft Key to view target lists. To return
to the Intelligreen view, select “iGreen” using the Right Soft Key.
2.3.2 Target Views
Your SkyCaddie can display four different target views depending on your pref-
erence. By default, two views will be active (Graphical and Expanded View). You
may choose any combination of four target views within the “Preferences” menu.
Fig. 11
IntelliGreen screen

20 SkyGolf®
To access “Preferences”, press the Menu button and scroll to “Preferences” and
select. Within “Preferences”, scroll to “Target Views” and select (Fig. 12). The
SkyCaddie will display four target view options (Fig. 13). Select the desired target
views to display (a checkmark will appear next to each selected target view).
The SkyCaddie will display “View” and “iGreen” at the bottom of each target view
screen. “View” (Left Soft Key) switches to the next enabled target view screen.
To quickly return to the Intelligreen view from any of the four target view options,
simply select “iGreen” using the Right Soft Key. Upon returning to the Intelligreen
screen using the “iGreen” option, selecting “Target” at a later time will return you
to the last target screen viewed. The four available Target Views are: Standard,
Graphical, Expanded, and Big Number.
• Standard: A listing of all targets including safe landing zones in play from
the tee that are visible or may be hidden will be displayed. You may move
Fig. 12 –Preferences screen Fig. 13 –Target View options
This manual suits for next models
1
Table of contents
Other SkyGolf GPS manuals

SkyGolf
SkyGolf SkyCaddie SG1 User manual

SkyGolf
SkyGolf SkyCaddie SG2.5 User manual

SkyGolf
SkyGolf SkyCaddie SG1 User manual

SkyGolf
SkyGolf SkyCaddie SG1 Manual

SkyGolf
SkyGolf SkyCaddie SGXw Administrator Guide

SkyGolf
SkyGolf SkyCaddie SG5 User manual

SkyGolf
SkyGolf GameTracker GT2 Installation and operation manual

SkyGolf
SkyGolf skycaddie sw2 User manual

SkyGolf
SkyGolf GameTracker GT1 User manual

SkyGolf
SkyGolf SkyCaddie LX5 User manual