SkyMate Mazu ISI-2000 User manual

Install Kit #1
1.
Activate your m2500 using mazu app or
https://www.skymate.com/mseries
2.
Install the Base Unit
(do not connect power until Step 4).
3.
Install the Keypad.
4.
Install the Smart Antenna with an
unobstructed view of the sky.
5.
Connect the Base Unit to power (within
minutes all indicators should be green).
6.
Wi-Fi connect your UI device to
the Base Unit.
7.
Launch mazu or login with a browser
at mseries.online.
Base Unit (ISI-2000) Power Cable (2m)
+ +
Smart Antenna (IGT-2100) with 10m cable +Install Kit #2
+
What’s in the m2500 box?
Quick Start
Install Kit #3Keypad (KPD-100) with Keypad Cable (2m)
2
3
1
iPad and Apple are trademarks of Apple Inc., registered in the U.S. and other countries. App Store is a service mark of Apple Inc. Wi-Fi is a
register trademark of the Wi-Fi Alliance. mazu is a trademark of SkyMate, Inc., registered in the U.S., Canada and other countries.
©2017 SkyMate, Inc. All rights reserved.
SkyMate, Inc.
100-11890 Sunrise Valley Drive
Reston, VA 20191, USA
Toll-free: 1-866-SkyMate
Phone: 1-703-961-5800
Email: support@skymate.com
www.mazu-marine.com
Quick
Start
Guide
Power Smart Antenna
Keypad
Self-installation Disclaimer
This product is designed to be DIY installable. It is your responsibility to determine if you have the knowledge, skills and
physical ability required to properly perform an m2500 installation. SkyMate shall have no liability for damage or injury
resulting from the installation or use of any SkyMate products.
Warning
This is a Class A product. In a domestic environment this product may cause radio interference in which case the user may be
required to take adequate measures.
Ⓐ Activate your m2500 system
1. Get the system serial number from the retail box (side) or ISI-2000 (bottom)
2.1. Using the mazu app…
a) Connect your iPad to the Internet. Download mazu from the Apple App Store.
b) Stay connected to the Internet. Launch mazu and follow the instructions to Register
and Activate your m2500 system.
c) Configure your email app as described in mazu Share. The Incoming and Outgoing Servers are mazu.skymate.com
Your Activation CREDENTIALS (e.g. username, password) are saved in mazu Settings General.
2.2. Without the mazu app…
a) Connect your device to the Internet. Open a browser and go to https://www.skymate.com/mseries
b) Follow the instructions to Activate.
3. An email is sent to you when you Activate which includes all your mSeries Credentials.
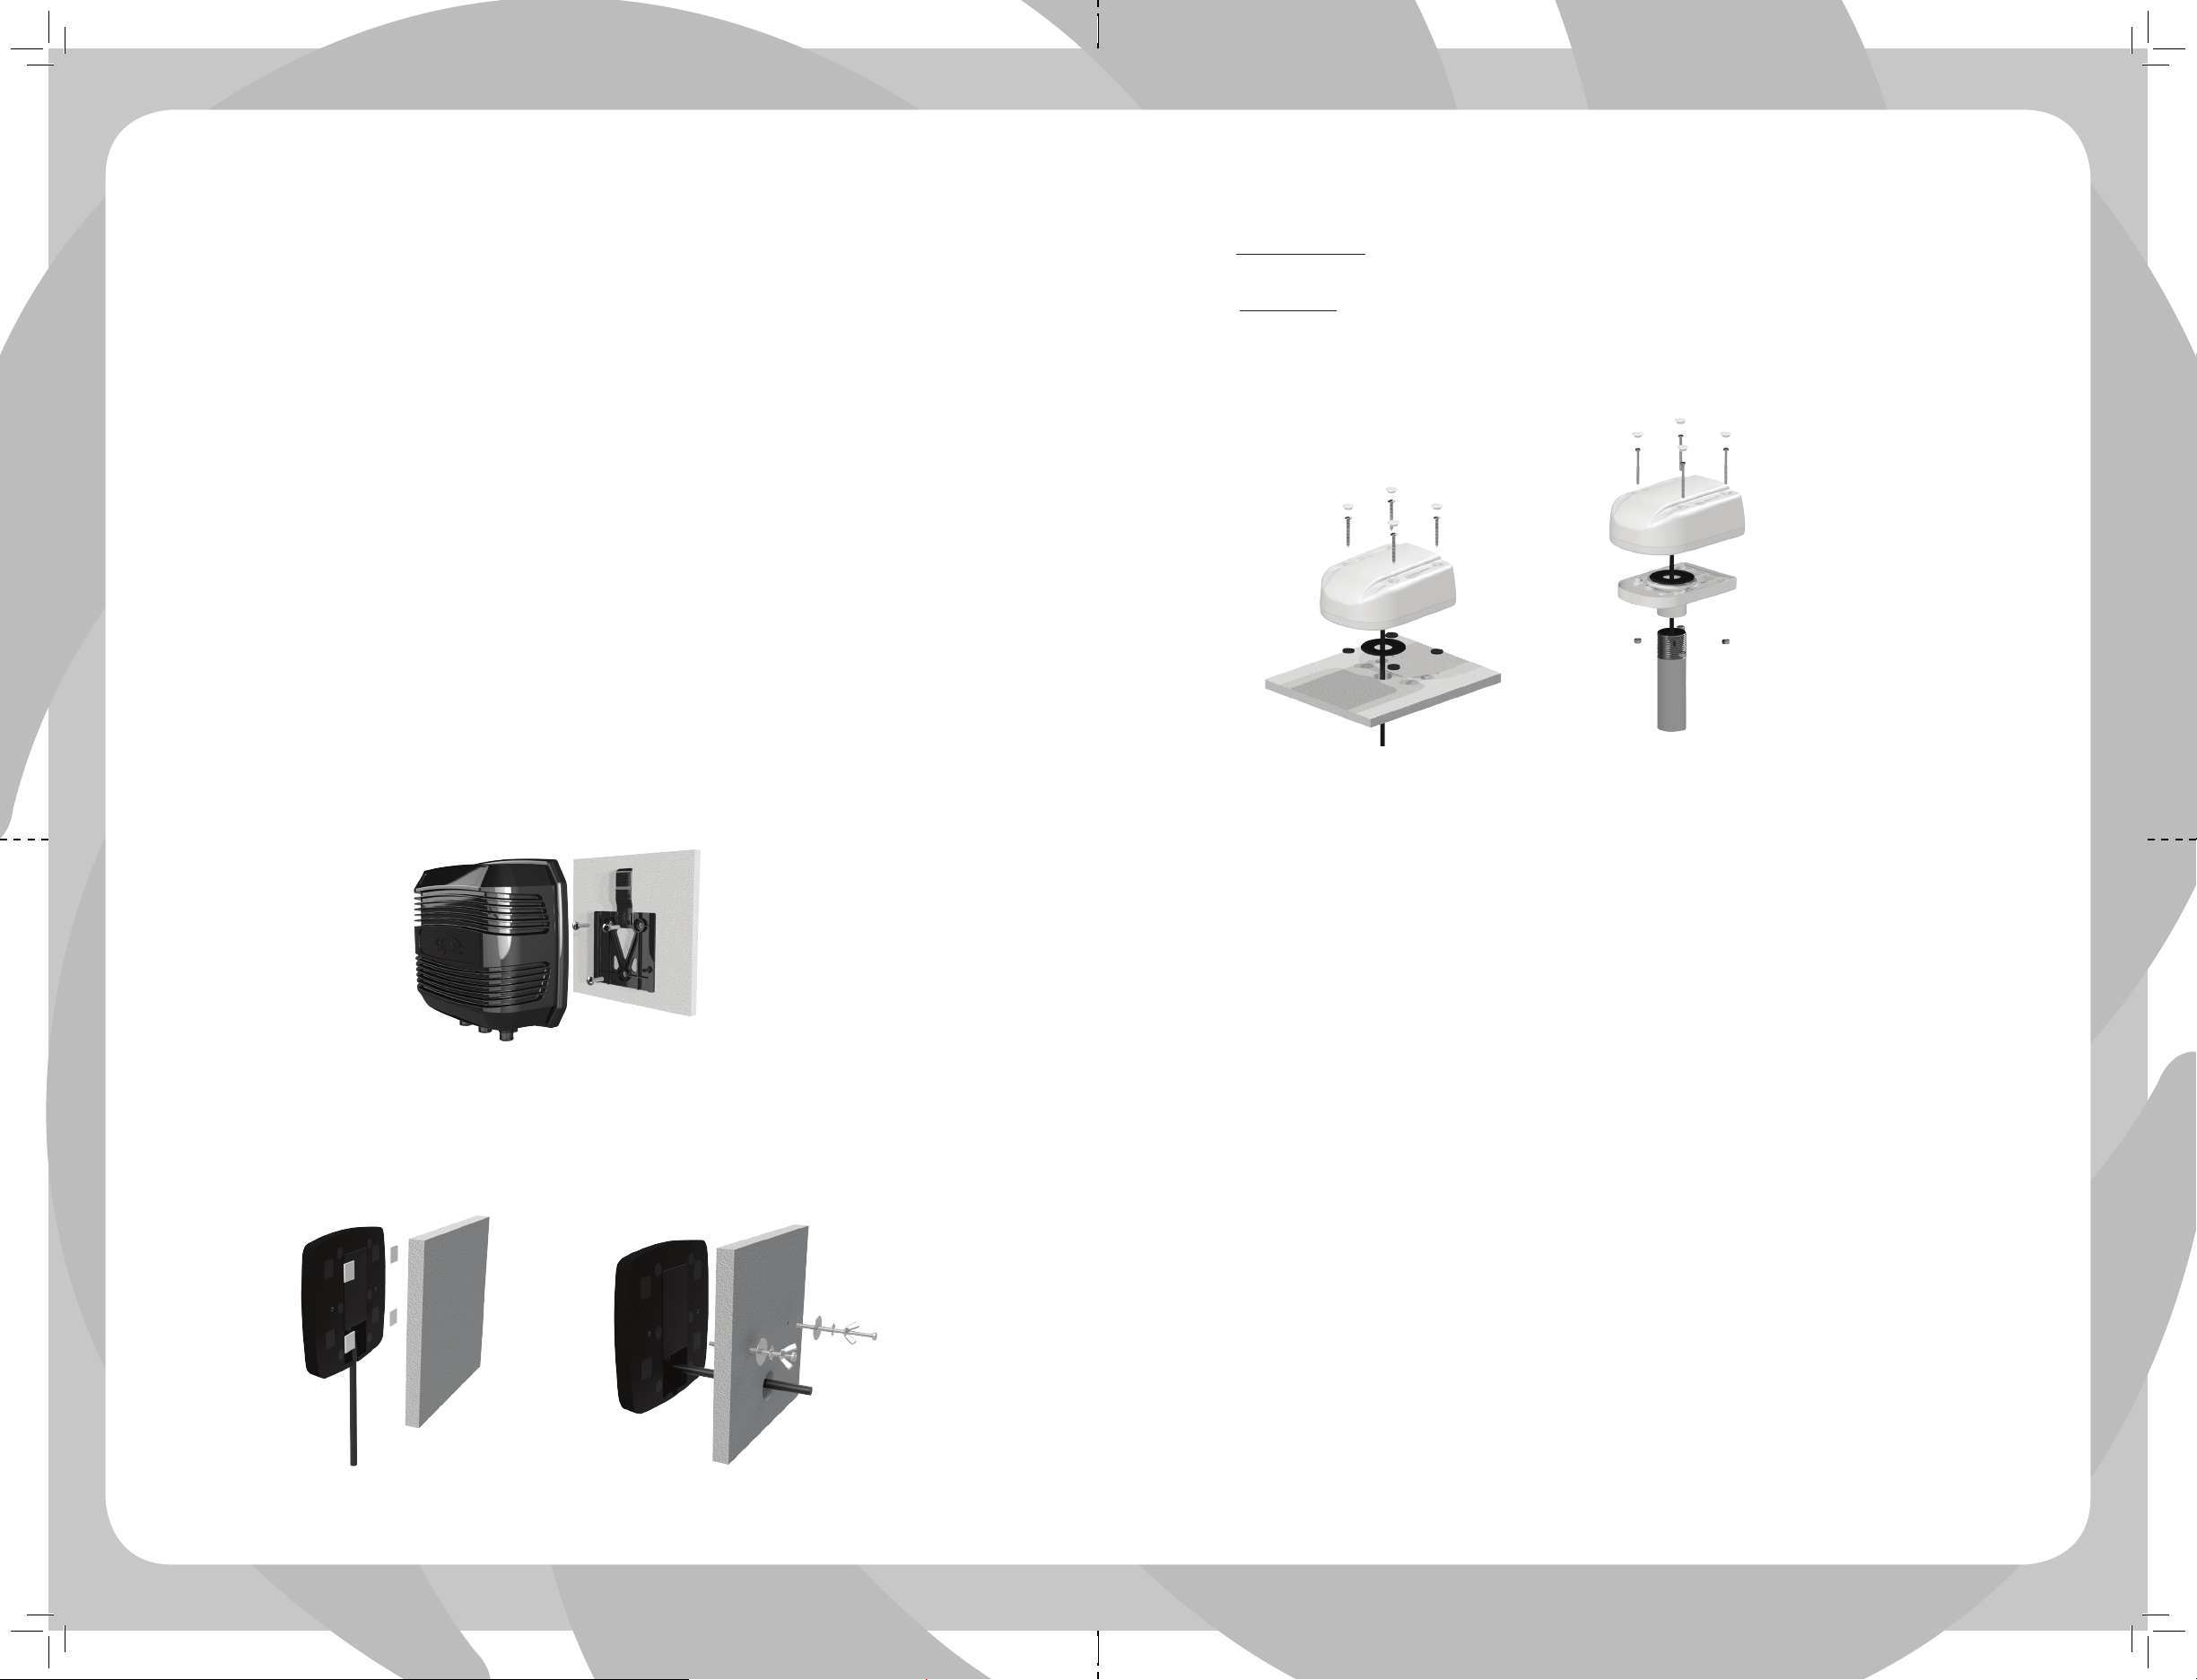
Ⓑ Install your m2500 system
1. Install the Base Unit (ISI-2000)
a) Select a dry location for the installation.
b) Secure the mounting bracket with the double-sided tape (already on the bracket) and/or using
the screws provided. Slide the Base Unit onto the bracket until it clicks in place.
c) Connect the Power Cable to the boat battery. Connect the black wire to the negative(-) and the red
wire to the positive (+). An in-line fuse is not required.
Note: Do not connect the Power Cable to the Base Unit until Step 4.
2. Install the Keypad (KPD-100)
a) Select a panel location for the Keypad. It can be mounted using the tape on the back of it or be bolted.
b) If the Keypad is to be bolted, then drill the holes in the panel using the template provided. Secure it with
the supplied wing nuts.
c) Connect the Keypad to the Base Unit.
Surface Mount Through Hole
3. Install the Smart Antenna (IGT-2100)
a) Decide whether you want the Smart Antenna to be flush mounted or attached to a standard 1-inch-14 mount.
Out-of-the-box, it is configured for the standard mount. The 1-inch-14 mount is not included.
b1) For the standard mount, slightly loosen the four bolts so that the 1-inch-14 adapter can be rotated.
Hand tighten the adapter to mount, orient the antenna; and then re-tighten the four bolts.
b2) For the flush mount, remove the four bolts, boot and threaded adapter. Drill holes for the four
mounting screws and the cable. Secure it to the deck with the screws and rubber washers supplied.
c) Insert the four screw caps provided into the bolt/screw recesses.
d) Connect the Smart Antenna to the Base Unit. The cable should not be cut. Contact SkyMate for cable extension.
Flush Mount
Standard Mount
4. Power ON your m2500 system
a) Connect the Power Cable to the Base Unit. It will turn ON and self-test. Observe the front panel
indicators and Keypad, as this is an indication of proper operation.
i. Within 3-10 minutes, all LED indicators on the Base Unit will be green.
ii. On the Keypad, only the SOS buttons will remain ON (dim).
b) With all LEDs green, the m2500 system has successfully powered ON and is ready for your
mazu iPad to Wi-Fi connect to it to complete your Activation.
Note: The Base Unit LED status descriptions are in mazu Settings > Base System > ISI-2000.
Ⓒ Test your m2500 system
1. Wi-Fi connect your device or mazu iPad to the Base Unit
a) If you have the mazu app, launch it.
b) If you don’t have mazu, open a browser and enter mseries.online to bring up your mSeries web interface.
Enter your username and password from Activation.
2. Send/Receive email
a) Open your email app or mSeries web interface and send a test email to test@skymate.com
(this email will be echoed back to you).
b) Within a few minutes, the Keypad message waiting light will go ON.
c) Confirm that you received the test email response.
3. If you need to change the configuration of your mSeries system...
a) Connect to the Internet.
b) Go to mazu Settings (SKYMATE ACCOUNT) or go the https://www.skymate.com/mazu and login.
This manual suits for next models
3


