Skyworth LCD-32L8E User manual

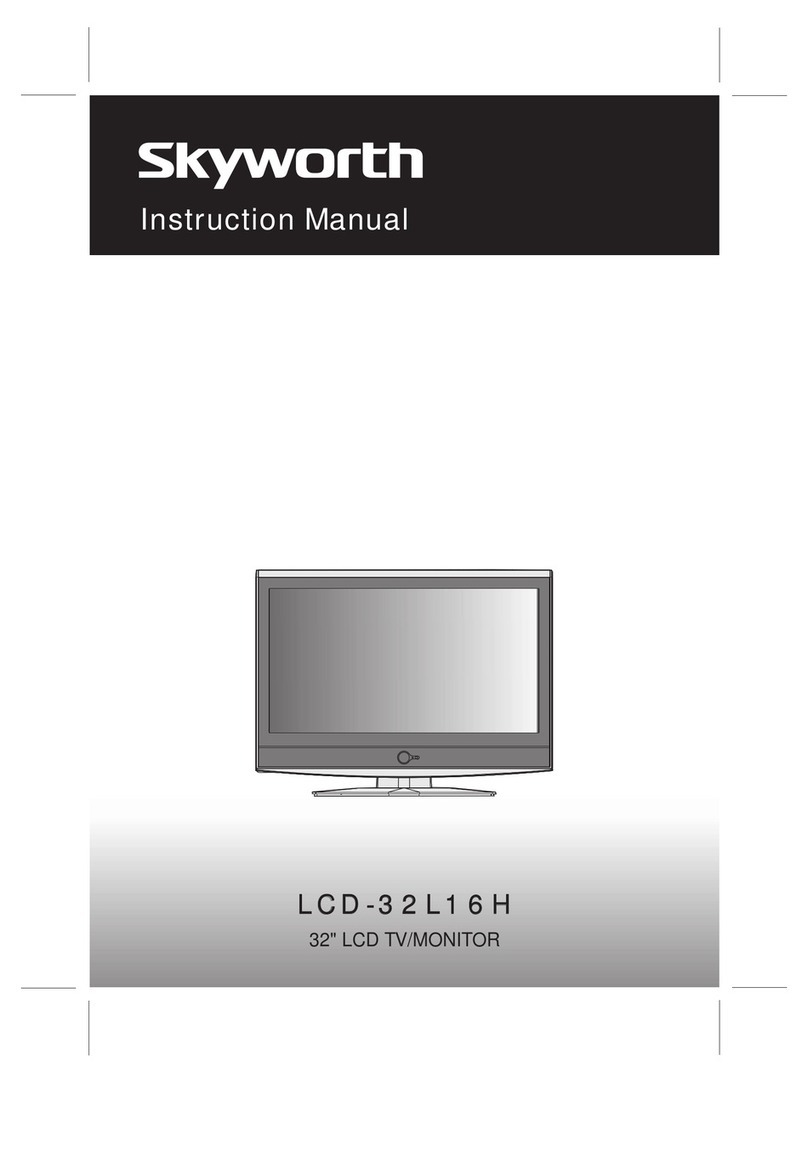
Instruction Manual
LCD-32L8ELCD-32L8E
32" LCD TV/MONITOR
SIZE:A5

SAFTY PRECAUTION
Read all of the instructions before operating the set. Keep these instructions well
for later use.
PRODUCT
The ventilation shouldnot be impedeby covering theventilation
openings with items,such as newspaper, table-cloths, curtains,etc.
Do not push any objects of any kind into this unit through the cabinet slots
as they could touch the current carrying parts or short-circuit parts, resulting
in fire, electric shock, or damage to the unit.
Unplug the set when it is not used for a long period of time.
Do not dismantle this product by yourself as this may cause damage.
Do not touch the screen surface with fingers as this may scratch or mar the
LCD screen.
Do not impact the LCD screen with hard pressure as this may damage the
LCD screen severely.
POWER
Please use the core plug as required.
PLUG
Unplug the set under the following conditions:
If the set will not be used for a long period of time.
If the power cord or the power outlet/plug is damaged.
Follow the instructions to install and adjust the product. Adjust those
controls that are covered in this operating instructions as improper
adjustment of other controls may result in damage. If this happens, unplug
the set and refer to the service personnel.
If the set is subject to impact or has been dropped to have the cabinet
damaged.
POWER CORD & SIGNAL CABLE
Do not allow anything to rest on or roll over the power cord & signal cable.
Protect the power cord & signal cable from being trampled.
Do not overload the power cord or power outlet.
Do not expose the power cord & signal cable to moisture.
The battery (batteryor batteries orbattery pack) shallnot be exposed
to excessive heatsuch as sunshine,fire or thelike.
The mains plugis used asthe disconnect deviceand shall remain
readily operable.

SAFTY PRECAUTION
CLEANING
Dust the set by wiping the screen and cabinet with a soft, clean cloth or
some special liquid cleaner.
Do not apply excessive force to the screen when cleaning.
Do not use water or other chemical cleaner to clean the screen as this
may damage the surface of the LCD screen.
USE ENVIRONMENT
Do not installthis equipment ina confined spacesuch as abook
case or similarunit. To prevent injury, this apparatusmust be securely
attached to thewall mount fastenedon the wall.
Place the set on a place that allows good ventilation.
Do not use the set near damp, and cold areas, protect the set from
overheating.
Keep away from direct sunlight.
The apparatus shallnot be exposedto dripping orsplashing and
that no objectsfilled with liquids,such as vases,shall be placed
on the apparatus.
Do not use the set near dust place.
Toreduce the risk offire or electric shock,do not expose thisappliance
to rain or moisture.
No naked flamesources, such aslighted candles, shouldbe placed on
the apparatus.

-1-
Precautions when usingbatteries
Do not useold and newbatteries together.
Do not usedifferent typesof batteries (forexample, manganese andalkaline
batteries) together.
Note that thereare chargeable andnon-chargeable batteries. Donot attempt to
charge non-chargeable batteries.
Remove the batteriesfrom the remotecontrol unit ifyou do notintend to usethe unit
for a longtime. Precautions whenusing the remotecontrol unit
Do not dropthe remote controlunit.
Do not subjectthe remote controlunit to physicalshocks.
Keep the remotecontrol unit dry. May causethe unit tomalfunction.
Replace the batterieswith new oneswhen operation ofthe unit deteriorates.
SETUP
Insert TheBatteries
Remove the batterycover by pressingit and slidingit down.
Insert the two1.5V (AAAsize) batteries makingsure the polarity(+or -)of the
batteries matches thepolarity marks Insidethe unit.
Replace the batterycover by slidingit in untilyou hear aclick sound.
TVInstallation

Locate the receiver in the room where direct light does not strike the screen.
Total darkness or a reflection on the picture screen can cause eyestrain. Soft and indirect
lighting is recommended for comfortable viewing.
Allow enough space between the receiver and the wall to permit ventilation.
Avoid excessively warm locations to prevent possible damage to the cabinet or premature
component failure.
This TV operates on AC supply directly, connect the AC plug to the socket at the back of
the TV. Insert the mains plug in the socket having a mains voltage of 100-240VAC.
Do not install the receiver in a location near heat sources such as radiator, air ducts, direct
sunlight, or in a place somewhere like close compartment and close area. Do not cover the
ventilation openings when using the set.
Features
Panel Features
High resolution (1366x768), 32"TFT LCD
display.
2
Brightness: 500cd/m
High-speed response time <8msec.
8-bit color depth, display 16.7M colors.
High contrast ratio (1300:1 Typital)
00
Viewingangle:178 (H)/178 (V)(CR>10).
Packaging
User Guide
Youshould received an
accessories as below:
Remote control
Warranty Card
2 xAAA battery
Stand
Wall mount
SETUP
Up to 200 programme memory.
Sleep timer.
picture modes.
When no TV signal isdectected, after 15
minutes the TV switches itself automatically
to stand-bymode.
CYS: PAL / SECAM / NTSC
SYS: BG/DK /I / M
HDMI Input (support up to 1080P)
PC Input (support up to 1080i)
NICAM Stereo / AVStereo
Program Organiser .
4:3 format , 16:9 format ,14:9 Zoom ,
16:9 Zoom1,16:9 Zoom2
-2-

FUNCTIONALPARTS
-3-
3. VOLUME UP/DOWN BUTTON
4. PROGRAM UP/DOWN BUTTON 5. MENU BUTTON
7. ON/OFF BUTTON
2. REMOTE SENSOR1. POWER INDICATOR
6. TV/AV BUTTON
9. AV3 INPUT
8. S-VIDEO INPUT
10. EARPHONE OUTPUT
Note: The graphics are for representation only.
Front Panel
11 HDMI3 INPUT
2
3
4
5
6
7
+ PROG -+ VOL - MENU TV/AV ON/OFF
12
12 1
8
9
-AUDIO- LRVIDEO S-VIDEO
ERAPHONE 3
10
HDMI3
11
12. SPEAKERS

-4-
FUNCTIONALPARTS
Back Panel
1. HDMI1\HDMI2: Connect HDMI input signal from signal source such as DVD.
2. VGA: Connect a PC via a VGA cable.
3. VGA AUDIO: Connect audio signal from PC.
4. Y Pb Pr(HDTV): Connect
5. AV2: Connect AUDIO and VIDEO input signal from signal source such as DVD.
6. S/PDIF : Connect digital AUDIO output signal.
7. AV OUT :Connect AUDIO and VIDEO output signal.
8. AV1 : Connect AUDIO and VIDEO input signal .
9. ANTENNA IN: Connect a coaxial cable to receive signal from the antenna or cable.
RCA cable to connect DVD player or other video device's YPbPr output.
VGA 75 ANT
HDMI2 VGA AUDIO Pb PrY
L - AUDIO - R VIDEO
S/PDIF
HDMI1
AV2
R - AUDIO - L VIDEO
R - AUDIO - L VIDEO
AV1
AV OUT
14
12356789

PROGRAM SELECTION BUTTONS (0-9)
You could select program you want with 0-9
button. For program up to 100-199, you need
press three digitnumber quickly, then TV will go
to the program directly. For program between
10-99, you need press two digit number
according program quicklyand wait, thenTV will
go to the program. For program between 0-9 ,
just press onedigit and wait.
Remote ControlUnit
4
6
8
7
5
MUTE BUTTON( )
Press once to mute the sound, press again to
return to presetsound level.
POWER (STAND BY) BUTTON ( )
Press this buttonto turn theTV on/off.
1
2
3
-5-
OPERATIONINSTRUCTIONS
AV/TV BUTTON
Press this buttonto display externalvideo signal
Such asTV/AVIN/HDTV/ VGA/HDMI1/HDMI2.
Press up/down arrowkey to selectitem and
press left/right arrowkey to enterselected item.
SLEEP BUTTON(SLEEP)
Press this buttonto set the sleep timer.
When the preset length of time has passed,
the TV set Enters standby mode. Thetime
change(minutes):10,20,30,40,50,60,90,120, off.
INFO BUTTON
Press this buttonto display thesettings on the
screen.(e.g. Channel numberfor TVinput,
channel name, coloursystem).
PROGRAM UP/DOWN BUTTONS (PROG.+/-)
Press the PROG.+button to selectthe program
Forwards. Press thePROG.- button toselect the
program backwards.
VOLUME UP/DOWN BUTTONS (VOL.+/-)
Press VOL+/- buttonsto adjust soundlevel. Or
adjust the volumeof each itemin the menu
status.
QUICK VIEW BUTTON (RECALL)
Press this button to return to the previously
viewed program.
9
SLEEP
CANCEL
REVEAL
Sub-page
INDEX
SIZEHOLD
MIXTEXT
PIPON/OFF PIPSOURCE PIP SOUND PIPSIZE
PICTURE SOUND FAV. NICAM
EXIT
MENU
VOL INFO PROG
RECALL
AV/TV
MUTE
POWER
MENU BUTTON(MENU)
Press this button to enter the menu screens for
various Optional adjustablesettings.
SOUND MODE BUTTON(NICAM)
Press this button,you can selectdifferent sound
mode when the source is different.
TV SOURCE
The NICAM
selection is commonfor allTV channels .
1. MONO: MONO.
2. STEREO: MONO,STEREO.
3. DUAL: MONO, DUAL1,DUAL2.
11
12
13
14
OPERATIONINSTRUCTIONS
Remote ControlUnit
-6-
CURSOR buttona( / )
Left/Right/Up/Down direction keys for selecting
menu itemsor signalsources.
EXIT BUTTON
Press to exit MENU directly.
OK BUTTON(OK)
Press to enterselected item.
LEFT RIGHT ARROW/ZOOM-/+ (Z- / Z+)
Press to change the screen format: 4:3 format, 16:9
format, 14:9 ZOOM, 16:9 ZOOM1, 16:9 ZOOM2.
PICTURE Button
Press to change the picture setting :Normal , soft ,
personal, bright .
FAV. BUTTON
Press Fav. button to switch favourite channel which
you had set in Favourite channel MENU. If there is
no channel in Favourite channel list, there is no
response for this FAV. Button.
SOUND Button
Press to change the sound setting :standard, Music,
Film, Voice, Personal .
10
15
16
17
18
PIP ON/OFF
Press this buttonto switch onor offPIP function.
PIP functionis available inHDTV,VGA, HDMI
mode only.
PIP SOURCE
Press this buttonto select PIPsource fromTV,
AVwhen PIPis active.
19
20
SLEEP
CANCEL
REVEAL
Sub-page
INDEX
SIZEHOLD
MIXTEXT
PIPON/OFF PIPSOURCE PIP SOUND PIPSIZE
PICTURE SOUND FAV. NICAM
EXIT
MENU
VOL INFO PROG
RECALL
AV/TV
MUTE
POWER
-7-
SLEEP
CANCEL
REVEAL
Sub-page
INDEX
SIZEHOLD
MIXTEXT
PIPON/OFF PIPSOURCE PIP SOUND PIPSIZE
PICTURE SOUND FAV. NICAM
EXIT
MENU
VOL INFO PROG
RECALL
AV/TV
MUTE
POWER
OPERATIONINSTRUCTIONS
21
CANCEL BUTTON(OPTION)
Press this buttonto appear theTV signalon the
background.
REVEAL BUTTON(OPTION)
Press this buttonto reveal thehidden information
for so meTeletext pages pressagain to hidethe
information.
INDEX BUTTON(OPTION)
Press this button to enter the Teletext's index
MENU.
SUB.PAGEBUTTON (OPTION)
Subcode mode, gives, the possibility to select
certain subcode pagesof a teletextpage.
SIZE BUTTON
Press this button you can select different image
sizes: Normal, double high top, double high
bottom.
MIX BUTTON(OPTION)
the button isused as closing/opening the
teletext Background.
HOLD BUTTON
Press this buttonto hold theTeletext page
without update toprevent the pagefrom
changing. Press againto release thehold state.
TEXT BUTTON
This button is usedfor entering the teletextMENU.
F1-F4 (OPTION)
These four colorkey are forrelative fast teletext
function in thebottom of teletextpage and
organizer function relativeoperation .
22
23
24
25
26
27
PIP SOUND
Press this buttonto select currentsound output
from main orPIP sourcewhen PIPis active .
PIP SIZE
Press this buttonto change PIPpicture size ,
Normal or Zoomwhen PIPis active .
28
29
30
31
Remote ControlUnit

INDEX
MIX
MIX
MIX
SIZE
-8-
SIZE
SIZE
REVEAL
REVEAL
SUB.PAGE
SUB.PAGE
1000
Text
Up arrow key
Down arrow key
Youcould
stop it bypress "HOLD" button.
So TVwill display textpage you required
quickly .

To Cancel TEXT
Press "CANCEL" button to clear the TEXT.
But the page number is still displayed on the
left top of the screen.
NOTICE: However, Teletextis playing all the
same on the background at the time.
Press " CANCEL" button again to resume
the TEXT.
Press "HOLD" button to hold a Text
Page. This means the page will not change
and refresh.
Press the button again to release the hold
state.
To Freeze TEXT
To exit Teletext
Press the " TEXT " or " EXIT" button. The
screen will switch to TV mode.
-9-
Up arrow key
Down arrow key
Note :If there isno teletext signalin
your region ,when you press"TEXT"
button , youcould entry teletextmode
also , butTV willshow top andbottom
line only asgraphics below ,all teletext
function is notavailable .
100
P - 110 200
P +

MENU BUTTON
1.Press menu buttonto display menu,and press left/rightarrow key toselect sub menu.
2.After entering anitem, you canselect the desiredadjusting item bythe up/down
arrow keyand adjust It by the left/rightarrow key buttons.
1. Plug inthe power cordand switch onpower switch .The powerindicator will lightup.
If TVis in standby mode.Then Press"¡¡" Key. Thepicture will displayin few minutes.
ANALOG MENU SCREENS
Enter picture menu,you can selectPicture
Preset, Contrast, Brightness,Colour, Sharpness,
and Noise Reduction.items by pressingup/down
arrow key.
Picture Preset
Press the left/rightarrow key tochange the
Picture Preset. Suchas Soft, Normal,Bright,
or Personal. Choosethe setting thatis best for
your viewing environment.
Contrast
Press the left/rightarrow key toincrease
/Decrease the contrastof the picture.
Brightness
Press the left/rightarrow key tolighten/darken
the picture.
Colour (not availableon PC)
Press the left/rightarrow key Adjusts the
richness of thecolor.
Sharpness
Press the buttonto sharpen orsoften the picture.
(Not available onPC and HDMIinput)
Tint
Press the left/rightarrow key toadjust tint.
(Available forNTSC)
Noise reduction
Press the buttonto select off, low,mid, high to
adjusts the dynamicnoise reduction levelof
image.(Not available onPC and HDMIinput)
Color Temp
Press left/right arrowkey to changepicture color
temperature such asneutral, warm andcool .
Picture Menu
-10-
SOUNDPICTURE INSTALLATION TIMER PREFERENCE PARENTAL CONTROL

Sound Menu Enter Sound menu,you can selectSound Mode,
Balance, Treble,Bass, AutoVolume Level.Items
by pressing up/downarrow key.
Sound Mode
Press the left/rightarrow key toselect the audio
mode. Theaudio mode areStandard, Music, Film,
Voice, Personal.
Balance
Press the left/rightarrow key toadjust to the
left to rightsound channel volume.
left/right arrow key
Auto VolumeLevel
Press left/right arrowkey to switchAVL function
on/off.AVLfunction is notavailable exceptTV
mode.
TV Speaker
When select Internal, sound isoutput fromTV
speaker , S/PDIFand audio ofAV Out ismute ;
when select External, TVspeaker is mute,
S/PDIF and audioof AV Out isactive as output
for external speaker. Be noted, output of
earphone is independentfrom "TV Speaker"
selection .
Treble
Press the to adjust thehigh
frequency signal value.
Bass
Press the to adjust thebass
boost value.
-11-
Installation Menu
ANALOG MENU SCREENS
Enter Installation menu,you can search,
and edit channelor favorite programby pressing
up/down arrow key.
Language
Press the left/rightarrow key andMENU buttons
to select theosd Language.
Channel Number
Youcould change anddisplay channel number
you want.

-12-
Channel Name
Display channel name,you could editit if press
"OK" to enteredit sub menu.use up/down arrow
key to changename of programin the editsub
menu.
It's
better to selectit before autoinstallation.
Country
Select country asyour location,TV will make
auto-sorting after autoinstallation, it's betterto
select it beforeauto installation.This functionis
available for somemodel only .If this itemis
gray , youneed not setit .
Auto Installation
Press right arrowkey to startauto program
search. TVwill search allband for program.
Manual Installation
Press right arrowkey to startmanual program
search .TV will searchupward until one
program found.Youcould input theprogram
frequency directly tofind program alsoif you
know it.
Fine Tuning
Press left/Right arrowkey to decrease/increase
current frequency stepby step.
Organiser
Press left arrowor OK keyto enter submenu,
then you coulduse four colorkey to Delete,
Copy, Move, Skip programin the list.
Favourite Channel
Press left arrowor OK keyto enter submenu.
There is 8Favourite program whichcould be set.
you could useleft/right arrow keyor digit
number key toselect favourite program.
Colour Sys
Press the buttonto select anew colour standard
value inTV.The choicesare AUTO, PAL,NTSC
and SECAM.
Sound Sys
Press the buttonto select anew sound standard
value inTV.The choicesare B/G, D/K, I, M.
ANALOG MENU SCREENS
Installation Menu

Preferences Menu
-13-
Enter Timermenu, you couldset time andturn
on/off timer. WithTime reference,you could set
channel from whichTV getteletext time. Current
Time showthe time ofyour TVremember, you
could set thistime manualy ifyou want.
Otherwise, TVget it fromchannel for time
reference .
Turn off/Wake up timeused for settingof TV turn
off and/orwake up timeaccording current time.
you could selectwhich channel youwant when the
TV wake upaccording wake uptime.
Time Menu
Enter preferences menuyou can setupthe
Zoom, Film mode,OSD Transparent.
Select preferences menuby press the
up/down arrow keyand enter thecaption function
by pressing left/rightarrow key, you canadjust
the Style functionitems by pressingleft/right
arrow key buttons.
Zoom
The picture displaywill change as4:3 format ,
16:9 format ,14:9 Zoom, 16:9Zoom1,16:9
Zoom2 when youchange Zoom setting.
Film Mode
This option setsthe file modeon or off .
OSD Transparent
you could selectdifferent OSDbackground
transparent by it. Setting itfrom 0 to7.
Teletextchar. Set
you could selectteletext character setby press
left/right arrow key. it couldbe selected from1 to
5 for characterset WestEu. , EastEu. , Cyrillic,
Turkey ,Arabic.
ANALOG MENU SCREENS

Parental ControlMenu Enter Parental Controlmenu you canset control
of it .Pressleft/right arrow keyto select Parental
Control item, thenpress up/down arrowkey to
entry menu.
Input correct passwordto entry submenu when
PIN item ishigh light .The initialpassword is
"0000".
Lock Installation
Press left/right arrowkey to lockinstallation
menu or unlockit. Thisitem is onlyavailable in
TV mode .
Channel Number
Press left/right arrowkey to selectchannel
which you wantlock. Thisitem is onlyavailable
in TVmode .
Lock Channel
Press left/right arrowkey to activechannel lock
function on oroff. Thisitem is onlyavailable in
TV mode.
Lock Front panel
Press left/right arrowkey to lockfront key board
or not.
New PIN code/RepeatPIN code
Input and doubleconfirm new PINcode if you
want have onenew password.
-14-
ANALOG MENU SCREENS

15 Pin MiniD-Sub Connector
PICTURE
PC Mode
Menu InPC Mode
-15-
and LCD TV.
PC Input typicaldisplay modes.The following
table is anillustration of someof the typical
video display modes.
1 640X480(recommend 60Hz)
2 800X600(recommend 60Hz)
3 1024X768(recommend 60Hz)
4 480p
5 576p
6 720p(50/60Hz)
7 1080i(50/60Hz)
In PC modestate,
there are 4 supported all functionsare the
same as inTV mode.
Enter menu bypressing the "MENU"
button on theremote control.
geneal menus (Picture,Sound, Time,
parental control)
ANALOG MENU SCREENS
Geometry Menu
when you connectVGA cableto the jacksof PC or
connect HD cableto device suchas DVD, andselect
the signal sourceas "VGA" or"YPBPR" the screen
menu will active.
Youcan use thefunction to adjustthe display setting
automatically or manual.
H-Position
Press left/right arrowkey to adjustthe H-Position oftelevision the screenappear as .
V-Position
Press left/right arrowkey to adjustthe V-Positionof television thescreen appear as.
Phase
Press left/right arrowkey to adjustthe phase ofthe picture.This item isonly available in
VGA mode.
Colck
Press left/right arrowkey to adjustthe updating frequencyof the picture.This itemis
only available inVGA mode.
Auto Adjust
Press left/right arrowkey to autoadjust PC sizeand position.This item isonly available
in VGAmode.

Enter preferences menuyou can setupthe
Language, Zoom, Filmmode, OSDTransparent.
Select preferences menuby press the
up/down arrow keyand enter thecaption
function by pressingleft/right arrow key, you can
adjust the Stylefunction items bypressing
left/right arrow keybuttons.
Language
Press the left/rightarrow key andMENU buttons
to select theosd Language.
Zoom
The picture displaywill change as4:3 format ,
16:9 format ,when you changeZoom setting.
OSD Transparent
you could selectdifferent OSDbackground
transparent by it. Setting it from0 to 7.
Press up/down arrowkey to selectPIP itemand
press left arrowkey to entrysub menu .PIP
function is onlyavaiable in PC,HDTV,HDMI
mode.
PIP
Press left/right arrowkey to switchon or off PIP
function .
PIP Source
Press left/right arrowkey to selectPIP source
such asTV ,AV.
Sound
Press left/right arrowkey to selectTV sound
from main orPIP channel.
PIP Size
Press left/right arrowkey to selectPIP sizesuch
as 1 or2 . 1for small PIPpicture(Normal), 2 for
big PIPpicture(Zoom) .
-16-
ANALOG MENU SCREENS
PIP Menu
Preferences Menu

The menu ofY PbPr mode isexactly same asthe menu ofHDMI mode.
YPbPr Input typicaldisplay modes.
The following tableis an illustrationof some ofthe typical videodisplay Modes.
HDMI Input typicaldisplay Modes.
The following tableis an illustrationof some of typical Video
display modes.
HDMI InputResolutions
-17 -
YPbPr Mode(Componentinput)
1 480i
2 480p
3 576i
4 576p
5 720p(50/60Hz)
6 1080i(50/60Hz)
1 640X480(recommend 60Hz)
2 800X600(recommend 60Hz)
3 1024X768(recommend 60Hz)
4 480p
5 576p
6 720p(50/60Hz)
7 1080i(50/60Hz)
8 1080p(24/50/60Hz)
7 1080p(50/60Hz)
ANALOG MENU SCREENS
Table of contents
Other Skyworth Monitor manuals

Skyworth
Skyworth LCD-32L16H User manual

Skyworth
Skyworth LCD-26L8E User manual

Skyworth
Skyworth LCD-19L03 User manual

Skyworth
Skyworth LCD-37L16 User manual

Skyworth
Skyworth LCD-22L5F User manual

Skyworth
Skyworth LCD-22L19 User manual

Skyworth
Skyworth LCD-42L8EFHD User manual

Skyworth
Skyworth LCD-26L16H User manual

Skyworth
Skyworth LCD-19L3F User manual
Popular Monitor manuals by other brands

Panasonic
Panasonic TH152UX1 - 152" PLASMA TV Service manual

LG
LG 50PM1M - - 50" Plasma Panel Service manual

Wells-Gardner
Wells-Gardner 19K4901 user manual

Elo TouchSystems
Elo TouchSystems M467 User manual & installation guide

NEC
NEC XP21 - MultiSync - 21" CRT Display user manual

Akai
Akai PDP4216M Service manual