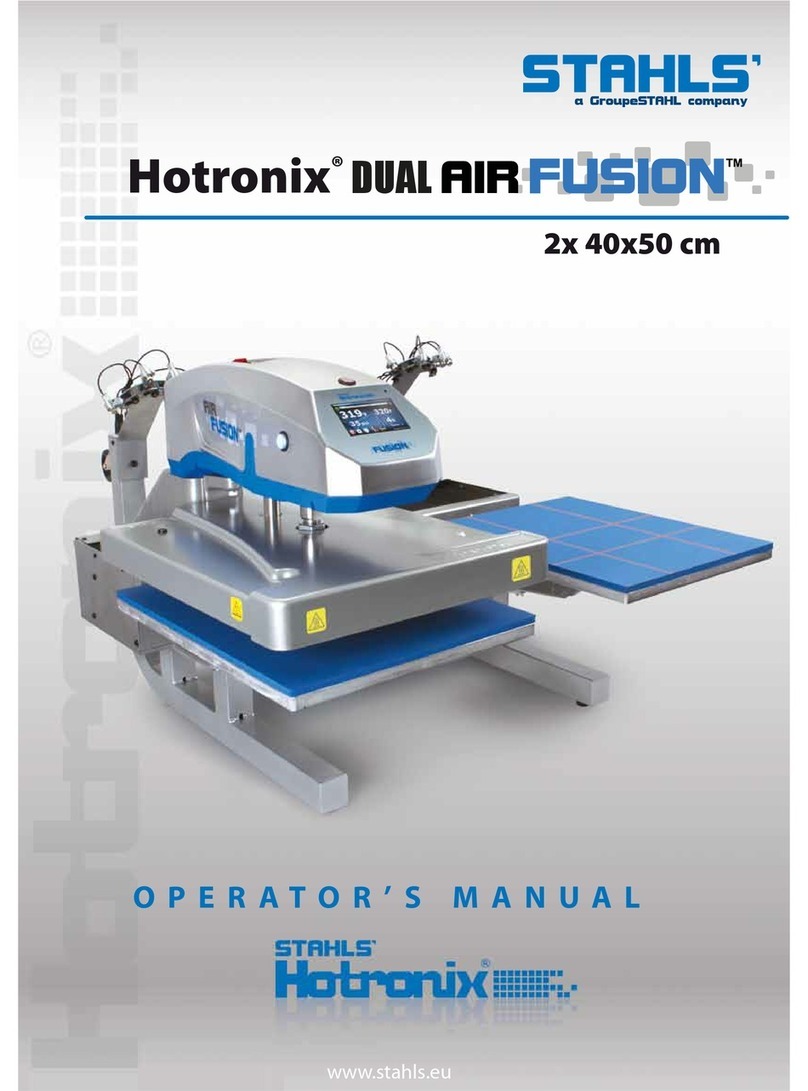
SLE 800 Series User manual

User Guide
SLE Hot Printers
800-Series

Contents
Page
Introduction
Safety Notes
Getting To Know Your SLE Hot Printer
Preparing for Operation
Setting up your hand-operated SLE Hot Printer
Setting up your air-operated SLE Hot Printer
Loading Foil
Setting Foil Pull
Unloading Used Foil
Setting Temperature
Preparing the Type, Emblem or Die
Printing with a 1-Line or 2-Line Type Holder
Printing with the Open Chase Type Holder
Printing with Engravings
Doing Test Imprints
Common Problems & Solutions
Special Imprinting Applications
How to imprint on ribbons
How to imprint on napkins
How to imprint on matchbook covers
How to imprint on pencils
How to imprint on stationery, invitations or announcements
How to imprint on Emboss-a-plates
How to imprint on larger items
How to imprint on Mylar balloons
How to imprint on leather articles
How to imprint on favor tags and confetti cards
How to get foil imprinting effects for computer output
How to imprint on glasses, ceramics and metal objects using Crysteramics
Supplies
Foils
Type Set, Spacers, Emblems and Dies
Imprintables
Caring for Your Hot Printer
How to Promote Sales
List of Optional Accessories
Specifications

Introduction
Congratulation on acquiring your new 800-series SLE Hot Printer and welcome to the exciting,
lucrative world of foil imprinting.
The SLE Hot Printer is a versatile machine, having a range of capabilities equal to that of many
commercial foil presses. With its precision engineering, ease of operation and reliability, your SLE
Hot Printer will perform faithfully and profitably for you year after year.
Your SLE Hot Printer is designed for simplicity and ease of operation. Anyone should be able to
achieve excellent results in a very short time. To get full use of all the features of your SLE Hot
Printer, we urge that you carefully study and thoroughly understand the instructions contained in this
manual and the accompanying video, until you can execute each of the prescribed procedures with
reasonable skill and confidence. Proficiency will come with time and continued practice. For quick
reference during operation, keep this manual in a handy location.
The machine models pictured in this manual are the 6-inch M-800E and AM-800E. However, the
information covered is equally applicable to the following models:
MODEL M-800B 3.5-Inch Hand-Operated Machine
MODEL AM-800B 3.5-Inch Air-Operated Machine
MODEL M-800A 5-Inch Hand-Operated Machine
MODEL AM-800A 5-Inch Air-Operated Machine
MODEL M-800D 6-Inch Hand-Operated Machine
MODEL AM-800D 6-Inch Air-Operated Machine
What is "Foil Imprinting"?
Foil imprinting or "Hot Stamping" is a process of permanently imbedding text or images onto a
surface like paper, plastic or leather with a very thin layer of foil. The foil usually comes in gold, but
is also available in many colors and textures.
The vibrant color and depth of foil imprinting imparts a 3-dimensional effect not obtainable with
conventional printing with ink. The process begins by setting the desired message on special metal
type or photoengraved dies. The type are inserted into the machine and heated to the operating
temperature. The article to be imprinted is then placed on the printing table under the foil. When the
machine handle is pulled, the type or dies will melt a coloring agent into the article leaving a crisp,
permanent mark.
With your SLE Hot Printer you can personalize thousands of articles such as award ribbons, napkins,
greeting cards, pencils, book covers, matchbooks, playing cards, letterheads, business cards, leather
goods, photographs, slide mounts, Mylar balloons, plastic name badges, satin pillows, champagne
glasses, ceramic mugs and candles.

Safety Notes
Your SLE Hot Printer and accessories have been designed to assure years of profitable, trouble-free
service, provided it is carefully maintained, handled with care and properly used. As with all
mechanical and electrical devices, it is essential that certain safety precautions be fully understood
and followed, to prevent injury to the operator and/or damage to the machine. In the interest of
safety, you are urged to read the following precautionary suggestions carefully before operating the
machine.
•Place the machine on a stable counter or table, to prevent undue movement during operation.
•Keep the work area clean and clutter free.
•Do not operate this machine near water, wet locations, or outdoors.
•This machine should be operated from the type of power source indicated on the marking
label. If you are not sure of the type of power available, consult your local power company.
•Do not allow anything to rest on the power cord. Do not locate the machine where a person
will step on the cord. Inspect power cord regularly and replace any worn or damaged cord.
•Use of an extension cord with this machine is not recommended or authorized. Users should
check building codes and insurance requirements if an extension cord is to be used. Ensure
that the total ampere ratings of the products plugged into the extension cord do not exceed
the extension cord rating.
•Make sure that the total amperage of all products plugged into the wall outlet does not exceed
the outlet rating, and that outlet is properly fused according to its electrical ratings.
•Toxic/inflammable material should not be placed near the machine. Do not attempt to imprint
on any object or product containing toxic/inflammable material.
•Dress appropriately for the job. Do not wear any jewelry or loose clothing, which could
become entangled in the machine.
•Avoid contacting the heated Type Holder/Heater Platen with bare hand as this may cause
severe burns. These portions of the machine can become very hot during operation.
•Never place your hands on the printing table during operation of the machine.
•When changing type sets or engravings, always use some form of protective gloves or the
supplied Holding Pad.
•Keep this machine and all supplies out of reach of children.
•Turn off machine when not in use. Unplug machine from the wall outlet before cleaning and
servicing.
•For air-operated units, never use the cycle mode for any application other than ribbon
imprinting. Always turn off the cycle mode when not in use.
•When setting up or changing foil on air-operated units, always turn off power to the
Pneumatic Control Box.
•Never leave machine handle on the machine when the Pneumatic Control Box is in use.
When air-operated units are to be used as hand operated units, always unplug the power to the
Pneumatic Control Box and disconnect the air hose to the compressor.

•Bleed off air pressure in the system when not in use and before servicing or storage. To release
the pressure, turn and press the valve underneath the Air Filter/Regulator.
•Disconnect electrical power to machine and compressor when not in use. Unplug machine from
the wall outlet before cleaning and servicing.

Getting to Know Your SLE Hot Printer
Handle
Handle Lock Screw
Rear Foil Bracket
Power
Foil Spool Tension
Temperature
Ribbon
Printing
Heater
Foil Take-up Spool
Foil Spool Clip
Foil Rack
Ram Bar
Heating
Temperature

Model AM-800E
Super-Quiet Compressor
Pneumatic Control
Cycle
Reset
Power-on
Stop Button
Dwell Timer
Activation Electronic
Cycle Mode
Cycle Mode
Pressure
Pressure Gauge
Power-on SwitchAir Filter
Petcock

Attachments and Accessories
Depending on the particular machine package you purchased, you might have one or more of the
following accessories.
Multipurpose Gauge Bar - serves as a vice to hold Napkin Guides, Matchbook Guides and other
accessories firmly in place when imprinting.
Type Holders - hold the text, logos, or artwork you wish to transfer onto the item you are
imprinting. There are several different styles of Type Holders, which are described below:
•1-Line Type Holder holds one line of 18-point body type.
•2Line Type Holder holds two lines of 18-point body type.
•3Line Type Holder holds three lines of 12 or 18-point body type.
•24/36-point Type Holder holds one line of 24 or 36-point body type.
•7-Line Type Holder holds seven lines of 18-point body type.
•Open Chase Type Holder - consists of a set of Lead Rule, Quoins, Allen Key and a
Typesetting Stand. Used for multi-line imprinting of various type sizes.
•72-point Type Holder holds one line of 72-point type.
•Wafer Die Holder available for 108 and 160-point dies.
•Wafer Holder for Open Chase - holds dies up to 1.5 x 2.0 inch. Used in combination with the
Open Chase Type Holder.
Adapter Sleeves - fit into the Heater Platen of your SLE Hot Printer to keep Type Holders in place.
To install an Adapter Sleeve, slide into the Heater Platen from either side and lock into place by
flipping the Butterfly Clips on both sides. To remove an Adapter Sleeve, use the eraser end of a
pencil and push the sleeve out. Be sure to use the Holding Pad, as the Adapter Sleeve can become
very hot.
•The 1-Line Adapter Sleeve is for 1-Line 18-point Type Holders.
•The Multi-line Adapter Sleeve is for 2-Line 18-point Type Holders, 3-Line 12-point Type
Holders and 1-Line 24/36-point Type Holders.
•Some Adapter Sleeves have a Die Holder built in to allow quick setup of dies and letters. This
is particularly useful for printing items like matchbooks or favor boxes.
•Open Chase Type Holders, 72-point Type Holders, Wafer Die Holders and 3-Line 18-point
Type Holders fit directly into the Heater Platen.
Kopyfoil Attachment - used to convert black ink from computer or copier output into brilliant foil
colors.
Napkin Guide - for diagonal imprinting of napkins. The Gauge Bar is used to secure the Napkin
Guide to the Printing Table.
Matchbook Guide - used to imprint the outside cover of matchbooks.
Pencil Guide - holds hex pencils in place to insure perfect imprinting.

Ribbon Guide - used to hold the ribbon in place to ensure a straight and uniform imprint.
Depending on your specific model, the Ribbon Guide is either built into the Printing Table or
attaches to the Printing Table similar to the Gauge Bar.
Ribbon Spindle - for holding spools of ribbon to be imprinted.
Extended Printing Table - allows you to imprint larger items like satin pillows, scrapbooks and
wedding albums quickly and easily. In addition, it helps speed up imprinting of greeting cards and
stationery.
Billfold Clamp - used to hold small leather items in place for imprinting.
Book Clamp - used to hold bibles, photo albums or scrapbook covers in place for imprinting.
Holding Pad - serves to protect you from the heat when handling hot items such as Type Holders
and Adapter Sleeves.
Type Box – for keeping your type organized.
Tweezers - for handling of individual type and spacer.

Preparing for Operation
Setting up your hand-operated SLE Hot Printer
(Models M-800A, M-800B, M-800D, M-800E)
As you unpack the SLE Hot Printer, familiarize yourself with its contents. Save the carton and
packing materials. They should be used to re-pack the machine for transportation or service if
necessary.
1. Remove the machine from the bag.
2. Place the machine on a flat, level table. Make sure that machine is stable during operation.
3. Insert the Handle into the Handle Slot and tighten the Handle Lock Screw.
Setting up your air-operated SLE Hot Printer
(AM-800A, AM-800B, AM-800D or AM-800E)
The air-operated machine is identical to the hand-operated model. The difference is that air pressure
does the work. Instead of pressing a handle, the mechanism operates with two Activation Buttons.
For the special application of imprinting ribbons, a cycle mode allows the machine to operate
automatically and only one hand is needed to feed the ribbon.
Your SLE Hot Printer comes in two boxes. Box one contains the machine, the Pneumatic Control
Box and accessories. Box two contains the compressor. To set up your air-operated machine:
1. Set up the compressor according to the instructions included in the box. Place the compressor
on the floor underneath your table. IMPORTANT! Be sure to install the air filter and add oil
to the compressor before operation.
2. Place the Pneumatic Control Box on a flat table surface where you will be working. Insert
one end of the black tubing into the pressure regulator of the compressor. Insert the other end
of the tubing into the back of the Pneumatic Control Box ("air inlet".)
3. If you use a compressor other than the Super-Quiet Compressor supplied by us, you need to
lead a 6mm O.D. tubing from your compressor to the air inlet at the back of the Pneumatic
Control Box.
To compressor
To Air Cylinder

4. Place the machine on top of the Pneumatic Control Box. Your machine comes with a braid of
two tubing. One has a label "Upper" and the other has a label "Lower." Insert the two tubing
into the back of the Pneumatic Control Box. ("Upper" to "Upper", "Lower" to "Lower".)
5. Plug the machine, the Pneumatic Control Box and the compressor into the proper electric
outlet and turn on the power switches.
6.Allow time for the air pressure to build up in the compressor.
7.Set the pressure needed for imprinting on the Pressure Regulator. Pull the round knob upward,
then turn to set pressure. Press the knob down when finished.
8. Your air-operated SLE Hot Printer is now ready for operation.
Loading Foil
Depending on your specific model, the SLE Hot Printer is designed to accommodate foils from one
to six-inch width. The foil is automatically advanced with each impression.
1. Remove the outer Foil Holding Socket from the Rear Foil Bracket by turning it clockwise and
pulling outward.
2. Remove the outer plastic Foil Holding Disc. Leave the inner disc on the Rear Foil Bracket.
3. Remove the label from the foil and mount the foil onto the Rear Foil Bracket with the foil
unwinding downward from the front of the roll.
4. Replace the outer Foil Holding Disc.
5. Replace the outer Foil Holding Socket to lock the foil in place by pushing the Socket in along
the groove and turning it counter-clockwise.
6. Center the foil by adjusting the position of the inner and outer Foil Holding Sockets.
7. Slip the foil under and around the Foil Guide Bar with the aid of a pencil. Pull the foil
towards the front of the machine. At this point check to verify that the dull side of the foil is
facing downward. (If the shiny side is facing downward instead, go back to step 3 and mount
the foil in the reverse direction.)
Foil Holding
Foil Holding Socket
Rear Foil Guide
Foil with Shiny Side

8. Snap the metal Foil Clip from the Foil Take-up Spool and wrap the end of the foil (dull side
facing in) around the spool.
9. Replace the Foil Clip over the foil.
CAUTION:
•During operation, the Heater Platen can become very hot. Take extreme caution when loading
or unloading foils.
•When setting up or changing foil on air-operated units, always turn off power to the
Pneumatic Control Box.
Setting Foil Pull
The purpose of setting the foil pull is to make sure that each printing impression is made on new foil.
Proper adjustment of the foil-advancing mechanism will automatically advance the right amount of
foil, thus preventing waste.
1. Loosen the thumbscrew locking the Foil Rack Assembly at the left side of the Foil Take-up
Spool.
Foil Clip
Foil
Foil Rack
Foil Take-up
Thumb

2.Raise or lower the Foil Rack Assembly to adjust the amount of foil pull. For maximum foil pull
the Rack should be set all the way down. For minimum foil pull, the Rack should be set all
the way up.
3. When you have adjusted the Rack to the desired setting, tighten the thumbscrew to firmly
lock it in position.
Unloading Used Foil
During operation, used foil will build up on the Foil Take-up Spool. This tends to alter your foil pull
setting. To maintain your foil pull setting, unload used foil periodically.
1. Raise the Foil Rack Assembly to the top-most position.
2. Cut the foil just underneath the Foil Take-up Spool.
3. Press the Machine Handle down slightly with your right hand while pulling the used foil off
the spool using your left hand.
4. Snap the metal Foil Clip from the Foil Take-up Spool. Discard the used foil.
5. Wrap the end of the new foil (dull side facing in) around the spool.
6. Replace the Foil Clip over the foil.
SETTING THE TEMPERATURE
Before you begin imprinting, you need to set the temperature of your SLE Hot Printer. Temperature
is regulated by rotating the small Regulator Knob on the controller, at the rear, left side of the
machine.
In general, SLE foils are formulated to perform best within a temperature range of from 200 to 250
degrees, depending on the type of material being printed. Smooth, coated papers perform well at the
low range, while textured stocks require higher temperatures.
Foil Rack Assembly
Raised
Pull off used foil

It is not possible to recommend a given temperature for any particular substrate to be imprinted
because of the various production conditions that are encountered. The affecting factors are:
•Formulation of the foil
•Surface to be imprinted; coarse or smooth
•Pressure applied
•Dwell time
•Type style used; light face vs. bold face
•Ambient condition
The following table is a guide in determining the proper setting, based upon the type of material
being imprinted. These readings, however, are only approximates and may require minor adjustments
to achieve the optimal result. To ensure a good imprint, it is recommended that you set the
temperature slightly lower in the beginning, and increase as necessary.
TEMPERATURE TABLE
Regulator Knob Setting
1-3
3-5
5-7
Temperature (°F)
190-230
(88 °C-110 °C)
230-260
(110 °C-127 °C)
260-280
(127 °C-138 °C)
Applicable Substrates
(for reference only)
Mylar, leather, PVC
Ribbon, paper
Plastic, wood
1. Plug in your SLE Hot Printer and turn on the power. (The Green and Red lights come on.)
2. Turn the Regulator Knob to the appropriate scale according to the above table. When the
temperature has reached the set point the green light on the temperature control panel will
begin to flash, on and off.
3. When the flashing begins, wait another minute or two for the heat to reach the typeface, then
proceed to make a test print.
Preparing the Type, Emblem, or Die
Power-on
Regulator

After setting the temperature on your SLE Hot Printer, the next step is to prepare the type, emblem,
or die. Setting type is a surprisingly simple procedure. With a little practice, it can be mastered by
almost anyone. Do not rush; speed will come with practice.
Here is a short primer to help you become conversant in type setting:
•Types are die-cast letters and numbers used to create personalized text.
•An emblem is a diecast piece of type incorporating a symbol or artwork that can be set next
to the type.
•Magnotypes are similar to type but with a complete word or phrase cast in a single piece to
make type setting less time consuming.
•A die is larger piece of artwork (such as a company logo) photoengraved and mounted on an
aluminum wafer or block. Dies are usually set in specialized Die Holders. Several die holders
are available for specific applications.
•Type size is measured in points. There are 72 points to an inch, so 18-point type is equal to
1/4 inch and 12-point type is equal to 1/6 inch.
•SLE offers a wide selection of type styles in several different sizes. Consult the SLE listing of
type styles for the ones that best suit your requirements.
•If you examine a piece of type, you will see a deep notch on one of the long sides. This is
called the "nick." Most types have only one nick, but some types have three nicks. The nicks
denote the bottom of the typeface.
•In order to achieve a printed impression from type (or emblem), individual letters must be set
by hand to form the text to be printed. The normal way of setting Type is to place each piece
of type into a Type Holder that holds the type together. SLE offers several Type Holders; each
designed to perform specific tasks in the most efficient manner. Choose the appropriate Type
Holder based on the requirement of your specific print job.
•Type is set line by line in the same sequence as they appear in the copy. This means you set
the type from left to right, starting with the first word of the first line and ending with the last
word of the last line. When setting type into the Type Holder, the nicks usually should face
UP, thus making the letters appear upside down.
•When setting type please make sure that the feet of all the type are in good contact with the
Type Holder, and make every effort to center the type in the Type Holder, as nearly as
possible. Centering will ensure even printing pressure on each character, resulting in higher
quality printing.
•Never mix new type with old ones.
•The spaces at the end of each line and those between words must be filled up with spacers
that do not actually show up as print. Always use spacers of the same point size as that of the
type being set. For example, 12-point spacers must be used with 12-point type; 18-point
spacers must be used with 18-point type, etc. Spacers of different point sizes should never be
mixed.
•When using an Open Chase Type Holder, lead rules are used to separate different lines of
type, to increase the space between lines and for centering. Lead rules (pronounced "led") are
flat metal strips that come in various thickness and lengths. They can be placed laterally
against either side of the Type Holder and may be used with all sizes of type.

•Do not leave type in a hot machine for an extended period of time. As soon as you have
finished printing, remove the Type Holder from the machine and return the type back into the
type box.
The following instructions are intended to aid those who have little or no experience with
typesetting. As one gains experience in setting type, different ways of shortening the process will
become apparent.
Printing with a 1-Line or 2-Line Type Holder
In many printing jobs, the print pattern is often limited to one or two lines. Although one or two line
jobs may be accomplished by means of the Open Chase Type Holder, many prefer the convenience
and simplicity of the 1-Line or 2-Line Type Holder. For example, ribbon printing is best done with a
1-Line Type Holder, whereas matchbook covers can best be printed using the 2-Line Type Holder.
The 1-Line or 2-Line Type Holder is used in combination with a corresponding Adapter Sleeve.
1. Insert the Adapter Sleeve into the Heater Platen and lock it by flipping the Butterfly Clips on
the side of the Heater Platen.
2. Hold the Type Holder with the handle pointing towards your left. Set your type onto the Type
Holder from left to right with the nick facing UP. The letters will appear upside down.
3. After the type is set, add spacers (starting with large spacers first) on either side of your type
to fill in the blank spaces while keeping the type centered.
4. Tighten the thumbscrew(s) on the right of the Type Holder to hold the type in place.
CAUTION:
•You should only turn the screws until they stop. Over tightening can damage the type and
the Type Holder. If you find it necessary to use a small screwdriver to aid in tightening
the thumbscrew(s), be sure to never exceed 1/8 of a turn.
One-Line
One-Line Type
Type
Adapter

5. Insert the Type Holder into the Adapter Sleeve. When imprinting at the top of a page, such as
on stationery, insert the Type Holder from the left side of the Adapter Sleeve. When
imprinting at the bottom of a page, such as on greeting cards, insert the Type Holder from the
right side of the Adapter Sleeve.
6. Remove the Handle from the Type Holder. Allow the type to heat up before imprinting.
NOTES:
•To remove an Adapter Sleeve, use a pencil and push the Adapter out of the Heater Platen.
Always use a Holding Pad as the Adapter Sleeve can become very hot.
•Always remove the Type Holder from the machine and loosen the screws when you are
through imprinting. Type last longer when it doesn't cool under pressure.
Printing with the Open Chase Type Holder
The Open Chase Type Holder is used for multi-line print jobs. A typical application is printing on
paper napkins.
1. Place the Type Holder onto the typesetting stand with the open side facing you and the handle
pointing to the left.
2. Place one or more lead rules into the holder, to achieve the desired starting distance from the
side of the holder.
3. Beginning from left to right, position the first character of the first word, with the nick facing
upward. The letters will appear upside down. Use the tweezers (furnished with your
accessories) to facilitate the handling and placement of the individual type.
4. Continue adding characters in the normal spelling sequence, until the first word is complete.
5. Place a spacer after each word to create a clear separation of words.
6. Continue the procedure until the first line is complete. If space remains, shift the completed
line toward the center of the holder and fill the end openings with spacers.
7. Place one or more lead rules on top of the first line, to create the desired space between the
first and second line. If you prefer less space between lines you may eliminate the lead rules
altogether.
8. Continue the same procedure for each succeeding line. Complete the setup by placing at least
one lead rule atop the last row of type. Be sure to leave enough space for the Quoins.
9. Place the Quoin(s) in position to lock the type.
Quoin
Helping
Allen key

10. Carefully study the setup to be sure there are no mistakes. Add lead rules where necessary to
center the print pattern.
11. When satisfied that the setup is correct, gently tighten the Helping Screws at the end of the
holder to secure each line of type. You should only turn the screws until they stop. Over
tightening can damage the type and the Type Holder. It is not necessary to use a screwdriver
for this purpose. Do not tighten those Helping Screws that are hitting against a lead rule.
12. Lightly press the top of each character with your forefinger, to verify that each one lies
firmly against the bottom of the Type Holder.
13. Expand the Quoin(s) with an Allen key in the clockwise direction until the type is held
securely in the holder. Do not over tighten as this may damage the type or Type Holder.
14. Insert the Type Holder into the Heater Platen. When imprinting at the top of a page, such as
on stationery, insert the Type Holder from the left side of the Heater Platen. When imprinting
at the bottom of a page, such as on greeting cards, insert the Type Holder from the right side
of the Heater Platen.
15. Remove the Handle from the Type Holder. Allow the type to heat up before imprinting.
PRINTING WITH ENGRAVINGS
Some imprinting job may include a graphic design or engraving. Used in combination with standard
typesetting, special engravings can add the "professional touch" that appeals to both business and
social customers and opens the door to a wide array of possibilities for those wishing to expand their
market.
Engraving dies, in the form of a metal wafer, can be produced from virtually any calligraphic or
graphic design. These Wafer Dies, if used alone, can be made to fit a number of specially designed
Die Holders or, if used together with type, can be made to fit the WHOC (Wafer Holder for Open
Chase).
The SLE Die catalog offers Engraving Dies for every occasion. You can also have custom dies made
from your own design by simply sending us your black-and-white camera-ready artwork. When you
prepare your artwork, try to use line drawings and avoid large areas of solids. Solid areas will not
produce satisfactory results.
WHOC
108 pt. Wafer
Combining engraving with
set type.

To combine an engraving with set type, simply slide the Wafer Die into the WHOC. Set the type
using the Open Chase Type Holder and then drop the WHOC into the Type Holder. Complete the
setup with spacers and lead rules and secure it with the Quoins. Insert the Type Holder into the
Heater Platen as usual.
Doing Test Imprints
Before imprinting any merchandise, always make a test imprint to check spelling and imprint quality.
The three essential factors for a quality foil imprint are the proper: TEMPERATURE, PRESSURE
and DWELL.
TEMPERATURE Temperature is controlled by the setting you select on the controller and
monitored by an easy to read Temperature Gauge.
PRESSURE Pressure is controlled by how hard you press on the Handle on a handle-
operated machine, and by the air pressure regulator on an air-operated
machine.
SOME NOTES ON PRINTING PRESSURE
•The correct amount of pressure applied by the type against the article to be printed is
essential for high quality printing. Too much or too little will produce results that are
unsatisfactory.
•Soft papers, smooth ribbons, vinyl's, leathers and plastics, require less pressure. Materials
with slight texture will require somewhat more pressure. Materials with pronounced
textures, in most cases, should be avoided.
•Sometimes a careful choice of type style can overcome the problems associated with
texture. Medium to heavy textures might be successfully printed provided the type size is
not too small, and that the type style has been designed with thin, light lines. The printing
surfaces of such type are sharper, making it easier to penetrate heavier textures than a
type design with heavier strokes.
•In addition, the printing area will have a definite influence on how much pressure to
apply. The heavier or more massive the printing area, the greater the pressure required.
Lighter and smaller printing areas require less pressure. For example, if the print pattern
contains five or six lines of type, somewhat more pressure will be required than if it
contains only two or three lines of the same, or similar, type size.
•It is, therefore, important that careful consideration be given to the texture of the material
being printed, and to the size and density of the type/engraving being used. All of these
factors have a direct bearing on the amount of pressure required to produce the desired
results, or whether the desired results can even be achieved.
DWELL TIME Dwell is the amount of time needed for pressing the hot type against the foil to
get a desired impression. The proper dwell time allows the foil to release
evenly at all points on the printed surface. The user controls the dwell time on
a hand-operated machine. On an air-operated machine, the setting you specify
on the electronic timer controls the dwell time.
1. Release the Side Screw and adjust the Gauge bar to fix the position for the article(s) to be
imprinted.

2. Position the article on the Printing Table. Substitute a piece of scrap paper for the actual
article if necessary.
3. For the correct imprinting pressure, always apply the pressure in two motions:
•Bring handle down with light, easy motion, with arms and finger relaxed until the
type is almost touching the article to be imprinted.
•Press down harder and hold for short (1 or 2 seconds) dwell.
•Release the pressure, and gently bring the handle back to the starting position. Do not
let handle snap back.
4. Check the copy for errors in spelling.
5. If the position of the imprint is not satisfactory, release the Side Screw and adjust the Gauge
bar to re-position the article to be imprinted.
For Air-operated units:
•Pressure is controlled by setting the pressure regulator on the compressor.
Clockwise = increase pressure
Counter-clockwise = reduce pressure
•Dwell time is control by turning the Dwell Time dial on the front panel of the Pneumatic
Control Box.
Clockwise = longer dwell time
Counter-clockwise = shorter dwell time
Pressure Regulator
Dwell
This manual suits for next models
6
Table of contents


