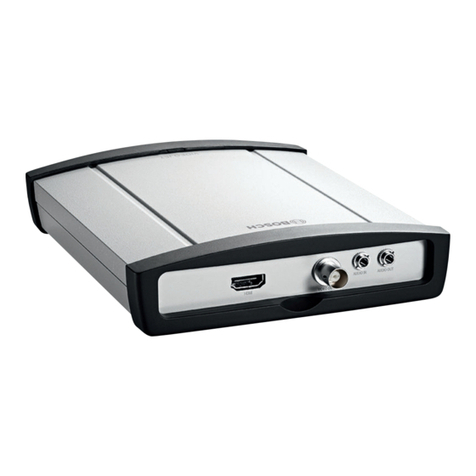
Slinex XR-30IP User manual

XR-30IP
{ Design. Uniqueness. Innovations }
IP converter
User manual
Link AP Power
SERIES
ACCESSORIES
Thank you for
choosing our equipment

{ Design. Uniqueness. Innovations }
1 2
Table of contents
1. Device functions .........................................................................................................................................................................2
2. Package ..........................................................................................................................................................................................3
3. Specication.................................................................................................................................................................................3
4. Description....................................................................................................................................................................................4
5. Installation.....................................................................................................................................................................................5
5.1 Cable requirements.....................................................................................................................................................5
5.2 Schematic diagrams....................................................................................................................................................6
5.3 Unit mount .....................................................................................................................................................................7
6. Software.........................................................................................................................................................................................8
6.1 Creating account..........................................................................................................................................................8
6.2 Wired network connection steps............................................................................................................................8
6.3 Wireless Wi-Fi network connection steps......................................................................................................... 10
6.4 Operation.....................................................................................................................................................................12
6.5 Notication messages.............................................................................................................................................13
7. Limited Warranty......................................................................................................................................................................14
1. Device functions
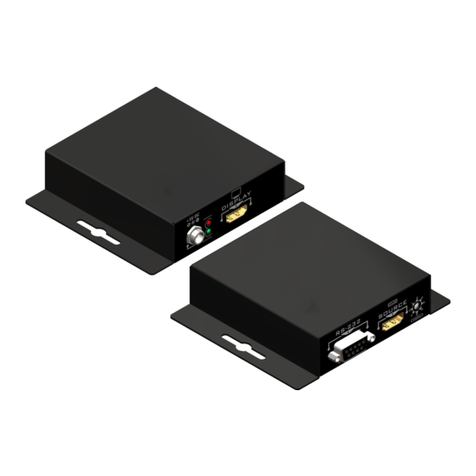
XR-30IP main function is to connect 4-wire door panels to the local network and internet. This function
enables to answer incoming calls from the door panel, view the image from the door camera, talk to visitors
and open lock from mobile devices, tablets or personal computers.
One door panel and door monitor can be connected to XR-30IP converter. It provides a possibility to use this
converter in systems where door panel and monitor are already installed for more convenient
communication with the visitors.
XR-30IP converter can be connected to the local network by wired (twisted pair) or wireless (Wi-Fi)
connection.
Attention!
As a result of continuous upgrades and functionality improvements, technical
characteristics of the device can be changed without any preliminary declaration.
This manual can contain some inaccuracy or misprint. The owner reserves the right to
make corrections to the information described in the user manual and device package.
The last revision of this manual is available on www.slinex.com
Safety instructions
Read and keep that manual.
The device installation process should be carried out by the qulied specialists.
Use the device from the –10 ˚C to +55 ˚C, always keep it within that temperature range.
Installation surface should be free from vibration and impact inuence.
Keep this device far from open sources of heat, such as radiators, heaters, and ovens.
The device can be installed near other electronic equipment in case if the temperature of the environment
does not exceed previously mentioned range.
The device should be protected from the direct inuence of the natural phenomena, such as direct sunlight,
rain or snow.
Don’t use aggressive or abradant detergent for the device surface cleaning.
Use soft wet cloth or tissue to remove strong dirt.
Don’t overpower outlets. It can cause re or electric shock.
Nature protection
Don’t throw away the device with other industrial or nutritive trash if you see that
symbol. Some regions have separation and recycling systems for the electronic
equipment. Connect with local authorities to receive information about recycling of
electronic equipment for your region.
Rights and limitation of liability
All rights reserved. Any part of that document can not be published in any form, translated into other
languages or reproduced in any way including electronic or mechanical.
Document recording and copying is strictly denied without owner permission.
!
SERIES
ACCESSORIES
Rev. 2.0

{ Design. Uniqueness. Innovations }
3 4
Video system
Power consumption (standby mode)
Power consumption (working mode)
Power supply
Network interface
Memory
Working temperature
Mount type
Size
PAL/NTSC
2 W
5 W
External, +12 V, 1 А
Ethernet 10/100M, Wi-Fi
MicroSD card slot, up to 32GB
−10...+55 ˚C
Surface mount
80×120×22 mm
1
2
3
4
5
6
7
8
9
10
DC power supply input +12 V, 1 A
Indoor monitor plug
Outdoor panel plug
Local area network RJ-45 plug (10/100M base T Ethernet)
Network LED. If device is connected to wired or wireless Wi-Fi network then LED is active.
«Access point» mode LED. If «Access point» mode is active then LED is blinking.
Power LED. If the device is powered up then LED is active.
SMA plug for the external antenna connection.
MicroSD card slot
«Access point» mode button. Push and hold that button until «Access point» mode LED
becomes active. «Access point» mode will be activated after reboot for 10 minutes.
Link AP Power
Antenna
AP MicroSD
120 mm
80 mm 22 mm
Link AP Power
5
1
2
3
4
6 7
8
10
9
Lan
Outdoor Indoor +12 V
Antenna
AP MicroSD
1. Package
XR-30IP converter – 1 pc.
Power supply – 1 pc.
Connection wires – 2 pcs.
Mounting screws and nuts – 1 pkg.
User manual – 1 pc.
2. Specication
4. Description
SERIES
ACCESSORIES

{ Design. Uniqueness. Innovations }
5 6
5. Installation
5.1 Cable requirements
Disconnect all power cables before device installation.
XR-30IP connects into breakup between door monitor and door panel.
This device can be connected with such cable types depends on the distance between door monitor and
door panel:
) Use 4-wire cable with such parameters:
• distance up to 25 meters use a cable with 0,22 mm square of one wire;
• distance 25 to 50 meters use a cable with 0,41 mm square of one wire;
• distance 50 to 100 meters use a cable with 0,75 mm square of one wire.
b) If the distance between door monitor and door panel is between 80 and 100 meters then use a 3-wire
cable with 0,75 square of one wire and RG-59 or RG-6 coaxial cable for the video signal.
c) Local network connection should be made with shielded or non-shielded twisted pair:
• distance up to 25 meters non-shielded twisted pair can be used;
• distance 25 to 100 meters shielded twisted pair should be used.
Also, wireless Wi-Fi connection can be used for the local network. In that case, there is no need to use
twisted pair cable. Instead of twisted pair cable, use Wi-Fi antenna connected to the SMA plug of the IP
converter.
Power
Audio
Ground
Video
Power
Audio
Ground
Video
Power
Audio
Ground
Video
Power
Audio
Ground
Video
Power
Audio
Ground
Video
Power
Audio
Ground
Video
0 - 50 m
Shield
Shield
50 - 80 m
80-100 m
RG-59 or RG-6
5.2 Schematic diagrams
Power
Audio
Ground
Video
Power
Audio
Ground
Video
Lock
Door
panel
Door monitor
Lock power
supply
Power supply
~ 220V / +12V
XR-30IP
converter
Diagram 2. XR-30IP network interface connection by the wired method.
Diagram 1. XR-30IP door panel and monitor connection.
Lan
Outdoor Indoor +12 V
Door 1
Door 2
Camera1
Camera 2
Input
Output
PowerTV-otput
Door panel
Android / iOS
Internet
3G / Wi-Fi
XR-30IP
converter
Router
Door monitor
PC
WAN 1 2 3 4
Link AP Power
RJ-45
Twisted pair
cable pinout
Type
8 7 6 5 4 3 2 1
White & Green
Green
White & Orange
Orange
White & Orange
Orange
White & Green
Green
Type B
8 7 6 5 4 3 2 1
SERIES
ACCESSORIES

{ Design. Uniqueness. Innovations }
7 8
Diagram 3. XR-30IP network interface connection by wireless method.
Door panel
Android / iOS
Internet
3G / Wi-Fi
Wi-Fi (LAN)
AP mode
(Access point)
XR-30IP
converter
Router
Door monitor
PC
WAN 1 2 3 4
Android / iOS
5.3 Unit mount
1) Mark and drill two halls in the wall.
2) Take two nuts from the kit and hammer them into the drilled halls.
3) Fix XR-30IP on the wall by the screws from the kit.
4) Connect all communication wires to the IP converter.
Antenna
AP MicroSD
Link AP Power
SERIES
ACCESSORIES
6. Software
Enter «Google Play»(for Android) or «Apple App Store»(for iOS) and search for «Cloud Call»application,
then install this applicationи on your mobile device.
Below you can nd basic steps how to add new device to «Cloud Call» application.
Full manual on «Cloud Call» application you can nd on www.slinex.com
6.1 Creating new account
1) Start «Cloud Call» application on your mobile device and press «NEW USER» button to create an account;
2) Fill in «Email» box and press «GET CODE» button;
3) Check for a new message with activation code on your Email account and enter it into «Verication
Code» box;
4) Fill in «Password» and «Conrm Password» boxes and press «CONFIRM» button to create new account.
That password will be used to login into created account.
6.2 Wired network connection steps
1) Use twisted pair CAT5 or CAT6 cable to connect device to the router;
2) Connect mobile device into the same local network;
3) Press «CONNECT NEW DEVICE» button, then choose «EXISTING» check box and press «CONFIRM»
button;
4) New devices search will be applied and you will see the list of the devices, connected to the local
network;
!

{ Design. Uniqueness. Innovations }
9 10
SERIES
ACCESSORIES
5) Tap on UID in the left column, corresponding to the device sticker or press «QR CodeScan» button and
then scan QR code on your device sticker if device UID isn’t in the list;
6) Fill in device information:
Device UID: unique identication number of the device (already lled);
Device Name: any name you like;
Password: 888888 (by default);
then press «CONFIRM» button and you will see added device on the main bar.
6.3 Wireless Wi-Fi network connection steps
1) Connect mobile device into the Wi-Fi network you want to connect the monitor;
2) Disable 3G/4G internet connection on your mobile device;
3) Press «CONNECT NEW DEVICE» button, then choose «NEW» check box and press «CONFIRM» button;
4) On the converter enter into «Access point» mode following next steps:
press&hold «AP mode»button on the right side of the converter until blue AP LED will be activated. Then
release «AP mode»button and converter will be rebooted. After a minute converter will enter «Access
point» mode, indicated by AP LED;
5) Press «CONTINUE» button on the mobile device screen to go to the next step;
6) Enter password of the Wi-Fi network which you want to connect to and press «CONTINUE» button;

{ Design. Uniqueness. Innovations }
11 12
SERIES
ACCESSORIES
6.4 Operation
Tap on the device
image to start
monitoring
Main bar Device bar
Tap on the recycle
bin to delete
this devise from
the account
Talk with
the visitor
Hang on
Door unlock
(Default password:
888888)
Disable
monitoring
Tap on settings icon
to enter device
settings
Change default
device password
Motion detection
settings
SD card
information
Door panel/
monitor
rmware update
List of
shared
devices
Change
default
unlock
password
Time sync
with mobile
device
Default
settings/
reboot
Share
device with
other
account
7) Fill in device information:
Device UID: unique identication number of the device (already lled);
Device Name: any name you like;
Password: 888888 (by default);
then press «CONFIRM» button and you will see added device on the main bar.
Notes:
1) If there is no LAN cable connected to the converter on the rst boot then it automatically goes into «Access
point» mode and you can skip 4th step of section 6.3.
2) If device is already added to some account, you can’t add it to another one, only can share it with other
account.

{ Design. Uniqueness. Innovations }
13 14
7. Limited warranty
Manufacturer guarantees product normal functioning during the warranty period if the user keeps all safety
instructions described in that manual.
Warranty period is 12 months from the moment of the product purchasing (warranty period could be
extended up to 24 months or more, depending on the local regulations).
Warranty period allows user to make guarantee repair in cases when normal functioning of the product was
violated by the fault of manufacturer and the user haven’t oend transporting, installation and working
conditions.
This limited warranty does not cover any damage to the product that results from improper installation,
accident, abuse, misuse, natural disaster, insucient or excessive electrical supply, abnormal mechanical or
environmental conditions, or any unauthorized disassembly, repair or modication.
Warranty void in such cases:
• the product was damaged by the fault of the customer;
• the product wasn’t properly installed according reccomendations from the manual;
• the sticker on the backside of the product was broken;
• the product was not used for its intended function.
This limited warranty covers only repair, replacement, refund or credit for defective products, as provided
above. Manufacturer is not liable for, and does not cover under warranty, any damages or losses of any kind
whatsoever resulting from loss of, damage to, or corruption of, content or data or any costs associated with
determining the source of system problems or removing, servicing or installing products. This warranty
excludes third party software, connected equipment or stored data. Manufacturer is therefore not liable for
any losses or damage attributable to third party software, connected equipment or stored data.
In the event a product has been discontinued, manufacturer shall either repair the product, oer to replace
it with a comparable product or provide a refund at the lesser of the purchase price or the product’s current
value.
Repaired or replacement products will continue to be covered by this limited warranty for the remainder of
the original warranty term.
SERIES
ACCESSORIES
8.5 Notication messages
Press button to activate notification
messages preset.
Home mode – notification messages
are disabled;
Away mode – notification messages are
enabled;
Custom mode – notification messages
can be enabled or disabled depending
on the settings inside that preset;
In case notification messages are
enabled then you wil receive push
message if somebody presses call
button on the outdoor panel.
Press «ANSWER» button to start talking
with the visitor or «CANCEL» button to
stop the call.
Take a
snapshot Record
video
Speaker volume/
microphone
sensitivity
Full screen
mode
Image quality:
HD or SD
Note:
While device monitoring, one way audio is constantly active from the outdoor panel side so you can hear
what hapens nearby. To activate two way communication press «Talk with the visitor» button in the
application.
Call
Other manuals for XR-30IP
1
Table of contents
Other Slinex Media Converter manuals

