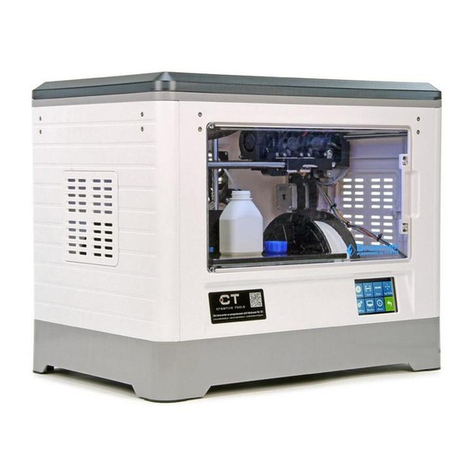
SMART 3D MACRO PU Operating manual

Maintenance Guide
Maintenance task must be perform on a regular basis in order to maintain optimal system
operation.
General Maintenance
6 months
3 months
As Needed
Maintenance Task
X
Linear guides and Leadscrew
X
Clean extruder
X
Coolant liquid level
X
Build plate
X
Fans

Linear guides and leadscrew
To access the leadscrew of the Macro unit, please follow
these instructions.
IMPORTANT: Make sure the Macro 3D Printer is turned
off and unplugged from any and all power sources to
avoid any accidents.
1. Open the top door.
2. Located and remove the screw inside the rail on the leside of the unit (see images)
using a 3mm Allen wrench. Be careful not to damage the surrounding cables.
3. Remove the 3 bottom screws that secures
the side panels using a 2.5mm hex key.
WARNING! Be careful not to damage dangerous
electrical parts with higher voltages (220V/230V).
Both linear guides and leadscrew need
maintenance every three months (if the use of
the printer is frequent the maintenance periods
must be shorter).
You will need grease to lubricate the items. Use a
brush to apply the grease on the linear guide.
Both linear guides and leadscrew need maintenance every three months (if the use
of the printer is frequent the maintenance periods must be shorter). You will need
grease to lubricate the items. Use a brush to apply the grease on the linear guide.

Leadscrews
For the leadscrews, you must use high-temperature grease. To apply it, put a small
amount on the nut.
Once you have applied the grease to both leadscrews, turn on the printer and move
the build plate up and down all along the printing area.
To do this, press HOME ALL, send the command G1 Z400 on the upper command bar,
and press HOME ALL again.
Turn off the printer.
Guidelines
For the axes guidelines, you must use bearings grease. To
apply it, you have to put a little amount along the side of
the rail.
Move the hotend all over to lubricate the guidelines
properly. To do this, Turn ON the printer and press the
button HOME X and HOME Y
Then, on the upper command bar send the following
command G1 X345 Y345.

Coolant liquid level:
1. Make sure the Macro HT 3D Printer is off. For this procedure, it is
important to have the printer off in order to completely refill the water
pump system. Then, open the top door.
2. Carefully, take out the reservoir top cup.
Attention: Be careful because the cup has an O-ring. It can fall out while
taking the cup out.
Picture references:
1. Reservoir top cup + O-ring
2. Reservoir
3. Water pump

3. Take the Smart3D liquid coolant and fill the system.
CAUTION: Wash your hands if you accidentally touch it, avoid touching your
mouth/ nose/ eyes.
Note: The Smart3D liquid coolant includes a small amount of additional
chemicals to address biological growth and corrosion. It is important to add
only Smart3D-approved coolants in filling your system. Regular tap water,
bottled drinking water, and "purified" water will eventually develop organic
growth (and possibly corrosion). This is bad for temperatures, can be messy
to clean up, and could potentially cause hardware damage.
4. Open the cooling system stopcock.
5. Once the reservoir is loaded, turn on the machine.
The system will begin to purge the remaining air in the
system and the user will see that the level drops. You will
need to add more liquid to reach the max level. Repeat
this operation until you see the max level is stabilizing.
After this procedure, close the reservoir and open the
small cap, and leave it open.
The machine should be left running without printing for
about 30 minutes to finish the air purge. Once completed,
close the reservoir permanently.
Note: The reservoir level must be checked periodically and
if necessary, refilled to the max level.

Extruders:
Both extruders need to be checked periodically as filament debris can accumulate
around it. You may have a quick view at least once every 2 weeks, but a careful
examination of the extruders is recommended at least every 2 months, where a
close inspection of the gears and the extruder must be carried out to ensure that
there’s no debris or dust present. If so, please use the provided brush to clean it.
1. First, be sure to check the surroundings of
the extruders.
If there is much debris accumulated, it will be
easily spotted below them.
2. There is no need to remove the extruder in
order to carry out the cleaning procedure.
Remove the thumbscrew tensioner in order to
access the internal gears.
Note: It is recommended to count how many
revolutions the screw had.
3. Using a brush, gently clean the inside of the
Bowden and the gears. Removing any residue
will improve the grip of the extruder and will
minimize the risk of cross-material
contamination when printing.
4.Insert back the thumbscrew tensioner and be sure to
screw in the same amount of revolutions it had.
Note: if you don’t know how many it had, apply 3-4
full clockwise screw revolutions.

PEI Print Bed
After every print, you must clean the print bed properly. It is important to keep the bed
clean and without any irregularities to prevent issues with the next print and to make
sure it is aligned relative to the platform. During the use of the printer, the print bed
may get scratched. You can prolong its serviceability by cleaning it with isopropyl
alcohol using a clean cloth.
How to clean the PEI Print bed
Note: If the printer has recently finished printing, use the corresponding protective gear to avoid
possible burns.
Remove the PEI sheet from the bed.
If a print was recently made, please remove it by flexing the PEI sheet.
Moisturize a microfiber cloth with clean water and use it to clean the PEI sheet. Use abundant water
if necessary. Then use isopropyl alcohol to do a final cleaning of the PEI sheet. Acetone can be used
to remove leftovers or grease that cannot be cleaned with alcohol.
If a print job is about to be sent, you can apply the corresponding adhesive at this stage before
putting the PEI sheet back into the print bed.
Fans Maintenance
Fans need to be checked every 1-2 months. Check that they are
free of any residue of dust or grime that could affect their operation. Use
a brush to carefully remove any dirt
Table of contents
