Smart Companion K9000 User manual
USER GUIDE
PRODUCT SPECIFICATIONS | GETTING STARTED | STATUS AND DESCRIPTIONS
ACTIVATION INSTRUCTIONS | FLEET CENTER WEB SPECIFICATIONS

K9000-SMART COMPANION SPECIFICATIONS
THE WORLD’S SMALLEST FULL BAND 3G/2G PERSONAL TRACKER
SPECIFICATIONS:
• Size: 77 mm x 47 mm x 20 mm
• Weight: 70g
• Charging voltage: Micro USB charging
port, DC 4.2 V-5.5 V/400mA
• Power consumption: 60mA standby
current and 5mA
deep sleep
• Operating temperature: -20°C to 55°C
• Humidity: 5% - 95%
• Memory: 8MB byte of internal memory
with store &
forward capacity
• Sensor: 3D acceleration sensor
• Frequency Band:
- UMTS/HSPA+: Five band
800/850/900/1900/2100 MHz
- GSM: Quad band
850/900/1800/1900 MHz
• Positioning accuracy: 10m
• IP65 Water resistant, specialized
design guarantees a stable operating
performance.
• Working hour: 180 hours in standby
mode (using deep sleep and left
untouched); 20 hours in normal mode
(location every 10 min by default)
• Charging empty battery: 8 hours
FUNCTIONALITY:
• Real-time location query
• Tracking by time interval
• 3G (WCDMA) network. Full band
worldwide roaming 3G/2G auto switch
• SOS alert
• Low battery alert
• Create up to 8 preferred areas
• Geo fence alerts
• Request a location update
at anytime
• Man down alert
• Moving alert
• Speeding alert
• Direction change report
K9000 KIT INCLUDES:
• 1 Smart Companion
• 1 compatible battery
• 1 Special USB Cable
• 1 Lanyard
• Quick Start Guide

LET’S GET YOU STARTED!
01
02
04
03
Removing the battery cover_
With back panel facing you use the mini
screwdriver to remove the two screws
to release the back cover.
Lift up the back cover from the notch at
the bottom of the device
Putting back the battery cover_
Remove the battery and pull tab
Insert the contact sides of the battery
first and gently push the battery cover
downward until it locks into place.
Fasten the screws on the back cover
with the mini screwdriver
Attach lanyard_
Slide the lanyard through the slot and hook
it over the small projection.
Charging the battery_
To charge battery, connect the device
through the USB cable, to a computer or
a USB adapter.
Device should be turned off and charged
for 8 hours.
Do not remove the battery unless
necessary while charging.
*Note: Device may heat up during charging, this is normal and
does not affect your device’s lifespan or performance.
If the battery is low, it may affect positioning and data trans-
mission. The battery must be charged before use.

APPEARANCE
Chart no. Item Description
1 GPS with Flashlight (Blue) Indicates GPS and battery status,
please refer below LED indications
2 GSM Led Flashlight (Green) Indicate GSM status, please refer
below to LED indications
3 SOS Button
Long press for 2 seconds, the
Smart Companion will send an SOS
alarm to the server.
Press to wake up if in sleep mode
4 Power On / Off Button
Press and hold down the button for
2-3 seconds to turn ON. It will make
a sound and vibration will occur.
Press and hold down for 2 seconds
to turn OFF. It will beep.
Shortly press the button to wake
up the Smart Companion from sleep
mode. The power LED indicator will
slowly blink for 10 seconds.
5 Mini USB
Mini USB is used for charging,
connecting to computer for setting
parameters, and updating software.
6 GPS Log
In standby mode long press for 2
seconds, when buzzer “BI” once, the
logger will run automatically. The
Smart Companion will log the route
every 30 seconds (default) auto-
matically.
7 Lanyard Loop For connecting lanyard.
8 Battery Cover To remove battery
1 7
2
6
4
5
3
8

GPS LED FLASHLIGHT (BLUE)
GSM LED FLASHLIGHT (GREEN)
Status Description
Steady On Is charging
Flashing (every 5 seconds) Sleep mode
Flash
(1 second on, 1 second off)
No GPS is invalid or the Smart Companion
is initializing
OFF GPS is valid
Fast Flash (0.3 seconds on
0.3 seconds off) Low Battery
Status Description
Flashing (every 5 seconds) Sleeping
Flash
(1 second on, 1 second off) No GSM signal or initializing
OFF Smart Companion is connected to the GSM network
APPEARANCE
CHARGING, POWER ON AND ACTIVATION
INSTRUCTIONS
Once your device is charged, go to SMART COMPANION have you QR code on hand,
found behind the card in your packaging.
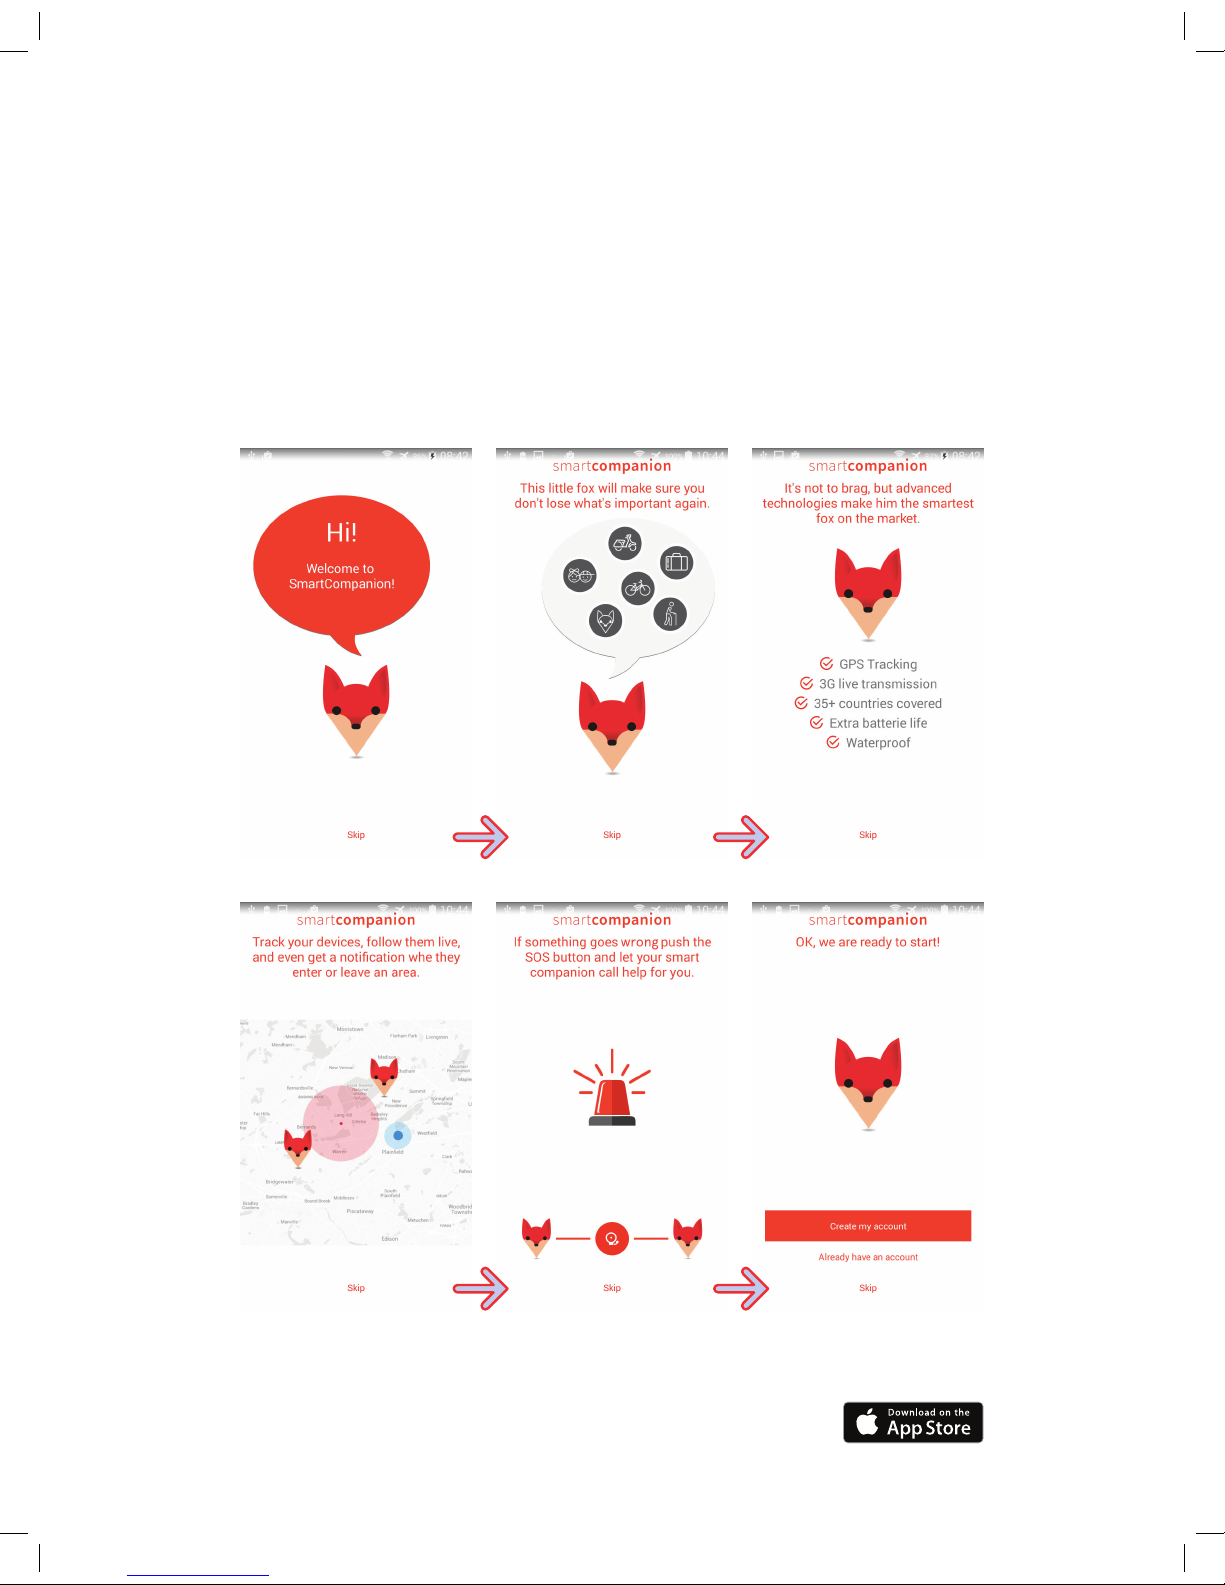
For first time users, wizard will guide you step by step.
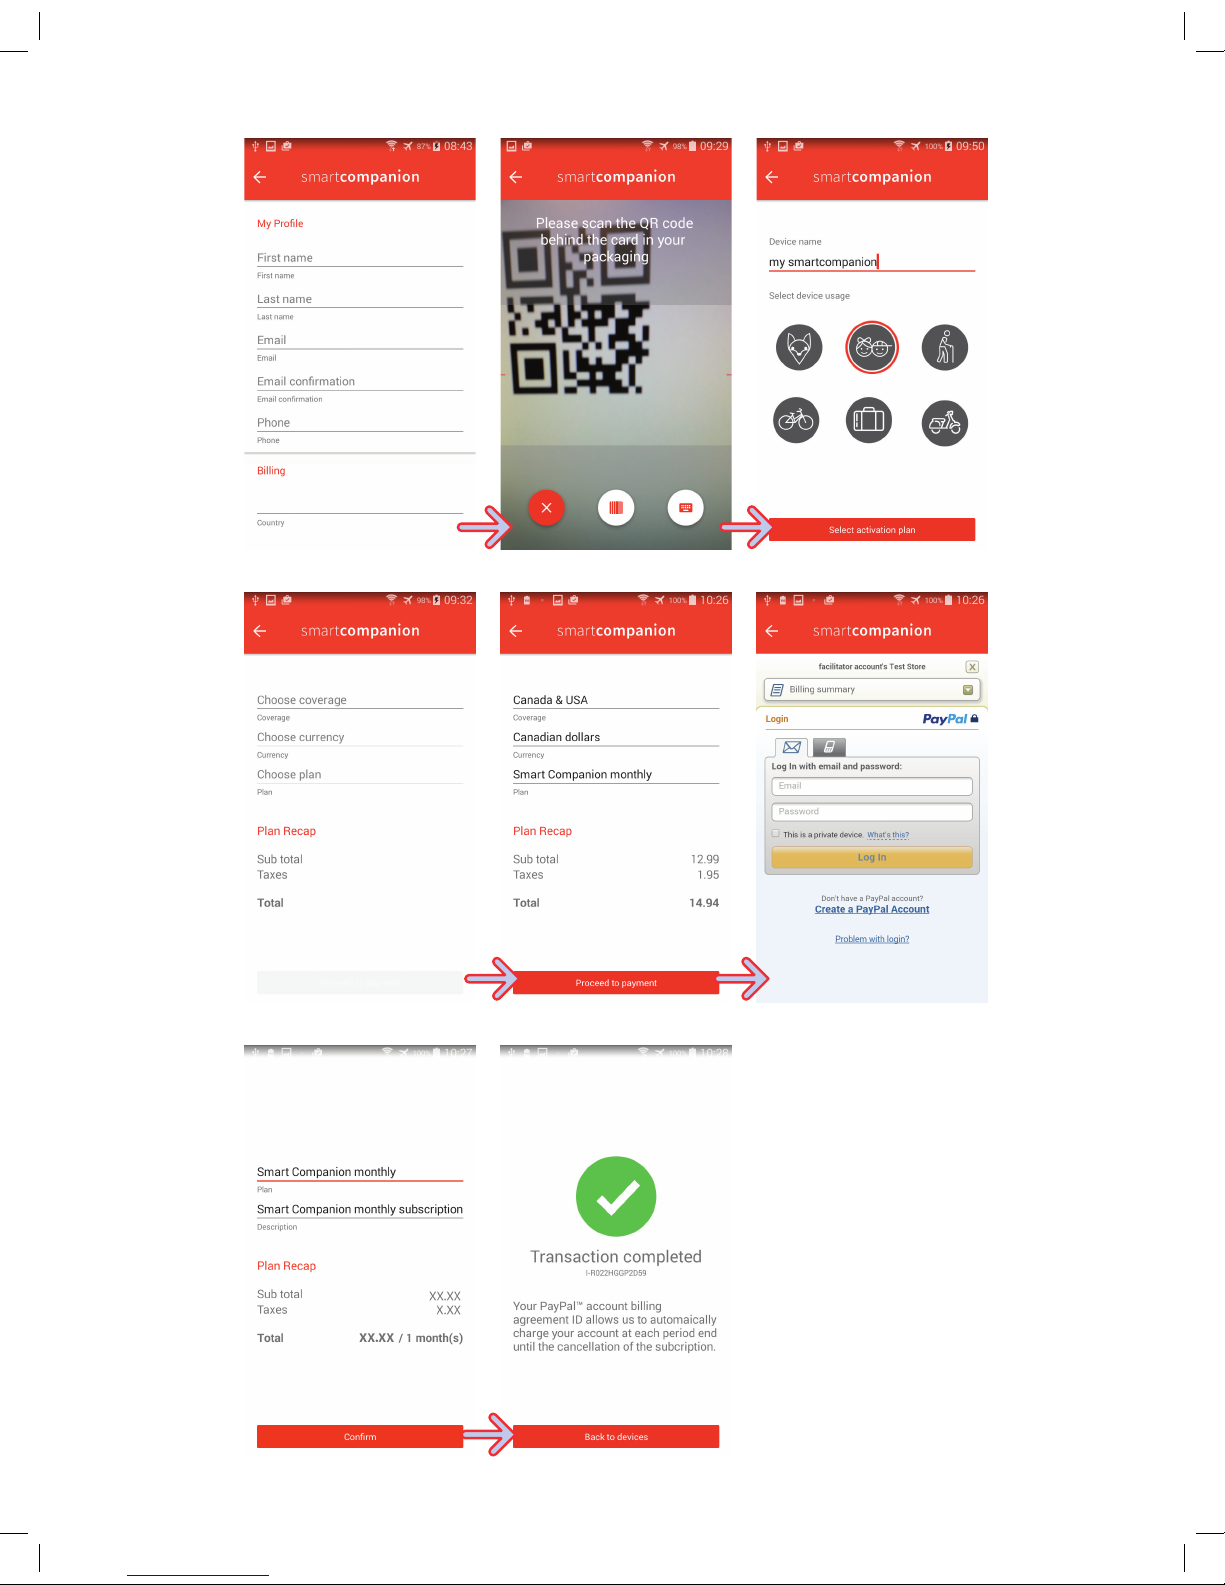

ACTIVATION INSTRUCTIONS

2 - Actions:
You can disable motion detection so that the device will NOT ‘wake up’ upon motion. It
will only wake up when an incoming request is received OR when a button is pressed. It
is not recommended to disable the motion detection in most applications:
4 -Zones and Priority Zones (dessiner des ondes):
A zone is a geofence or a virtual fence polygon representing a particular place. As soon as
the device enters or leaves a zone, an event is created, therefore, making it possible to link
an alert to the device. *Before assigning an alert, the zone must first be created first.
The Smart Companion can have up to 8 circular zones assigned to it. The alerts received are
based on the device moving in or out of the zones created by you.
3 - Alerts (notications that can be sent to you by SMS or Email):
• Man down alarm can be
set up to light medium
and hard impacts
• Still time Still time
after drop detection is
in seconds
• Cancel alarm time is in
seconds
• SOS: Occurs when
built in SOS button is
pressed manually
• Low battery: Occurs
when the battery
condition ON is detected
• Geofence in/out:
Occurs when unit
sends a location
update from an existing
zone. This event is
highly dependant on
how frequently a unit
will send location
updates (every 10
minutes by default)
• Speeding: This event
occurs when speeding
occurs within the
setting applied
• Border crossing: This
event occurs when a
unit changes state,
province or country
• Not reporting: This event
occurs when a unit is
not in network range
• Moving (no idling)
• Power On
• Man down alarm
(impact event type)
1 - Communication with your Smart Companion:
Your device will ‘wake up’ and transmit position according to the following:
• Location (every 10
minutes by default)
• Heading change (90
degrees by default)
• GPS fix
• Speeding (according to
setting that is applied)
• Still (as idling event type)
• Move (as No idling
event type)
• Man down alarm
(impact event type)
• Vibration
• Incoming request
• Button pressed
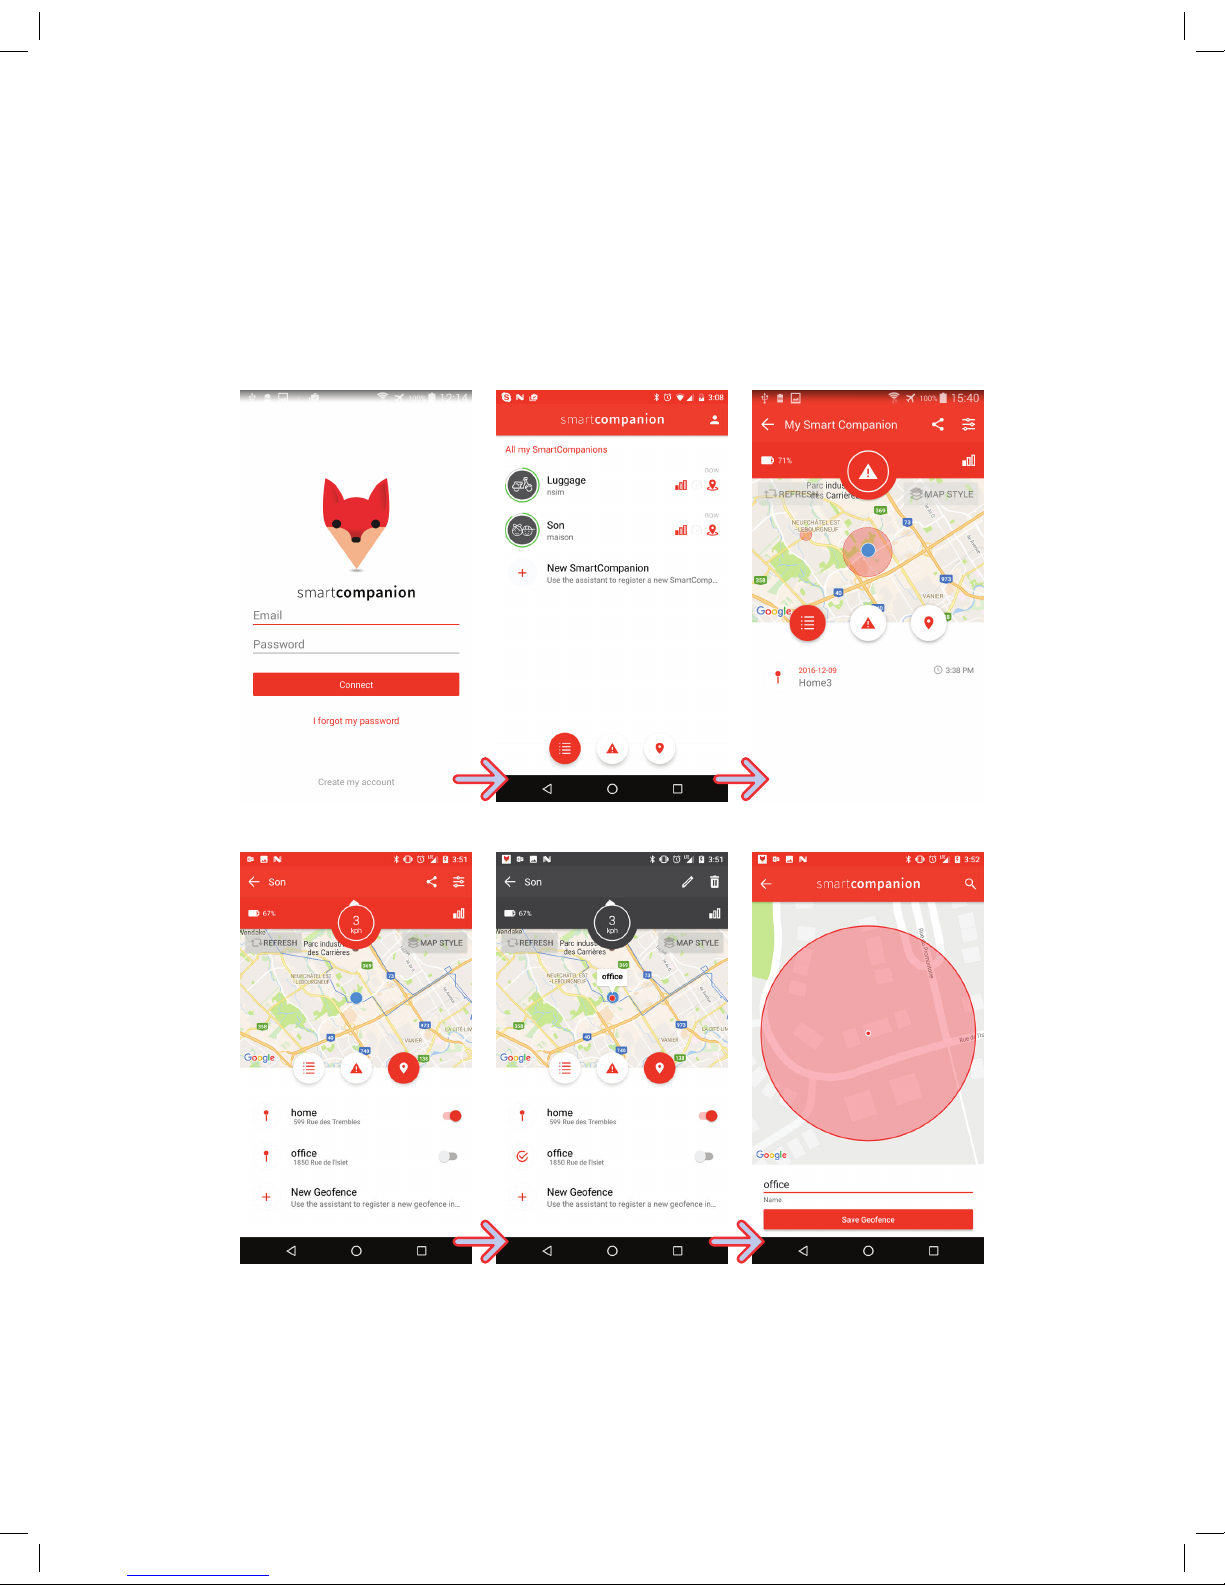
TO CREATE/EDIT OR DELETE A ZONE:
Table of contents


