Smart Health Walking Fit User manual

USER MANUAL
www.smarthealthusa.com

TIME
LIGHT VIEW
RESET
HEART SENSOR
BUTTON
The watch buttons are not intended for
use in or under water.
NOTE: Images may
vary from actual watch
Watch Buttons
1

VIEW
To Turn Your Watch On
If the watch is off at time of purchase:
1. Remove the LCD display sticker on the
watch face.
2. Hold down TIME for 5 seconds until the
screen turns on. Time (home) screen will
display.
Thank you for choosing Smart Health®. Your
watch will automatically record your calories, step
count and distance traveled after putting it on.
No button presses needed to start. It’s that simple!
Time screen is the home screen. Your
watch will always return to Time
screen.
2

+
-
2. Press VIEW or
RESET to set
the hours.
VIEW =
increase setting
RESET =
decrease setting
Time and Basic Setup
1. While in Time screen,
hold down TIME
for 2 seconds. The
hours will flash.
3

+
-
3. Press TIME and
minutes will flash.
4. Press VIEW or
RESET to set
the minutes.
5. Press TIME and
distance unit will
flash.
4

6. Press VIEW or
RESET to set
to miles or
kilometers.
7. Press TIME
to complete setup.
5

2. Press VIEW to
view your current
data. All data will
be displayed as a
snapshot.
3. Continue to press
VIEW to scroll thru
calorie burn, step
count, and distance
traveled.
Using Your Step Counter
1. Put the watch on your wrist and begin
walking. Your data will automatically
record!
6

4. To manually reset all
your current data,
hold down RESET
for 3 seconds. You
must be in your
current data screens
to reset.
Manually resetting your data will only
clear the current data displayed. It will
NOT affect data stored in your 1-day
Memory.
7

Helpful Hints | Step Count
If you are having difficulty acquiring your
steps, try the following:
1. Take 30 - 40 steps before checking your
step count.
2. If your steps are being over or
undercounted, try adjusting the sensitivity
level (see p.16 - 19).
Step count is determined by actual
steps. Arm motion can affect this count.
8

Your watch allows for a more comprehensive
calorie count by factoring in calories burned
simply through living, in addition to any exercise/
activity. This is a great tool to compare against
your daily calorie intake!
Your watch will also provide a more accurate
calorie count by calculating in your heart rate
reading whenever it is taken. So remember to
get your heart rate throughout the day and more
frequently during your exercise.
All-Day Calorie
9

Helpful Hints | All-Day Calorie
1. Your body is always burning calories,
even when sleeping or not in motion. Our
All-Day Calorie meter accounts for these
calories burned.
2. You will see calories burned even during
periods of non-activity.
For a more accurate distance, your watch adjusts
your stride length based on how fast you are
walking.
Auto-Calculated Distance
10

1-Day Memory (Autosave)
Your watch has a 1-day memory and will
store data from the previous day. All data will
clear and autosave at 12:00am (midnight)
everyday.
1. Press VIEW to view
calorie burn, step
count or distance
traveled.
2. Hold down VIEW for
2 seconds to view
1-day Memory.
11

3. Press VIEW to scroll
thru your previous
day’s data.
The screen will ash to indicate you
are viewing your 1-day Memory.
After viewing each of your previous
day’s data once, you will return to your
current data.
12
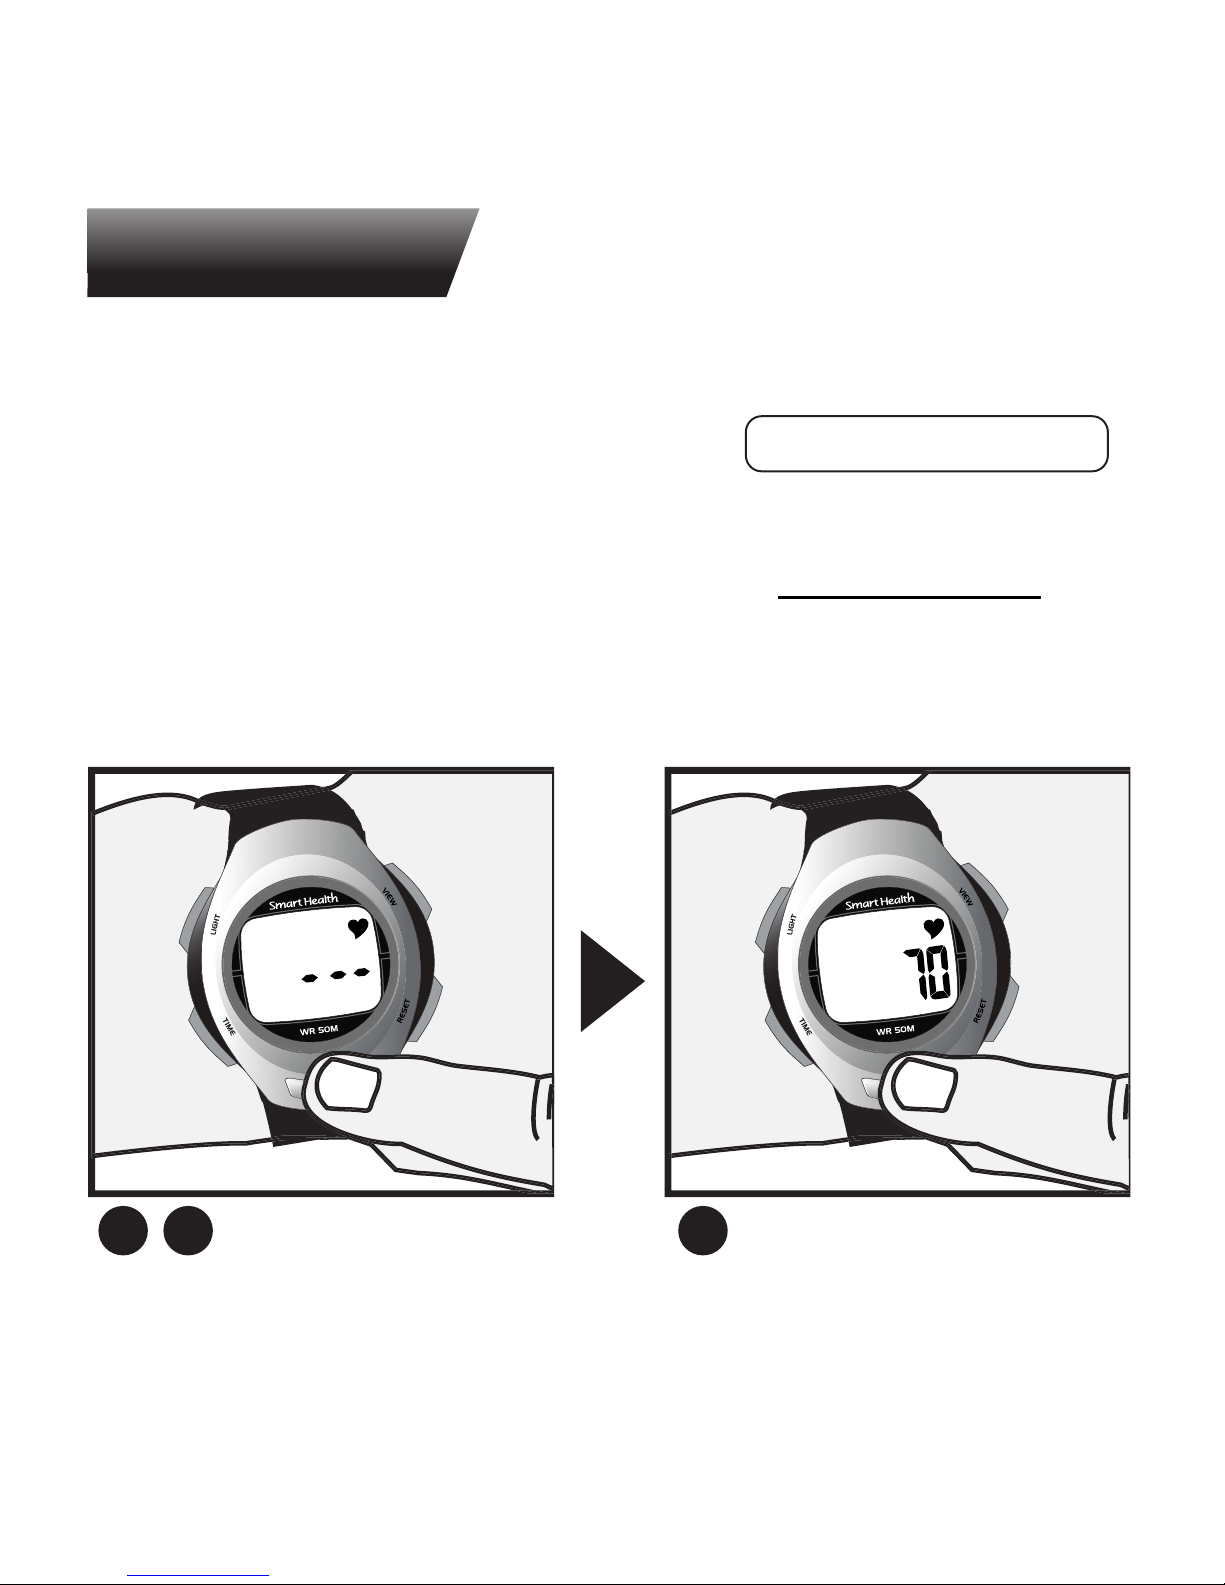
Heart Rate
Put the watch snugly around your wrist.
1. Place your finger on the HEART SENSOR
button.
2. Gently press and hold for 3-8 seconds
until your heart rate appears.
3. Your heart rate will be displayed.
NOTE: Images may
vary from actual watch
,
1 2 3
PRESS AND HOLD FOR
3-8 SECONDS
HEART RATE WILL DISPLAY
IN BEATS PER MINUTE
13

Helpful Hints | Heart Rate
If you are having difficulty acquiring your heart
rate, try the following:
1. Make sure the watch is snugly strapped
to your wrist. A loose fit makes it more
difficult to properly measure your heart
rate.
2. Upon putting the watch on for the first
time, allow one minute to warm up before
trying to obtain your heart rate.
3. When touching the heart sensor button,
make sure you are using the soft, flat pads
of your fingers, not the tips of your fingers.
4. Touch gently with enough pressure to
activate the heart sensor button. Pressing
too hard can make it difficult to measure
your heart rate.
14

5. Make sure the back metal plate of the
watch is laying flat on your skin.
6. Make sure your wrist and fingers are
clean and free from dirt, oils, or lotions.
7. Clean the heart sensor button and back
metal plate with a mild soap and water, or
similar cleaning solution.
8. Moisten with water the pads of the fingers
you are using to contact the heart sensor
button.
9. Moisten with water the surface between
the back metal plate of the watch and the
skin on your wrist.
15

Advanced Setup (optional)
Advanced Setup uses your personal information
in the distance and calorie burn calculations,
allowing you to get more out of your watch.
1. While in Time screen,
hold down TIME for
2 seconds. The hours
will flash.
2. Hold down TIME for
another 2 seconds
to enter Advanced
Setup. The age value
will flash.
16

+
-
3. Press VIEW or
RESET to set
your age.
4. Press TIME and
gender will flash.
Press VIEW or
RESET to set
your gender.
17

5. Press TIME and the
height value will
flash. Press VIEW
or RESET to set
your height.
6. Press TIME and the
weight value will
flash. Press VIEW
or RESET to set
your weight.
18

7. Press TIME and
the step counter
sensitivity will flash.
Press VIEW or
RESET to set
the sensitivity.
8. Press TIME
to complete setup.
If you feel the step counter is
overcounting your steps, set the
sensitivity to LOW. If it is undercounting,
set the sensitivity to HIGH. Default
setting is MEDIUM.
19
Table of contents
Other Smart Health Heart Rate Monitor manuals


