Smart series HT2024SS User manual

1
Save This Manual
Smart Series™
Wall Heater
Operations Manual
Models: HT2024SS 240V, 2000W
FSSWH2004 240V, 2000W
HT1502SS 120V, 1500W
FSSWH1502 120V, 1500W

2
Index
Features that are functional ........................................................................... pg. 3
Thermostat Display ....................................................................................... pg. 4
Functionality of touch screen buttons............................................................ pg. 5
Operating instructions.................................................................................... pg. 6
Initial setup instructions................................................................................. pg. 6
Setup day and time Procedure........................................................................ pg. 6
Homeowner setup instructions....................................................................... pg. 8
Automatic Mode - Factory Setting................................................................. pg. 8
Customize your settings................................................................................. pg. 9
Celsius or Fahrenheit indication .................................................................. pg. 12
Lockout feature ............................................................................................ pg. 12
Night light operation.................................................................................... pg. 13
Hold option or vacation mode...................................................................... pg. 14
Remote controller......................................................................................... pg. 14
Fan only operation (no heat)........................................................................ pg. 15

3
Touch Screen Control Board
OPERATIONS MANUAL
FEATURES THAT ARE FUNCTIONAL
1. 2” X 6” Electronic LED Display with blue backlight
- Easy to read, in the dark or lighted areas
2. Touch Screen surface with soft signal beeps
3. Fahrenheit or Celsius readout
4. 7 day (5 and 2) programmable settings, up to 4 settings per day
5. Manual or Preset automatic mode selection
6. Proportional temperature control
7. Power Memory Function (time and operating mode)
8. Lock-out feature
9. Night Light
10. Built-in Safety feature to alert status of the thermal safety limit
11. Vanishing display readout (only ON/OFF and MODE icons appear)

4
THERMOSTAT DISPLAY
Days of week
Group 1 (Mon to Fri)
Group 2 (Sat & Sun)
Time of day
This area is also used when pro-
gramming custom periods
Time Periods
1 = Wake up period
2 = Daytime period
3 = Evening Period
4 = Sleep Time
Ambient temperature
Tamper proof setting
Proportional heat control indicator
Night light indicator
Up icon
Mode icon
Down icon
Centigrade Setting
Fahrenheit Setting
Fan operation
Automatic Mode
Hold function
On / Off icon

5
FUNCTIONALITY OF TOUCH SCREEN ICONS (For Touch Screen only)
Note: The four icons (touch pads) shown below control the setting and operation
of the heater as indicated.
ON/OFF icon (in OFF position, this icon is orange and half the
brightness.
Setup parameter DOWN icon
Setup parameter UP icon
Functional MODE icon
Caution: It is not necessary to push/press the icons to work. They are sen-
sitive to touch, not pressure.

6
OPERATING INSTRUCTIONS
1. Whentheheatingunitisrstpoweredup,itwilldefaulttotheOFFposition.
The power ON /OFF icon in the lower left corner of the display will il-
luminate an orange color.
INITIAL SETUP INSTRUCTIONS (This setup is usually performed by the installer)
1. Touch ON /OFF icon located in the lower left corner of the display. The
Icon will illuminate a bright blue color, indicating the heater is ON.
Note: For all the following setup procedures, the display will automatically reset
after a 30 second pause. If this occurs, start back at step 1 of the setup proce-
dures.
SETUP DAY AND TIME PROCEDURE (This setup is usually performed by the installer)
1. Simultaneously touch and hold the UP Icon and DOWN Icon for 1.5
seconds. A beep will sound and the Day indicator at the top of the display
willash.
2. Using the UP Icon or DOWN Icon adjust to appropriate DAY of
week.

7
SETUP DAY AND TIME PROCEDURE (This setup is usually performed by the installer)
3. TouchtheMODEicon.AM/PMindicatorwillash.UsetheUP Icon
and DOWN Icon to set appropriate time. AM / PM will change automati-
cally once you pass 12:00.
4. TouchtheMODEicon.MINUTESwillash.UsetheUP Icon and
DOWN Icon to set MINUTES to the appropriate time.
5. To lock in your settings, touch the MODE icon.
Note: If this setup is performed by the installer, power down the display unit by
touching the power ON / OFF icon if no other programming will be done at
this time.

8
HOMEOWNER SETUP INSTRUCTIONS
1. The digital display has default settings for the “Automatic Mode”. See de-
fault settings below. If these settings are satisfactory please skip to the next
programming option, Celsius and Fahrenheit (page 12). If not, follow the
steps below for “Customized Settings”.
AUTOMATIC MODE --- FACTORY SETTINGS
PERIOD TIME SETPOINT
Wake-UP 6:00 AM 70ºF (21ºC)
Daytime 8:00 AM 62ºF (17ºC)
Evening 6:00 PM 70ºF (21ºC)
Sleep Time 10:00 PM 62ºF (17ºC)

9
CUSTOMIZE YOUR SETTINGS
Note: You can customize ON and OFF times and temperature for two catagories,
Weekdays (MON - FRI) and Weekends (SAT & SUN). Each category has 4 set-
tings.
Wake-Up Daytime Evening Sleep Time.
Please set a start time and temperature for each period.
1. To start setup, simultaneously touch and hold the ON / OFF icon and
MODE icon for 1.5 seconds. MON through FRI will illuminate at the
top of the display with the hour and Period 1. This is your wake-up time.
2. Touch MODE icon to start programming the HOURS for Period 1 (Mon-
day through Friday). Touch either the UP Icon or the Down Icon to
set START time in hours.
3. Touch MODE icon again to start programming the MINUTES for Period
1. (Wakeup) Touch either the UP Icon or the DOWN Icon to set Min-
utes.
CUSTOMIZ

10
CUSTOMIZE YOUR SETTINGS
4. Touch MODE icon again to start programming the “Set Temperature
Setting”(Wake Up). Touch UP Icon or the Down Icon to set tempera-
ture for Wake Up.
5. Touch MODE icon to start programming the HOURS for Period 2 (Day-
time Period). Touch either the UP Icon or the DOWN Icon to set
START time in hours.
6. Touch MODE icon again to start programming the MINUTES for Period
2 (Daytime). Touch either the UP Icon or the DOWN Icon to set
MINUTES.
7. Touch MODE icon again to start programming the “Set Temperature Set-
ting” (Day Time). Touch UP Icon or the DOWN Icon to set TEM-
PERATURE. for day time.
8. Touch MODE icon to start programming the HOURS for Period 3 (Eve-
ning Period). Touch either the UP Icon or the DOWN Icon to set
START time in hours.
9. Touch MODE icon again to start programming the MINUTES for Period
3 (Evening). Touch either the UP Icon or the DOWN Icon to set
MINUTES.

11
CUSTOMIZE YOUR SETTINGS
10. Touch MODE icon again to start programming the “Set Temperature Set-
ting” (Evening). Use the UP Icon or the Down Icon to set temperature
for evening.
11. Touch MODE icon to start programming the HOURS for Period 4 (Sleep
Time Period). Touch either the UP Icon or the Down Icon to set
START time in hours.
12. Touch MODE icon again to start programming the MINUTES for Period
4. (Sleep Time) Touch either the UP Icon or the DOWN Icon
to set Minutes.
13. Touch MODE icon again to start programming the “Set Temperature Set-
ting” (Sleep Time). Use the UP Icon or the Down Icon to set tempera-
ture for sleep.
14. Touch MODE icon to start programming the HOURS for Period (Satur-
day and Sunday). Touch either the UP Icon or the Down Icon to set
START time in hours.
15. Repeat steps 3 through 14 for the weekend Periods.

12
CUSTOMIZE YOUR SETTINGS
16. Once the steps are completed above, Touch MODE icon to set all the in-
formation programmed in above steps. The display is now back to Normal/
Standard operation.
CELSIUS OR FAHRENHEIT INDICATION
1. Simultaneously touch and hold MODE icon and DOWN Icon icon for
1.5 seconds. Notice either the ºC symbol or the ºF symbol is illuminated.
Touch both icons again to toggle back and forth from ºC to ºF.
2. Once decided, the display will lock in place after 30 seconds.
LOCKOUT FEATURE
1. Touch and hold ON/OFF and DOWN Icon simultaneously for 1.5
seconds. Notice that the Padlock symbol under the Celsius and Fahrenheit
symbols will illuminate. Touch and hold both icons again to toggle Padlock
symbol ON or Padlock symbol OFF.
Note: With the Padlock symbol ON, the unit is locked out and the “customized”
settings cannot be changed. LOCKOUT FEATURE
2. Once decided, the display will lock in place after 30 seconds.

13
NIGHT LIGHT OPERATION (Also this will allow display to fully illuminate display)
1. Touch and hold MODE Icon and UP Icon simultaneously for 1.5 sec-
onds. Notice that the “Light bulb” symbol will illuminate. Touch both
icons again and the “Light Bulb” will not illuminate.
2. Once decided, the display will lock in place after 20 seconds.
Note: Without the NIGHT LIGHT Icon illuminated, the display will darken
except the ON/OFF and MODE icons.
Tip: Touch any of the remote controller icons (except OFF) and all the lights
will illuminate on the display, but will turn OFF again in 20-60 seconds. Instead
of using the remote controller you can simply touch the MODE icon once and
get the same results.

14
HOLD OPTION OR VACATION MODE
1. Touch MODE icon once to activate the display and keep touching until
theHOLDIconappearsinbrightblueandashing.TouchtheUp Icon
or the Down Icon to set temperature back or up to your “Hold” tempera-
ture.
2. Once decided, the display will lock in place after 30 seconds or Touch
MODE icon.
REMOTE CONTROLLER
This tiny device is a remote means to control your heater from a distance no more
than 12 feet away from the display. When pointing the device it must be in line
of sight in order to operate correctly. There are only four icons that are active.
1. Power ON button.
2. Power OFF button.
3. Button to lower the displayed temperature. (located bottom left)
4. Button to raise the displayed temperature. (located bottom right)

15
REMOTE CONTROLLER
This remote is not intended to program your settings. It is mainly a device to
conveniently change the temperature or turn your heater ON or OFF.
Note: Should you misplace your remote; the operation of your heater can be
controlled at the heater display.
FAN ONLY OPERATION (NO HEAT)
This heater also has the option to use as a FAN ONLY device. Heat will not be
produced, but the ventilator fan will operate to provide a nice gentle breeze to
circulate the air.
1. Make sure your heat selection is low enough, or turn OFF the call for heat.
2. Touch the MODE iconuntilyouseetheFANiconilluminateandash.
3. Touch the MODE icon again to lock the setting in place.

16
5200-11047-000 3/10
470 Beauty Spot Road E
Bennettsville, SC 29512
www.marleymep.com

17
Guarde este manual
Smart Series™
Manual de operación de
calefactor de montaje en pared
Modelos: HT2024SS 240V, 2000W
FSSWH2004 240V, 2000W
HT1502SS 120V, 1500W
FSSWH1502 120V, 1500W

18
Índice
Características funcionales........................................................................................pág. 19
Pantalla del termostato .............................................................................................pág. 20
Funcionalidad de los botones de la pantalla táctil ....................................................pág. 21
Instrucciones de operación........................................................................................pág. 22
Instruccionesdeconguracióninicial ......................................................................pág. 22
Procedimientodeconguracióndeldíayhora.........................................................pág. 22
Instruccionesparaconguraciónporpartedelpropietario.......................................pág. 24
Modo automático - Valores de ajuste de fábrica.......................................................pág. 24
Personalice sus valores de ajuste ..............................................................................pág. 25
Indicación en grados Celsius o Fahrenheit ...............................................................pág. 28
Característica de bloqueo..........................................................................................pág. 28
Funcionamiento con luz nocturna.............................................................................pág. 29
Opción Detener (Hold) o modo de vacaciones.........................................................pág. 30
Control remoto..........................................................................................................pág. 30
Funcionamiento con sólo ventilador (sin calor)........................................................pág. 31

19
MANUAL DE OPERACIÓN
del tablero de control tipo pantalla táctil
CARACTERÍSTICAS FUNCIONALES
1. Pantalla LED electrónica de 2” x 6” con luz de fondo azul - fácil de leer en áreas
oscuras o iluminadas
2. Superciedepantallatáctilconpitidosindicadoressuaves
3. Lectura en grados Fahrenheit o Celsius
4. Valores de ajuste programables para los 7 días (5 y 2),
hasta 4 valores de ajuste por día
5. Selección de modo Manual o Automático Preajustado
6. Control proporcional de temperatura
7. Función de memoria de energía (hora y modo de operación)
8. Característica de bloqueo
9. Luz nocturna
10. Característica de seguridad incorporada para avisar el estado del
límite de seguridad térmico
11. Lectura de pantalla que se desvanece (sólo aparecen el ícono de
Encendido/Apagado y el ícono de Modo)

20
PANTALLA DEL TERMOSTATO
Días de la semana
Grupo 1 (lunes a viernes)
Grupo 2 (sábado y domingo)
Hora del día
Esta área también se utiliza cuando se
programan períodos personalizados
Períodos de tiempo
1 = Periodo Despertar
2 = Periodo Diurno
3 = Periodo Anochecer
4 = Periodo Dormir
Temperatura ambiente
Valores de ajuste inalterables
Indicador de control proporcional
de calor
Indicador de luz nocturna
Ícono AUMENTAR
Ícono de Modo
Ícono DISMINUIR
Valores en grados Centígrados
Valores en grados Fahrenheit
Funcionamiento con
sólo ventilador
Modo automático
Función Detener (Hold)
Ícono de Encendido /
Apagado
This manual suits for next models
3
Table of contents
Languages:
Popular Heater manuals by other brands
Momento
Momento MOR Series instructions
Pfannenberg
Pfannenberg PFH operating instructions
cecotec
cecotec Ready Warm 8600 Power Gold instruction manual

THORMA
THORMA FALUN Installation and operation manual

Detroit Radiant Products
Detroit Radiant Products DES 20-75 Installation, operation, maintenance and parts manual
ELARABY
ELARABY TORNADO TPH-2000M owner's manual
Orbegozo
Orbegozo CR 5039 instruction manual

Rowi
Rowi HHL 2000/3/4 operating instructions
HJM
HJM RCL Original operating instructions
IRSAP
IRSAP RELAX HYBRID REHM092A Instructions for installation, use and maintenance manual
Pro-Elec
Pro-Elec PEL00922 quick start guide
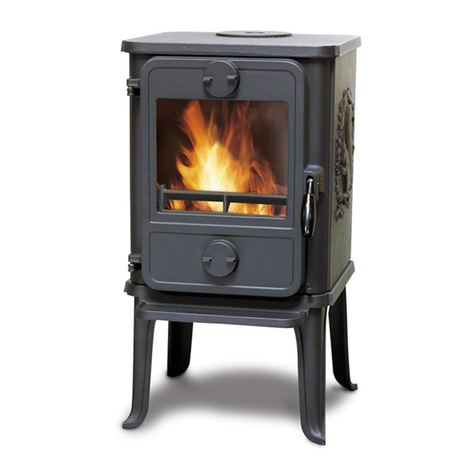
Morso
Morso 1410 Installation and operating instructions

