Smart Trailers 200 User manual
12
SMART TRAILERS
A Division of Iron Men Industries, Inc
•
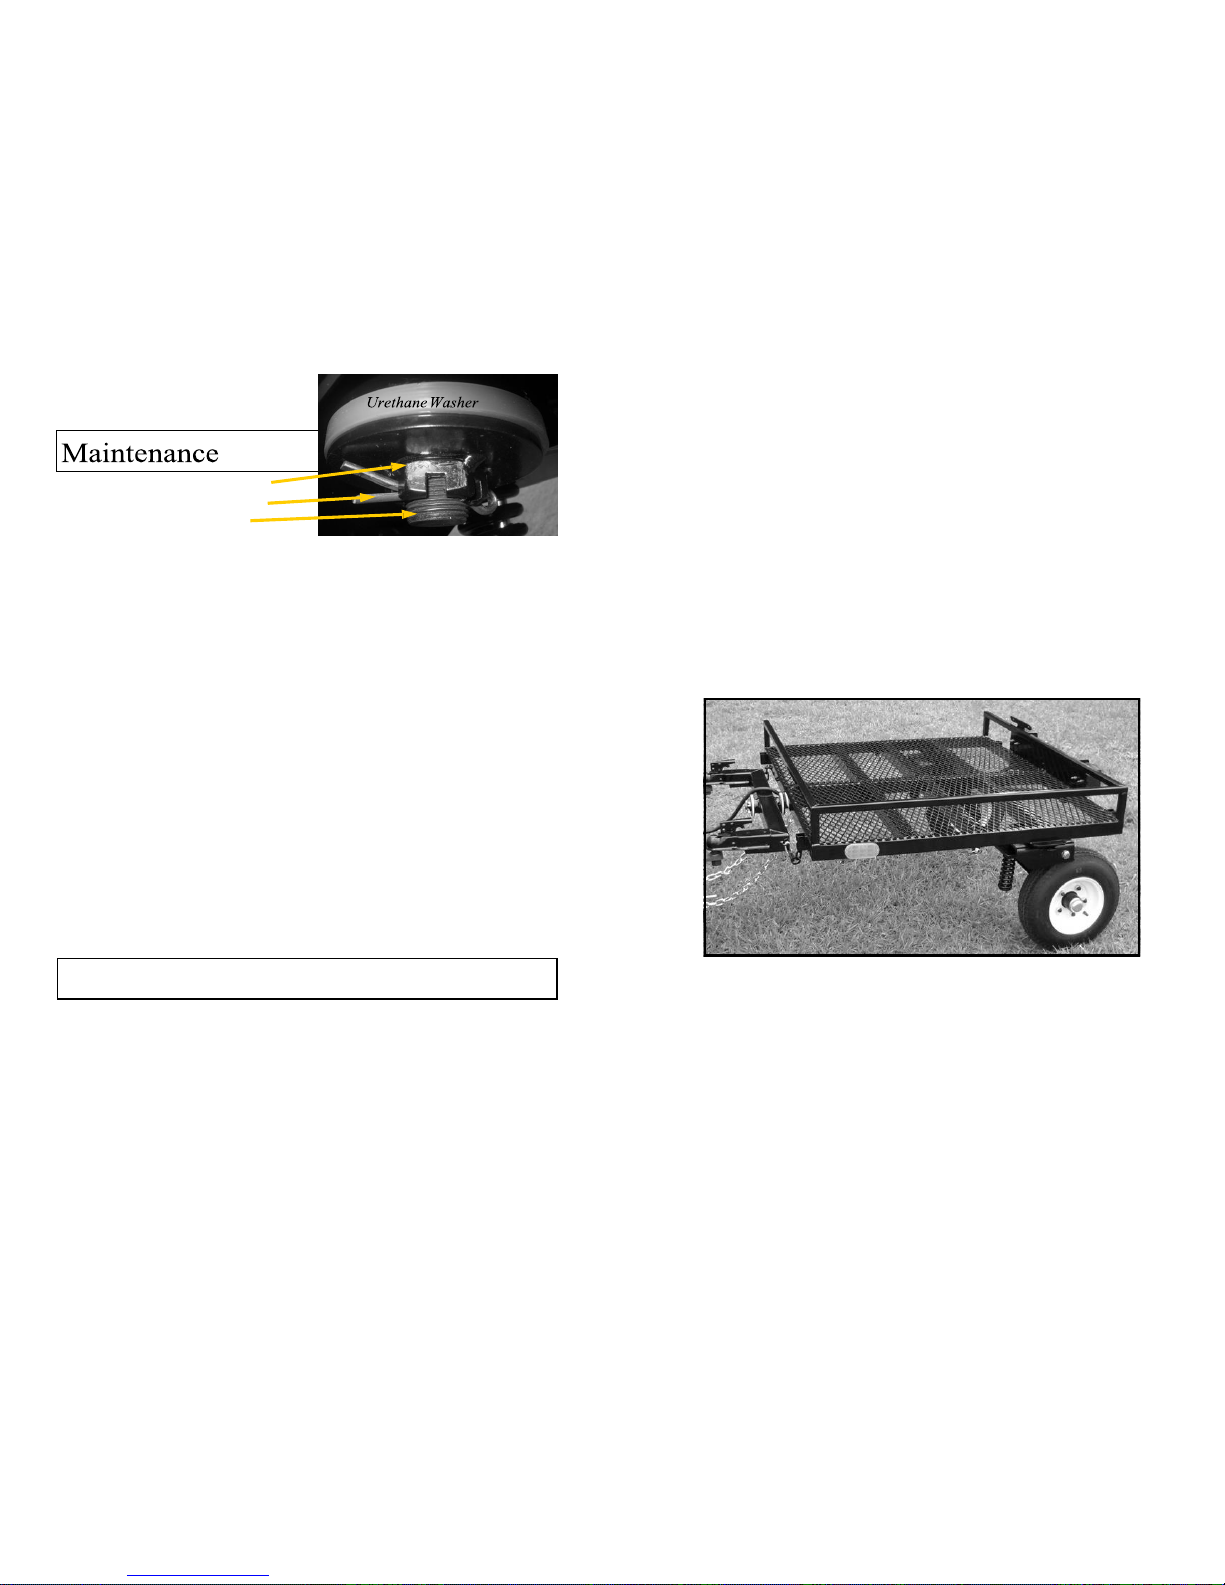
Maintain recommended tire air pressure at alltimes.
•
Check the casters for proper adjustment to minimize
any unwanted motion in the caster. If unwanted mo-
tion occurs with the caster, it can be easily elimi-
nated by removing the cotter pin on the chassis spin-
dle immediately above the tire and then tighten the
slotted nut until it appears a little on the tightside.
•
If caster ever locks up and will not swivel, remove the
castle nut, drop the caster from the spindle, clean out
any road debris, lubricate spindle with a light ap-
plication of axel grease, and then secure the caster
onto the spindle using the castle nut and cotterpin.
CALL or write with any comments or questions about our
products or service.
Monday-Friday 8:00 a.m.—6:00 p.m. EasternTime.
ConsumerRelations,SmartTrailers,Inc,
536 S. Combee Rd.
Lakeland, FL 33801 USA
1 (863) 644-6060
Owner’sManual
For Smart Trailers: Model 200
Warning! Read and understand the contents of
this manual for safe use of your Smart Trailer.
Use caution when using your Smart Trailer!
© May, 12, 2005
Updated April, 2016
ConsumerInformation
Castle Nut
Cotter Pin
Spindle

2
11
Receiving YourTrailer 3
Steps to follow
Hitching Trailer to Vehicle 6
How to attach hitch adapter
Things NEVER to do! 10
Safety warnings
Things ALWAYSto do! 11
Information & responsibility
Maintenance 12
Troubleshooting tips
Consumer Information 12
•
Always maintain recommended tire air
pressure.
•
Always secure safety chains.
•
Always tightly secure the load onto the
trailer and check frequently.
•
Always leave 2 to 3 times more space
between your vehicle and the vehicle
ahead of you than when driving an
unloaded vehicle.
•
Always slow down to half (½) the
recommended speed limit on curves.
•
Always drive in the outside lane.
•
Always avoid pot holes, road debris, and
broken concrete road bed.
Table of Contents
Things ALWAYStoDo!

10
3
•
Do not hitch or unhitch the trailer when
it is loaded.
•
Do not exceed the recommended tongue
weight for your trailer hitch.
•
Do not make short, sharp turns to right
or left.
•
Do not exceed the speed limit. Less than
the legal posted speed limit is recom-
mended for towing a trailer whether it is
loaded or unloaded.
•
Do not drive with the caster locking pins
in the locked position. These pins are to
be used only when hitching and unhitch-
ing the trailer.
Thank you for your Smart Trailer purchase. We
want your ownership of your trailer to be a pleasant
experience.
Because Smart Trailers are unique in design, we take
every precaution in making sure it is properly
prepared for shipping. It will come packaged upside
down and strapped to a wooden pallet. The trailers
will weigh about 550 lbs. It is therefore
recommended that you have two or three adult males
to help uncrate it and turn it over to a rolling
position. It will help to follow the suggested steps
below.
Be Careful! Avoid getting hurt while handling!
Steps:
1. Remove the sides of carton and thebanding.
2. Remove any boxes of accessories.
3. Mount the tires. Be careful to make sure that all
lug nuts are centered in the holes of the rims.
Otherwise, the trailer will bounce on the road
when traveling. Make sure all lug nuts are
properly torqued (75-80lbs.)
4. Make two stacks of three pieces of 2x4’s about
Things NEVER toDo!
Receiving Your Trailer—ModelSL-200

4
9
12-15 inches long (total of six pieces) and place
near each end of trailer. Then move the rear of
the trailer about 2 inches off the pallet to rest on
the 2 stacks of 2x4’s.
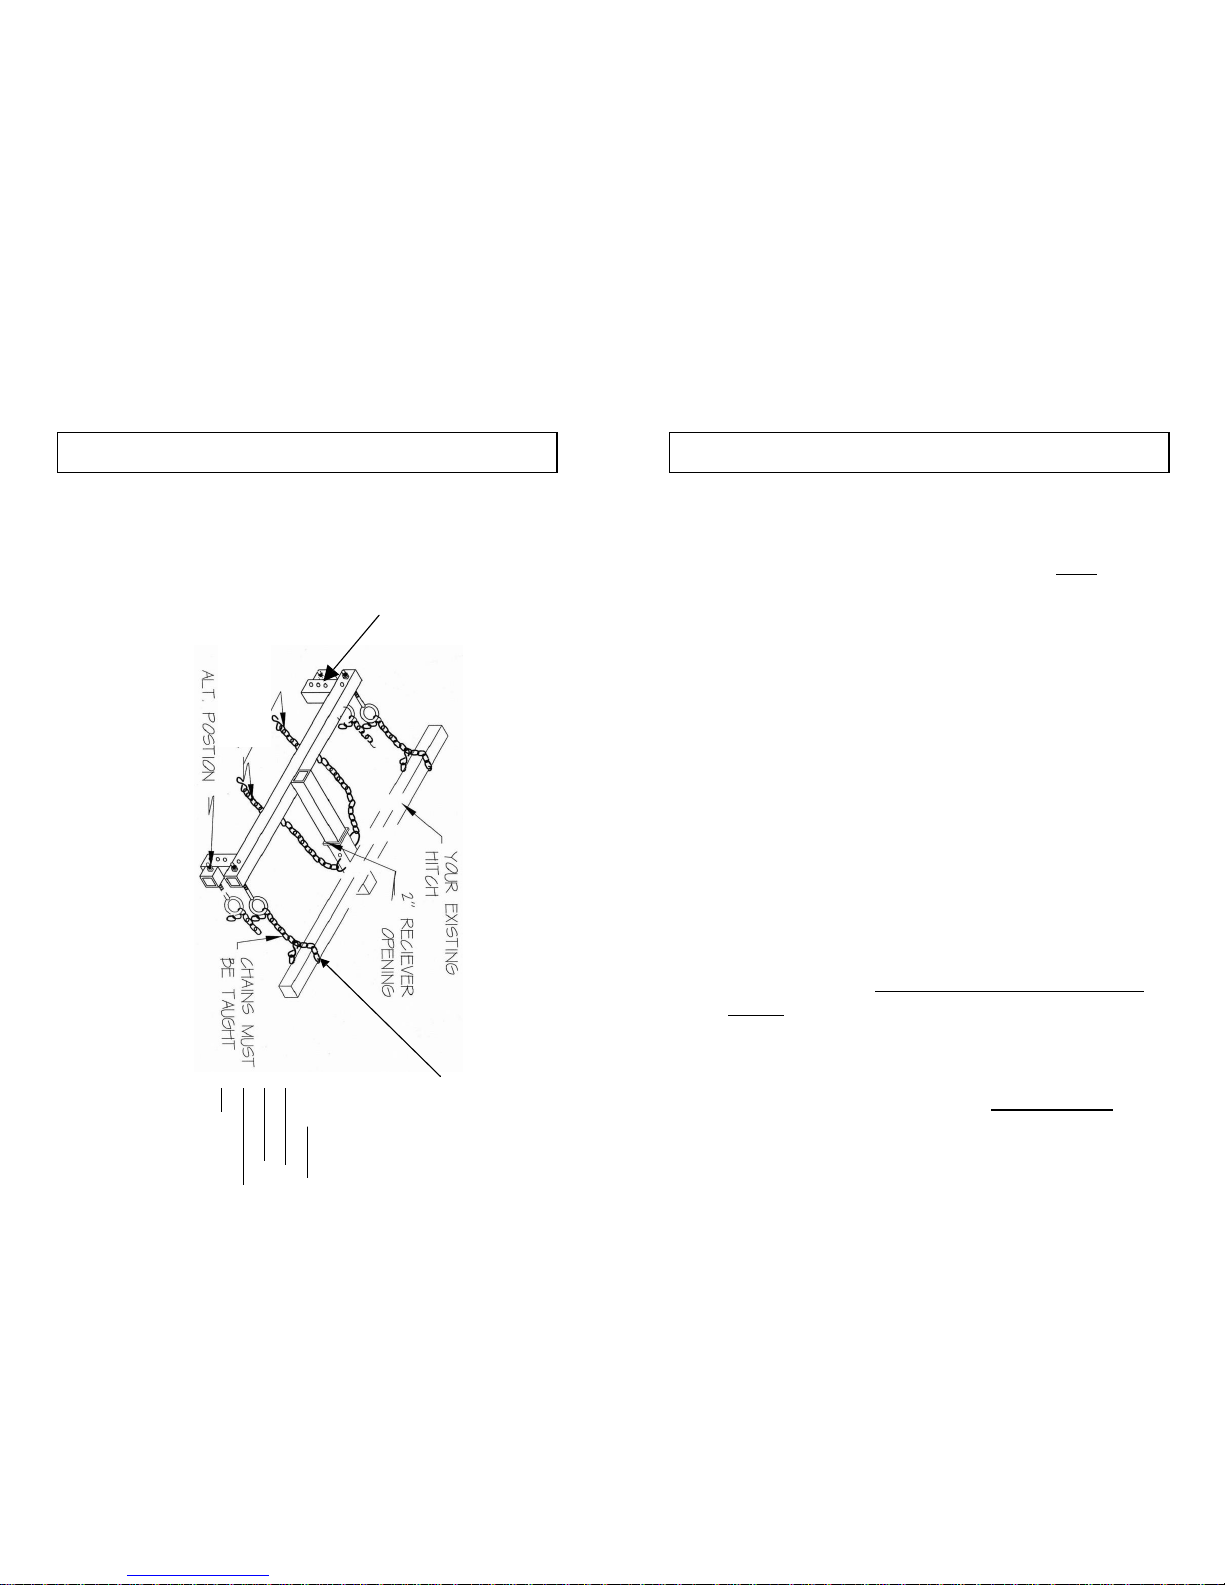
5. Place swivel hitch on front of trailer as shown
below.
White
UHMW
Washers
7. Always make sure that when the hitch couplers
are latched onto the coupler balls that there is no
loose play in the connection. Use lockingpins.
8. Once the proper height for the front of the trailer
has been established, firmly tighten allbolts.
9. Plug in lights, remove locking pins from
casters, and place pins in pin keeper underneath
chassis frame just forward the wheelcasters.
10.Secure safety chains to trailer hitch.
11.Always be careful when using your Smart
Trailer. Do not speed! Do not make sharp turns
to the right or left. Observe all traffic
regulations.
Castle
Nut
SWIVEL HITCH
Ball MountBracket
Receiving YourTrailer—continued
Hitching Trailer to Vehiclecontinued
8
5
6. Remove cotter pin, castle nut, and one white
UHMW washer from spindle on front of trailer.
Place 2-point hitch on spindle and put UHMW
washer on shoulder of spindle. Place castle nut
on snuggly, insert cotter pin, and spread the ends.
Use repair links on the short chains near each end
of the hitch to secure to the hitch. These chains
limit the amount of swivel on the hitch.
7. You are now ready to lift the front of the trailer
to a vertical position. Two or Three adult males
should be used for this task. With the trailer
being held firmly in a vertical position, move
around to the front of the trailer to carefully let it
down to the pavement. The trailer is now well
balanced and one should be able to go to the rear
of the trailer, bear down on it, which will raise
the front end up, and push it easily up to the
towing vehicle. Please note for the consumer
benefit, the caster locking pins are secured with
the casters in a backing up position. Once the
trailer is firmly hitched to the towing vehicle,
remove caster locking pins and place in pin
keeper on bottom of chassis. Never, never tow
the trailer with the casters locked in a fixed
position.
Hitching Trailer to Vehiclecontinued
Receiving YourTrailer—continued
Make sure
these chains
are directly
behind the
eye-bolts for
a straight
pull. Do not
put chains
where the
safety chains
go.
Riser
This Hitch
adapter can
be turned
over 180º
where the
adjustment
is upward.
Safety
To
Chains
Trailer
(no
longer
available)

6
7
The Model SL-200 should be used only with duel
wheel trucks. The towing vehicle should have a
class III or heavier receiver hitch. Some fifth-wheel
trailers may be suitable for our Model SL-200 if the
underneath frame work is heavy enough. It would
need to be sufficient for a class III receiver hitch or
heavier. It is the consumer’s responsibility to consult
with a manufacturer of the fifth-wheel or the
manufacturer of the trailer hitch to make this
determination. Some states may allow a trailer to be
pulled behind a fifth-wheel and some may not. This
determination will be the responsibility of the
consumer.
Follow the following steps to properly hitch the
trailer to the towing vehicle.
Steps:
1. Put vehicle on level ground.
2. Plug the 2-point hitch adapter into the receiver
opening of the trailer hitch and insert ⅝ inch pin
(provided by consumer) to secure the hitch into
the receiver.
3. Secure the stabilizing chains to the cross bar of
the trailer hitch on the towing vehicle. Use hook
on end of chain to wrap around the cross bar (see
diagram on next page). Use repair link to place in
the proper link in the chain. Place repair link
over the eye-bolt and slightly tighten nut on
bottom of eye-bolt. This takes the stress off of
the receiver when backing up.
4. Repeat step 3 on opposite end of hitchadapter.
5. Measure to make sure the hitch adapter (both
ends) are the same distance from the cross bar on
trailer hitch of the vehicle. Otherwise, the trailer
will not follow straight behind the vehicle.
Tighten nuts on eye-bolts.
6. Secure ball-mount brackets to the riser parts on
the hitch adapter in a position to allow the front
of the trailer to be level or a little lower in the
front than the rear (1 to 2 inches.) The hitch
adapter can be inverted when necessary to
maintain the correct level with the bed of the
trailer. This makes it easier for the wheels to
swivel. Do not tighten the coupler or the 2 ball-
mount bracket bolts until the trailer hitch coupler
is placed on the coupler balls and the proper
height of the front of the trailer has been
established. Always maintain exactly 30 inches
center to center between coupler balls.
Hitching Trailer
(Model SL-200)
to Vehicle
Hitching Trailer to Vehiclecontinued


